CAS单点登录(七)——自定义验证码以及自定义错误信息
在前面我们讲解了CAS单点登录(六)——自定义登录界面和表单信息,知道了如何去实现页面和表单信息的自定义信息提交,就像我们提交表单的信息可能包括手机、邮箱等等,这些都能以我们前面的知识点去解决。但平时登录我们会发现除了必填的信息外,还需要填写一下验证码。这是为了流控、暴力破解、降低数据库压力等等原因,今天我们就讲解一下如何在CAS中添加验证码。
注意:这一节的内容需要上一节的知识点,其中不会再次介绍自定义验证策略,定义Webflow校验流程等知识了,如果不知道,请先查看上一节的内容。
一、自定义验证码
其实网上有很多关于CAS验证码如何实现的,只是CAS版本都是以前比较低的,今天讲解一下CAS 5.3.x版本中如何自定义验证码。知识点和上一节关于自定义表单基本类似,只是这里补充了一些细节。
1、生成验证码类
这里提供两种方法,一种是自定义生成验证码的工具类,领一种是使用谷歌提供的kaptcha类。
A、自定义工具类
package net.anumbrella.sso.utils;

import javax.imageio.ImageIO;
import java.awt.*;
import java.awt.image.BufferedImage;
import java.io.*;
import java.util.Random;

/**
 * @author anumbrella
 */
public class CaptchaCodeUtils {

    //宽度
    private static final int CAPTCHA_WIDTH = 100;
    //高度
    private static final int CAPTCHA_HEIGHT = 35;
    //数字的长度
    private static final int NUMBER_CNT = 6;
    //图片类型
    private static final String IMAGE_TYPE = "JPEG";

    private Random r = new Random();
    //  字体
    //  private String[] fontNames = { "宋体", "华文楷体", "黑体", "华文新魏", "华文隶书", "微软雅黑", "楷体_GB2312" };
    private String[] fontNames = {"宋体", "黑体", "微软雅黑"};

    // 可选字符
    private String codes = "23456789abcdefghjkmnopqrstuvwxyzABCDEFGHJKMNPQRSTUVWXYZ";

    // 背景色,白色
    private Color bgColor = new Color(255, 255, 255);

    // 验证码上的文本
    private String text;

    private static CaptchaCodeUtils utils = null;

    /**
     * 实例化对象
     *
     * @return
     */
    public static CaptchaCodeUtils getInstance() {
        if (utils == null) {
            synchronized (CaptchaCodeUtils.class) {
                if (utils == null) {
                    utils = new CaptchaCodeUtils();
                }
            }
        }
        return utils;
    }

    /**
     * 创建验证码
     *
     * @param path 路径地址
     * @return
     * @throws Exception
     */
    public String getCode(String path) throws Exception {
        BufferedImage bi = utils.getImage();
        output(bi, new FileOutputStream(path));
        return this.text;
    }

    /**
     * 生成图片对象,并返回
     *
     * @return
     * @throws Exception
     */
    public CaptchaCode getCode() throws Exception {
        BufferedImage img = utils.getImage();

        //返回验证码对象
        CaptchaCode code = new CaptchaCode();
        code.setText(this.text);
        code.setData(this.copyImage2Byte(img));
        return code;
    }

    /**
     * 将图片转化为 二进制数据
     *
     * @param img
     * @return
     * @throws Exception
     */
    public byte[] copyImage2Byte(BufferedImage img) throws Exception {
        //字节码输出流
        ByteArrayOutputStream bout = new ByteArrayOutputStream();

        //写数据到输出流中
        ImageIO.write(img, IMAGE_TYPE, bout);

        //返回数据
        return bout.toByteArray();
    }

    /**
     * 将二进制数据转化为文件
     *
     * @param data
     * @param file
     * @throws Exception
     */
    public boolean copyByte2File(byte[] data, String file) throws Exception {
        ByteArrayInputStream in = new ByteArrayInputStream(data);
        FileOutputStream out = new FileOutputStream(file);
        try {
            byte[] buff = new byte[1024];
            int len = 0;
            while ((len = in.read(buff)) > -1) {
                out.write(buff, 0, len);
            }
            out.flush();
            return true;
        } catch (Exception e) {
            e.printStackTrace();
            return false;
        } finally {
            out.close();
            in.close();
        }
    }

    /**
     * 生成随机的颜色
     *
     * @return
     */
    private Color randomColor() {
        int red = r.nextInt(150);
        int green = r.nextInt(150);
        int blue = r.nextInt(150);
        return new Color(red, green, blue);
    }

    /**
     * 生成随机的字体
     *
     * @return
     */
    private Font randomFont() {
        int index = r.nextInt(fontNames.length);
        String fontName = fontNames[index];// 生成随机的字体名称
        int style = r.nextInt(4);// 生成随机的样式, 0(无样式), 1(粗体), 2(斜体), 3(粗体+斜体)
        int size = r.nextInt(5) + 24; // 生成随机字号, 24 ~ 28
        return new Font(fontName, style, size);
    }

    /**
     * 画干扰线
     *
     * @param image
     */
    private void drawLine(BufferedImage image) {
        int num = 5;// 一共画5条
        Graphics2D g2 = (Graphics2D) image.getGraphics();
        for (int i = 0; i < num; i++) {// 生成两个点的坐标,即4个值
            int x1 = r.nextInt(CAPTCHA_WIDTH);
            int y1 = r.nextInt(CAPTCHA_HEIGHT);
            int x2 = r.nextInt(CAPTCHA_WIDTH);
            int y2 = r.nextInt(CAPTCHA_HEIGHT);
            g2.setStroke(new BasicStroke(1.5F));
            g2.setColor(randomColor()); // 随机生成干扰线颜色
            g2.drawLine(x1, y1, x2, y2);// 画线
        }
    }


    /**
     * 随机生成一个字符
     *
     * @return
     */
    private char randomChar() {
        int index = r.nextInt(codes.length());
        return codes.charAt(index);
    }

    /**
     * 创建BufferedImage
     *
     * @return
     */
    private BufferedImage createImage() {
        BufferedImage image = new BufferedImage(CAPTCHA_WIDTH, CAPTCHA_HEIGHT, BufferedImage.TYPE_INT_RGB);
        Graphics2D g2 = (Graphics2D) image.getGraphics();
        g2.setColor(this.bgColor);
        g2.fillRect(0, 0, CAPTCHA_WIDTH, CAPTCHA_HEIGHT);
        return image;
    }

    /**
     * 获取验证码
     *
     * @return
     */
    public BufferedImage getImage() {
        BufferedImage image = createImage();// 创建图片缓冲区
        Graphics2D g2 = (Graphics2D) image.getGraphics();// 得到绘制环境
        StringBuilder sb = new StringBuilder();// 用来装载生成的验证码文本
        // 向图片中画4个字符
        for (int i = 0; i < NUMBER_CNT; i++) {// 循环四次,每次生成一个字符
            String s = randomChar() + "";// 随机生成一个字母
            sb.append(s); // 把字母添加到sb中
            float x = i * 1.0F * CAPTCHA_WIDTH / NUMBER_CNT; // 设置当前字符的x轴坐标
            g2.setFont(randomFont()); // 设置随机字体
            g2.setColor(randomColor()); // 设置随机颜色
            g2.drawString(s, x, CAPTCHA_HEIGHT - 5); // 画图
        }
        this.text = sb.toString(); // 把生成的字符串赋给了this.text
        drawLine(image); // 添加干扰线
        return image;
    }

    /**
     * @return 返回验证码图片上的文本
     */
    public String getText() {
        return text;
    }

    // 保存图片到指定的输出流
    public static void output(BufferedImage image, OutputStream out) throws IOException {
        ImageIO.write(image, IMAGE_TYPE, out);
    }

    /**
     * 图片验证码对象
     */
    public static class CaptchaCode {
        //验证码文字信息
        private String text;
        //验证码二进制数据
        private byte[] data;

        public String getText() {
            return text;
        }

        public void setText(String text) {
            this.text = text;
        }

        public byte[] getData() {
            return data;
        }

        public void setData(byte[] data) {
            this.data = data;
        }
    }
}
B、谷歌Kaptcha工具类
先添加依赖:
    com.github.penggle
    kaptcha
    2.3.2
再新建KaptchaCodeUtils类,用于Kaptcha的相关配置信息。
    /**
     * Kaptcha 配置信息
     *
     * @return
     */
    public static DefaultKaptcha getDefaultKaptcha() {
        com.google.code.kaptcha.impl.DefaultKaptcha defaultKaptcha = new com.google.code.kaptcha.impl.DefaultKaptcha();
        Properties properties = new Properties();
        properties.setProperty("kaptcha.border", "yes");
        properties.setProperty("kaptcha.border.color", "105,179,90");
        properties.setProperty("kaptcha.textproducer.font.color", "blue");
        properties.setProperty("kaptcha.image.width", "110");
        properties.setProperty("kaptcha.image.height", "40");
        properties.setProperty("kaptcha.textproducer.font.size", "30");
        properties.setProperty("kaptcha.session.key", "code");
        properties.setProperty("kaptcha.textproducer.char.length", "4");
        properties.setProperty("kaptcha.textproducer.font.names", "宋体,楷体,微软雅黑");
        Config config = new Config(properties);
        defaultKaptcha.setConfig(config);
        return defaultKaptcha;
    }
以上两种方法选择一种即可,这个是用于验证码生成的作用。
2、定义访问控制器
在前面CAS单点登录(五)——Service配置及管理我们曾经讲解过Restful请求访问的方法,这里验证码也需要使用到,因为验证码其实就是生成的图片,需要给前台去显示。
我们新建一个CaptchaController类,用于验证码方法访问:
package net.anumbrella.sso.controller;

import com.fasterxml.jackson.databind.ObjectMapper;
import com.google.code.kaptcha.impl.DefaultKaptcha;
import net.anumbrella.sso.utils.CaptchaCodeUtils;
import net.anumbrella.sso.utils.KaptchaCodeUtils;
import org.springframework.stereotype.Controller;
import org.springframework.util.StringUtils;
import org.springframework.web.bind.annotation.GetMapping;
import org.springframework.web.bind.annotation.RequestMapping;
import org.springframework.web.bind.annotation.RequestMethod;
import javax.imageio.ImageIO;
import javax.servlet.http.HttpServletRequest;
import javax.servlet.http.HttpServletResponse;
import java.awt.image.BufferedImage;
import java.io.ByteArrayOutputStream;
import java.io.IOException;
import java.io.OutputStream;
import java.io.PrintWriter;
import java.util.HashMap;
import java.util.Map;

/**
 * @author anumbrella
 */
@Controller
public class CaptchaController {

    /**
     * 工具类生成captcha验证码路径
     *
     * @param request
     * @param response
     * @throws Exception
     */
    @GetMapping(value = "/captcha", produces = "image/png")
    public void captcha(HttpServletRequest request, HttpServletResponse response) throws Exception {
        OutputStream out = null;
        try {
            //设置response头信息
            //禁止缓存
            response.setHeader("Cache-Control", "no-cache");
            response.setContentType("image/png");
            //存储验证码到session
            CaptchaCodeUtils.CaptchaCode code = CaptchaCodeUtils.getInstance().getCode();

            //获取验证码code
            String codeTxt = code.getText();
            request.getSession().setAttribute("captcha_code", codeTxt);
            //写文件到客户端
            out = response.getOutputStream();
            byte[] imgs = code.getData();
            out.write(imgs, 0, imgs.length);
            out.flush();
        } finally {
            if (out != null) {
                out.close();
            }
        }
    }

    /**
     * 谷歌kaptcha验证码路径
     *
     * @param request
     * @param response
     * @throws Exception
     */
    @GetMapping(value = "/kaptcha", produces = "image/png")
    public void kaptcha(HttpServletRequest request, HttpServletResponse response) throws Exception {
        byte[] captchaChallengeAsJpeg = null;
        DefaultKaptcha captchaProducer = KaptchaCodeUtils.getDefaultKaptcha();
        OutputStream out = null;
        ByteArrayOutputStream jpegOutputStream = new ByteArrayOutputStream();
        try {

            response.setHeader("Cache-Control", "no-store");
            response.setContentType("image/png");

            //生产验证码字符串并保存到session中
            String createText = captchaProducer.createText();
            request.getSession().setAttribute("captcha_code", createText);

            //使用生产的验证码字符串返回一个BufferedImage对象并转为byte写入到byte数组中
            BufferedImage challenge = captchaProducer.createImage(createText);
            ImageIO.write(challenge, "png", jpegOutputStream);

            //使用response输出流输出图片的byte数组
            captchaChallengeAsJpeg = jpegOutputStream.toByteArray();

            out = response.getOutputStream();

            out.write(captchaChallengeAsJpeg);
            out.flush();
        } catch (IllegalArgumentException e) {
            response.sendError(HttpServletResponse.SC_NOT_FOUND);
            return;
        } finally {
            if (out != null) {
                out.close();
            }
        }
    }

    /**
     * 用于前端ajax校验
     */
    @RequestMapping(value = "/chkCode", method = RequestMethod.POST)
    public void checkCode(String code, HttpServletRequest req, HttpServletResponse resp) {

        //获取session中的验证码
        String storeCode = (String) req.getSession().getAttribute("captcha_code");
        code = code.trim();
        //返回值
        Map map = new HashMap();
        //验证是否对,不管大小写
        if (!StringUtils.isEmpty(storeCode) && code.equalsIgnoreCase(storeCode)) {
            map.put("error", false);
            map.put("msg", "验证成功");
        } else if (StringUtils.isEmpty(code)) {
            map.put("error", true);
            map.put("msg", "验证码不能为空");
        } else {
            map.put("error", true);
            map.put("msg", "验证码错误");
        }
        this.writeJSON(resp, map);
    }

    /**
     * 在SpringMvc中获取到Session
     *
     * @return
     */
    public void writeJSON(HttpServletResponse response, Object object) {
        try {
            //设定编码
            response.setCharacterEncoding("UTF-8");
            //表示是json类型的数据
            response.setContentType("application/json");
            //获取PrintWriter 往浏览器端写数据
            PrintWriter writer = response.getWriter();

            ObjectMapper mapper = new ObjectMapper(); //转换器
            //获取到转化后的JSON 数据
            String json = mapper.writeValueAsString(object);
            //写数据到浏览器
            writer.write(json);
            //刷新,表示全部写完,把缓存数据都刷出去
            writer.flush();
            //关闭writer
            writer.close();
        } catch (IOException e) {
            e.printStackTrace();
        }
    }
}
主要提供了三个方法,captcha、kaptcha、checkCode,分别是类库生成的验证码路径,谷歌kaptcha类库生成的验证码路径,前端ajax校验路径。主要的方法就是将生成的验证码图片流输出到响应流中,同时将文本保存在session中。
在前面我们讲解过CAS要在Restful中进行访问,定义好Controller类后,需要在resources下的META-INF文件下的spring.factories注入Spring Boot的配置。但如果我们定义多个controller类,这样定义是很麻烦的。其实只要注入到配置里就可以了。
在config包下,新建CustomControllerConfigurer类,将我们需要使用的controller注入bean到其下即可。
package net.anumbrella.sso.config;

import net.anumbrella.sso.controller.CaptchaController;
import net.anumbrella.sso.controller.ServicesManagerController;
import org.apereo.cas.configuration.CasConfigurationProperties;
import org.springframework.boot.autoconfigure.condition.ConditionalOnMissingBean;
import org.springframework.boot.context.properties.EnableConfigurationProperties;
import org.springframework.context.annotation.Bean;
import org.springframework.context.annotation.Configuration;

/**
 * @author anumbrella
 */
@Configuration("captchaConfiguration")
@EnableConfigurationProperties(CasConfigurationProperties.class)
public class CustomControllerConfigurer {

    /**
     * 验证码配置,注入bean到spring中
     *
     * @return
     */
    @Bean
    @ConditionalOnMissingBean(name = "captchaController")
    public CaptchaController captchaController() {
        return new CaptchaController();
    }

    /**
     * 自定义SercicesManage管理配置,注入bean到spring中
     *
     * @return
     */
    @Bean
    @ConditionalOnMissingBean(name = "servicesManagerController")
    public ServicesManagerController servicesManagerController() {
        return new ServicesManagerController();
    }
}
然后我们再到resources下的META-INF文件下的spring.factories文件里注入到Spring Boot的配置里。
org.springframework.boot.autoconfigure.EnableAutoConfiguration=\
  net.anumbrella.sso.config.CustomAuthenticationConfiguration,\
  net.anumbrella.sso.config.CustomerAuthWebflowConfiguration,\
  net.anumbrella.sso.config.CustomControllerConfigurer
现在我们就可以启动CAS服务,访问路由/captcha 或者 /kaptcha,我们可以得到验证码图片如下:


3、添加字段修改登录页面
同理,如果验证码字段是一个必填的字段,我们像上一节CAS单点登录(六)——自定义登录界面和表单信息添加手机号和邮箱一样,新增验证码字段。
在entity包下的CustomCredential类里,新增capcha字段。
 @Size(min = 6, max = 6, message = "required.capcha")
    private String capcha;

    public String getCapcha() {
        return capcha;
    }

    public void setCapcha(String capcha) {
        this.capcha = capcha;
    }
同时在config包下的CustomWebflowConfigurer中添加信息绑定。
        // 重写绑定自定义credential
        createFlowVariable(flow, CasWebflowConstants.VAR_ID_CREDENTIAL, CustomCredential.class);

        // 登录页绑定新参数
        final ViewState state = (ViewState) flow.getState(CasWebflowConstants.STATE_ID_VIEW_LOGIN_FORM);
        final BinderConfiguration cfg = getViewStateBinderConfiguration(state);
        // 由于用户名以及密码已经绑定,所以只需对新加系统参数绑定即可
        // 字段名,转换器,是否必须字段
        cfg.addBinding(new BinderConfiguration.Binding("email", null, true));
        cfg.addBinding(new BinderConfiguration.Binding("telephone", null, true));
        cfg.addBinding(new BinderConfiguration.Binding("capcha", null, true));
如果忘记了可以去看看上一节的CAS内容。
接着我们在登录页面casLoginView.html中添加验证码的字段,如下:
![]()
因为这里添加了一些js功能,点击图片更换验证码,所以引入了code.js。
code.js 内容如下:
function changeCode(){
    var node = document.getElementById("captcha_img");
    //修改验证码
    if (node){
        node.src = node.src+'?id='+uuid();
    }
}

function uuid(){
    //获取系统当前的时间
    var d = new Date().getTime();
    //替换uuid里面的x和y
    var uuid = 'xxxxxxxx-xxxx-4xxx-yxxx-xxxxxxxxxxxx'.replace(/[xy]/g, function(c) {
        //取余 16进制
        var r = (d + Math.random()*16)%16 | 0;
        //向下去整
        d = Math.floor(d/16);
        //toString 表示编程16进制的数据
        return (c=='x' ? r : (r&0x3|0x8)).toString(16);
    });
    return uuid;
};
在casLoginView.html底部引入js,如下

在anumbrella.properties中填写js路径,如下:
anumbrella.javascript.file=/themes/anumbrella/js/cas.js
anumbrella.standard.css.file=/themes/anumbrella/css/cas.css
anumbrella.javascript.code.file=/themes/anumbrella/js/code.js

anumbrella.login.images.path=/themes/anumbrella/images

cas.standard.css.file=/css/cas.css
cas.javascript.file=/js/cas.js
cas.admin.css.file=/css/admin.css

spring.thymeleaf.cache=false
当然这里也可以不用配置,直接在casLoginView.html底部,配置js的路径即可。
最后我们在authentication包下的CustomerHandlerAuthentication的doAuthentication中可以获取到验证码进行匹配。如下:
            ....

    CustomCredential customCredential = (CustomCredential) credential;

    String username = customCredential.getUsername();
    String password = customCredential.getPassword();
    String email = customCredential.getEmail();
    String telephone = customCredential.getTelephone();
    String capcha = customCredential.getCapcha();

    ServletRequestAttributes attributes = (ServletRequestAttributes) RequestContextHolder.getRequestAttributes();
    String right = attributes.getRequest().getSession().getAttribute("captcha_code").toString();

    if(!capcha.equalsIgnoreCase(right)){
        throw new AccountException("Sorry, capcha not correct !");
    }

            ....
重启CAS服务,可以发现验证码效果出来了,点击验证码会自动更新。
当我们不填写验证码提交后,会出现提示信息,如果填写错误,也会出现相应的“认证信息无效”提示。
到此,我们的验证码基本功能完成。
二、自定义错误信息
我们可以看到当我们没有输入信息点击登录后,会出现required on x,x是必填项。这里是email、telephone、capcha。但是当我们没有填写用户名和密码的提示不一样,这是因为CAS的对应中文提示是在messages_zh_CN.properties文件下的,我们可以在target文件中找到需要的messages_zh_CN.properties。
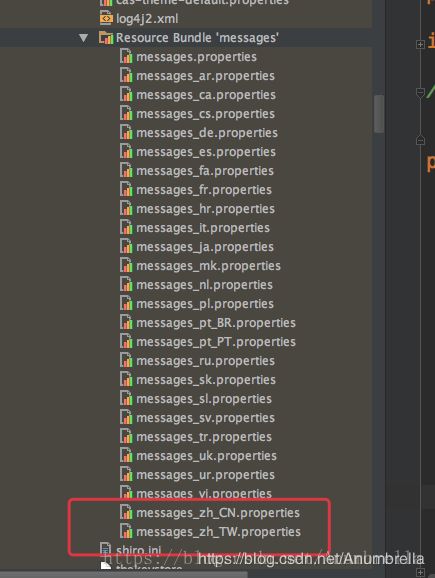
在文件里我们可以发现username.required,password.required这里就是配置用户名和密码提示的。
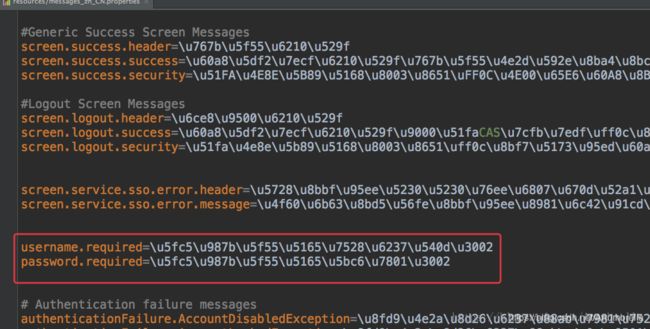
那么我们能通过email.required,telephone.required来配置相应的提示么,很可惜不行,CAS中的错误不能这样配。对应为空的提示比较麻烦一些,我们后面点介绍,接下来先介绍错误提示自定义。比如验证码错误了,如何自定义提示?
我们新建一个exception包,同时新建CheckCodeErrorException类,继承于AuthenticationException。
package net.anumbrella.sso.exection;

import org.apereo.cas.authentication.AuthenticationException;

/**
 * @author Anumbrella
 */
public class CheckCodeErrorException extends AuthenticationException {

    public CheckCodeErrorException(){
        super();
    }

    public CheckCodeErrorException(String msg) {
        super(msg);
    }
}
然后我们在application.properties文件中添加自定义错误,指定我们自己编写的异常类。如下:
# 自定义异常配置
cas.authn.exceptions.exceptions=net.anumbrella.sso.exection.CheckCodeErrorException
最后我们依照messages_zh_CN.properties中,其他异常的配置,填写如下:
authenticationFailure.CheckCodeErrorException=验证码不正确
最后再更改一下错误抛出的异常,如下:
        ServletRequestAttributes attributes = (ServletRequestAttributes) RequestContextHolder.getRequestAttributes();
        String right = attributes.getRequest().getSession().getAttribute("captcha_code").toString();

       if(!capcha.equalsIgnoreCase(right)){
            throw new CheckCodeErrorException();
        }
重启CAS服务,输入信息,验证码乱填,点击登录,提示我们配置的错误。

如何更改为空信息提交提示,因为我们是采用的自定义表单,所以思路是我们需要在提交验证信息之前进行校验。更改表单验证信息,或者采用另一种方法,更改webflow的流程。先进行验证后再经过我们的自定义校验。
更改webflow可以采用XML配置,也可以通过代码来更改,这里采用代码更改。
在CustomWebflowConfigurer中更改bindCredential方法如下:
    /**
     * 绑定自定义的Credential信息
     *
     * @param flow
     */
    protected void bindCredential(Flow flow) {

        // 重写绑定自定义credential
        createFlowVariable(flow, CasWebflowConstants.VAR_ID_CREDENTIAL, CustomCredential.class);

        // 登录页绑定新参数
        final ViewState state = (ViewState) flow.getState(CasWebflowConstants.STATE_ID_VIEW_LOGIN_FORM);
        final BinderConfiguration cfg = getViewStateBinderConfiguration(state);

        // 由于用户名以及密码已经绑定,所以只需对新加系统参数绑定即可
        // 字段名,转换器,是否必须字段
        cfg.addBinding(new BinderConfiguration.Binding("email", null, false));
        cfg.addBinding(new BinderConfiguration.Binding("telephone", null, false));
        cfg.addBinding(new BinderConfiguration.Binding("capcha", null, false));

        final ActionState actionState = (ActionState) flow.getState(CasWebflowConstants.STATE_ID_REAL_SUBMIT);
        final List currentActions = new ArrayList<>();
        actionState.getActionList().forEach(currentActions::add);
        currentActions.forEach(a -> actionState.getActionList().remove(a));

        actionState.getActionList().add(createEvaluateAction("validateLoginAction"));
        currentActions.forEach(a -> actionState.getActionList().add(a));

        actionState.getTransitionSet().add(createTransition("emailError", CasWebflowConstants.STATE_ID_INIT_LOGIN_FORM));
        actionState.getTransitionSet().add(createTransition("telephoneError", CasWebflowConstants.STATE_ID_INIT_LOGIN_FORM));
        actionState.getTransitionSet().add(createTransition("captchaError", CasWebflowConstants.STATE_ID_INIT_LOGIN_FORM));

    }
这里主要更改了两个地方,将必填字段更改为false,让我们手动去判断,其次添加Webflow的流程,先将原来的action备份一下,然后删除掉,再将需要的action添加进去,同时将备份的action还原。
新建一个action包,添加一个ValidateLoginAction类,主要用于我们自定义添加的表单信息的验证,如下:
package net.anumbrella.sso.action;

import net.anumbrella.sso.entity.CustomCredential;
import org.apereo.cas.web.support.WebUtils;
import org.springframework.binding.message.MessageBuilder;
import org.springframework.binding.message.MessageContext;
import org.springframework.webflow.action.AbstractAction;
import org.springframework.webflow.execution.Event;
import org.springframework.webflow.execution.RequestContext;

/**
 * @author anumbrella
 */
public class ValidateLoginAction extends AbstractAction {

    private static final String CAPTCHA_CODE = "captchaError";

    private static final String EMAIL_CODE = "emailError";

    private static final String TELEPHONE_CODE = "telephoneError";

    /**
     * 是否开启验证码
     *
     * @return
     */
    private boolean isEnable() {
        return true;
    }

    @Override
    protected Event doExecute(RequestContext context) throws Exception {
        CustomCredential credential = (CustomCredential) WebUtils.getCredential(context);

        System.out.println("excute");

        //系统信息不为空才检测校验码
        if (credential instanceof CustomCredential) {

            String email = credential.getEmail();
            String telephone = credential.getTelephone();
            String capcha = credential.getCapcha();

            if (capcha.equals("") || capcha == null) {
                return getError(context, CAPTCHA_CODE);
            }

            if (email.equals("") || email == null) {
                return getError(context, EMAIL_CODE);
            }

            if (telephone.equals("") || telephone == null) {
                return getError(context, TELEPHONE_CODE);
            }
        }
        return null;
    }

    /**
     * 跳转到错误页
     *
     * @param requestContext
     * @return
     */
    private Event getError(final RequestContext requestContext, String CODE) {
        final MessageContext messageContext = requestContext.getMessageContext();
        messageContext.addMessage(new MessageBuilder().error().code(CODE).build());
        return getEventFactorySupport().event(this, CODE);
    }
}
最后我们将ValidateLoginAction的类注入到配置CustomerAuthWebflowConfiguration中去,如下:
    @Bean
    @RefreshScope
    @ConditionalOnMissingBean(name = "validateLoginAction")
    public Action validateLoginAction() {
        ValidateLoginAction validateCaptchaAction = new ValidateLoginAction();
        return validateCaptchaAction;
    }
最后我们还需要在messages_zh_CN.properties中添加错误提示信息,如下:
emailError=邮箱不能为空
telephoneError=电话号码不能为空
captchaError=验证码不能为空
重启我们的CAS服务,当我们没有输入邮箱、电话或验证码时会提示相应的错误提示并不能登录!


除此之外,验证码校验那里的情况还可以采用ajax去实现异步,主要是使用JavaScript请求配置去实现,在controller中也提供了接口,可以自行扩展。好了,这节的内容到此为止!
代码实例:Chapter6
参考
- CAS单点登录-登录校验码(十七)
- CAS之5.2x版本登录验证码-yellowcong
- https://apereo.github.io/cas/5.3.x/installation/Webflow-Customization.html