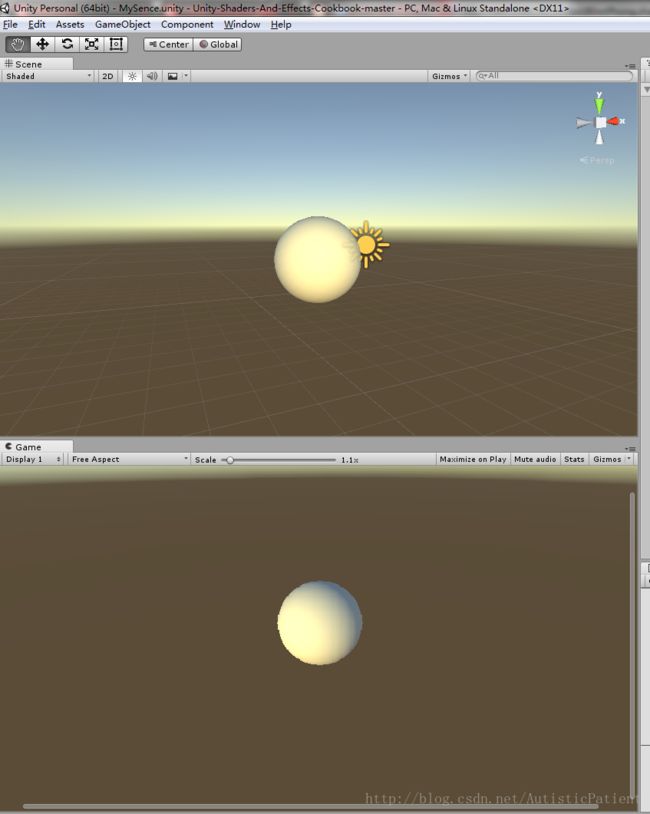
UnityShader之建立高光效果
本来特效插件都找好了,结果看到youtube上有个大神做的塔防游戏,很好的idea
而且看了他的代码,感觉挺好的,,比原先自己写塔防的时候要强的多, 面向对象的三大特性基本都涉及了,代码的扩展性也很强,这两天看完了他的全部源码,收获很大,但是整体讲,这个前辈做的是有小小缺陷的(在我看来),代码一定会参考的,因为确实是值得学习的好代码
OK,言归正传,本节将要实现的是
介绍unity内置的blinnPhong镜面反射高光模型
创建自定义Phong光照
step1
Shader "CookbookShaders/Chapter03/BlinnPhong"
{
    Properties
    {
        _MainTex ("Base (RGB)", 2D) = "white" {}
        _MainTint ("Diffuse Tint", Color) = (1,1,1,1)
        //_SpecColor ("Specular Color", Color) = (1,1,1,1)
        _SpecPower ("Specular Power", Range(0,1)) = 0.5
    }

    SubShader
    {
        Tags { "RenderType"="Opaque" }
        LOD 200

        CGPROGRAM
        //unity内置的BlinnPhong高光模型,现在我们告诉着色器使用BlinnPhong光照模型
        #pragma surface surf BlinnPhong

        sampler2D _MainTex;
        float _SpecPower;
        float4 _MainTint;

        struct Input
        {
            float2 uv_MainTex;
        };

        void surf (Input IN, inout SurfaceOutput o)
        {
            half4 c = tex2D (_MainTex, IN.uv_MainTex) * _MainTint;

            //镜面反射度 ,跟Inspector面板关联,可以滑动条进行测试
            o.Specular = _SpecPower;

            //光泽度
            o.Gloss = c.r;

            //Albedo: 反射的颜色值,这里接受的就是tex2D经过采样后发射的值
            o.Albedo = c.rgb;

            //透明度
            o.Alpha = c.a;
        }
        ENDCG
    }
    FallBack "Diffuse"
}
没什么特殊的?
接着看
step2 : 创建Phong高光模型
1.如何对Phong高光类型进行逐顶点操作,
2.在表面着色器中使用输入结构体的新参数进行逐像素操作
Shader "CookbookShaders/Chapter03/Phong"
{
    Properties
    {
        _MainTint ("Diffuse Tint", Color) = (1,1,1,1)
        _MainTex ("Base (RGB)", 2D) = "white" {}
        _SpecularColor ("Specular Color", Color) = (1,1,1,1)

        //高光强度
        _SpecPower ("Specular Power", Range(0.1,30)) = 1
        _SpecHardness ("Specular Hardness", Range(0.1, 10)) = 2

    }

    SubShader
    {
        Tags { "RenderType"="Opaque" }
        LOD 200

        CGPROGRAM
        //自定义Phong光照
        #pragma surface surf Phong

        //添加对应的属性变量
        float4 _SpecularColor;
        sampler2D _MainTex;
        float4 _MainTint;
        float _SpecPower;
        float _SpecHardness;

        //实现光照函数,必要的参数可以参考Lighting.cginc
        //除了输出结构,这里需要有光照方向,视点方向,衰减系数
        //这里我们要创建的是高光着色器,所以我们需要加上视点
        inline fixed4 LightingPhong (SurfaceOutput s, fixed3 lightDir, half3 viewDir, fixed atten)
        {
            //计算漫反射矢量,声明漫反射组件
            //做顶点法线和光源方向的点积运算,将返回(-1,1)
            //当返回1时,表明物体整对着光源,反之同理
            float diff = dot(s.Normal, lightDir);

            //计算反射向量,实现法线朝向光源弯曲的效果
            float3 reflectionVector = normalize((2.0 * s.Normal * diff) - lightDir);

            //计算最终的高光
            float spec = pow(max(0,dot(reflectionVector, viewDir)), _SpecPower);
            float3 finalSpec = _SpecularColor.rgb * spec;

            //得到最后的颜色值
            fixed4 c;
            c.rgb = (s.Albedo * _LightColor0.rgb * diff) + (_LightColor0.rgb * finalSpec);
            c.a = 1.0;
            return c;
        }

        struct Input
        {
            float2 uv_MainTex;
        };

        void surf (Input IN, inout SurfaceOutput o)
        {
            half4 c = tex2D (_MainTex, IN.uv_MainTex) * _MainTint;
            o.Albedo = c.rgb;
            o.Alpha = c.a;
        }
        ENDCG
    }
    FallBack "Diffuse"
}
高光的就先写到这,本节会持续更新

