#include
#include
using namespace cv;
using namespace std;
int main(int argc, char** argv)
{
// Read the image file
Mat image = imread("/home/CORPUSERS/xp025362/Pictures/st.jpeg");
// Check for failure
if (image.empty())
{
cout << "Could not open or find the image" << endl;
cin.get(); //wait for any key press
return -1;
}
Mat imageBrighnessHigh50;
image.convertTo(imageBrighnessHigh50, -1, 1, 50); //increase the brightness by 50
Mat imageBrighnessHigh100;
image.convertTo(imageBrighnessHigh100, -1, 1, 100); //increase the brightness by 100
Mat imageBrighnessLow50;
image.convertTo(imageBrighnessLow50, -1, 1, -50); //decrease the brightness by 50
Mat imageBrighnessLow100;
image.convertTo(imageBrighnessLow100, -1, 1, -100); //decrease the brightness by 100
//Defining window names for above images
String windowNameOriginalImage = "Original Image";
String windowNameBrightnessHigh50 = "Brightness Increased by 50";
String windowNameWithBrightnessHigh100 = "Brightness Increased by 100";
String windowNameBrightnessLow50 = "Brightness Decreased by 50";
String windowNameBrightnessLow100 = "Brightness Decreased by 100";
//Create and open windows for above images
namedWindow(windowNameOriginalImage, WINDOW_NORMAL);
namedWindow(windowNameBrightnessHigh50, WINDOW_NORMAL);
namedWindow(windowNameWithBrightnessHigh100, WINDOW_NORMAL);
namedWindow(windowNameBrightnessLow50, WINDOW_NORMAL);
namedWindow(windowNameBrightnessLow100, WINDOW_NORMAL);
//Show above images inside the created windows.
imshow(windowNameOriginalImage, image);
imshow(windowNameBrightnessHigh50, imageBrighnessHigh50);
imshow(windowNameWithBrightnessHigh100, imageBrighnessHigh100);
imshow(windowNameBrightnessLow50, imageBrighnessLow50);
imshow(windowNameBrightnessLow100, imageBrighnessLow100);
waitKey(0); // Wait for any key stroke
destroyAllWindows(); //destroy all open windows
return 0;
}
PS: 这里为什么是明度而不是亮度,请大家自行google。然后看下效果图(从左往右,至上而下的顺序,依次为原始img, +50, +100, -50 ,-100):
#include
#include
using namespace cv;
using namespace std;
int main(int argc, char** argv)
{
// Read the image file
Mat image = imread("/home/CORPUSERS/xp025362/Pictures/st.jpeg");
// Check for failure
if (image.empty())
{
cout << "Could not open or find the image" << endl;
cin.get(); //wait for any key press
return -1;
}
Mat imageContrastHigh2;
image.convertTo(imageContrastHigh2, -1, 2, 0); //increase the contrast by 2
Mat imageContrastHigh4;
image.convertTo(imageContrastHigh4, -1, 4, 0); //increase the contrast by 4
Mat imageContrastLow0_5;
image.convertTo(imageContrastLow0_5, -1, 0.5, 0); //decrease the contrast by 0.5
Mat imageContrastLow0_25;
image.convertTo(imageContrastLow0_25, -1, 0.25, 0); //decrease the contrast by 0.25
//Defining window names for above images
String windowNameOriginalImage = "Original Image";
String windowNameContrastHigh2 = "Contrast Increased by 2";
String windowNameContrastHigh4 = "Contrast Increased by 4";
String windowNameContrastLow0_5 = "Contrast Decreased by 0.5";
String windowNameContrastLow0_25 = "Contrast Decreased by 0.25";
//Create and open windows for above images
namedWindow(windowNameOriginalImage, WINDOW_NORMAL);
namedWindow(windowNameContrastHigh2, WINDOW_NORMAL);
namedWindow(windowNameContrastHigh4, WINDOW_NORMAL);
namedWindow(windowNameContrastLow0_5, WINDOW_NORMAL);
namedWindow(windowNameContrastLow0_25, WINDOW_NORMAL);
//Show above images inside the created windows.
imshow(windowNameOriginalImage, image);
imshow(windowNameContrastHigh2, imageContrastHigh2);
imshow(windowNameContrastHigh4, imageContrastHigh4);
imshow(windowNameContrastLow0_5, imageContrastLow0_5);
imshow(windowNameContrastLow0_25, imageContrastLow0_25);
waitKey(0); // Wait for any key stroke
destroyAllWindows(); //destroy all open windows
return 0;
}
同样看下效果图(同上):
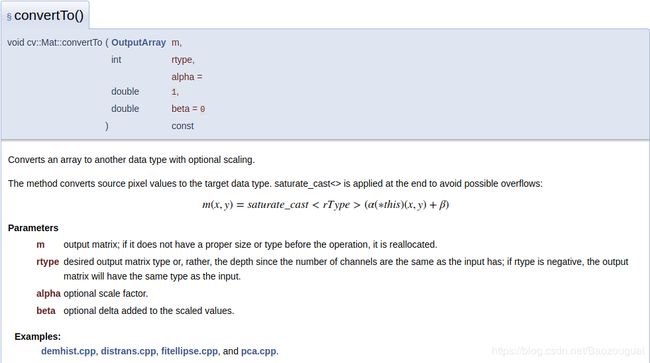
例子很简单,看下convertTo的使用,相信大家也看出来了,alpha其实就是前面说的对比度,beta就是前面说的明度。
PS:想起以前同学经常看得一本经典的入门书籍《数字图像处理》冈萨写的,我是没有看过,推荐大家有时间可以看下,很多概念很有意思,与君共勉~