Hexo优化(鼠标点击效果+评论系统+站点统计+hexo-admin-qiniu+markdown图片存储+live2d板娘)
欢迎访问我的博客
文章目录
- 欢迎访问[我的博客](http://blog.duanzy.xyz)
- 鼠标点击效果
- 鼠标点击出现桃心
- 鼠标点击出现爆炸烟花
- 评论系统
- DISQUS
- Facebook Comments 由 hydai 贡献
- HyperComments 由 ivan-nginx 贡献
- 网易云跟帖 由 geekrainy 贡献
- 来必力 由 asmoker 贡献
- 站内统计
- live2D
- hexo-admin-qiniu后台管理
鼠标点击效果
本博客采用hexo-theme-next主题,大部分的主题可能只是文件的后缀名不相同,文件名相同,可以使用subline Text 3或者其他编辑器修改配置文件等。
鼠标点击出现桃心
在\codeblog\themes\next6\source\js下新建文件love.js文件,其中加入代码如下:
!function(e,t,a){function n(){c(".heart{width: 10px;height: 10px;position: fixed;background: #f00;transform: rotate(45deg);-webkit-transform: rotate(45deg);-moz-transform: rotate(45deg);}.heart:after,.heart:before{content: '';width: inherit;height: inherit;background: inherit;border-radius: 50%;-webkit-border-radius: 500%;-moz-border-radius: 50%;position: fixed;}.heart:after{top: -5px;}.heart:before{left: -5px;}"),o(),r()}function r(){for(var e=0;e在主题文件夹下的layout文件夹下的_layout配置文件里面的标签里添加
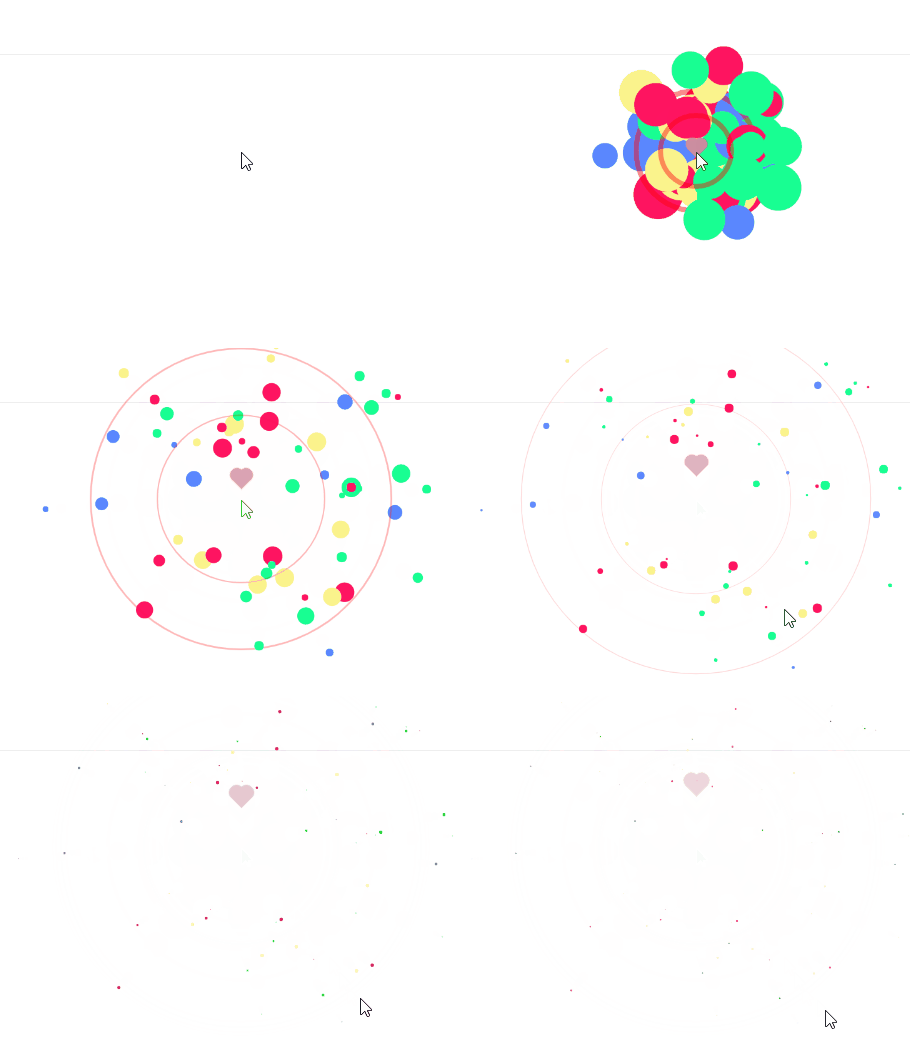
鼠标点击出现爆炸烟花
在\codeblog\themes\next6\source\js下新建文件firework.js文件,其中加入代码如下:
"use strict";function updateCoords(e){pointerX=(e.clientX||e.touches[0].clientX)-canvasEl.getBoundingClientRect().left,pointerY=e.clientY||e.touches[0].clientY-canvasEl.getBoundingClientRect().top}function setParticuleDirection(e){var t=anime.random(0,360)*Math.PI/180,a=anime.random(50,180),n=[-1,1][anime.random(0,1)]*a;return{x:e.x+n*Math.cos(t),y:e.y+n*Math.sin(t)}}function createParticule(e,t){var a={};return a.x=e,a.y=t,a.color=colors[anime.random(0,colors.length-1)],a.radius=anime.random(16,32),a.endPos=setParticuleDirection(a),a.draw=function(){ctx.beginPath(),ctx.arc(a.x,a.y,a.radius,0,2*Math.PI,!0),ctx.fillStyle=a.color,ctx.fill()},a}function createCircle(e,t){var a={};return a.x=e,a.y=t,a.color="#F00",a.radius=0.1,a.alpha=0.5,a.lineWidth=6,a.draw=function(){ctx.globalAlpha=a.alpha,ctx.beginPath(),ctx.arc(a.x,a.y,a.radius,0,2*Math.PI,!0),ctx.lineWidth=a.lineWidth,ctx.strokeStyle=a.color,ctx.stroke(),ctx.globalAlpha=1},a}function renderParticule(e){for(var t=0;t在主题文件夹下的layout文件夹下的_layout配置文件里面的标签里添加
展示效果如下
评论系统
由hexo-next的官方文档,可以看出hexo支持多种第三方评论插件。
如需取消某个 页面/文章 的评论,在 md 文件的 front-matter 中增加 comments: false
官方文档。
DISQUS
编辑 主题配置文件, 将 disqus 下的 enable 设定为 true,同时提供您的 shortname。count 用于指定是否显示评论数量。
disqus:
  enable: false
  shortname:
  count: true
Facebook Comments 由 hydai 贡献
需要先集成 Facebook SDK。修改 主题配置文件 以下配置:
# Facebook comments plugin
# This plugin depends on Facebook SDK.
# If facebook_sdk.enable is false, Facebook comments plugin is unavailable.
facebook_comments_plugin:
enable: false
num_of_posts: 10  # min posts num is 1
width: 100%       # default width is 550px
scheme: light     # default scheme is light (light or dark)
HyperComments 由 ivan-nginx 贡献
Add support for Hypercomments system instead of Disqus. 修改 主题配置文件 以下配置:
# Hypercomments
#hypercomments_id:
网易云跟帖 由 geekrainy 贡献
登陆 网易云跟帖 获取你的 Product Key。 编辑 主题配置文件, 编辑 gentie_productKey 字段,设置如下:
gentie_productKey: #your-gentie-product-key
请注意,您在云跟帖管理后台设置的域名必须跟您站点的域名一致。在本地测试时,需要做两步骤前置设定:

修改 hosts 文件,将您域名的请求指向本地。例如:127.0.0.1 notes.example.com
修改 Hexo 监听的端口为 80:hexo s --debug -p 80
测试完成后请将 hosts 文件中的域名映射删除。
来必力 由 asmoker 贡献
登陆 来必力 获取你的 LiveRe UID。 编辑 主题配置文件, 编辑 livere_uid 字段,设置如下:
livere_uid: #your livere_uid
本博客采用的是来必力的评论系统,登陆来比力获取city免费版,获取UID,放在主题配置文件config中的livere_uid中,(要先取消UID的注释)
效果图:
[外链图片转存失败(img-npNlncg7-1568728572910)(http://plii4i8ws.bkt.clouddn.com/1547874906585ww81rvx3.png?imageslim)]
站内统计
本博客采用的是不蒜子的站内统计,具体配置如下:
注意: 此特性在版本 5.0.1 中引入,要使用此功能请确保所使用的 NexT 版本在此之后
-
全局配置
编辑
主题配置文件中的busuanzi_count的配置项。
当enable: true时,代表开启全局开关。若site_uv、site_pv、page_pv的值均为false时,不蒜子仅作记录而不会在页面上显示。 -
站点UV配置
当
site_uv: true时,代表在页面底部显示站点的UV值。
site_uv_header和site_uv_footer为自定义样式配置,相关的值留空时将不显示,可以使用(带特效的)font-awesome。显示效果为[site_uv_header]UV值[site_uv_footer]。# 效果:本站访客数12345人次 site_uv: true site_uv_header: 本站访客数 site_uv_footer: 人次
-
站点PV配置
当
site_pv: true时,代表在页面底部显示站点的PV值。
site_pv_header和site_pv_footer为自定义样式配置,相关的值留空时将不显示,可以使用(带特效的)font-awesome。显示效果为[site_pv_header]PV值[site_pv_footer]。# 效果:本站总访问量12345次 site_pv: true site_pv_header: 本站总访问量 site_pv_footer: 次
-
单页面PV配置
当page_pv: true时,代表在文章页面的标题下显示该页面的PV值(阅读数)。
page_pv_header和page_pv_footer为自定义样式配置,相关的值留空时将不显示,可以使用(带特效的)font-awesome。显示效果为[page_pv_header]PV值[page_pv_footer].# 效果:本文总阅读量12345次 page_pv: true page_pv_header: 本文总阅读量 page_pv_footer: 次
效果图:
[外链图片转存失败(img-5htdv9FE-1568728572912)(http://plii4i8ws.bkt.clouddn.com/1547874825919k3x0nqm9.png?imageslim)]
live2D
说实话写到这里,这是我最想要的了.以前做django个人博客的时候,有一次去看别的的博客,发现了live2d板娘,当时扣了很长时间的源码都没有找出来这个到底是则么构造的,偶然之间发现这是叫live2d板娘,当时的个人博客上并没有实现他.而hexo框架完美的结合了各种第三方库,在hexo中可以直接安装.
以下是使用流程:
-
下载相应的模板
在项目文件夹下使用
git bash工具,执行npm install {packagename},其中的packagename可以在次项目中找到。
live2d模板.
我使用的是live2d-widget-model-z16。
- 在
项目配置文件(_config)中添加以下代码:
live2d:
  enable: true
  scriptFrom: local
  model:
    use: live2d-widget-model-z16 #模型选择
  display:
    position: right  #模型位置
    width: 100       #模型宽度
    height: 200      #模型高度
  mobile:
    show: false      #是否在手机端显示
执行效果如下:
hexo-admin-qiniu后台管理
最开始创建文章,必须在本地新建一个md文件,然后以markdown的格式去新建博客。在本地没有markdown编辑器的时候,很难受,不能实时看到编辑的效果,于是在想有没有当初的做django时候的后台管理。一番搜索之后,有hexo-admin和hexo-admin-qiniu两种选择,其中后者绑定七牛云,可以直接实现粘贴图片,很舒服。所以采用后者。
安装方法:
npm install hexo-admin-qiniu
然后在项目配置文件(_config)中,添加一下代码:
#Qiniu
admin:
  qiniuCfg:
      imageslim: true  # 启动图片瘦身,仅华东区bucket可以使用
      AccessKey: 'your key'
      SecretKey: 'your key'
      BucketName: 'your bucketname'
      bucketHost: 'your buckethost'
其中前两项是你的七牛云密钥,后者是你新建的存储空间的名字以及外链连接。
效果如下:
[外链图片转存失败(img-EAPHtSHW-1568728572913)(http://plii4i8ws.bkt.clouddn.com/1547876997271ep2ndgsp.png?)]
参考文档
- Hexo官方文档

