win10下用tensorflow_gpu-1.12.0入门MNIST避坑备忘录
基础环境:Win10、Python3.6.7、Pycharm2018 2.4、tensorflow_gpu-1.12.0
Python与Pycharm配置安装:https://blog.csdn.net/Fowee/article/details/83048154
tensorflow_gpu-1.12.0安装:https://blog.csdn.net/Fowee/article/details/84983245
主要参考:http://www.tensorfly.cn/tfdoc/tutorials/overview.html
-----------------------------------------------------------------------------------------------------------------------------
MNIST 一开始就被 input_data.py 这个给打击了,我将 input_data.py 代码 copy 在这
input_data.py 是 “下载用于训练和测试的MNIST数据集的源码”
MNIST 四个数据集,可以通过下列代码下载(网络慢的话可以手动下载)
input_data 是TensorFlow 自带的案例库,可直接引用,也可以手动下载使用
from tensorflow.examples.tutorials.mnist import input_data
mnist = input_data.read_data_sets('MNIST_data', one_hot=True)
from myMNIST import input_data
mnist = input_data.read_data_sets('MNIST_data', one_hot=True)-----------------------------------------如果要手动下载的话-----------------------------------------
Yann LeCun's MNIST page 提供了数据集的下载,依此下载

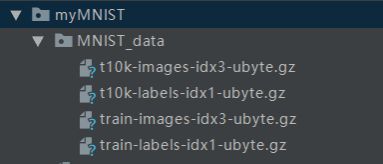
将四个文件放在同一文件夹下,命名为MNIST_data,放在一级目录下,如图:
---------------------------------------------------------------------------------------------------------------------------------------------------------
下面代码依此实现两个模型,具体阐述请参照:http://www.tensorfly.cn/tfdoc/tutorials/mnist_beginners.html
1.Softmax回归模型
# from myMNIST import input_data
from tensorflow.examples.tutorials.mnist import input_data
import tensorflow as tf

mnist = input_data.read_data_sets('MNIST_data', one_hot=True)
sess = tf.InteractiveSession()

# 构建Softmax 回归模型
x = tf.placeholder("float", shape=[None, 784])
y_ = tf.placeholder("float", shape=[None, 10])

W = tf.Variable(tf.zeros([784,10]))
b = tf.Variable(tf.zeros([10]))

sess.run(tf.global_variables_initializer())

y = tf.nn.softmax(tf.matmul(x,W) + b)
cross_entropy = -tf.reduce_sum(y_*tf.log(y))

# 训练模型
train_step = tf.train.GradientDescentOptimizer(0.01).minimize(cross_entropy)
for i in range(1000):
    batch = mnist.train.next_batch(50)
    train_step.run(feed_dict={x: batch[0], y_: batch[1]})

# 评估模型
correct_prediction = tf.equal(tf.argmax(y,1), tf.argmax(y_,1))
accuracy = tf.reduce_mean(tf.cast(correct_prediction, "float"))
# print(accuracy.eval(feed_dict={x: mnist.test.images, y_: mnist.test.labels}))
print(sess.run(accuracy, feed_dict={x: mnist.test.images, y_: mnist.test.labels}))
这里原手册有个坑,我按提示做了修改,因为运行之后报了一个提示,如图:

Instructions for updating:
Use `tf.global_variables_initializer` instead.
比较蒙,看意思是需要改一下,这里将中间原来的
sess.run(tf.initialize_all_variables())改成了
sess.run(tf.global_variables_initializer())入门部分到此结束,准确率结果在91%左右,具体的细节可以参照:http://www.tensorfly.cn/tfdoc/tutorials/overview.html
-----------------------------------------------------------------------------------------------------------------------------
2.多层卷积网络
91%的准确率是不是依旧不太令人满意,这里依托TensorFlow强大的深度学习构建网络的能力,构造了一个多层卷积网络,效果能再次得到较大提升。
这段代码复制后直接执行,一般没什么问题,具体细节参照:http://www.tensorfly.cn/tfdoc/tutorials/mnist_pros.html
# from myMNIST import input_data
import tensorflow as tf
from tensorflow.examples.tutorials.mnist import input_data
# 手动下载数据集:http://yann.lecun.com/exdb/mnist/
mnist = input_data.read_data_sets('MNIST_data', one_hot=True)
# 60000行的训练数据集(mnist.train)和10000行的测试数据集(mnist.test)
# 训练数据集的图片是 mnist.train.images ,训练数据集的标签是 mnist.train.labels

sess = tf.InteractiveSession()

# 权重初始化
def weight_variable(shape):
    return tf.Variable(tf.truncated_normal(shape, stddev=0.1) ) # 权重在初始化时应该加入少量的噪声来打破对称性以及避免0梯度

# 偏置项初始化
def bias_variable(shape):
  return tf.Variable(tf.constant(0.1, shape=shape))

def conv2d(x, W):
    return tf.nn.conv2d(x, W, strides=[1, 1, 1, 1], padding='SAME')

def max_pool_2x2(x):
    return tf.nn.max_pool(x, ksize=[1, 2, 2, 1], strides=[1, 2, 2, 1], padding='SAME')

# 参数
x = tf.placeholder("float", shape=[None, 784])  # None表示此张量的第一个维度可以是任何长度的
W = tf.Variable(tf.zeros([784,10]))
b = tf.Variable(tf.zeros([10]))
y = tf.nn.softmax(tf.matmul(x, W) + b)
y_ = tf.placeholder("float", shape=[None, 10])
x_image = tf.reshape(x, [-1,28,28,1])

# Level 1 CNN
W_conv1 = weight_variable([5, 5, 1, 32])
b_conv1 = bias_variable([32])
h_conv1 = tf.nn.relu(conv2d(x_image, W_conv1) + b_conv1)
h_pool1 = max_pool_2x2(h_conv1)

# Level 2 CNN
W_conv2 = weight_variable([5, 5, 32, 64])
b_conv2 = bias_variable([64])
h_conv2 = tf.nn.relu(conv2d(h_pool1, W_conv2) + b_conv2)
h_pool2 = max_pool_2x2(h_conv2)

# Full Connection
W_fc1 = weight_variable([7 * 7 * 64, 1024])
b_fc1 = bias_variable([1024])
h_pool2_flat = tf.reshape(h_pool2, [-1, 7*7*64])
h_fc1 = tf.nn.relu(tf.matmul(h_pool2_flat, W_fc1) + b_fc1)

# Dropout
keep_prob = tf.placeholder("float")
h_fc1_drop = tf.nn.dropout(h_fc1, keep_prob)

# Output Layer
W_fc2 = weight_variable([1024, 10])
b_fc2 = bias_variable([10])

y_conv=tf.nn.softmax(tf.matmul(h_fc1_drop, W_fc2) + b_fc2)

# train & result
cross_entropy = -tf.reduce_sum(y_*tf.log(y_conv))
train_step = tf.train.AdamOptimizer(1e-4).minimize(cross_entropy)
correct_prediction = tf.equal(tf.argmax(y_conv,1), tf.argmax(y_,1))
accuracy = tf.reduce_mean(tf.cast(correct_prediction, "float"))
sess.run(tf.global_variables_initializer())
for i in range(20000):
    batch_xs, batch_ys = mnist.train.next_batch(50)
    if i % 100 == 0:
        train_accuracy = accuracy.eval(feed_dict={x:batch_xs, y_: batch_ys, keep_prob: 1.0})
        print("step {0}, training accuracy {1}".format(i, train_accuracy))
    train_step.run(feed_dict={x: batch_xs, y_: batch_ys, keep_prob: 0.5})
print("test accuracy {0}".format(accuracy.eval(feed_dict={x: mnist.test.images, y_: mnist.test.labels, keep_prob: 1.0})))