Centos7 7.5 1804 安装Open-falcon 0.2.1
1.下载安装wget
yum install -y wget
2.升级所有安装包
yum -y update
3.安装git
yum -y install git
git version
安装结束后查看git版本 git >= 1.7.5
4.安装go语言环境
yum -y install epel-release
CentOS: rpm --import https://mirror.go-repo.io/centos-unstable/RPM-GPG-KEY-GO-REPO curl -s https://mirror.go-repo.io/centos-unstable/go-repo-unstable.repo | tee /etc/yum.repos.d/go-repo-unstable.repo
yum -y install golang
go version
安装结束后查看go版本 go > 1.6
5.安装redis
yum -y install redis
启动redis
systemctl start redis
创建开机启动
systemctl enable redis
查看redis状态
systemctl status redis
6.安装mysql
下载安装repo源 :wget http://repo.mysql.com/mysql-community-release-el7-5.noarch.rpm
rpm -ivh mysql-community-release-el7-5.noarch.rpm
安装mysql
yum -y install mysql-server
启动mysql
systemctl start mysql
查看mysql状态
systemctl status mysql
设置环境变量GOROOT和GOPATH
export GOROOT=/usr/lib/golang
export GOPATH=/home
7.在github get open-falcon源码
创建GOPATH下的本地路径
mkdir -p $GOPATH/src/github.com/open-falcon
cd $GOPATH/src/github.com/open-falcon
将源码get $GOPATH/src/github.com/open-falcon
git clone https://github.com/open-falcon/falcon-plus.git
初始化数据库
cd $GOPATH/src/github.com/open-falcon/falcon-plus/scripts/mysql/db_schema/
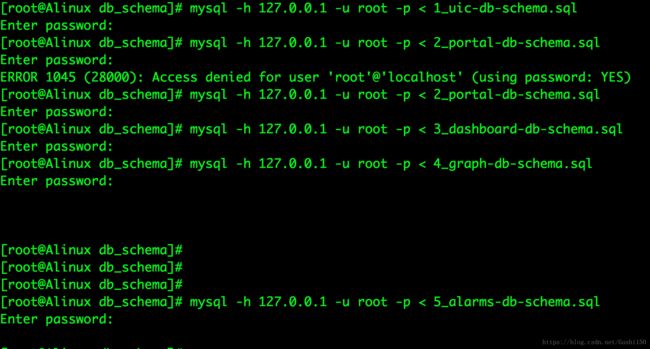
mysql -h 127.0.0.1 -u root -p < 1_uic-db-schema.sql
mysql -h 127.0.0.1 -u root -p < 2_portal-db-schema.sql
mysql -h 127.0.0.1 -u root -p < 3_dashboard-db-schema.sql
mysql -h 127.0.0.1 -u root -p < 4_graph-db-schema.sql
mysql -h 127.0.0.1 -u root -p < 5_alarms-db-schema.sql
root用户没有密码 可直接回车
编译并打包
cd $GOPATH/src/github.com/open-falcon/falcon-plus/
go get github.com/open-falcon/rrdlite
make all
make pack
部署后端
创建目录
export WORKSPACE=/home/work
mkdir -p $WORKSPACE
解压二进制安装包
cd $GOPATH/src/github.com/open-falcon/falcon-plus/
tar xf open-falcon-v0.2.1.tar.gz -C $WORKSPACE
修改配置文件cfg.json
| 模块 | 配置文件所在路径 |
| aggregator | /home/work/aggregator/config/cfg.json |
| graph | /home/work/graph/config/cfg.json |
| hbs | /home/work/hbs/config/cfg.json |
| nodata | /home/work/nodata/config/cfg.json |
| api | /home/work/api/config/cfg.json |
| alarm | /home/work/alarm/config/cfg.json |
启动后端模块
cd $WORKSPACE
./open-falcon start
检查各个模块启动状态
./open-falcon check
部署后端模块
export FRONTSPACE=/home/front/open-falcon
mkdir -p $FRONTSPACE
获取前端代码
cd $FRONTSPACE
git clone https://github.com/open-falcon/dashboard.git
安装依赖包
yum install -y python-virtualenv
yum install -y python-devel
yum install -y openldap-devel
yum install -y mysql-devel
yum groupinstall "Development tools" -y
cd $FRONTSPACE/dashboard/
virtualenv ./env
./env/bin/pip install -r pip_requirements.txt
dashboard的配置文件在/home/front/open-falcon/dashboard/rrd/config.py,需要根据实际情况对内部配置进行修改。
开启防火墙8081端口
firewall-cmd --add-port=8081/tcp --permanent
重新载入防火墙配置
firewall-cmd --reload
在生产环境启动
bash control start
在开发环境启动
./env/bin/python wsgi.py
