在IDEA使用Maven搭建Struts2框架
使用IDEA通过Maven搭建Struts2
- 本机环境
- 创建项目
- 打开IDEA 创建Maven项目
- 在pom文件中添加依赖
- 指定项目的web目录
- 配置Struts
- 定义自定义Action
- 添加jsp文件
- 部署运行
- 获取源码,
struts框架是很多程序员从servlet过渡所使用的第一个web框架,本文使用如今比较流行的编辑器IDEA,结合Maven搭建Struts框架,希望能帮助大家
本机环境
编译器:IDEA 2018
jdk版本:1.7
maven:3.5
struts版本:2.5.10
创建项目
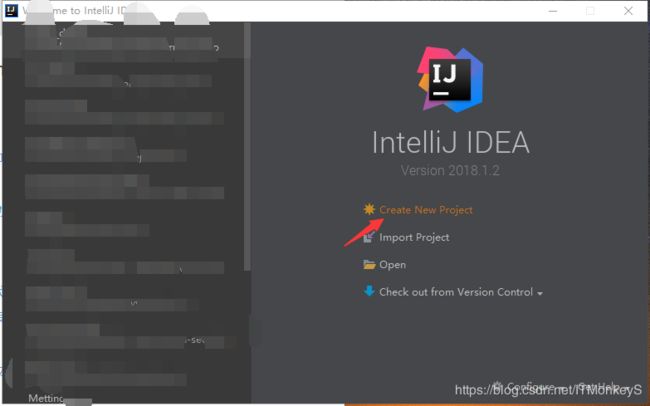
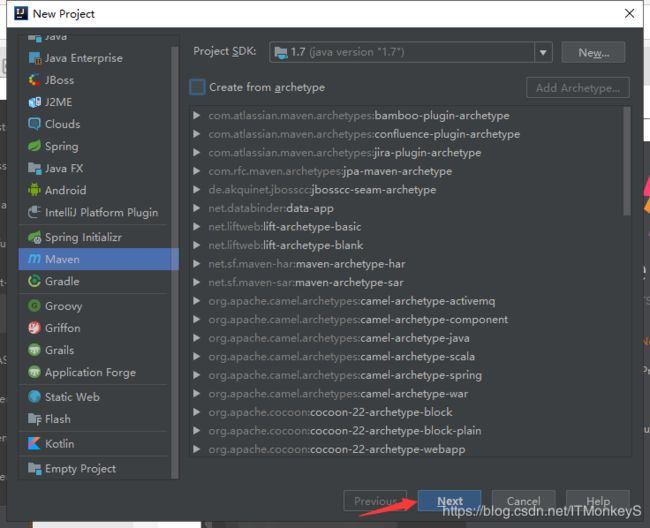
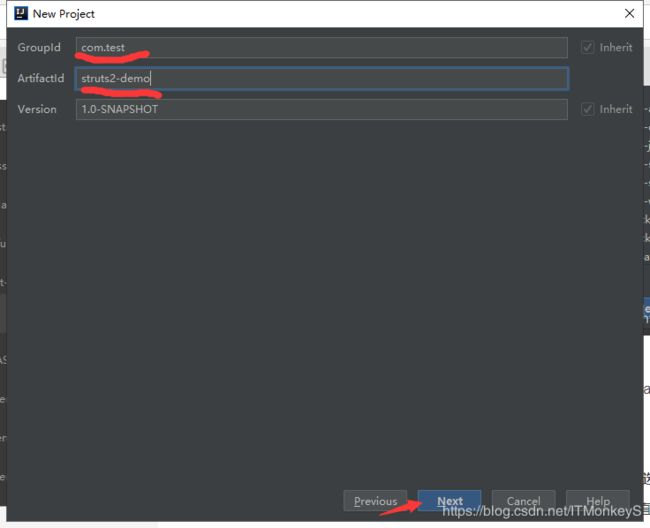
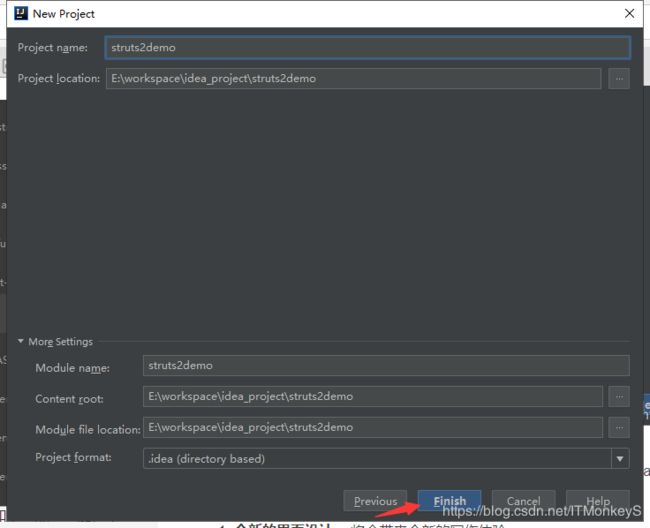
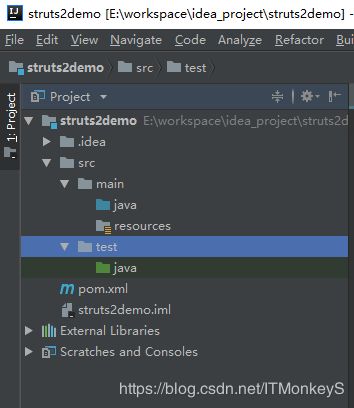
打开IDEA 创建Maven项目
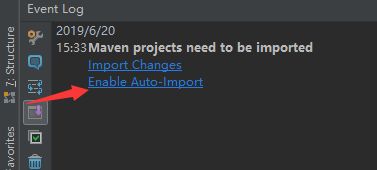
在pom文件中添加依赖
pom.xml文件如下所示
<project xmlns="http://maven.apache.org/POM/4.0.0"
         xmlns:xsi="http://www.w3.org/2001/XMLSchema-instance"
         xsi:schemaLocation="http://maven.apache.org/POM/4.0.0 http://maven.apache.org/xsd/maven-4.0.0.xsd">
    <modelVersion>4.0.0modelVersion>

    <groupId>com.testgroupId>
    <artifactId>struts2-demoartifactId>
    <version>1.0-SNAPSHOTversion>

    <dependencies>
        <dependency>
            <groupId>org.apache.strutsgroupId>
            <artifactId>struts2-coreartifactId>
            <version>2.5.10version>
        dependency>
    dependencies>
project>
指定项目的web目录
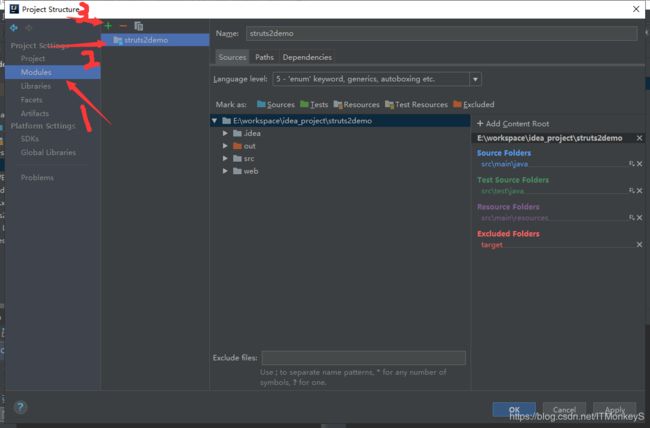
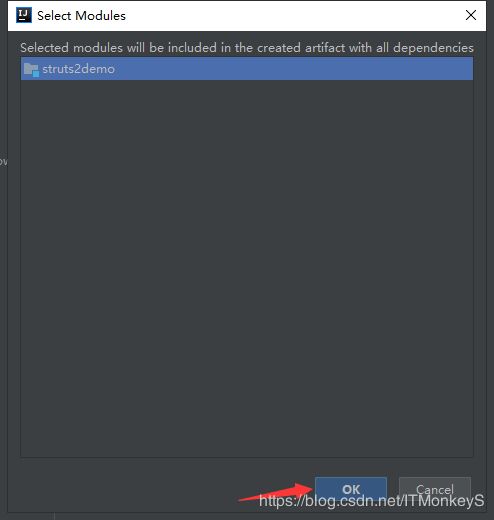
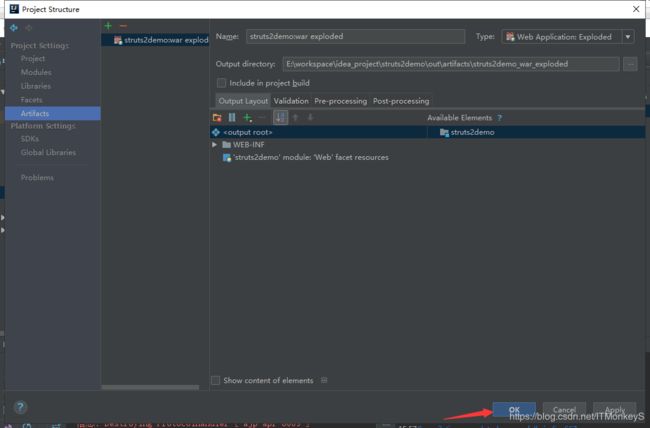
IDEA 的Maven项目并没有指定web目录,需要用户主动选择,请依次点击File ->Project Structure 进入项目的结构设置
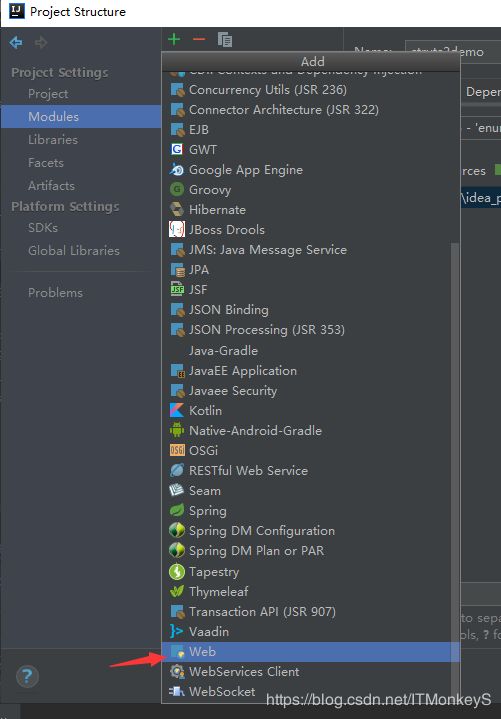
点击后会出现一个Web的选项,图中所画线段为编译器会自动创建的web.xml路径以及web资源路径。(用户也可以通过修改此项指定自己的web.xml以及web目录),
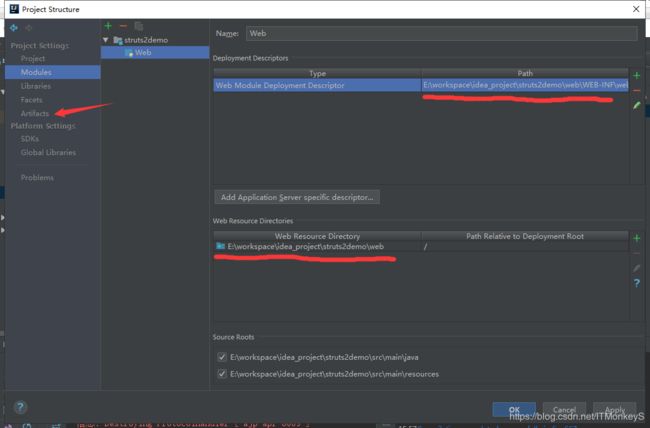
一会儿启动TOMCAT需要
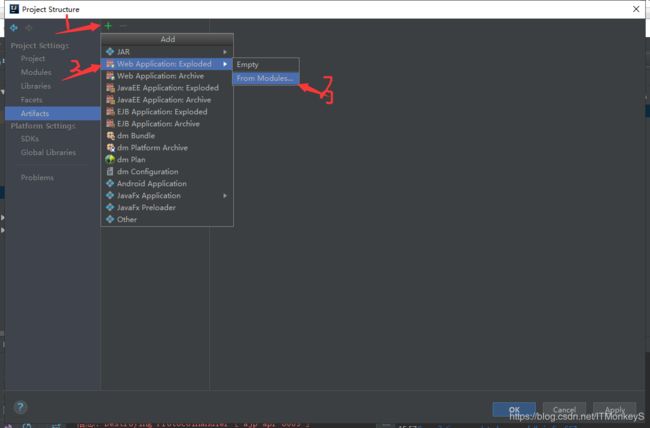
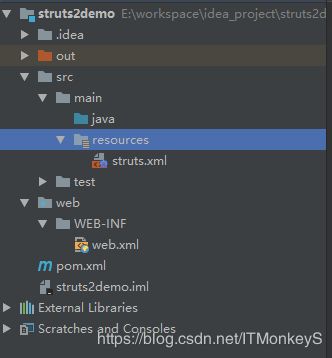
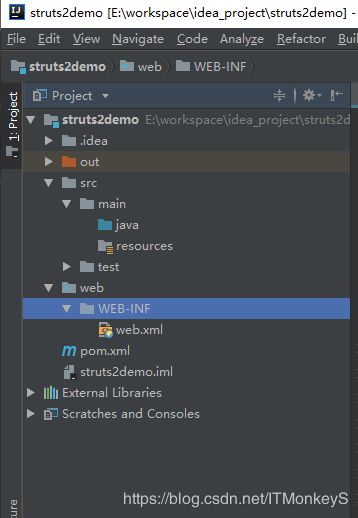
此时的目录结构
配置Struts
1 配置web.xml, 添加过滤器
<web-app xmlns="http://xmlns.jcp.org/xml/ns/javaee"
         xmlns:xsi="http://www.w3.org/2001/XMLSchema-instance"
         xsi:schemaLocation="http://xmlns.jcp.org/xml/ns/javaee http://xmlns.jcp.org/xml/ns/javaee/web-app_4_0.xsd"
         version="4.0">

    <filter>
        <filter-name>struts2filter-name>
        <filter-class>
            org.apache.struts2.dispatcher.filter.StrutsPrepareAndExecuteFilter
        filter-class>
    filter>

    <filter-mapping>
        <filter-name>struts2filter-name>
        <url-pattern>/*url-pattern>
    filter-mapping>

    <welcome-file-list>
        <welcome-file>index.jspwelcome-file>
    welcome-file-list>
web-app>
<struts>
   <package name="com.demo" namespace="/" extends="struts-default">
       <action name="hello" class="com.demo.action.HelloAction">
           <result name="success" >/success.jspresult>
       action>
   package>
struts>
其中package的那么是区分不同的package,namespace设置action的前缀,extends继承默认的的struts配置即可
而action标签的name属性即action的名称,自定义即可,class为Action的类路径,method默认执行execute()方法
定义自定义Action
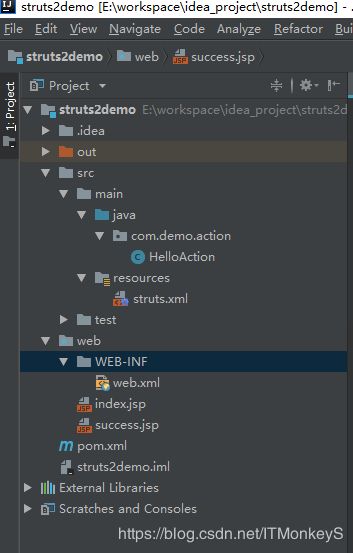
通过上面struts.xml的配置,在src/main/java创建com.demo.action.HelloAction类。
用户定义自定义action有三种形式
1、继承ActionSupport类
2、实现Action方法
3、在类中定义execute()方法
本次使用第一种进行试验
package com.demo.action;

import com.opensymphony.xwork2.ActionSupport;

public class HelloAction extends ActionSupport {

    @Override
    public String execute() throws Exception {
        System.out.println("你好 struts2 ");
        return SUCCESS;
    }

}
添加jsp文件
在web目录下添加index.jsp以及success.jsp文件,代码分别如下所示
///index.jsp
<%@ page contentType="text/html;charset=UTF-8" language="java" %>
<html>
<head>
    <title>主页title>
head>
<body>
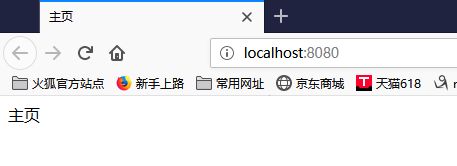
主页
body>
html>

//success.jsp
<%@ page contentType="text/html;charset=UTF-8" language="java" %>
<html>
<head>
    <title>成功title>
head>
<body>
跳转成功
body>
html>
部署运行

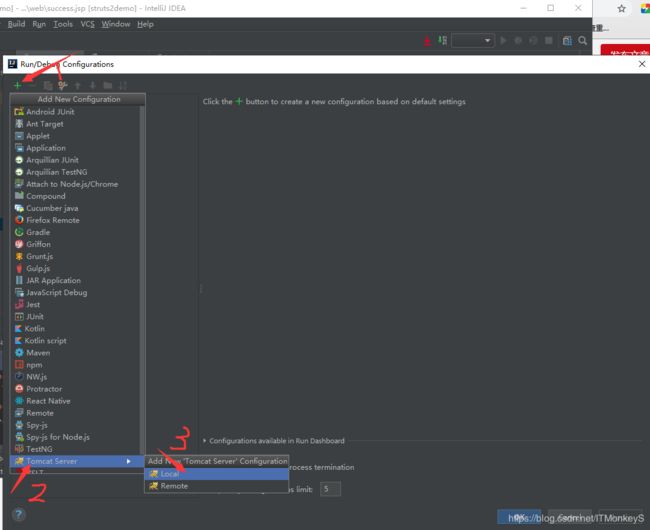


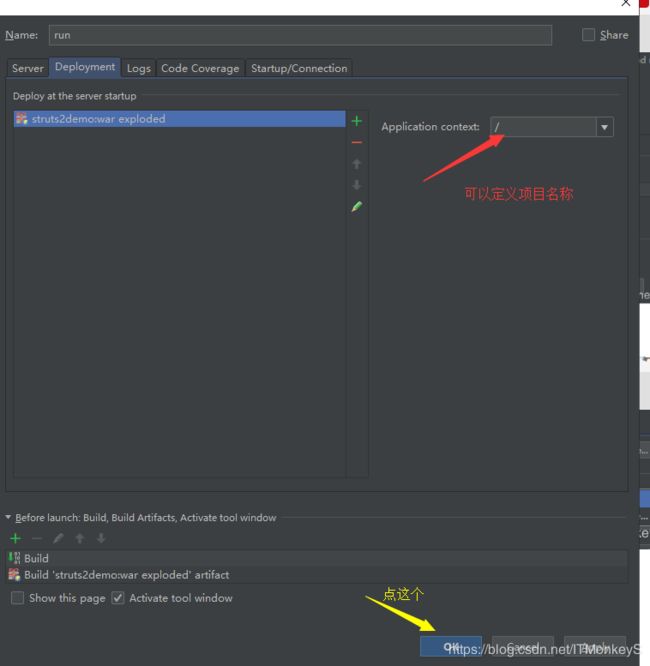
点击启动按钮

访问localhost:8080
访问localhost:8080/hello

控制台日志

获取源码,
点击【这儿】,
如果感觉还行 扫码支持一下呗

