SpringBoot整合spring-ws开发webservice接口(全流程详细教程)
场景
spring-ws
spring-ws官网:
https://spring.io/projects/spring-ws
SpringWebServices(Spring-WS)是Spring社区的一个产品,专注于创建文档驱动的Web服务。SpringWebServices旨在促进契约优先的SOAP服务开发,允许使用多种操作XML有效负载的方式之一创建灵活的Web服务。该产品基于Spring本身,这意味着您可以使用Spring概念,例如依赖注入作为Web服务的一个组成部分。
Soap
SOAP(Simple Object AccessProtocol)简单对象访问协议。它是轻型协议,用于分散的、分布式计算环境中交换信息。SOAP有助于以独立于平台的方式访问对象、服务和服务器。它借助于XML,提供了HTTP所需的扩展。
Soap与Http区别
都是底层的通信协议,请求包的格式不同,soap包是XML格式,http纯文本格式
soap 的 可以传递结构化的 数据,http只能传输纯文本数据;
WSDL
WSDL(Web服务描述语言,Web Services Description Language)是为描述Web服务发布的XML格式。
XSD
XML Schema Definition缩写。
XML Schema 是基于 XML 的 DTD 替代者。
XML Schema 可描述 XML 文档的结构。
XML Schema 语言也可作为 XSD(XML Schema Definition)来引用。
XSD教程:菜鸟教程
http://www.runoob.com/schema/schema-intro.html
实现
添加依赖
除了springboot的基本依赖,还要添加spring-ws以及wsdl4j的依赖。
打开项目的pom.xml
这里为了设置打包时去掉tomcat的jar包。
            org.springframework.boot
            spring-boot-starter-web-services


                    org.springframework.boot
                    spring-boot-starter-tomcat


            wsdl4j
            wsdl4j
添加插件
为了能实现根据xsd文件自动生成代码,还要添加maven的jaxb2插件。
打开pom.xml
                org.apache.maven.plugins
                maven-compiler-plugin


                org.springframework.boot
                spring-boot-maven-plugin

                    true


                org.codehaus.mojo
                jaxb2-maven-plugin
                1.6


                        xjc

                            xjc


                        ${project.basedir}/src/main/resources/xsd/


                        ${project.basedir}/src/main/java


                        false

                    utf-8


                src/main/resources


                src/main/java

                    **/*.xml
将下面这部分代码放在如上的位置:
                org.codehaus.mojo
                jaxb2-maven-plugin
                1.6


                        xjc

                            xjc


                        ${project.basedir}/src/main/resources/xsd/


                        ${project.basedir}/src/main/java


                        false

                    utf-8
注:
1.${project.basedir} 是内置属性,表示项目根目录,即包含pom.xml文件的目录。
2.可以通过
3.可以通过
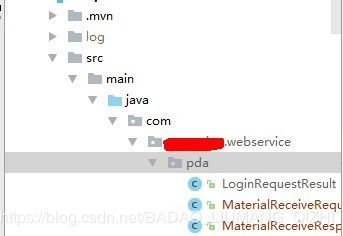
这里就是src/main/java下,然后jaxb2插件生成代码是以命名空间来确定包名。
比如命名空间是http://test.com/webservice/pda
那么就会在src/main/java下生成com/test/wewwbservice/pda目录,并在此目录下生成对应代码。
4.可以通过
编写schema文件/xsd文件
spring-ws的发布,都是以一个schema文件(xsd)定义开始的,它描述了web service的参数以及返回的数据。
在上面插件里指明的xsd所在目录下,新建xsd文件,后缀名是.xsd
xsd文件示例代码:
注意将:xmlns:tns="http://test.com/webservice/pda"和targetNamespace="http://test.com/webservice/pda"改为自己的命名空间。
这里是实现一个简单的登录请求与相应。登录请求时传递两个参数username和password。
string是自带类型,如果要使用自定义类型,要使用登录响应中的类似这样:
然后登录后的响应是有两个自定义属性。
第一个request-result表示请求结果。请求结果里面有是否请求成功的布尔值属性和请求结果。
第二个是登录成功后不同用户根据不同的权限返回不同的菜单List。
而每一个MenuList的属性又是一个自定义Menu,而每一个自定义Menu有两个属性。
一个是菜单的名字,一个是点击菜单后返回的url。
使用插件生成代码
jaxb2插件可以根据描述的xsd文件来帮我们生成相应的ws代码
使用Maven的install命令或者package就可以在设置的输出的目录下生成对应的实体类代码。
这里以IDEA为例,打开Maven命令面板。
双击运行install或者package会生成代码。
来到配置输出的目录下
编写Endpoint
SpringBoot的Endpoint主要是用来监控应用服务的运行状况,并集成在Mvc中提供查看接口。简单点说相当于一个url服务,就是将请求时的url与后台响应的方法对应起来。
其编写方法类似于Controller。
新建webservice包,包下新建EndPoint
package com.ws.api.webservice;
import com.ws.api.sys.service.LoginService;
import com.ws.api.sys.service.ProduceReceiveService;
import org.springframework.ws.server.endpoint.annotation.Endpoint;
import org.springframework.ws.server.endpoint.annotation.PayloadRoot;
import org.springframework.ws.server.endpoint.annotation.RequestPayload;
import org.springframework.ws.server.endpoint.annotation.ResponsePayload;

import javax.annotation.Resource;
import java.util.List;


/**
 * PDA接口切点
 * @author
 * @version badao
 * @see
 * @since
 **/
@Endpoint
public class PdaEndpoint {

    @Resource
    private LoginService loginService;//引入用户mapper


    private static final String NAMESPACE_URI = "http://test.com/webservice/pda";

    @PayloadRoot(namespace = NAMESPACE_URI, localPart = "PdaLoginRequest")
    @ResponsePayload
    public PdaLoginResponse statusFeedbacke(@RequestPayload PdaLoginRequest request){
        String username = request.getUsername();
        String password = request.getPassword();
        return loginService.loginRequest(username,password);
    }

}
注:
其中@Endpoint作用类似于@Controller
@PayloadRoot(namespace = NAMESPACE_URI, localPart = "PdaLoginRequest")声明命名空间,要与xsd文件中的一致。
@ResponsePayload 必加,方法的返回类型要与xsd定义的请求类型一致,方法参数里请求类型要与xsd文件中的一致。
我们可以通过request对象的get方法获取相应的请求参数。
然后将service方法中的返回类型设置为相应的响应类型。
LoginService 代码:
package com.ws.api.sys.service;

import com.test.webservice.pda.PdaLoginResponse;
import org.springframework.stereotype.Service;

@Service
public interface LoginService {
    PdaLoginResponse loginRequest(String username, String password);
}
serviceImpl代码:
package com.ws.api.sys.service.impl;
import com.baomidou.mybatisplus.core.conditions.query.QueryWrapper;
import com.wongoing.webservice.pda.LoginRequestResult;
import com.wongoing.webservice.pda.Menu;
import com.test.webservice.pda.MenuList;
import com.test.webservice.pda.PdaLoginResponse;
import com.ws.api.sys.entity.SysUser;
import com.ws.api.sys.mapper.SysUserMapper;
import com.ws.api.sys.service.LoginService;
import com.ws.api.sys.shiro.ShiroHelper;
import org.springframework.stereotype.Service;
import javax.annotation.Resource;
import java.util.List;
@Service
public class LoginServiceImpl implements LoginService {
@Resource
private SysUserMapper sysUserMapper;//引入用户mapper
@Override
public PdaLoginResponse loginRequest(String username, String password) {
PdaLoginResponse response = new PdaLoginResponse();
LoginRequestResult result = new LoginRequestResult();
MenuList menuList = new MenuList();
List其他业务流程要结合具体业务编写,注意响应的返回格式。
编写配置类
在项目目录下新建config目录,并新建config类
package com.ws.api.config;

import org.springframework.boot.web.servlet.ServletRegistrationBean;
import org.springframework.context.ApplicationContext;
import org.springframework.context.annotation.Bean;
import org.springframework.context.annotation.Configuration;
import org.springframework.core.io.ClassPathResource;
import org.springframework.ws.config.annotation.EnableWs;
import org.springframework.ws.config.annotation.WsConfigurerAdapter;
import org.springframework.ws.transport.http.MessageDispatcherServlet;
import org.springframework.ws.wsdl.wsdl11.DefaultWsdl11Definition;
import org.springframework.xml.xsd.SimpleXsdSchema;
import org.springframework.xml.xsd.XsdSchema;

@EnableWs
@Configuration
public class WebServiceConfig extends WsConfigurerAdapter {
    @Bean
    public ServletRegistrationBean messageDispatcherServlet(ApplicationContext applicationContext) {
        MessageDispatcherServlet servlet = new MessageDispatcherServlet();
        servlet.setApplicationContext(applicationContext);
        servlet.setTransformWsdlLocations(true);
        return new ServletRegistrationBean(servlet, "/ws/*");
    }

    @Bean(name = "pda2wms")
    public DefaultWsdl11Definition pdaWsdl11Definition(XsdSchema pda2wmsSchema) {
        DefaultWsdl11Definition wsdl11Definition = new DefaultWsdl11Definition();
        wsdl11Definition.setPortTypeName("WmsPort");
        wsdl11Definition.setLocationUri("/");
        wsdl11Definition.setTargetNamespace("http://test.com/webservice/pda");
        wsdl11Definition.setSchema(pda2wmsSchema);
        return wsdl11Definition;
    }
    @Bean
    public XsdSchema pda2wmsSchema() {
        return new SimpleXsdSchema(new ClassPathResource("/xsd/pda2wms.xsd"));
    }
}
注:
wsdl11Definition.setPortTypeName("WmsPort");
接口说明:
设置用于此定义的端口类型名称。需要。
public void setPortTypeName(String portTypeName)
这里的WmsPort是自动生成的代码,跟实体类一起生成的。

其他参数详细说明参照:
类DefaultWsdl 11定义中英文对比API文档
https://blog.csdn.net/BADAO_LIUMANG_QIZHI/article/details/89394809
启动项目
编写项目启动类并启动:
package com.ws.api;

import org.springframework.boot.SpringApplication;
import org.springframework.boot.autoconfigure.SpringBootApplication;
import org.springframework.retry.annotation.EnableRetry;

@SpringBootApplication
@EnableRetry
public class ApiApplication {

    public static void main(String[] args) {
        SpringApplication.run(ApiApplication.class, args);
    }

}
启动项目后访问:
http://127.0.0.1:7878/ws/pda2wms.wsdl
本地是127.0.0.1,项目端口号是7878
发现web service已经成功发布了。
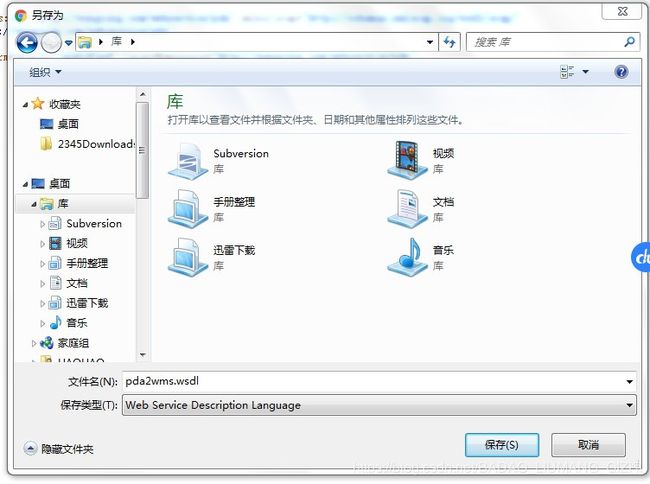
右键点击另存为
然后就可以使用SoapUI进行测试。测试方法见:
https://blog.csdn.net/BADAO_LIUMANG_QIZHI/article/details/89356462


