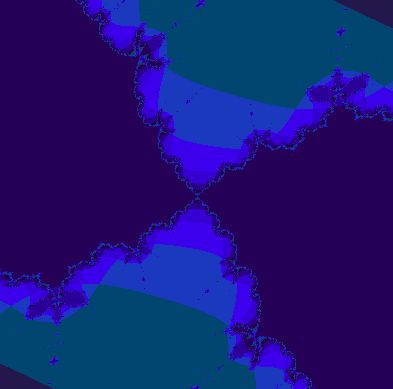
本篇文章使用Tensorflow做数学运算的一个范例,并不涉及机器学习,但可以产生很炫的效果。
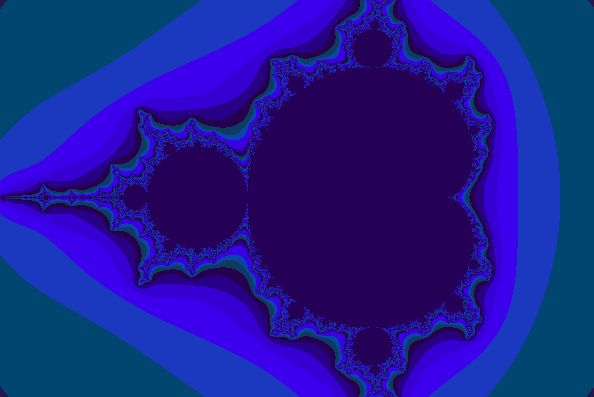
曼德勃罗集是人类有史以来做出的最奇异最瑰丽的几何图形.曾被称为“上帝的指纹”。 这个点集均出自公式:Zn+1=(Zn)^2 +C,对于非线性迭代公式Zn+1= (Zn)^2+C,所有使得无限迭代后的结果能保持有限数值的复数C的集合,构成曼德勃罗集,这篇文章将使用python和tensorflow来形成最简单的曼德勃罗集图案.
准备工作
安装pillow图像库,windows下管理员运行命令行工具,mac下终端命令开头加sudo。
sudo pip3 --trusted-host http://mirrors.aliyun.com/pypi/simple/ install pillow
这里使用了阿里云aliyun的镜像站点,也可以更换其他镜像,参照这里
Pillow显示图像
首先介绍一下tensorflow+pillow的绘图流程。
首先我们编写绘图函数DisplayNxN:
import tensorflow as tf
import numpy as np
from PIL import Image #用来显示图片的模块

def DisplayNxN(atable, fmt='jpeg'):
    #a形状[x,x]转变到[x,x,1]
    acube = atable.reshape(list(atable.shape)+[1])
    #把[x,x,1]变为[x,x,3],只是把一个元素复制3份表示每像素
    acube3 = np.concatenate([acube,acube,acube], 2)
    acube3 = np.uint8(np.clip(acube3, 0, 255)) #裁剪到255
    img=Image.fromarray(acube3)
    img.show()
DisplayNxN主要接收一个形状为[n,n]的数组atable,例如下面4x4的矩阵(数据表)格式:
#atable格式
[[  0.     0.     0.     0.  ]
 [ 63.75  63.75  63.75  63.75]
 [127.5  127.5  127.5  127.5 ]
 [191.25 191.25 191.25 191.25]]
然后acube = atable.reshape(list(atable.shape)+[1])把atable变为4x4x1的三维的数字立方形式ar:
#acube格式
[[[  0.  ]
  [  0.  ]
  [  0.  ]
  [  0.  ]]

 [[ 63.75]
  [ 63.75]
  [ 63.75]
  [ 63.75]]

 [[127.5 ]
  [127.5 ]
  [127.5 ]
  [127.5 ]]

 [[191.25]
  [191.25]
  [191.25]
  [191.25]]]
在上面数组中,每个最底层元素如[63.75]就代表了一个像素的颜色,但我们知道应该是[R,G,B]三个数字才对,下一步acube3 = np.concatenate([acube,acube,acube], 2)把每个数字重复3遍,就得到了下面的4x4x3的格式
[[[  0.     0.     0.  ]
  [  0.     0.     0.  ]
  [  0.     0.     0.  ]
  [  0.     0.     0.  ]]

 [[ 63.75  63.75  63.75]
  [ 63.75  63.75  63.75]
  [ 63.75  63.75  63.75]
  [ 63.75  63.75  63.75]]

 [[127.5  127.5  127.5 ]
  [127.5  127.5  127.5 ]
  [127.5  127.5  127.5 ]
  [127.5  127.5  127.5 ]]

 [[191.25 191.25 191.25]
  [191.25 191.25 191.25]
  [191.25 191.25 191.25]
  [191.25 191.25 191.25]]]
上面这个数据将生成一个超小的4像素x4像素的图像,第一行是4个[ 0. 0. 0. ]黑色像素,第二行63.75稍微亮一些,第三行像素更亮,第四行也更亮,所以这是一个从上到下逐步变亮的黑白图片,下图是放大到100x100x3的结果(先不要着急生成它,先理解):
Tensorflow数据处理
在写代码之前,我们先看一下numpy的np.magrid([start:end:step, start:end:step])这个函数。
import numpy as np
Y, X = np.mgrid[0:1:0.25, 0:1:0.25]
print('y',Y)
print('x',X)
它的输出如下,两个4x4的数组,数值从0到1,间隔0.25。注意,Y是竖向每行递增,X是横向每列递增的。
y [[0.   0.   0.   0.  ]
 [0.25 0.25 0.25 0.25]
 [0.5  0.5  0.5  0.5 ]
 [0.75 0.75 0.75 0.75]]
x [[0.   0.25 0.5  0.75]
 [0.   0.25 0.5  0.75]
 [0.   0.25 0.5  0.75]
 [0.   0.25 0.5  0.75]]
这就是最原始的要传递给DisplayNxN(atable, fmt='jpeg')函数的atable数据。
下面我们在DisplayNxN函数后添加更多代码(以下代码处于DisplayNxN函数外面):
#mgrid[start:end:step, start:end:step]
#从start到end每份step均分成n份,得到两个[n,n]形状
Y, X = np.mgrid[0:1:0.01, 0:1:0.01]
Yc = tf.constant(Y) #创建常数张量
clrs = tf.Variable(Yc) #创建张量变量
nextclrs = clrs*16 #对张量里每个元素进行运算,被group包裹,被step.run循环执行

sess = tf.InteractiveSession()
tf.global_variables_initializer().run()
step = tf.group(
    clrs.assign(nextclrs),
  )
for i in range(2): step.run()

DisplayNxN(clrs.eval())
保存并运行这个文件,可以看到弹出上面显示100x100像素的黑白渐变图片。
注意,MacOS下不要添加sudo命令,可能会报错无法显示图片。
我们留意上面的代码,先是Y, X = np.mgrid[0:1:0.01, 0:1:0.01]这句话100x100的数组,元素的值从0到1分布成100级。
主要运算就是nextclrs = clrs*16,把数组每个元素乘以16,执行了2次,这样相当于把01范围的数值放缩到了0256范围,所以能够最终被显示为正常的黑白渐变。
更多实验
上面我们提到过Y, X = np.mgrid[0:1:0.01, 0:1:0.01]得到X和Y两个数组,X是横向递增,Y是竖向递增。那么如果我们把Yc = tf.constant(Y)中小括号内的Y换成X,那么就能得到横向的渐变图。
Yc = tf.constant(X)
如果我们把下面的x16运算改变一下可以得到下面的图:
nextclrs = (clrs+X)*12
使用判断得到0或1
nextclrs = X<0.5
nextclrs = nextclrs*200
修改DisplayNxN函数中的concatenate方法把RGB三个数字变得不同,得到蓝紫色图像
acube3 = np.concatenate([20+30*np.cos(acube),
                        60+80*np.sin(acube),
                        200-40*np.cos(acube)], 2)
更复杂的运算
继续上面的例子,我们把它改的更加复杂一些:
import tensorflow as tf
import numpy as np
from PIL import Image #用来显示图片的模块

def DisplayNxN(atable, fmt='jpeg'):
    #a形状[x,x]转变到[x,x,1]
    acube = atable.reshape(list(atable.shape)+[1])
    #把[x,x,1]变为[x,x,3],只是把一个元素复制3份表示每像素
    #acube3 = np.concatenate([acube,acube,acube], 2)
    acube3 = np.concatenate([10+20*np.cos(acube),
                        30+50*np.sin(acube),
                        155-80*np.cos(acube)], 2)
    acube3 = np.uint8(np.clip(acube3, 0, 255)) #裁剪到255
    img=Image.fromarray(acube3)
    img.show()

#mgrid[start:end:step, start:end:step]
#从start到end每份step均分成n份,得到两个[n,n]形状
sess = tf.InteractiveSession()

Y, X = np.mgrid[-1:1:0.005, -2:1:0.005]
Z = X+Y
Z = tf.constant(Z)
clrs = tf.Variable(Z)
nclrs = tf.Variable(tf.zeros_like(Z, tf.float32))

nclrs2 = clrs*2
div = tf.abs(nclrs2) < 3

step = tf.group(
    clrs.assign(nclrs2),
    nclrs.assign_add(tf.cast(div, tf.float32))
  )

tf.global_variables_initializer().run()
for i in range(10): step.run()

DisplayNxN(nclrs.eval())
我们使用复数产生圆形
Y, X = np.mgrid[-1:1:0.005, -2:1:0.005]
Z = X+1j*Y
Z = tf.constant(Z.astype(np.complex64))
clrs = tf.Variable(Z)
nclrs = tf.Variable(tf.zeros_like(Z, tf.float32))
最后,调整一下nclrs2的算法,产生漂亮的分形图案
nclrs2 = clrs*clrs+Z
div = tf.abs(nclrs2) < 3
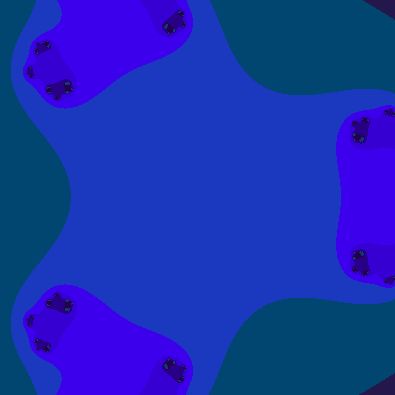
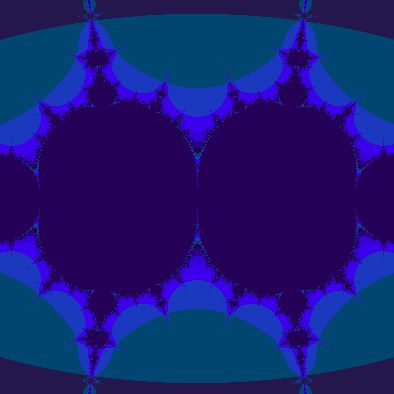
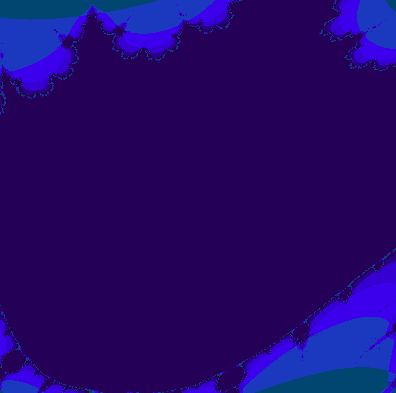
下面还有一些其他算法产生的图像:
最后,是完整的代码,仅供参考:
import tensorflow as tf
import numpy as np
from PIL import Image #用来显示图片的模块

def DisplayNxN(atable, fmt='jpeg'):
    #a形状[x,x]转变到[x,x,1]
    acube = atable.reshape(list(atable.shape)+[1])
    #把[x,x,1]变为[x,x,3],只是把一个元素复制3份表示每像素
    #acube3 = np.concatenate([acube,acube,acube], 2)
    acube3 = np.concatenate([10+20*np.cos(acube),
                        30+50*np.sin(acube),
                        155-80*np.cos(acube)], 2)
    acube3 = np.uint8(np.clip(acube3, 0, 255)) #裁剪到255
    img=Image.fromarray(acube3)
    img.show()

#mgrid[start:end:step, start:end:step]
#从start到end每份step均分成n份,得到两个[n,n]形状
sess = tf.InteractiveSession()

Y, X = np.mgrid[-1:1:0.005, -2:1:0.005]
Z = X+1j*Y
Z = tf.constant(Z.astype(np.complex64))
clrs = tf.Variable(Z)
nclrs = tf.Variable(tf.zeros_like(Z, tf.float32))

nclrs2 = clrs*clrs+Z
div = tf.abs(nclrs2) < 3

step = tf.group(
    clrs.assign(nclrs2),
    nclrs.assign_add(tf.cast(div, tf.float32))
  )

tf.global_variables_initializer().run()
for i in range(100): step.run()

DisplayNxN(nclrs.eval())
探索人工智能的新边界
如果您发现文章错误,请不吝留言指正;
如果您觉得有用,请点喜欢;
如果您觉得很有用,感谢转发~
END
