1.简介
1.1架构部署原因
1)作为 Web 服务器:相比 Apache,Nginx 使用更少的资源,支持更多的并发连接,体现更高的效率。
2)作为负载均衡服务器:Nginx 既可以在内部直接支持Rails和PHP,也可以支持作为 HTTP代理服务器对外进行服务。Nginx 用C编写,不论是系统资源开销还是CPU使用效率都比Perlbal要好的多。
3)这四种软件均为免费开源软件,组合到一起,成为一个免费、高效、扩展性强的网站服务系统。
1.2架构组成
Linux、nginx、MySQL、PHP
2.部署nginx网站
2.1下载nginx软件(官方地址:http://nginx.org/)
[root@web01 tools]# wget http://nginx.org/download/nginx-1.12.2.tar.gz
2.2解压到当前目录下
[root@web01 tools]# tar xf nginx-1.12.2.tar.gz
2.3安装依赖包
[root@web01 tools]# yum install -y pcre-devel openssl-devel
2.4创建管理用户
[root@web01 tools]# useradd -s /sbin/nologin -M -u 1000 www
2.5进入nginx解压包进行编译安装
[root@web01 nginx-1.12.2]# cd nginx-1.12.2/
[root@web01 nginx-1.12.2]# ./configure --prefix=/application/nginx-1.12.2 --user=www --group=www --with-http_ssl_module --with-http_stub_status_module && make && make install
2.6创建软连接
[root@web01 nginx-1.12.2]# ln -s /application/nginx-1.12.2/ /application/nginx
2.7对nginx站点目录进行配置
[root@web01 nginx-1.12.2]# cd /application/nginx/conf/
[root@web01 conf]# mkdir extra
[root@web01 conf]# cat nginx.conf
worker_processes 1;
events {
worker_connections 1024;
}
http {
include mime.types;
default_type application/octet-stream;
sendfile on;
keepalive_timeout 65;
log_format main '$remote_addr - $remote_user [$time_local] "$request" '
'$status $body_bytes_sent "$http_referer" '
'"$http_user_agent" "$http_x_forwarded_for"';
include extra/www.conf;
include extra/bbs.conf;
include extra/blog.conf;
}
[root@web01 conf]# cat extra/www.conf
server {
listen 80;
server_name www.fengyu.com;
root html/www;
index index.php index.html index.htm;
access_log logs/access.log main;
location ~ .*\.(php|php5)?$ {
fastcgi_pass 127.0.0.1:9000;
fastcgi_index index.php;
include fastcgi.conf;
}
}
[root@web01 conf]# cat extra/bbs.conf
server {
listen 80;
server_name bbs.fengyu.com;
root html/bbs;
index index.html index.htm;
}
[root@web01 conf]# cat extra/blog.conf
server {
listen 80;
server_name blog.fengyu.com;
root html/blog;
index index.html index.htm;
}
[root@web01 conf]# mkdir ../html/www
[root@web01 conf]# mkdir ../html/bbs
[root@web01 conf]# mkdir ../html/blog
2.8下载wordpress,解压到站点目录(wordpress官方:https://cn.wordpress.org/ )
[root@web01 tools]# unzip wordpress-4.9.1-zh_CN.zip
[root@web01 tools]# \cp -rp wordpress/* /application/nginx/html/www/
2.9修改站点目录的属主属组
[root@web01 tools]# chown -R www.www /application/nginx/html/www/
2.10检查语法是否错误
[root@web01 tools]# /application/nginx/sbin/nginx -t
nginx: the configuration file /application/nginx-1.12.2/conf/nginx.conf syntax is ok
nginx: configuration file /application/nginx-1.12.2/conf/nginx.conf test is successful
2.11启动nginx
[root@web01 ~]# /application/nginx/sbin/nginx
3.部署php
3.1下载php,并解压(官方:http://cn2.php.net/downloads.php)
[root@web01 tools]# tar xf php-5.5.32.tar.gz
3.2安装依赖包
[root@web01 tools]# yum install -y zlib libjpeg freetype libpng gd curl zlib-devel libxml2-devel libjpeg-devel freetype-devel libpng-devel gd-devel curl-devel libjpeg-turbo-devel libcurl-devel libxslt-devel libmcrypt-devel mhash mcrypt
3.3编译安装
[root@web01 tools]# cd php-5.5.32/
./configure --prefix=/application/php-5.5.32 --enable-mysqlnd --with-mysql=mysqlnd --with-mysqli=mysqlnd --with-pdo-mysql=mysqlnd --with-freetype-dir --with-jpeg-dir --with-png-dir --with-zlib --with-libxml-dir=/usr --enable-xml --disable-rpath --enable-bcmath --enable-shmop --enable-sysvsem --enable-inline-optimization --with-curl --enable-mbregex --enable-fpm --enable-mbstring --with-mcrypt --with-gd --with-gettext --enable-gd-native-ttf --with-openssl --with-mhash --enable-pcntl --enable-sockets --with-xmlrpc --enable-zip --enable-soap --enable-short-tags --enable-static --with-xsl --with-fpm-user=www --with-fpm-group=www --enable-opcache=no --enable-ft &&make && make install
3.4php解释器配置文件
[root@web01 php-5.5.32]# cp /server/tools/php-5.5.32/php.ini-production /application/php-5.5.32/lib/php.ini
3.5修改PHP主配置文件
[root@web01 php-5.5.32]# cp /application/php-5.5.32/etc/php-fpm.conf.default /application/php-5.5.32/etc/php-fpm.conf
3.6启动PHP
[root@web01 php-5.5.32]# /application/php-5.5.32/sbin/php-fpm
4.部署MySQL数据库
4.1安装mysql
[root@db01 ~]# yum install -y mariadb-server mariadb
4.2启动mysql
[root@db01 ~]# yum install -y mariadb-server mariadb
4.3创建wordpress库
MariaDB [(none)]> create database wordpress;
Query OK, 1 row affected (0.00 sec)
4.4添加授权用户
MariaDB [(none)]> grant all on *.* to wordpress@'172.16.1.0/255.255.255.0' identified by '123456';
Query OK, 0 rows affected (0.00 sec)
5.测试
5.1Windows本地hosts解析
www.fengyu.com
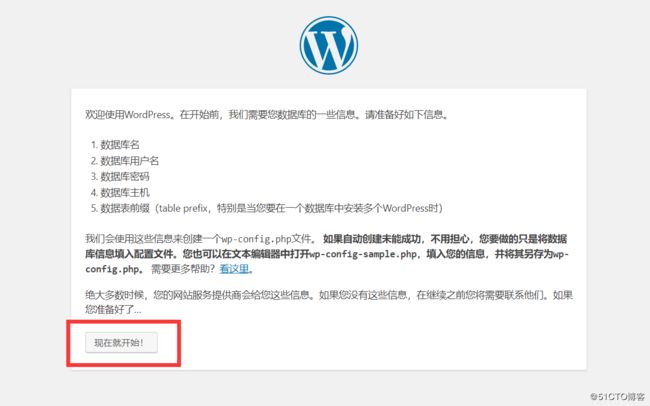
5.2浏览器访问(www.fengyu.com)
