confluence 和 Trello 的母公司都是 ATLASSIAN,confluence 本身是一个非常牛的协助共享平台。
准备工作
所需文件
安装文件:atlassian-confluence-6.10.3-x64.bin (按需选择版)https://cn.atlassian.com/software/confluence/download-archives
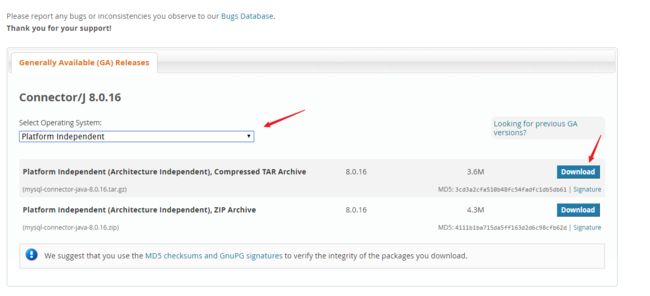
mysql 驱动:mysql-connector-java-5.1.47-bin.jar
https://dev.mysql.com/downloads/connector/j/
解压缩后只需要 *bin.jar 文件
- 注册程序 atlassian-agent.jar (已有注册码则无需该程序)
mysql 修改配置
修改/etc/mysql/my.cnf 文件
[mysqld]
# 设置服务器使用 UTF-8 字符集
character-set-server=utf8
collation-server=utf8_bin
#设置默认的存储引擎是 InnoDB:
default-storage-engine=INNODB
#指定 max_allowed_packet 变量设置为 256M:
max_allowed_packet=256M
innodb_log_file_size=256M
# 确定全局事务的隔离级别被设置为 READ-COMMITTED.
transaction-isolation=READ-COMMITTED
重启mysql
service mysqld restart
# /etc/init.d/mysql stop
# /etc/init.d/mysql start
mysql 建立数据库
# 登陆
mysql -u root -p

# 创建一个空的 Confluence 数据库实例
CREATE DATABASE confluence_new CHARACTER SET utf8 COLLATE utf8_bin;
#  创建一个 Confluence 数据库用户并赋予权限
GRANT ALL PRIVILEGES ON confluence_new.* TO 'confluence'@'localhost' IDENTIFIED BY  'confluence';
安装 confluence
删除旧 confluence 账户(如果有),否则会一直累加命名。
userdel confluence
安装confluence 最后不要启动服务。在这个部分修改安装和存储目录。
/home/zhaofei/atlassian-confluence-6.10.3-x64.bin

Unpacking JRE ...
Starting Installer ...

This will install Confluence 6.10.3 on your computer.
OK [o, Enter], Cancel [c]
o
Click Next to continue, or Cancel to exit Setup.

Choose the appropriate installation or upgrade option.
Please choose one of the following:
Express Install (uses default settings) [1],
Custom Install (recommended for advanced users) [2, Enter],
Upgrade an existing Confluence installation [3]
2

Select the folder where you would like Confluence 6.10.3 to be installed,
then click Next.
Where should Confluence 6.10.3 be installed?
[/opt/atlassian/confluence]
/project/atlassian_new/confluence

Default location for Confluence data
[/var/atlassian/application-data/confluence]
/project/atlassian_new/application-data/confluence

Configure which ports Confluence will use.
Confluence requires two TCP ports that are not being used by any other
applications on this machine. The HTTP port is where you will access
Confluence through your browser. The Control port is used to Startup and
Shutdown Confluence.
Use default ports (HTTP: 8090, Control: 8000) - Recommended [1, Enter], Set custom value for HTTP and Control ports [2]
1

Confluence can be run in the background.
You may choose to run Confluence as a service, which means it will start
automatically whenever the computer restarts.
Install Confluence as Service?
Yes [y, Enter], No [n]
y

Extracting files ...

Please wait a few moments while we configure Confluence.

Installation of Confluence 6.10.3 is complete
Start Confluence now?
Yes [y, Enter], No [n]
n

Installation of Confluence 6.10.3 is complete
Finishing installation ...
启动及激活
复制需要的文件到对应位置
cp /home/zhaofei/mysql-connector-java-5.1.47-bin.jar /project/atlassian_new/confluence/lib/
cp /home/zhaofei/atlassian-agent.jar /project/atlassian_new/confluence
vi atlassian_new/confluence/bin/setenv.sh
因为已有注册码,实际下面几步是不需要的,在注册界面直接输入注册码即可。如果没有注册码,则需要指定 javaagene 路径和生成注册码。
修改配置文件 bin/setenv.sh 指定 atlassian-agent.jar 路径
CATALINA_OPTS="-javaagent:/project/atlassian_new/confluence/atlassian-agent.jar ${CATALINA_OPTS}"
启动 confluence 进行注册
service confluence start
登陆网站域名:8090 进入设置界面
语言修改为简体中文
选择产品安装
保存服务器ID
获得对应授权码
java -jar atlassian-agent.jar -p conf -m [email protected] -n abc -o https://1.23 -s 服务器ID
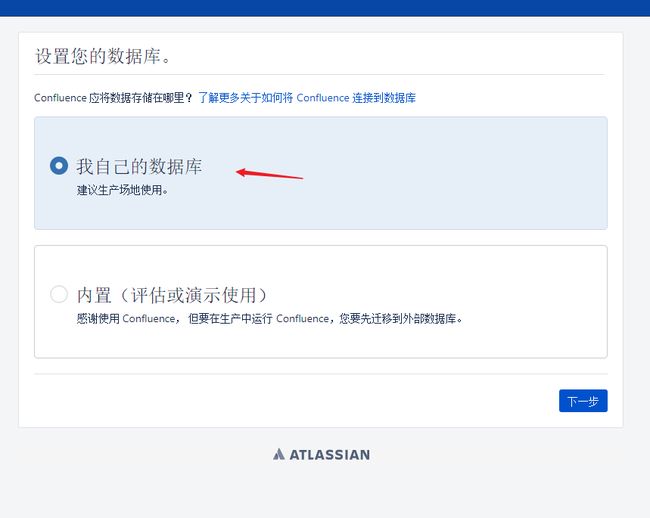
设置数据库
配置之前填写的数据库信息
为了中文正常显示输入如下url: jdbc:mysql://localhost:3306/confluence_new?useUnicode=true&characterEncoding=UTF-8
测试是否成功
选择示范站点
进行基本配置
配置管理员账号
即可正常使用


