Shader着色器的基础学习
认识Shader
着色器(shader)是用来控制可编程图形渲染管线的程序,Unity中也有很多内建的着色器,所有的渲染工作都要依赖于Shader,Unity中也配置了一个着色器语言ShaderLab,语法风格和CgFX和金额Direct3D比较类似。主要功能是描述材质Material所需要的一切基本信息。
在Unity5.x中新增的一款常用的基于物理的内置着色器Standard Shader
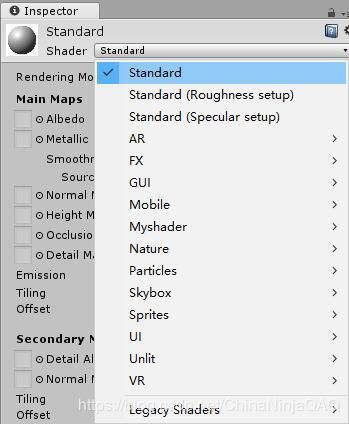
满足了大部分的着色需求,并简化了开发流程。
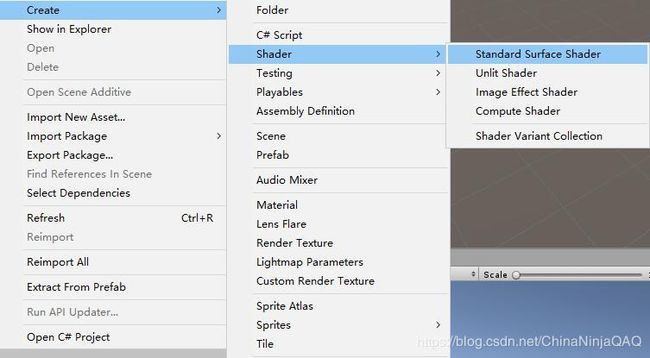
我们可以通过在project项目试图中右键->Create->Shader->Standard Surface Shader(标准表面着色器)并改名为Test
![]()
打开之后里面自动生成了脚本:
Shader "Custom/Test" {
	Properties {
		_Color ("Color", Color) = (1,1,1,1)
		_MainTex ("Albedo (RGB)", 2D) = "white" {}
		_Glossiness ("Smoothness", Range(0,1)) = 0.5
		_Metallic ("Metallic", Range(0,1)) = 0.0
	}
	SubShader {
		Tags { "RenderType"="Opaque" }
		LOD 200

		CGPROGRAM
		// Physically based Standard lighting model, and enable shadows on all light types
		#pragma surface surf Standard fullforwardshadows

		// Use shader model 3.0 target, to get nicer looking lighting
		#pragma target 3.0

		sampler2D _MainTex;

		struct Input {
			float2 uv_MainTex;
		};

		half _Glossiness;
		half _Metallic;
		fixed4 _Color;

		// Add instancing support for this shader. You need to check 'Enable Instancing' on materials that use the shader.
		// See https://docs.unity3d.com/Manual/GPUInstancing.html for more information about instancing.
		// #pragma instancing_options assumeuniformscaling
		UNITY_INSTANCING_BUFFER_START(Props)
			// put more per-instance properties here
		UNITY_INSTANCING_BUFFER_END(Props)

		void surf (Input IN, inout SurfaceOutputStandard o) {
			// Albedo comes from a texture tinted by color
			fixed4 c = tex2D (_MainTex, IN.uv_MainTex) * _Color;
			o.Albedo = c.rgb;
			// Metallic and smoothness come from slider variables
			o.Metallic = _Metallic;
			o.Smoothness = _Glossiness;
			o.Alpha = c.a;
		}
		ENDCG
	}
	FallBack "Diffuse"
}
第一行可以自己修改跟命令,是着色器的名称,我们这边改为Shader “Myshader/Helloword”
之后我们可以创建一个材质material,之后再材质中选择我们要用的shader

之后就可以将材质指定给模型进行渲染。
首先我们要了解一下shaderLab的基本结构
1.根命令
每个shader都要先有一个根命令
Shader “着色器名称”
2.Properties属性
3.SubSharder子着色器
SubShader{
[Tags 标签] [CommonState 通用状态] Pass[] 通道列表
}
每个pass都会渲染一次对象。
表面着色器Surface Shader
这里介绍一下编写相对轻松的表面着色器,工作原理:
先定义一个表面函数(suface fuction)进行输入,然后处理,计算结果填充到SurfaceOutput作为输出
规则:
(1)位于CGPROGRAM…ENDCG之间
(2)必须在子着色器(SubShader)里面,而不是在Pass通道里面。表面着色器会在多重通道编译自己。
(3)使用#pragma surface 表面函数光照模型 [可选参数] 声明自己是一个表面着色器。
表面函数是表面着色器的核心,下面有个白色漫反射的例子:
Shader "Myshader/Helloword" {

	SubShader {
		Tags { "RenderType"="Opaque" }
		CGPROGRAM
		//告诉着色器着色器类型,表面函数,光照模型
		//这里Lambert光照模型被使用
		#pragma surface surf Lambert

		struct Input {
			float4 color :COLOR;
		};

		void surf (Input IN, inout SurfaceOutput o) {
			//o.Albedo表示材质的albedo的输出颜色值,1即白色
			o.Albedo =  1;

		}
		ENDCG
	}
	FallBack "Diffuse"
}
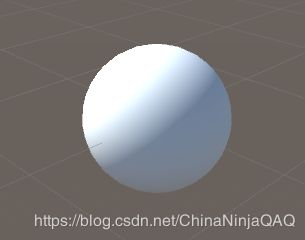
input中的一些附加数据有
float3 veiwDir:摄像机方向
float4 COLOR:顶点差值颜色
float4 screenPos:屏幕空间坐标
float3 worldPos:世界空间坐标
float3 worldRefl:世界坐标系中的反射向量
float3 worldNormal:世界坐标系中的法线向量
输出结构体SurfaceOutput作为一个容器存储最终数据,里面的参数有:
Albedo:反射光
Normal:法线
Emission:自发光
Specular:高光
Gloss:光泽度
Alpha:透明度
我们这里重新写一个漫反射:
Shader "Myshader/Helloword" {
	Properties{
		_MainTex("Texture",2D) = "white"{}

	}

	SubShader {
		Tags { "RenderType"="Opaque" }
		CGPROGRAM

		#pragma surface surf Lambert

		struct Input {
			float2 uv_MainTex;
		};
		sampler2D _MainTex;

		void surf (Input IN, inout SurfaceOutput o) {

			o.Albedo =  tex2D(_MainTex,IN.uv_MainTex).rgb;

		}
		ENDCG
	}
	FallBack "Diffuse"
}

我们可以看到,显示出来的纹理不是很满意那么我们接着
添加法线:
Shader "Myshader/Helloword" {
	Properties{
		_MainTex("Texture",2D) = "white"{}//纹理数值,默认白色
		_BumpMap("BumpMap",2D) = "bump"{}

	}

	SubShader {
		Tags { "RenderType"="Opaque" }
		CGPROGRAM

		#pragma surface surf Lambert
		//定义了一个输入类型结构体,参数是纹理的uv和法线的uv
		struct Input {
			float2 uv_MainTex;
			float2 uv_BumpMap;
		};
		sampler2D _MainTex;
		sampler2D _BumpMap;
		//对输入纹理计算
		void surf (Input IN, inout SurfaceOutput o) {

			o.Albedo =  tex2D(_MainTex,IN.uv_MainTex).rgb;
			o.Normal = UnpackNormal(tex2D(_BumpMap,IN.uv_BumpMap));
		}
		ENDCG
	}
	FallBack "Diffuse"
}
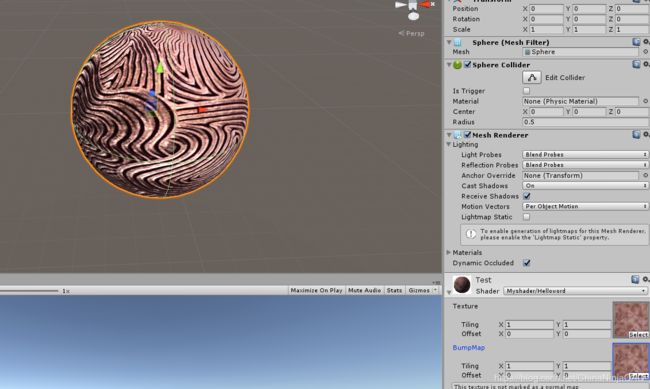
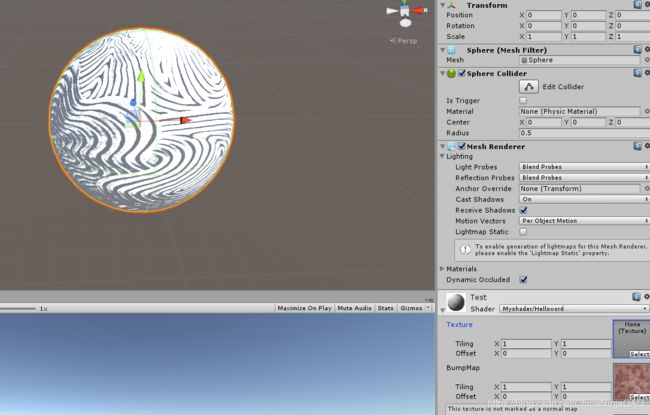
我们可以把之前的贴图隐藏掉 就是这个效果:
为了提升模型表现细节而又不增加性能消耗,所以不选择提高模型的面数,而是给模型的材质Shader中使用上法线贴图(Normal Map),通过更改模型上的点的法线方向,增加光影凹凸效果,从而提升模型表现细节。使用法线贴图能使一个三角面(平面)表现出凹凸的视觉效果!

