windows编译hadoop 2.x Hadoop-eclipse-plugin插件
一.简介
Hadoop2.x之后没有Eclipse插件工具,我们就不能在Eclipse上调试代码,我们要把写好的java代码的MapReduce打包成jar然后在Linux上运行,所以这种不方便我们调试代码,所以我们自己编译一个Eclipse插件,方便我们在我们本地上调试,经过hadoop1.x的发展,编译hadoop2.x版本的eclipse插件比之前简单多了。接下来我 们开始编译Hadoop-eclipse-plugin插件,并在Eclipse开发Hadoop。
二.软件安装并配置
1.JDK配置
1) 安装jdk
2) 配置环境变量
JAVA_HOME、CLASSPATH、PATH等设置,这里就不多介绍,网上很多资料
2.Eclipse
1).下载eclipse-jee-juno-SR2.rar
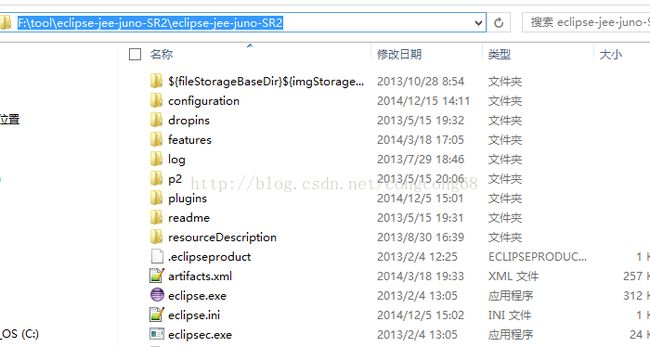
2).解压到本地磁盘,如图所示:
3.Ant
1)下载
http://ant.apache.org/bindownload.cgi
apache-ant-1.9.4-bin.zip
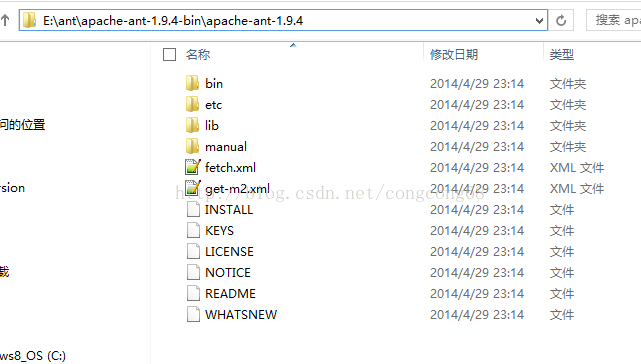
2)解压到一个盘,如图所示:
3).环境变量的配置
新建ANT_HOME=E:\ant\apache-ant-1.9.4-bin\apache-ant-1.9.4
在PATH后面加;%ANT_HOME%\bin
4)cmd 测试一下是否配置正确
ant version 如图所示:
4.Hadoop
1).下载hadoop包
hadoop-2.6.0.tar.gz
解压到本地磁盘,如图所示:
下载hadoop2x-eclipse-plugin源代码
1)目前hadoop2的eclipse-plugins源代码由github脱管,下载地址是https://github.com/winghc/hadoop2x-eclipse-plugin,然后在右侧的Download ZIP连接点击下载,如图所示:

2)下载hadoop2x-eclipse-plugin-master.zip
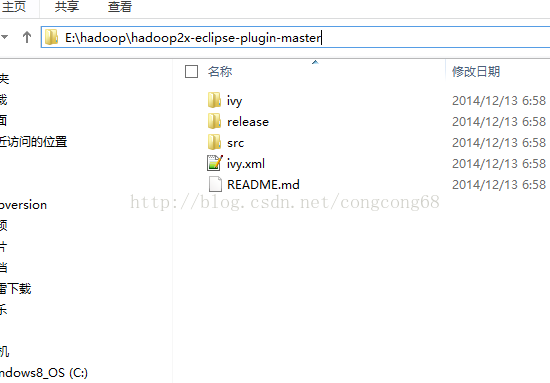
解压到本地磁盘,如图所示:
三.编译hadoop-eclipse-plugin插件
1.hadoop2x-eclipse-plugin-master解压在E:盘打开命令行cmd,切换到E:\hadoop\hadoop2x-eclipse-plugin-master\src\contrib\eclipse-plugin 目录,如图所示:
2.执行ant jar
antjar -Dversion=2.6.0 -Declipse.home=F:\tool\eclipse-jee-juno-SR2\eclipse-jee-juno-SR2 -Dhadoop.home=E:\hadoop\hadoop-2.6.0\hadoop-2.6.0,如图所示:

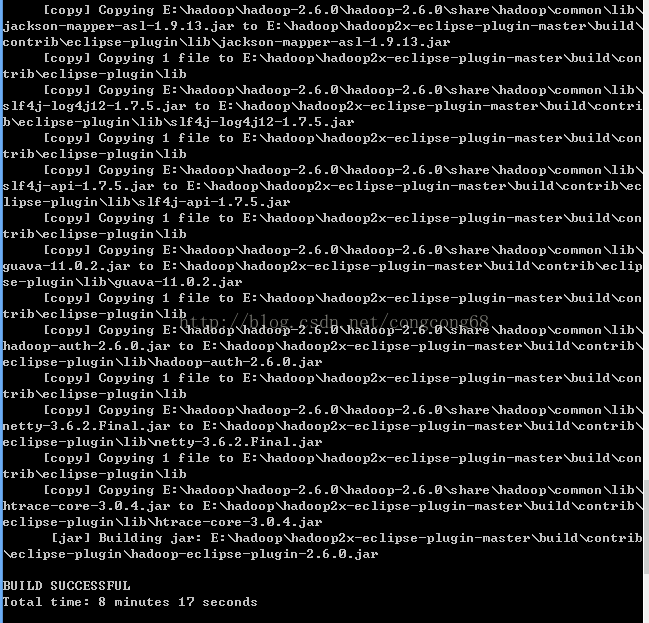
3.编译成功生成的hadoop-eclipse-plugin-2.6.0.jar在E:\hadoop\hadoop2x-eclipse-plugin-master\build\contrib\eclipse-plugin路径下,如图所示:

四.Eclipse配置hadoop-eclipse-plugin 插件
1.把hadoop-eclipse-plugin-2.6.0.jar拷贝到F:\tool\eclipse-jee-juno-SR2\eclipse-jee-juno-SR2\plugins目录下,重启一下Eclipse,然后可以看到DFS Locations,如图所示:

2.打开Window-->Preferens,可以看到Hadoop Map/Reduc选项,然后点击,然后添加hadoop-2.6.0进来,如图所示:

3.配置Map/ReduceLocations
1)点击Window-->Show View -->MapReduce Tools 点击Map/ReduceLocation
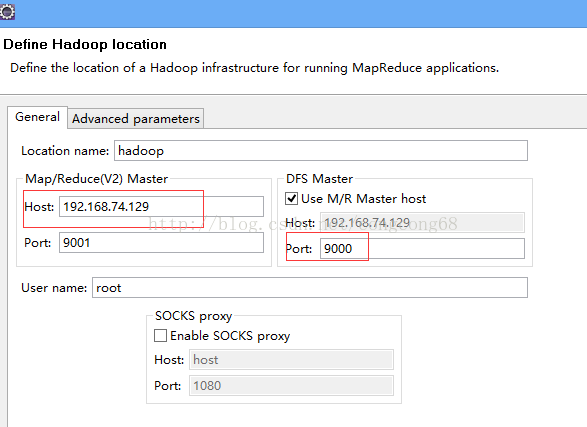
2)点击Map/ReduceLocation选项卡,点击右边小象图标,打开Hadoop Location配置窗口: 输入Location Name,任意名称即可.配置Map/Reduce Master和DFS Mastrer,Host和Port配置成hdfs-site.xml与core-site.xml的设置一致即可。
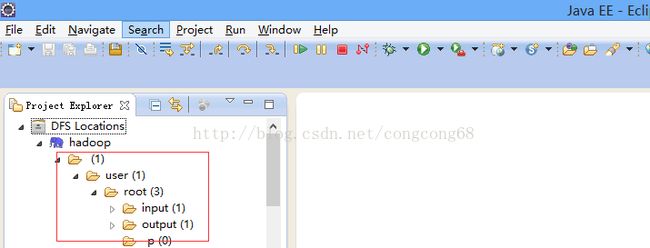
4.查看是否连接成功
五.运行新建WordCount 项目并运行
1.右击New->Map/Reduce Project
2.新建WordCount.java
import java.io.IOException;
import java.util.StringTokenizer;

import org.apache.hadoop.conf.Configuration;
import org.apache.hadoop.fs.Path;
import org.apache.hadoop.io.IntWritable;
import org.apache.hadoop.io.Text;
import org.apache.hadoop.mapreduce.Job;
import org.apache.hadoop.mapreduce.Mapper;
import org.apache.hadoop.mapreduce.Reducer;
import org.apache.hadoop.mapreduce.lib.input.FileInputFormat;
import org.apache.hadoop.mapreduce.lib.output.FileOutputFormat;

public class WordCount {

  public static class TokenizerMapper
       extends Mapper{

    private final static IntWritable one = new IntWritable(1);
    private Text word = new Text();

    public void map(Object key, Text value, Context context
                    ) throws IOException, InterruptedException {
      StringTokenizer itr = new StringTokenizer(value.toString());
      while (itr.hasMoreTokens()) {
        word.set(itr.nextToken());
        context.write(word, one);
      }
    }
  }

  public static class IntSumReducer
       extends Reducer {
    private IntWritable result = new IntWritable();

    public void reduce(Text key, Iterable values,
                       Context context
                       ) throws IOException, InterruptedException {
      int sum = 0;
      for (IntWritable val : values) {
        sum += val.get();
      }
      result.set(sum);
      context.write(key, result);
    }
  }

  public static void main(String[] args) throws Exception {
    Configuration conf = new Configuration();
    Job job = Job.getInstance(conf, "word count");
    job.setJarByClass(WordCount.class);
    job.setMapperClass(TokenizerMapper.class);
    job.setCombinerClass(IntSumReducer.class);
    job.setReducerClass(IntSumReducer.class);
    job.setOutputKeyClass(Text.class);
    job.setOutputValueClass(IntWritable.class);
    FileInputFormat.addInputPath(job, new Path(args[0]));
    FileOutputFormat.setOutputPath(job, new Path(args[1]));
    System.exit(job.waitForCompletion(true) ? 0 : 1);
  }
}
1)没有输入输出目录卡,先在hdfs上建个文件夹
#bin/hdfs dfs -mkdir –p /user/root/input
#bin/hdfs dfs -mkdir -p /user/root/output
2).把要统计的文本上传到hdfs的输入目录下
# bin/hdfs dfs -put/usr/local/hadoop/hadoop-2.6.0/test/* /user/root/input //把tes/file01文件上传到hdfs的/user/root/input中
3).查看
#bin/hdfs dfs -cat /user/root/input/file01
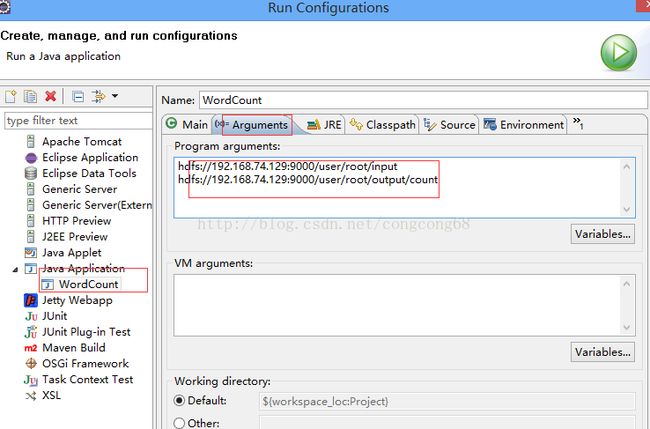
4.点击WordCount.java右击-->Run As-->Run COnfigurations 设置输入和输出目录路径,如图所示:
5.点击WordCount.java右击-->Run As-->Run on Hadoop
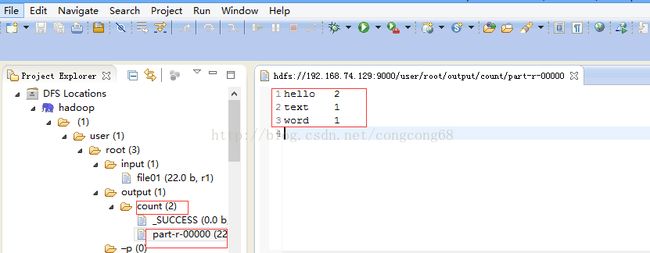
然后到output/count目录下,有一个统计文件,并查看结果,所以配置成功。
五.注意的地方
我们在这篇介了,Eclipse连接Linux虚拟机上Hadoop并在Eclipse开发Hadoop的一些问题,解决Exception: org.apache.hadoop.io.nativeio.NativeIO$Windows.access0(Ljava/lang/String;I)Z 等一系列问题
