树莓派上实现人脸识别
之前成功实现了一次,但是最近项目新买了个树莓派。本以为5分钟就能搞定,结果弄了一上午。所以写个博客记录下,帮助大家也帮助自己。
我实现人脸识别主要是参考 JireRen的方案,给一个链接:
大神如何在树莓派上实现人脸识别
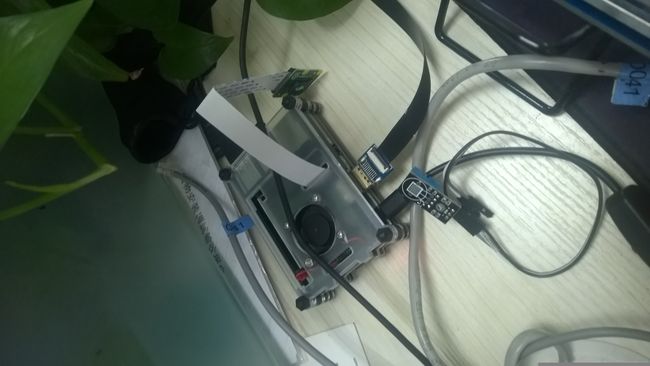
我直接使用demo4的代码,但是需要做一些小改变。因为我现在还没有装小云台,只是简单的把树莓派和picamera连接在了一起。就是这样:
(感谢@https://raspi.taobao.com/ 店铺的东西,很好用)
我没有小云台和马达,所以删掉了demo4中所有关于云台的代码:
### Imports ###################################################################

from picamera.array import PiRGBArray
from picamera import PiCamera
from functools import partial

import multiprocessing as mp
import cv2
import os
import time


### Setup #####################################################################

os.putenv( 'SDL_FBDEV', '/dev/fb0' )

resX = 320
resY = 240

cx = resX / 2
cy = resY / 2

# os.system( "echo 0=150 > /dev/servoblaster" )
# os.system( "echo 1=150 > /dev/servoblaster" )

xdeg = 150
ydeg = 150


# Setup the camera
camera = PiCamera()
camera.resolution = ( resX, resY )
camera.framerate = 60

# Use this as our output
rawCapture = PiRGBArray( camera, size=( resX, resY ) )

# The face cascade file to be used
face_cascade = cv2.CascadeClassifier('/usr/share/opencv/lbpcascades/lbpcascade_frontalface.xml')

t_start = time.time()
fps = 0


### Helper Functions ##########################################################

def get_faces( img ):

    gray = cv2.cvtColor( img, cv2.COLOR_BGR2GRAY )
    faces = face_cascade.detectMultiScale( gray )

    return faces, img

def draw_frame( img, faces ):

    global xdeg
    global ydeg
    global fps
    global time_t

    # Draw a rectangle around every face
    for ( x, y, w, h ) in faces:

        cv2.rectangle( img, ( x, y ),( x + w, y + h ), ( 200, 255, 0 ), 2 )
        cv2.putText(img, "Face No." + str( len( faces ) ), ( x, y ), cv2.FONT_HERSHEY_SIMPLEX, 0.5, ( 0, 0, 255 ), 2 )

        tx = x + w/2
        ty = y + h/2

        # if   ( cx - tx > 15 and xdeg <= 190 ): xdeg += 1 os.system( "echo 0=" + str( xdeg ) + " > /dev/servoblaster" )
        # elif ( cx - tx < -15 and xdeg >= 110 ):
            # xdeg -= 1
            # os.system( "echo 0=" + str( xdeg ) + " > /dev/servoblaster" )

        # if   ( cy - ty > 15 and ydeg >= 110 ):
            # ydeg -= 1
            # os.system( "echo 1=" + str( ydeg ) + " > /dev/servoblaster" )
        # elif ( cy - ty < -15 and ydeg <= 190 ): ydeg += 1 os.system( "echo 1=" + str( ydeg ) + " > /dev/servoblaster" )

    # Calculate and show the FPS
    fps = fps + 1
    sfps = fps / (time.time() - t_start)
    cv2.putText(img, "FPS : " + str( int( sfps ) ), ( 10, 10 ), cv2.FONT_HERSHEY_SIMPLEX, 0.5, ( 0, 0, 255 ), 2 )

    cv2.imshow( "Frame", img )
    cv2.waitKey( 1 )


### Main ######################################################################

if __name__ == '__main__':

    pool = mp.Pool( processes=4 )
    fcount = 0

    camera.capture( rawCapture, format="bgr" )

    r1 = pool.apply_async( get_faces, [ rawCapture.array ] )
    r2 = pool.apply_async( get_faces, [ rawCapture.array ] )
    r3 = pool.apply_async( get_faces, [ rawCapture.array ] )
    r4 = pool.apply_async( get_faces, [ rawCapture.array ] )

    f1, i1 = r1.get()
    f2, i2 = r2.get()
    f3, i3 = r3.get()
    f4, i4 = r4.get()

    rawCapture.truncate( 0 )

    for frame in camera.capture_continuous( rawCapture, format="bgr", use_video_port=True ):
        image = frame.array

        if   fcount == 1:
            r1 = pool.apply_async( get_faces, [ image ] )
            f2, i2 = r2.get()
            draw_frame( i2, f2 )

        elif fcount == 2:
            r2 = pool.apply_async( get_faces, [ image ] )
            f3, i3 = r3.get()
            draw_frame( i3, f3 )

        elif fcount == 3:
            r3 = pool.apply_async( get_faces, [ image ] )
            f4, i4 = r4.get()
            draw_frame( i4, f4 )

        elif fcount == 4:
            r4 = pool.apply_async( get_faces, [ image ] )
            f1, i1 = r1.get()
            draw_frame( i1, f1 )

            fcount = 0

        fcount += 1

        rawCapture.truncate( 0 )
首先需要安装python-opencv、opencv、picamera驱动:
sudo apt-get update
sudo apt-get upgrade
sudo apt-get install libopencv-dev python-opencv
sudo apt-get install python-opencv
sudo apt-get install python-pip
sudo apt-get install python-dev
sudo pip install picamera
这里安装opencv参考了:大神如何安装opencv
然后需要修改代码中lbpcascades文件路径。我们在linux中查找lbpcascades文件
sudo find / -iname '*lbpcascad*'
这里使用了模糊查询,就是前后加个 * 。
结果如下:
所以把路径替换了就可以了!
来张截图:


