Python之ipython、notebook、matplotlib安装使用
交互式编程不需要创建脚本文件,是通过 Python 解释器的交互模式进来编写代码。
linux上你只需要在命令行中输入 Python 命令即可启动交互式编程
Window上在安装Python时已经已经安装了默认的交互式编程客户端
备注:> 中文编码
#!/usr/bin/python# -*- coding: UTF-8 -*-
以下进行逐步安装配置
python 3.5.2, ipython 5.1.0, jupyter notebook, matplotlib
1、安装python3.5
具体安装请参考官方文档。安装程序时注意勾选配置环境变量。https://www.python.org/downloads/windows/
2、升级pip
python -m pip install --upgrade pip
3、使用pip安装ipython
pip.exe install ipython
交互模式效果如下
D:\tools>ipython
Python 3.5.2 (v3.5.2:4def2a2901a5, Jun 25 2016, 22:01:18) [MSC v.1900 32 bit (Intel)]Type "copyright", "credits" or "license" for more information.
IPython 5.1.0 -- An enhanced Interactive Python.?         -> Introduction and overview of IPython's features.
%quickref -> Quick reference.
help      -> Python's own help system.
object?   -> Details about 'object', use 'object??' for extra details.In [1]: print('hello world!')
hello world!In [2]: a = ['Windows','10','Python','3.5.2','ipython','jupyter notebook']In [3]: aOut[3]: ['Windows', '10', 'Python', '3.5.2', 'ipython', 'jupyter notebook']In [4]: for i in a:
   ...:     print(i)
   ...:
Windows10Python3.5.2ipython
jupyter notebookIn [5]:
4、使用pip安装notebook
pip install notebook
提示已成功安装的包和版本
Installing collected packages: jupyter-core, MarkupSafe, jinja2, jsonschema, nbformat, entrypoints, mistune, nbconvert, tornado, pyzmq, jupyter-client, ipykernel, notebook
  Running setup.py install for MarkupSafe ... done
Successfully installed MarkupSafe-0.23 entrypoints-0.2.2 ipykernel-4.5.0 jinja2-2.8 jsonschema-2.5.1 jupyter-client-4.4.0 jupyter-core-4.2.0 mistune-0.7.3 nbconvert-4.2.0 nbformat-4.1.0 notebook-4.2.3 pyzmq-15.4.0 tornado-4.4.2
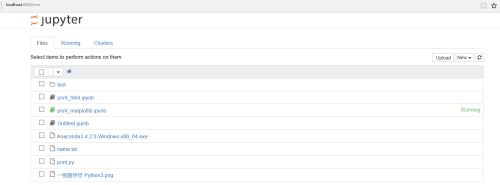
在工作目录下启动notebook
jupyter notebook

D:\tools>jupyter notebook
[W 07:44:23.940 NotebookApp] Widgets are unavailable. Please install widgetsnbextension or ipywidgets 4.0[I 07:44:23.955 NotebookApp] The port 8888 is already in use, trying another port.
[I 07:44:24.143 NotebookApp] Serving notebooks from local directory: D:\tools
[I 07:44:24.143 NotebookApp] 0 active kernels
[I 07:44:24.143 NotebookApp] The Jupyter Notebook is running at: http://localhost:8889/
[I 07:44:24.143 NotebookApp] Use Control-C to stop this server and shut down all kernels (twice to skip confirmation).
web
5、安装画图工具 matplotlib
pip install matplotlib
pip install matplotlib --upgrade
结果提示
Installing collected packages: cycler, pytz, pyparsing, numpy, python-dateutil, matplotlib
Successfully installed cycler-0.10.0 matplotlib-1.5.3 numpy-1.11.2 pyparsing-2.1.10 python-dateutil-2.5.3 pytz-2016.7
6、测试
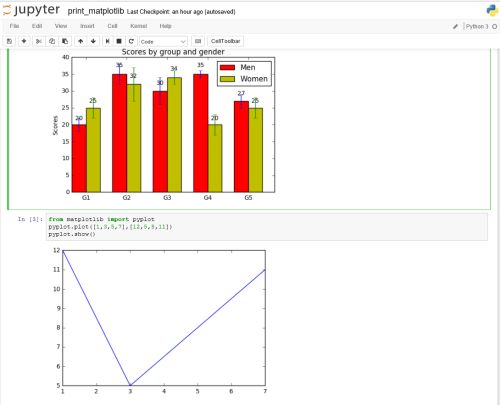
b图像测试代码来源:
https://my.oschina.net/bery/blog/203595
import numpy as np
import matplotlib.pyplot as plt
N = 5
menMeans = (20, 35, 30, 35, 27)
menStd =   (2, 3, 4, 1, 2)
ind = np.arange(N)  # the x locations for the groups
width = 0.35       # the width of the bars
fig, ax = plt.subplots()
rects1 = ax.bar(ind, menMeans, width, color='r', yerr=menStd)
womenMeans = (25, 32, 34, 20, 25)
womenStd =   (3, 5, 2, 3, 3)
rects2 = ax.bar(ind+width, womenMeans, width, color='y', yerr=womenStd)
# add some
ax.set_ylabel('Scores')
ax.set_title('Scores by group and gender')
ax.set_xticks(ind+width)
ax.set_xticklabels( ('G1', 'G2', 'G3', 'G4', 'G5') )
ax.legend( (rects1[0], rects2[0]), ('Men', 'Women') )
def autolabel(rects):
    # attach some text labels
    for rect in rects:
        height = rect.get_height()
        ax.text(rect.get_x()+rect.get_width()/2., 1.05*height, '%d'%int(height),
                ha='center', va='bottom')
autolabel(rects1)
autolabel(rects2)
plt.show()
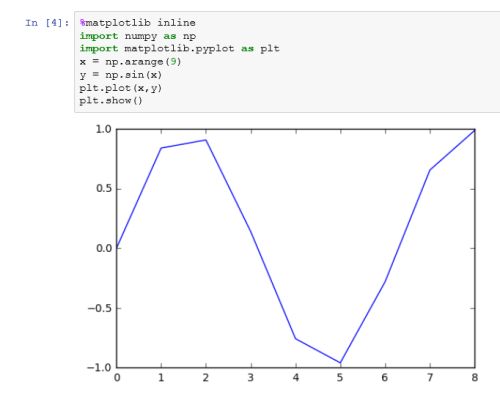
%matplotlib inline
import numpy as np
import matplotlib.pyplot as plt
x = np.arange(9)
y = np.sin(x)
plt.plot(x,y)
plt.show()


