于前不久,公司论坛的图片终于将服务器给挤爆了,已经达到了恐怖的34G,服务器总容量才40G。如果直接加硬盘的话,那么discuz中的逻辑几乎就要全改,所以不行。如果将所有图片扔到对象存储的话,那么这会是一大笔支出(虽然钱不是我出),所以还是不行。没办法,只能自己来弄个图片服务器。![]()
为什么选择 FastDFS
FastDFS是一个开源的轻量级分布式文件系统,它对文件进行管理,功能包括:文件存储、文件同步、文件访问(文件上传、文件下载)等,解决了大容量存储和负载均衡的问题。特别适合以文件为载体的在线服务,如相册网站、视频网站等等。
最重要的是:当存储空间不足或即将耗尽时,可以动态添加卷。只需要增加一台或多台服务器,并将它们配置为一个新的卷,这样就扩大了存储系统的容量。这样的话,如果服务器上挂的硬盘满了,只需要添加硬盘,再修改一下配置即可继续使用。
安装 FastDFS
-
下载并安装 FastDFS 依赖包 libfastcommon
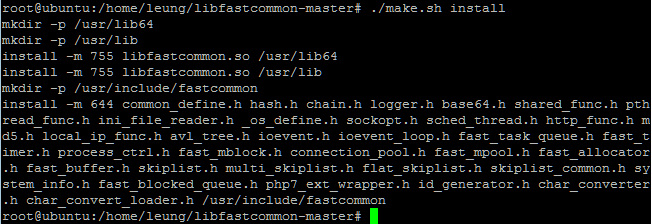
下载可以到 这里 直接下载再 scp 复制到服务器上。root@ubuntu:/home/leung# unzip libfastcommon-master.zip root@ubuntu:/home/leung# cd libfastcommon-master root@ubuntu:/home/leung# ./make.sh root@ubuntu:/home/leung# ./make.sh install -
下载并安装FastDFS
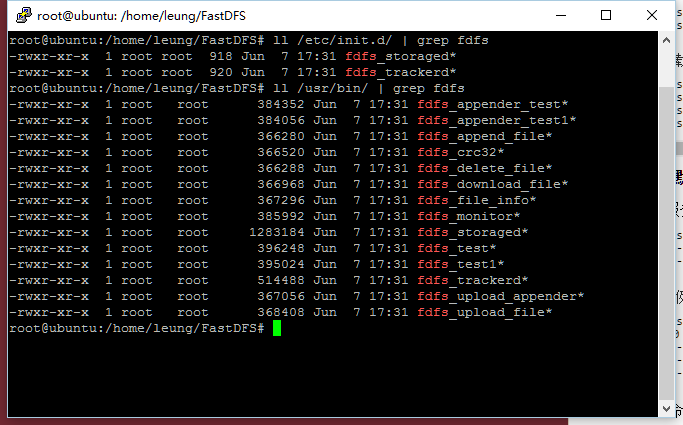
下载可以到 这里 直接下载再 scp 复制到服务器上。root@ubuntu:/home/leung# tar -xf FastDFS_v5.08.tar_2.gz root@ubuntu:/home/leung# cd FastDFS root@ubuntu:/home/leung# ./make.sh root@ubuntu:/home/leung# ./make.sh install -
配置跟踪服务器(tracker server)
先将 fdfs 的默认配置复制到 fdfs 的配置路径中:/etc/fdfs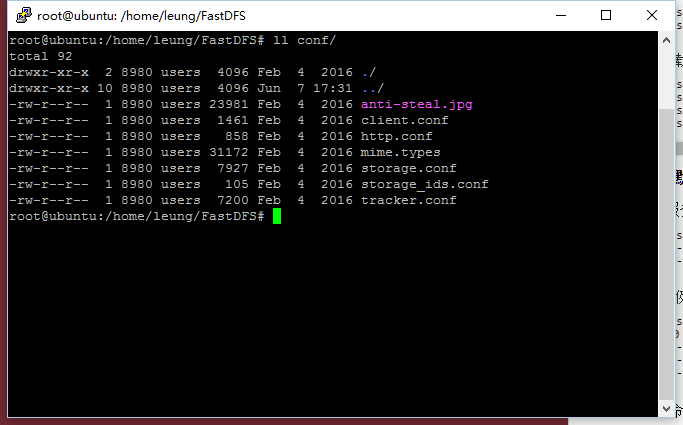
root@ubuntu:/home/leung/FastDFS# cp -r conf/* /etc/fdfs/
root@ubuntu:/home/leung/FastDFS# ls /etc/fdfs/
anti-steal.jpg  http.conf   storage.conf      tracker.conf
client.conf     mime.types  storage_ids.conf
修改 tracker 的配置文件,
tracker.conf.其中最基本的修改配置为:bind_addr: 修改为YOUR_SERVER_IP,我这里设置为虚拟机的IP:192.168.0.144base_path: 修改为自定义的存储路径,我这里为/data/fastdfs/tracker保存退出。
新建 tracker 文件夹:
mkdir -p /data/fastdfs/tracker尝试启动 tracker : (22122 为tracker默认监听端口)
root@ubuntu:/etc/fdfs# fdfs_trackerd /etc/fdfs/tracker.conf
root@ubuntu:/etc/fdfs# ss -lntup | grep 22122
tcp    LISTEN     0      128    192.168.0.144:22122                 *:*                   users:(("fdfs_trackerd",pid=82767,fd=5))
看到tracker已经在监听22122端口,说明启动成功。
-
配置存储服务器(storage server)
修改 storage 的配置文件storage.conf。其中最基本的修改配置为:bind_addr: 修改为YOUR_SERVER_IP,我这里设置为虚拟机的IP:192.168.0.144base_path: 修改为自定义的存储路径,我这里为/data/fastdfs/storagestorage_path0: 修改为自定义的存储路径,我这里为/data/fastdfs/storagetracker_server: 修改为你的 tracker 监听的ip和端口号,我这里为192.168.0.144:22122http.server_port: 修改为你的 Nginx 监听的端口号,我这里是80端口保存退出。
新建 storage 文件夹:
mkdir -p /data/fastdfs/storage尝试启动 storage : (23000 为tracker默认监听端口)
root@ubuntu:/etc/fdfs# fdfs_storaged /etc/fdfs/storage.conf
root@ubuntu:/etc/fdfs# ss -lntup | grep 23000
tcp    LISTEN     0      128    192.168.0.144:23000                 *:*                   users:(("fdfs_storaged",pid=82800,fd=5))
看到storage已经在监听23000端口,说明启动成功。
-
文件上传测试
基本配置完成之后,需要上传个文件测试看是否真的可用。修改 client.conf :
base_path: 修改为tracker的路径,我这里为/data/fastdfs/trackertracker_server: 修改为你的 tracker 监听的ip和端口号,我这里为192.168.0.144:22122保存退出。
使用 fdfs_upload_file 测试上传是否成功:
root@ubuntu:/home/leung# fdfs_upload_file /etc/fdfs/client.conf /home/leung/gal_gadot.jpg
group1/M00/00/00/wKgAkFk3zbeANnOvAAODyc0cLwA944.jpg
root@ubuntu:/home/leung#
看到返回来了一个 file_id (看上去像是文件路径,在 fdfs系统中称之为 file_id )表明上传图片成功,该 tracker 和 storage 均是可用的。
在 Nginx 上使用 FastDFS
现在图片是传上去了,但是怎么能查看到呢?
这时候需要配置 Nginx 了。(Apache没试过)
先下载 Nginx 的 fdfs 模块,并修改模块配置文件(这里有个坑,不修改的话,可能在安装的时候报错)
root@ubuntu:/home/leung/# wget https://nchc.dl.sourceforge.net/project/fastdfs/FastDFS%20Nginx%20Module%20Source%20Code/fastdfs-nginx-module_v1.16.tar.gz
root@ubuntu:/home/leung/# tar xf fastdfs-nginx-module_v1.16.tar.gz
root@ubuntu:/home/leung/# cd fastdfs-nginx-module/src/
root@ubuntu:/home/leung/fastdfs-nginx-module/src/# vim config
// 进入编辑后,直接输入 `:%s+/usr/local/+/usr/+g` 包括 `:` ,替换全文的 `/usr/local` 配置路径,保存退出
拷贝fastdfs-nginx-module模块中配置文件到/etc/fdfs目录中并编辑:
root@ubuntu:/home/leung/fastdfs-nginx-module/src# cp mod_fastdfs.conf /etc/fdfs/
root@ubuntu:/home/leung/fastdfs-nginx-module/src# cd /etc/fdfs/
root@ubuntu:/etc/fdfs# vi mod_fastdfs.conf
修改配置项:
connect_timeout: 连接超时时间,我这里设置为 10 秒
base_path: 路径,我这里没动,默认为/tmp
tracker_server:服务器tracker 的监听ip和端口,我这里设置为 192.168.0.144:22122
storage_server_port:storage 监听端口,我这里是默认的 23000
url_have_group_name:url是否带上 group_name,这里最好设置为true,要不待会 Nginx 会报400的错误
store_path0:修改为storage的存储路径,我这里为 /data/fastdfs/storage
group_name:设置为默认group1即可。
编辑完毕,保存退出。
安装 Nginx 依赖库:
For Ubuntu: apt-get install libpcre3 libpcre3-dev zlib1g-dev openssl libssl-dev -y
For CentOS: yum install -y pcre-devel zlib-devel
因为虚拟机刚刚安装,所以先安装 Nginx。
root@ubuntu:/home/leung# wget https://nginx.org/download/nginx-1.13.1.tar.gz
root@ubuntu:/home/leung# ls
FastDFS  FastDFS_v5.08.tar_2.gz  gal_gadot.jpg  libfastcommon-master  libfastcommon-master.zip  nginx-1.13.1.tar.gz
root@ubuntu:/home/leung# tar -xf nginx-1.13.1.tar.gz
root@ubuntu:/home/leung# cd nginx-1.13.1
root@ubuntu:/home/leung/nginx-1.13.1# ls
auto  CHANGES  CHANGES.ru  conf  configure  contrib  html  LICENSE  man  README  src
root@ubuntu:/home/leung/nginx-1.13.1# ./configure --prefix=/usr/local/nginx/  --with-http_stub_status_module --with-http_ssl_module --with-http_v2_module --with-http_gzip_static_module --with-ipv6 --with-http_sub_module --add-module=/home/leung/fastdfs-nginx-module/src/
root@ubuntu:/home/leung/nginx-1.13.1# make && make install
注意,如果不是新安装的 nginx,请先执行 nginx -V 查看当前nginx已安装的模块,再加上 fdfs 的模块。并且,覆盖安装的话请不要 make install ,具体看下面的操作
如果已经安装过Nginx的话,只需要加上新模块重新编译即可。
先执行 nginx -V 查看当前nginx已安装的模块,如下图,我的服务器之前使用 apt 安装的,所以安装的模块有点多: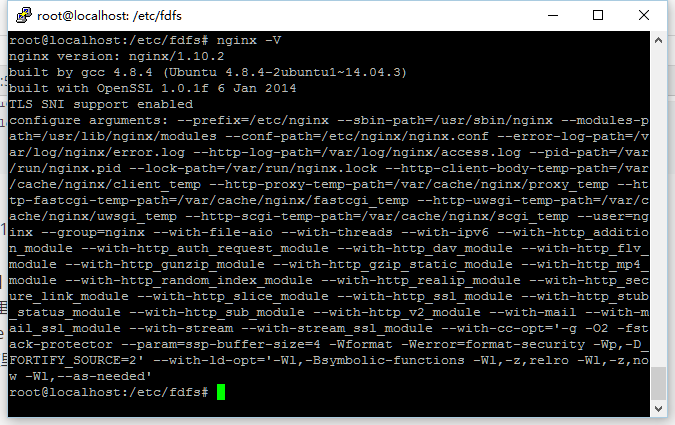
把 configure arguments: 后的参数拷贝下载,放在 ./configure 后面,再加上 --add-module=/home/leung/fastdfs-nginx-module/src/ 即可,add-module后的路径请根据实际情况进行替换.
./configure --prefix=/etc/nginx --sbin-path=/usr/sbin/nginx --modules-path=/usr/lib/nginx/modules --conf-path=/etc/nginx/nginx.conf --error-log-path=/var/log/nginx/error.log --http-log-path=/var/log/nginx/access.log --pid-path=/var/run/nginx.pid --lock-path=/var/run/nginx.lock --http-client-body-temp-path=/var/cache/nginx/client_temp --http-proxy-temp-path=/var/cache/nginx/proxy_temp --http-fastcgi-temp-path=/var/cache/nginx/fastcgi_temp --http-uwsgi-temp-path=/var/cache/nginx/uwsgi_temp --http-scgi-temp-path=/var/cache/nginx/scgi_temp --user=nginx --group=nginx --with-file-aio --with-threads --with-ipv6 --with-http_addition_module --with-http_auth_request_module --with-http_dav_module --with-http_flv_module --with-http_gunzip_module --with-http_gzip_static_module --with-http_mp4_module --with-http_random_index_module --with-http_realip_module --with-http_secure_link_module --with-http_slice_module --with-http_ssl_module --with-http_stub_status_module --with-http_sub_module --with-http_v2_module --with-mail --with-mail_ssl_module --with-stream --with-stream_ssl_module --with-cc-opt='-g -O2 -fstack-protector --param=ssp-buffer-size=4 -Wformat -Werror=format-security -Wp,-D_FORTIFY_SOURCE=2' --with-ld-opt='-Wl,-Bsymbolic-functions -Wl,-z,relro -Wl,-z,now -Wl,--as-needed' --add-module=/home/leung/fdfs/fastdfs-nginx-module/src/完毕后只执行 make,不要执行 make install
先将原来的nginx 执行文件备份:我这里的执行路径为上述的 /usr/sbin/nginx ,大家替换成真实的路径。
root@localhost:~# mv /usr/sbin/nginx /usr/sbin/nginx-bak
root@localhost:/home/leung/fdfs/nginx-1.13.1# cp objs/nginx /usr/sbin/nginx
root@localhost:/home/leung/fdfs/nginx-1.13.1# nginx -v
nginx version: nginx/1.13.1
root@localhost:/home/leung/fdfs/nginx-1.13.1# nginx -V
可以看到已经加上 fdfs 的模块了,这时候就可以平滑升级 nginx: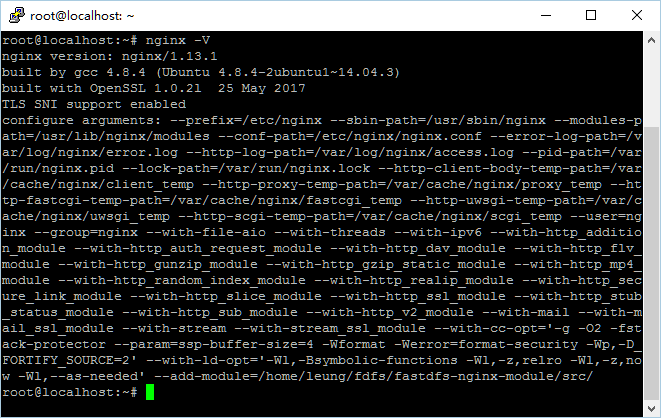
root@localhost:/home/leung/fdfs/nginx-1.13.1# make upgrade
/usr/sbin/nginx -t
nginx: the configuration file /etc/nginx/nginx.conf syntax is ok
nginx: configuration file /etc/nginx/nginx.conf test is successful
kill -USR2 `cat /var/run/nginx.pid`
sleep 1
test -f /var/run/nginx.pid.oldbin
kill -QUIT `cat /var/run/nginx.pid.oldbin`
root@localhost:/home/leung/fdfs/nginx-1.13.1#
Nginx 的升级/安装到这里就完成了。
在 Nginx 配置文件中加入一句:
location /group[0-9]/ {
    ngx_fastdfs_module;
}PHP与FDFS的交集
一个简易的服务器终于跑起来了,能正常上传和下载。但是,总不可能每次上传图片都要用命令行吧,这样既不安全,又麻烦。还是PHP大法好。
PHP要支持fdfs的话,就需要安装 php 的 fdfs 拓展。
root@localhost:~# cd /home/leung/fdfs/FastDFS/php_client
root@localhost:/home/leung/fdfs/FastDFS/php_client# phpize
root@localhost:/home/leung/fdfs/FastDFS/php_client# ./configure --with-php-config=/usr/local/php5/bin/php-config
root@localhost:/home/leung/fdfs/FastDFS/php_client# make && make install
root@localhost:/home/leung/fdfs/FastDFS/php_client# cat fastdfs_client.ini >> /usr/local/php5/etc/php.ini
其中, --with-php-config 后面接的是你的 php-config 的路径,不知道的直接 ./configure 试试(我的是 apt 安装的直接 configure 就可以了)
运行 php -m | grep fastdfs 查看是否安装模块成功
重启 php-fpm : service php-fpm restart
root@localhost:/etc/php/7.0/fpm# cat /run/php/php7.0-fpm.pid
17904
root@localhost:/etc/php/7.0/fpm# kill -USR2 17904
测试PHP上传图片
新建php文件:
运行php文件:
root@localhost:/home/leung# php fdfs.php
group1/M00/00/02/eBmZrlk6cU-AY-cLAAQ9NyZsxTs546.jpg
root@localhost:/home/leung#