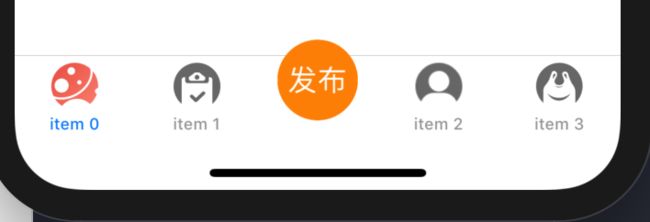
先看效果
核心思想
通过设置子视图控制器 tabbarItme 的 titlePositionAdjustment x 偏移量,来把中间的发布按钮控件给腾出来,然后把发布按钮当作子视图添加到 TabBar 上面。顶部超出TabBar 的部分事件是无法响应的,通过重写 UITabBarController 的 “- touchesBegan: withEvent: ”取得发布按钮相对于UITabBarController 的视图相对位置,进行事件响应。
实现步骤
第一步
创建一个iOS项目工程,新建一个 MyTabBarController 类继承至 UITabBarController。为 MyTabBarController.m 创建四个子视图控制器,此时 MyTabBarController 代码如下
CG_INLINE UIImage *myImage(NSString *imageName) {
    return [[UIImage imageNamed:imageName] imageWithRenderingMode:UIImageRenderingModeAlwaysOriginal];
}

@interface MyTabBarController ()

@end

@implementation MyTabBarController

- (void)viewDidLoad {
    [super viewDidLoad];
    self.viewControllers = [self createSubviewController];
    self.tabBar.translucent = NO;
    self.tabBar.shadowImage = [[UIImage alloc] init];
    [self addpublishBtn];
}

// 创建子视图
- (NSArray*)createSubviewController {
    NSMutableArray * subviewController = [NSMutableArray array];
    NSArray *selectimage = @[myImage(@"tabbar_card_select"), myImage(@"tabbar_mission_select"), myImage(@"tabbar_my_select"), myImage(@"tabbar_shop_select")];
    NSArray *normalimage = @[myImage(@"tabbar_card_normal"), myImage(@"tabbar_mission_normal"), myImage(@"tabbar_my_normal"), myImage(@"tabbar_shop_normal")];
    for (NSInteger i = 0; i < 4; i++) {
        UINavigationController *nav = [[UINavigationController alloc] initWithRootViewController:[[ViewController alloc]init]];
        nav.tabBarItem.title = [NSString stringWithFormat:@"item %ld", i];
        nav.tabBarItem.image = normalimage[i];
        nav.tabBarItem.selectedImage = selectimage[i];
        [subviewController addObject:nav];
    }
    return subviewController;
}
@end
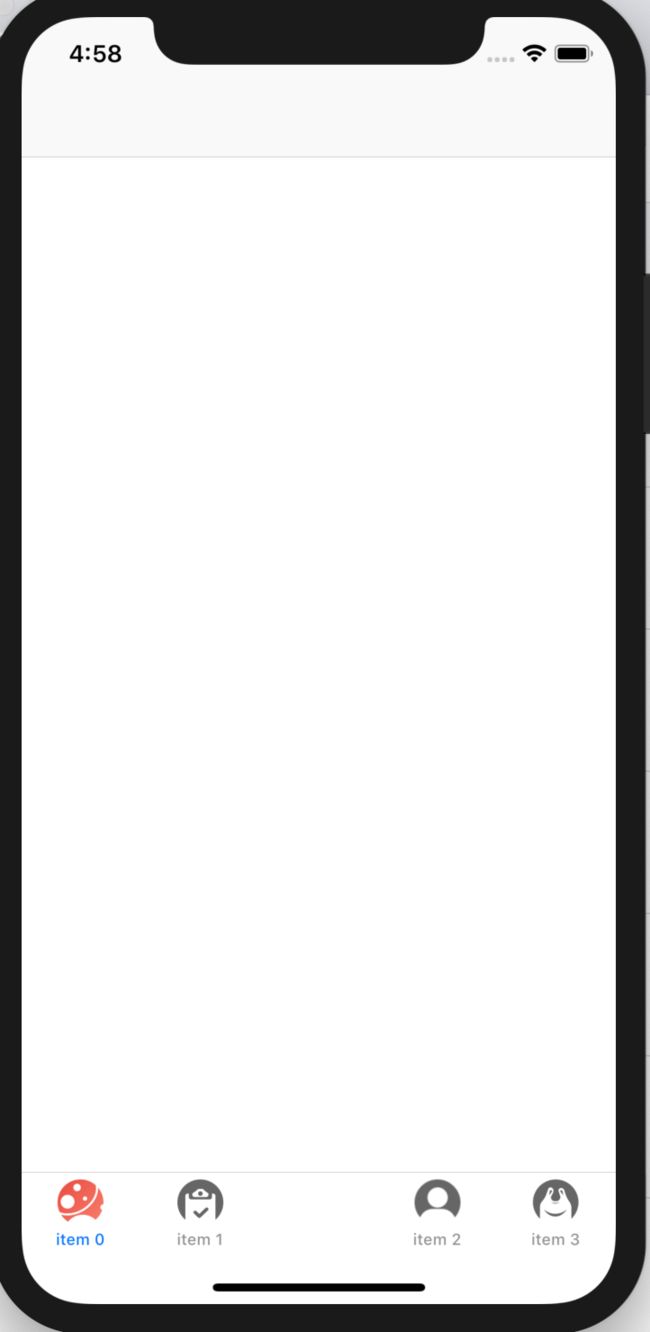
效果如下
第二步
移动每一个TabBarItem 到指定位置,这里需要掌握每一个item 需要偏移的距离,左边的向左移,右边的向右移。此时 MyTabBarController.m 代码如下:
CG_INLINE UIImage *myImage(NSString *imageName) {
    return [[UIImage imageNamed:imageName] imageWithRenderingMode:UIImageRenderingModeAlwaysOriginal];
}

@interface MyTabBarController ()
@end

@implementation MyTabBarController

- (void)viewDidLoad {
    [super viewDidLoad];
    self.viewControllers = [self createSubviewController];
    self.tabBar.translucent = NO;
    self.tabBar.shadowImage = [[UIImage alloc] init];
    [self addpublishBtn];
}

// 创建子视图
- (NSArray*)createSubviewController {
    NSMutableArray * subviewController = [NSMutableArray array];
    NSArray *selectimage = @[myImage(@"tabbar_card_select"), myImage(@"tabbar_mission_select"), myImage(@"tabbar_my_select"), myImage(@"tabbar_shop_select")];
    NSArray *normalimage = @[myImage(@"tabbar_card_normal"), myImage(@"tabbar_mission_normal"), myImage(@"tabbar_my_normal"), myImage(@"tabbar_shop_normal")];
    for (NSInteger i = 0; i < 4; i++) {
        UINavigationController *nav = [[UINavigationController alloc] initWithRootViewController:[[ViewController alloc]init]];
        nav.tabBarItem.title = [NSString stringWithFormat:@"item %ld", i];
        nav.tabBarItem.image = normalimage[i];
        nav.tabBarItem.selectedImage = selectimage[i];
        [subviewController addObject:nav];
    }
    return subviewController;
}

// 添加发布按钮
- (void)addpublishBtn {
    CGFloat totalW = self.tabBar.frame.size.width;
    CGFloat itemW = totalW/self.tabBar.items.count;
    CGFloat newItemW = totalW/(self.tabBar.items.count + 1);
    //向下取整
    NSInteger halfcount = floor(self.tabBar.items.count/2.0);

    for (NSInteger i = 0; i < self.tabBar.items.count; i++) {
        UITabBarItem *item = self.tabBar.items[i];
        CGFloat offsetX = 0;
        if (i < halfcount) {
            offsetX = (i*newItemW) + (newItemW/2) - ((i*itemW) + (itemW/2.0));
        } else {
            offsetX = ((i+1)*newItemW) + (newItemW/2) - ((i*itemW) + (itemW/2.0));
        }
        item.titlePositionAdjustment = UIOffsetMake(offsetX, 0);
    }
}
@end
效果如下:
第三步
创建一个发布按钮添加到 Tabbar 上面,此时 MyTabBarController.m 代码如下:
CG_INLINE UIImage *myImage(NSString *imageName) {
    return [[UIImage imageNamed:imageName] imageWithRenderingMode:UIImageRenderingModeAlwaysOriginal];
}

@interface MyTabBarController ()
@property (nonatomic, weak) UIButton *publishBtn;
@end

@implementation MyTabBarController

- (void)viewDidLoad {
    [super viewDidLoad];
    self.viewControllers = [self createSubviewController];
    self.tabBar.translucent = NO;
    self.tabBar.shadowImage = [[UIImage alloc] init];
    [self addpublishBtn];
}

// 创建子视图
- (NSArray*)createSubviewController {
    NSMutableArray * subviewController = [NSMutableArray array];
    NSArray *selectimage = @[myImage(@"tabbar_card_select"), myImage(@"tabbar_mission_select"), myImage(@"tabbar_my_select"), myImage(@"tabbar_shop_select")];
    NSArray *normalimage = @[myImage(@"tabbar_card_normal"), myImage(@"tabbar_mission_normal"), myImage(@"tabbar_my_normal"), myImage(@"tabbar_shop_normal")];
    for (NSInteger i = 0; i < 4; i++) {
        UINavigationController *nav = [[UINavigationController alloc] initWithRootViewController:[[ViewController alloc]init]];
        nav.tabBarItem.title = [NSString stringWithFormat:@"item %ld", i];
        nav.tabBarItem.image = normalimage[i];
        nav.tabBarItem.selectedImage = selectimage[i];
        [subviewController addObject:nav];
    }
    return subviewController;
}

// 添加发布按钮
- (void)addpublishBtn {
    CGFloat totalW = self.tabBar.frame.size.width;
    CGFloat itemW = totalW/self.tabBar.items.count;
    CGFloat newItemW = totalW/(self.tabBar.items.count + 1);
    //向下取整
    NSInteger halfcount = floor(self.tabBar.items.count/2.0);

    for (NSInteger i = 0; i < self.tabBar.items.count; i++) {
        UITabBarItem *item = self.tabBar.items[i];
        CGFloat offsetX = 0;
        if (i < halfcount) {
            offsetX = (i*newItemW) + (newItemW/2) - ((i*itemW) + (itemW/2.0));
        } else {
            offsetX = ((i+1)*newItemW) + (newItemW/2) - ((i*itemW) + (itemW/2.0));
        }
        item.titlePositionAdjustment = UIOffsetMake(offsetX, 0);
    }

    UIButton *button = [[UIButton alloc] initWithFrame:CGRectMake(0, 0, 50, 50)];
    button.backgroundColor = UIColor.orangeColor;
    button.layer.cornerRadius = 25;
    button.center = CGPointMake(self.tabBar.center.x, 15);
    [button setTitle:@"发布" forState:UIControlStateNormal];
    [button addTarget:self action:@selector(publishing) forControlEvents:UIControlEventTouchUpInside];
    button.clipsToBounds = YES;

    self.publishBtn = button;
    [self.tabBar addSubview:button];
}

- (void)publishing {
    UIAlertController *alertController = [UIAlertController alertControllerWithTitle:@"发布" message:@"发布内容" preferredStyle:UIAlertControllerStyleAlert];
    UIAlertAction *action = [UIAlertAction actionWithTitle:@"关闭"
                                                     style:UIAlertActionStyleCancel
                                                   handler:^(UIAlertAction * _Nonnull action) {}];
    [alertController addAction:action];
    [self presentViewController:alertController
                       animated:YES
                     completion:nil];
}

@end
效果图如下
Mar-24-2019 17-05-47.gif
此时基本功能已经实现来,但是还有一些缺陷,超出 Tabbar 部分响应不了事件
第四步
重写 UITabBarController 的 “- touchesBegan: withEvent: ”方法,实现发布按钮超出tabBar 部分事件,此时 MyTabBarController.m 代码如下:
CG_INLINE UIImage *myImage(NSString *imageName) {
    return [[UIImage imageNamed:imageName] imageWithRenderingMode:UIImageRenderingModeAlwaysOriginal];
}

@interface MyTabBarController ()
@property (nonatomic, weak) UIButton *publishBtn;
@end

@implementation MyTabBarController

- (void)viewDidLoad {
    [super viewDidLoad];
    self.viewControllers = [self createSubviewController];
    self.tabBar.translucent = NO;
    self.tabBar.shadowImage = [[UIImage alloc] init];
    [self addpublishBtn];
}

// 创建子视图
- (NSArray*)createSubviewController {
    NSMutableArray * subviewController = [NSMutableArray array];
    NSArray *selectimage = @[myImage(@"tabbar_card_select"), myImage(@"tabbar_mission_select"), myImage(@"tabbar_my_select"), myImage(@"tabbar_shop_select")];
    NSArray *normalimage = @[myImage(@"tabbar_card_normal"), myImage(@"tabbar_mission_normal"), myImage(@"tabbar_my_normal"), myImage(@"tabbar_shop_normal")];
    for (NSInteger i = 0; i < 4; i++) {
        UINavigationController *nav = [[UINavigationController alloc] initWithRootViewController:[[ViewController alloc]init]];
        nav.tabBarItem.title = [NSString stringWithFormat:@"item %ld", i];
        nav.tabBarItem.image = normalimage[i];
        nav.tabBarItem.selectedImage = selectimage[i];
        [subviewController addObject:nav];
    }
    return subviewController;
}

// 添加发布按钮
- (void)addpublishBtn {
    CGFloat totalW = self.tabBar.frame.size.width;
    CGFloat itemW = totalW/self.tabBar.items.count;
    CGFloat newItemW = totalW/(self.tabBar.items.count + 1);
    //向下取整
    NSInteger halfcount = floor(self.tabBar.items.count/2.0);

    for (NSInteger i = 0; i < self.tabBar.items.count; i++) {
        UITabBarItem *item = self.tabBar.items[i];
        CGFloat offsetX = 0;
        if (i < halfcount) {
            offsetX = (i*newItemW) + (newItemW/2) - ((i*itemW) + (itemW/2.0));
        } else {
            offsetX = ((i+1)*newItemW) + (newItemW/2) - ((i*itemW) + (itemW/2.0));
        }
        item.titlePositionAdjustment = UIOffsetMake(offsetX, 0);
    }

    UIButton *button = [[UIButton alloc] initWithFrame:CGRectMake(0, 0, 50, 50)];
    button.backgroundColor = UIColor.orangeColor;
    button.layer.cornerRadius = 25;
    button.center = CGPointMake(self.tabBar.center.x, 15);
    [button setTitle:@"发布" forState:UIControlStateNormal];
    [button addTarget:self action:@selector(publishing) forControlEvents:UIControlEventTouchUpInside];
    button.clipsToBounds = YES;

    self.publishBtn = button;
    [self.tabBar addSubview:button];
}

//重写touchesbegan 方法
- (void)touchesBegan:(NSSet *)touches withEvent:(UIEvent *)event {
    //获得点击的位置
    UITouch *touch = touches.allObjects.firstObject;
    CGPoint touchPoint = [touch locationInView:self.view];

    //获得发布按钮相对当前视图的位置和大小
    CGRect rect =  [self.publishBtn convertRect:self.publishBtn.bounds toView:self.view];
    //如果点击位置在发布按钮上,则触发发布事件
    if (CGRectContainsPoint(rect, touchPoint)) {
        [self.publishBtn sendActionsForControlEvents:UIControlEventTouchUpInside];
    }
}

- (void)publishing {
    UIAlertController *alertController = [UIAlertController alertControllerWithTitle:@"发布" message:@"发布内容" preferredStyle:UIAlertControllerStyleAlert];
    UIAlertAction *action = [UIAlertAction actionWithTitle:@"关闭"
                                                     style:UIAlertActionStyleCancel
                                                   handler:^(UIAlertAction * _Nonnull action) {}];
    [alertController addAction:action];
    [self presentViewController:alertController
                       animated:YES
                     completion:nil];
}

@end
效果如下:
Mar-24-2019 17-12-40.gif
此时此刻就完美来,发布按钮超出部分也能响应事件了。还有谁能想到比这个更简单的实现方法,麻烦告诉我。
Demo 地址


