Inception V3源代码(Slim实现)
整体架构
Google的Tensorflow已经在Github上开源了,找到了这样的一个源代码,由于非科班出身,所以也无法断定是否这个就是inception的源代码了。暂时就以这个作为对象进行研究了
[文章编写的时候参考如下代码,已经失效]
https://github.com/tensorflow/models/tree/master/inception
然后按照ReadMe的指示看到以下的工程
https://github.com/tensorflow/models/tree/master/slim
最新的V3代码在以下链接里面
https://github.com/tensorflow/models/blob/master/slim/nets/inception_v3.py
最新代码如下
https://github.com/tensorflow/models/tree/master/research/inception
分析源代码的时候,可以将上节的图和代码一起观看。(暂时没有找到V4的图片,所以,只能研究V3了。如果大家有兴趣也可以研究最牛逼的ResNet深度残差网络)
从代码上看,整个深度网络的结构体系可能是这样子的。从输入端开始,先有3个卷积层,然后是1个pool层。然后又是2个卷积层,一个pool层。这个和上面那张神经网络构造图是完全一致的。前3个是卷积层(黄色),然后是1个MaxPool(绿色),然后是2个卷积层,1个Maxpool。
后面的11个混合层(Mixed)具体的代码还需要进一步检查。
Here is a mapping from the old_names to the new names:
  Old name          | New name
  =======================================
  conv0             | Conv2d_1a_3x3
  conv1             | Conv2d_2a_3x3
  conv2             | Conv2d_2b_3x3
  pool1             | MaxPool_3a_3x3
  conv3             | Conv2d_3b_1x1
  conv4             | Conv2d_4a_3x3
  pool2             | MaxPool_5a_3x3
  mixed_35x35x256a  | Mixed_5b
  mixed_35x35x288a  | Mixed_5c
  mixed_35x35x288b  | Mixed_5d
  mixed_17x17x768a  | Mixed_6a
  mixed_17x17x768b  | Mixed_6b
  mixed_17x17x768c  | Mixed_6c
  mixed_17x17x768d  | Mixed_6d
  mixed_17x17x768e  | Mixed_6e
  mixed_8x8x1280a   | Mixed_7a
  mixed_8x8x2048a   | Mixed_7b
  mixed_8x8x2048b   | Mixed_7c
TF-Slim
先看一下最前面的第1个卷积层,在继续阅读代码之前,想去网络上找一下关于slim的API资料,可惜暂时没有太多的资料。
TensorFlow-Slim@github
slim操作的源代码
TF-Slimを使ってTensorFlowを簡潔に書く
从下面这个例子可以看到,slim的conv2d构造的是一个激活函数为Relu的卷积神经网络。(其实slim估计和keras一样,是一套高级的API函数,语法糖)
//使用TensorFlow的代码
W_conv1 = weight_variable([5, 5, 1, 32])
b_conv1 = bias_variable([32])
h_conv1 = tf.nn.relu(conv2d(x_image, W_conv1) + b_conv1)
//使用slim的代码
h_conv1 = slim.conv2d(x_image, 32, [5, 5])
第一个卷积层的输入参数 299 x 299 x 3 :
      # 299 x 299 x 3
      end_point = 'Conv2d_1a_3x3'
      net = slim.conv2d(inputs, depth(32), [3, 3], stride=2, scope=end_point)
      end_points[end_point] = net
      if end_point == final_endpoint: return net, end_points
前面的299 x 299 代表的含义,在源代码中可以看到,是图片的默认尺寸。(The default image size used to train this network is 299x299.)
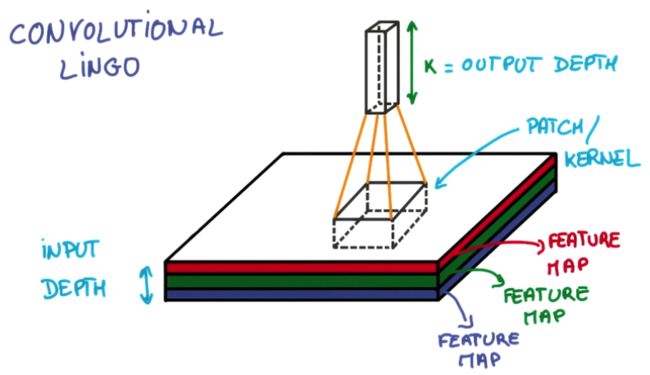
后面一个3 表示深度Depth(有时候叫做Chanel),原始的JPEG图片的每个像素具有RGB 3个不同的数值,在卷积层中则设置了3个通道。下面的测试代码中,整个张量:
- 第一维表示每次投入的图片数为5
- 第二,三维表示图片的长和宽是299
- 第四维表示RGB
    batch_size = 5
    height, width = 299, 299
    ...
    #inputs: a tensor of size [batch_size, height, width, channels].
    ...
    inputs = tf.random_uniform((batch_size, height, width, 3))
然后看一下第一个卷基层自身的参数:
表示输出层的深度为32,卷积核是 3 * 3 ,步长为2。这里输入层深度为3输出层深度为32.
(这里应该使用了32个不同的Filter,每个Filter应该是 3 x 3 x 3,高度,宽度,深度都是3。高和宽是3的原因是卷积核大小是[3, 3],深度是3的原因是输入层的深度是3)
在上面两个公式中,W2是卷积后Feature Map的宽度;W1是卷积前图像的宽度;F是filter的宽度;P是Zero Padding数量,Zero Padding是指在原始图像周围补几圈0,如果的值是1,那么就补1圈0;S是步幅;H2是卷积后Feature Map的高度;H1是卷积前图像的高度。
按照公式可以推导出卷积之后的Feature Map 为 149 x 149
W2 = (299 - 3 + 2 * 0)/ 2 + 1 = 149
第一层的卷积输出就是第二层的卷积输入,所以第二层的第一行表示输入的注释是这样的:
      # 149 x 149 x 32
      end_point = 'Conv2d_2a_3x3'
      net = slim.conv2d(net, depth(32), [3, 3], scope=end_point)
      end_points[end_point] = net
      if end_point == final_endpoint: return net, end_points
149 x 149 x 32 :卷积前的特征图(FeatureMap)的大小是149 x 149 ,一共有32个特征图。
关于padding的细节
如果再往下看代码,会看到一个padding的参数设定
      # 147 x 147 x 32
      end_point = 'Conv2d_2b_3x3'
      net = slim.conv2d(net, depth(64), [3, 3], padding='SAME', scope=end_point)
      end_points[end_point] = net
      if end_point == final_endpoint: return net, end_points
padding有两种参数可以设定,分别是SAME和VALID:
What is the difference between 'SAME' and 'VALID' padding in tf.nn.max_pool of tensorflow?
If you like ascii art:
In this example:
Input width = 13
Filter width = 6
Stride = 5
Notes:
"VALID" only ever drops the right-most columns (or bottom-most rows).
"SAME" tries to pad evenly left and right, but if the amount of columns to be added is odd, it will add the extra column to the right, as is the case in this example (the same logic applies vertically: there may be an extra row of zeros at the bottom).
这个例子很清楚的解释了两个参数的含义。如果Input的宽度是13,卷积核宽度是6,步长是5的情况下,VALID将只做2次卷积(1-6,6-11),第三次由于宽度不够(11-16,但是14,15,16缺失),就被舍弃了。SAME的情况下,则自动在外层补零(Zero Padding),保证所有的元素都能够被卷积使用到。
注意:如果conv2d方法没有特别设定padding,则需要看一下arg_scope是否标明了padding。
前三层卷积的总结
      with slim.arg_scope([slim.conv2d, slim.max_pool2d, slim.avg_pool2d],
                        stride=1, padding='VALID'):
      # 299 x 299 x 3
      end_point = 'Conv2d_1a_3x3'
      net = slim.conv2d(inputs, depth(32), [3, 3], stride=2, scope=end_point)
      end_points[end_point] = net
      if end_point == final_endpoint: return net, end_points
      # 149 x 149 x 32
      end_point = 'Conv2d_2a_3x3'
      net = slim.conv2d(net, depth(32), [3, 3], scope=end_point)
      end_points[end_point] = net
      if end_point == final_endpoint: return net, end_points
      # 147 x 147 x 32
      end_point = 'Conv2d_2b_3x3'
      net = slim.conv2d(net, depth(64), [3, 3], padding='SAME', scope=end_point)
      end_points[end_point] = net
      if end_point == final_endpoint: return net, end_points
注意:前三层默认是步长为1,padding为VALID。
以下文字,需要业内人士帮忙看一下是否正确:
输入的时候,原始图像大小是 299 x 299 的。
在图像预处理的时候,根据 R G B 三个通道,将图像分为了3个深度。
这样的话,输入层是 高度299 宽度 299 深度3
第一个卷积层,由于Depth是32,则认为一共有32个深度为3,高度和宽度为3的Filter。步长为2
卷积之后,结果为32个特征图,高度和宽度为149.
前面我们已经讲了深度为1的卷积层的计算方法,如果深度大于1怎么计算呢?其实也是类似的。如果卷积前的图像深度为D,那么相应的filter的深度也必须为D。我们扩展一下式1,得到了深度大于1的卷积计算公式:
不管深度为多少,经过一个Filter,最后都通过上面的公式变成一个深度为1的特征图。
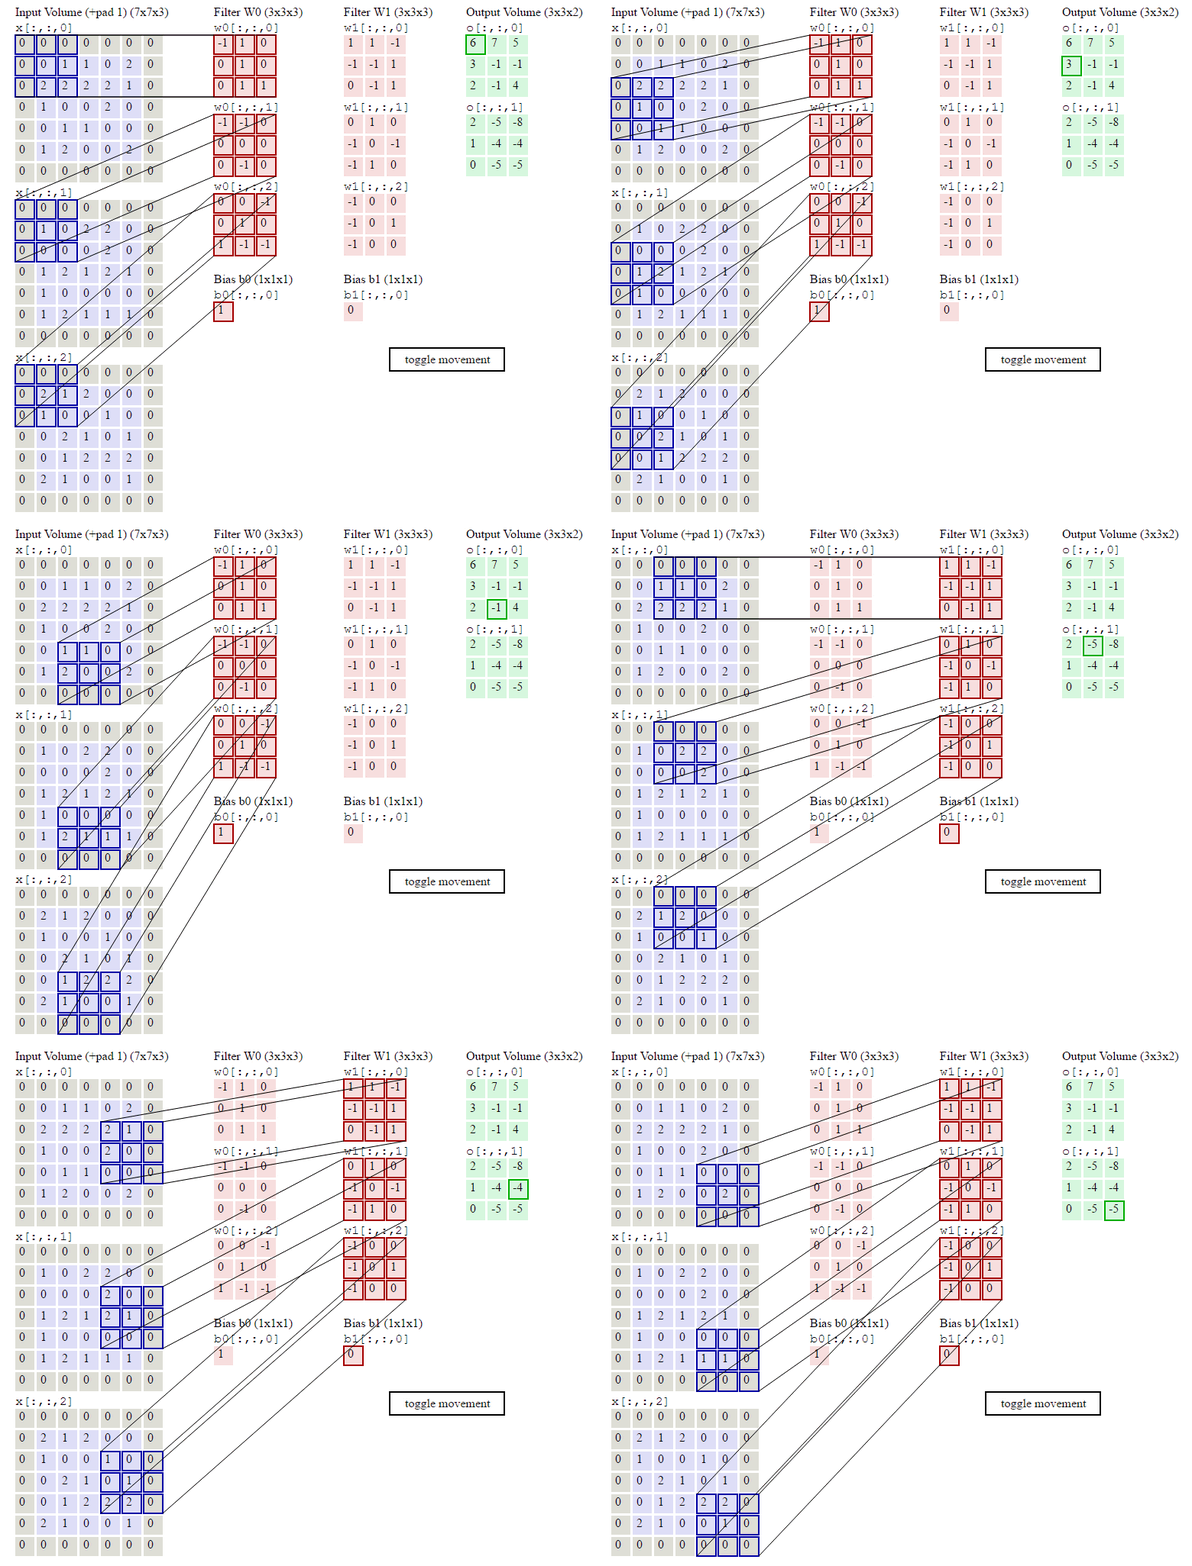
下面的例子中,输入层是高度和宽度是 7 x 7 ,深度是3.
两个Filter的,每个Filter的高度和宽度是 3 x 3 ,深度因为要和输入层保持一致,所以也必须是 3
最左边的输入层(Input Volume)和Filter W0 进行计算(输入的第一层和Filter的第一层进行运算,第二层和第二层进行运算,第三层和第三层进行运算,最后三层结果累加起来),获得了 Output Volume 的第一个结果(绿色的上面一个矩阵);和Filter W1 进行计算,获得了 Output Volume 的第二个结果(绿色的下面一个矩阵)。
访问 http://upload-images.jianshu.io/upload_images/2256672-958f31b01695b085.gif 观看动态图片
参数估算
第一层输入为 深度为 3,第一层卷积核为[3,3],输出深度为32
需要32个不同的Filter,每个Filter的参数是 3 x 3 x 3 = 27个。总共需要参数 27 x 32 = 864 个。
第二层输入深度为32,第二层卷积核为[3,3],输出深度为32
需要32个不同的Filter,每个Filter的参数是 3 x 3 x 32 = 288个。总共需要参数 288 x 32 = 9612 个。
第三层输入深度为32,第三层卷积核为[3,3],输出深度为64
需要64个不同的Filter,每个Filter的参数是 3 x 3 x 32 = 288个。总共需要参数 288 x 64 = 18432 个。
前三层的参数大约为28908个。
MaxPool
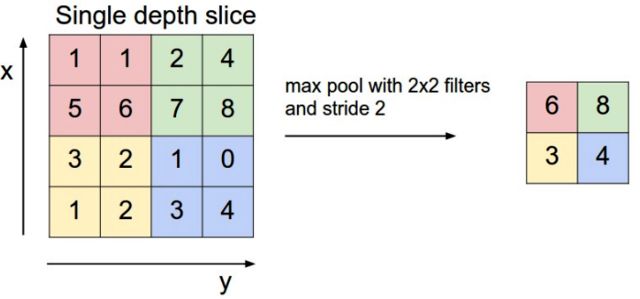
Pool是一个将卷积参数进行减少的过程,这里是将 3 x 3 的区域进行步长为2的Max的下采样。
这里同样可以使用步长和宽度的计算公式,获得输出层的高度和宽度。
W2 = (147 - 3 + 2 * 0)/ 2 + 1 = 73
和卷积层相比,这里就没有什么深度计算了。这里只是单纯的进行特征图的压缩而已。
对于深度为D的Feature Map,各层独立做Pooling,因此Pooling后的深度仍然为D。
      # 147 x 147 x 64
      end_point = 'MaxPool_3a_3x3'
      net = slim.max_pool2d(net, [3, 3], stride=2, scope=end_point)
      end_points[end_point] = net
      if end_point == final_endpoint: return net, end_points
      # 73 x 73 x 64
      end_point = 'Conv2d_3b_1x1'
      net = slim.conv2d(net, depth(80), [1, 1], scope=end_point)
      end_points[end_point] = net
      if end_point == final_endpoint: return net, end_points
按照这个思路整理Inception V3的Mixed Layer之前的代码,应该没有什么问题了。
      # 299 x 299 x 3
      end_point = 'Conv2d_1a_3x3'
      net = slim.conv2d(inputs, depth(32), [3, 3], stride=2, scope=end_point)
      end_points[end_point] = net
      if end_point == final_endpoint: return net, end_points
      # 149 x 149 x 32
      end_point = 'Conv2d_2a_3x3'
      net = slim.conv2d(net, depth(32), [3, 3], scope=end_point)
      end_points[end_point] = net
      if end_point == final_endpoint: return net, end_points
      # 147 x 147 x 32
      end_point = 'Conv2d_2b_3x3'
      net = slim.conv2d(net, depth(64), [3, 3], padding='SAME', scope=end_point)
      end_points[end_point] = net
      if end_point == final_endpoint: return net, end_points
      # 147 x 147 x 64
      end_point = 'MaxPool_3a_3x3'
      net = slim.max_pool2d(net, [3, 3], stride=2, scope=end_point)
      end_points[end_point] = net
      if end_point == final_endpoint: return net, end_points
      # 73 x 73 x 64
      end_point = 'Conv2d_3b_1x1'
      net = slim.conv2d(net, depth(80), [1, 1], scope=end_point)
      end_points[end_point] = net
      if end_point == final_endpoint: return net, end_points
      # 73 x 73 x 80.
      end_point = 'Conv2d_4a_3x3'
      net = slim.conv2d(net, depth(192), [3, 3], scope=end_point)
      end_points[end_point] = net
      if end_point == final_endpoint: return net, end_points
      # 71 x 71 x 192.
      end_point = 'MaxPool_5a_3x3'
      net = slim.max_pool2d(net, [3, 3], stride=2, scope=end_point)
      end_points[end_point] = net
      if end_point == final_endpoint: return net, end_points
      # 35 x 35 x 192.
原始的图片大小是299 x 299 ,由于有三元色,则深度为 3.
经过一系列处理之后,尺寸变成了 35 * 35 ,深度则上升为 192.
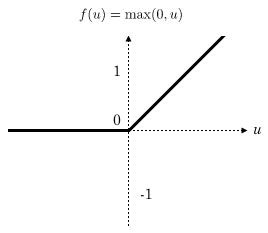
卷积使用的激活函数是Relu。Pooling使用的是 Max Pooling。
辅助块
在整个Mixed层的中间,可以看到有一个分支块。这个分支包含一个AvgPool层,两个Conv层,和一个Fully Connect层,一个Softmax层。
这个层是用来干什么的呢?从代码的注释看:
Auxiliary Head logits 如果直译的话:辅助用头部洛基特几率。
这个东西的用法,在模型里面无法找到答案,那么我们看一下测试用代码里面是不是有答案。
https://github.com/tensorflow/models/blob/master/slim/nets/inception_v3_test.py
  def testBuildEndPoints(self):
    batch_size = 5
    height, width = 299, 299
    num_classes = 1000
    ...
    ...
    self.assertTrue('AuxLogits' in end_points)
    aux_logits = end_points['AuxLogits']
    self.assertListEqual(aux_logits.get_shape().as_list(),
                         [batch_size, num_classes])
这个看上去应该是用来做检证的,看一下张量的形状是不是和我们预期的一样。并没有什么特别的意义。
最后3层
最后3层的理解应该是比较容易的。
    def inception_v3(inputs,
                 num_classes=1000,
                 is_training=True,
                 dropout_keep_prob=0.8,
                 min_depth=16,
                 depth_multiplier=1.0,
                 prediction_fn=slim.softmax,
                 spatial_squeeze=True,
                 reuse=None,
                 scope='InceptionV3'):

      # Final pooling and prediction
      with tf.variable_scope('Logits'):
        kernel_size = _reduced_kernel_size_for_small_input(net, [8, 8])
        net = slim.avg_pool2d(net, kernel_size, padding='VALID',
                              scope='AvgPool_1a_{}x{}'.format(*kernel_size))
        # 1 x 1 x 2048
        net = slim.dropout(net, keep_prob=dropout_keep_prob, scope='Dropout_1b')
        end_points['PreLogits'] = net
        # 2048
        logits = slim.conv2d(net, num_classes, [1, 1], activation_fn=None,
                             normalizer_fn=None, scope='Conv2d_1c_1x1')
        if spatial_squeeze:
          logits = tf.squeeze(logits, [1, 2], name='SpatialSqueeze')
        # 1000
      end_points['Logits'] = logits
      end_points['Predictions'] = prediction_fn(logits, scope='Predictions')
Dropout层:
这个层的作用是随机除去一些神经元,使得整个模型不至于过拟合。
至于为什么这样做能够防止过拟合,网络上有很多说明文档,这里就不再啰嗦了。
这里一般选择keep_prob = 0.8 (这个参数值在代码中定义,可以修改),保留80%的神经元。至于为什么是0.8,这个应该是很多实验得出的结果。
理解dropout
FullConnect
全连接层,在整个过程的最后,才使用全连接,训练出权重。
(仅仅这里进行训练权重?还是filter也需要训练?)
Softmax
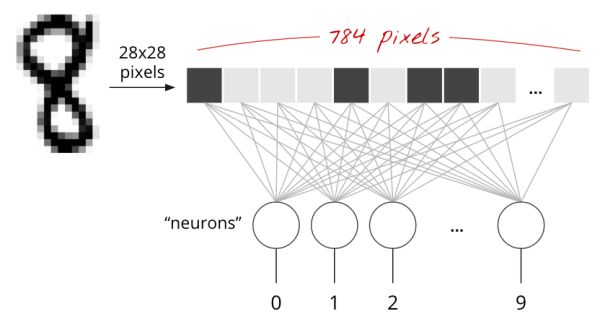
这个神经网络的最后是softmax层。softmax层也就是分类专用的层,使用一个概率来表示待分类对象有多大概率属于某个类。
从代码里面看,最后一层一个有2048个元素(下图中784个元素),输出层的class nums为1000。(下图为10)
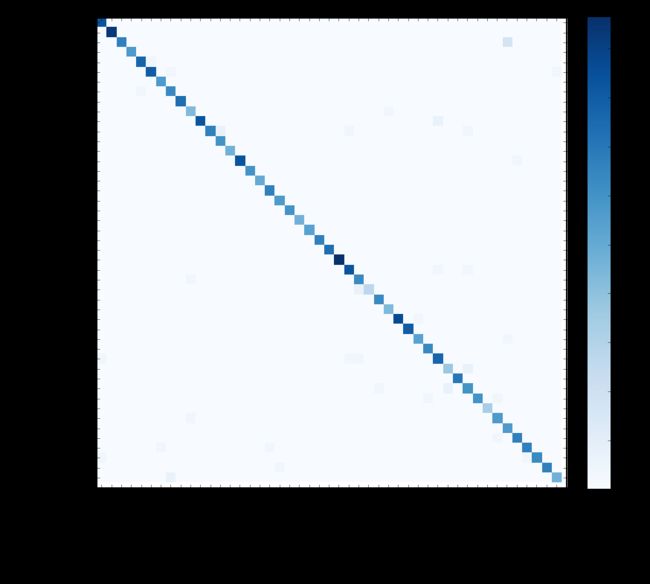
最后的概率矩阵看上去应该是这个样子的。
