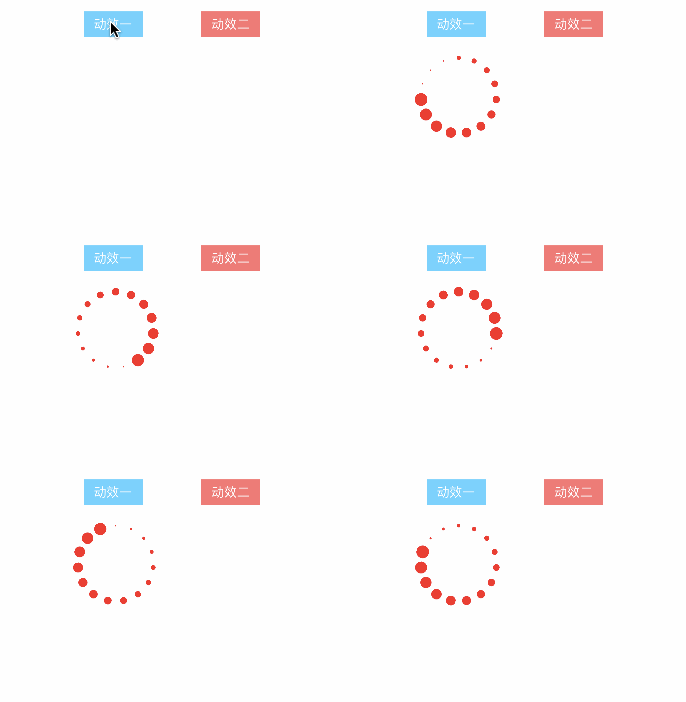
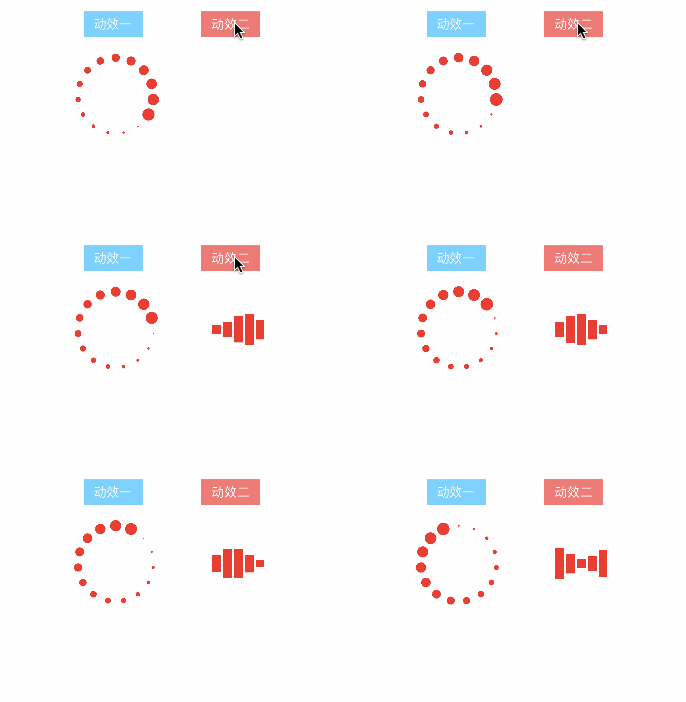
CAReplicatorLayer就是一个容器,可以对已经存在的一个图层进行复制,单一的形状经过复制后可以显示多个相同的形状,复制图层可以在原图层的基础上做出一些属性变换。在原图层上加上动画效果之后,这些动画效果也会被复制的图层获得,这样我们就可以做出很多炫酷的动画效果。
主要参数:
instanceCount 图层的拷贝次数,默认值为1
instanceDelay 图层拷贝延时
instanceTransform 复制图层和上一个复制图层之间的位移量,锚点为CAReplicatorlayer中心点
下面使用CAReplicatorLayer创建两个简单的加载动画的效果
    //1.创建容器
    CAReplicatorLayer *replicatorLayer = [CAReplicatorLayer layer];
    replicatorLayer.frame = CGRectMake(0, 0, 100, 100);
    replicatorLayer.position = CGPointMake(140, 160);
    //2.创建基础图层
    CAShapeLayer *dotLayer = [CAShapeLayer layer];
    dotLayer.frame = CGRectMake(0, 0, 15, 15);
    dotLayer.position = CGPointMake(50, 5);
    dotLayer.backgroundColor = [UIColor redColor].CGColor;
    dotLayer.cornerRadius = dotLayer.frame.size.width/2;
    dotLayer.transform = CATransform3DMakeScale(0.1, 0.1, 0.1);
    //3.在基础图层上添加动画
    CABasicAnimation *animation = [CABasicAnimation animationWithKeyPath:@"transform.scale"];
    animation.fromValue = @1;
    animation.toValue = @0.1;
    animation.duration = 1;
    animation.repeatCount = HUGE_VALF;  // 重复次数无限大
    [dotLayer addAnimation:animation forKey:@"animation"];
    //4.设置关键参数在容器中开始对基础图层进行复制
    replicatorLayer.instanceCount = 15;
    CGFloat angle = (M_PI*2.0)/15;   // 旋转的角度
    replicatorLayer.instanceTransform = CATransform3DMakeRotation(angle, 0, 0, 1);  // 旋转
    replicatorLayer.instanceDelay = 1.0/15;
    [replicatorLayer addSublayer:dotLayer];
    // 最后添加到父视图上
    [self.view.layer addSublayer:replicatorLayer];
    //1.创建容器
    CAReplicatorLayer *replicatorLayer = [CAReplicatorLayer layer];
    replicatorLayer.bounds = CGRectMake(0, 0, 100, 100);
    replicatorLayer.position = CGPointMake(300, 160);
    //2.创建基础图层
    CAShapeLayer *basicLayer = [CAShapeLayer layer];
    basicLayer.bounds = CGRectMake(0, 0, 10, 40);
    basicLayer.position = CGPointMake(10, 50);
    basicLayer.backgroundColor = [UIColor redColor].CGColor;
    basicLayer.transform = CATransform3DMakeScale(1, 0.1, 1);
    //3.基础图层上添加动画
    CAKeyframeAnimation *animation = [CAKeyframeAnimation animationWithKeyPath:@"transform.scale.y"];
    animation.values = @[@1,@0.8,@0.6,@0.4,@0.2,@0.4,@0.6,@0.8,@1];
    animation.duration = 0.5;
    animation.repeatCount = HUGE_VALF;
    [basicLayer addAnimation:animation forKey:@"animation"];
    //4.设置关键参数在容器中开始对基础图层进行复制
    replicatorLayer.instanceCount = 5;
    replicatorLayer.instanceTransform = CATransform3DMakeTranslation(13, 0, 0);
    replicatorLayer.instanceDelay = 0.1;
    [replicatorLayer addSublayer:basicLayer];
    //添加图层
    [self.view.layer addSublayer:replicatorLayer];
使用CAReplicatorLayer可以对原图层进行一次复制,并对复制图层的属性进行一定的更改,可以做出一个倒影的效果。
    //1.创建一个容器
    CAReplicatorLayer *replicatorLayer = [CAReplicatorLayer layer];
    replicatorLayer.bounds = CGRectMake(0, 0, 300, 300);
    replicatorLayer.position = CGPointMake(self.view.bounds.size.width/2, 260);
    //2.创建基础图层
    CALayer *basicLayer = [CALayer layer];
    basicLayer.bounds = CGRectMake(0, 0, 208, 107);
    basicLayer.position = CGPointMake(replicatorLayer.bounds.size.width/2, 97);
    basicLayer.contents = (id)[UIImage imageNamed:@"ss(4)"].CGImage;
    //3.设置复制图层的属性
    replicatorLayer.instanceCount = 2;
    CATransform3D transform = CATransform3DIdentity;
    transform = CATransform3DTranslate(transform, 0, 0, 0);
    transform = CATransform3DScale(transform, 1, -1, 0);
    replicatorLayer.instanceTransform = transform;
    replicatorLayer.instanceAlphaOffset = -0.5;
    [replicatorLayer addSublayer:basicLayer];
    //4.添加图层
    [self.view.layer addSublayer:replicatorLayer];
所有的动画效果或者页面实现的方式不唯一,这里的例子只希望能给读者更多一点的思路,可以在需要制作类似的页面的时候可以有更多选择。从上面两个简单的动效图的例子可以知道,配合基础动画,使用CAReplicatorLayer可以制作更多的动画效果,多练习制作几个就可以实现更多复杂的加载动画。


