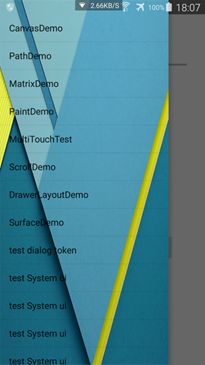
DrawerLayout侧滑菜单沉浸式分析
接着android6.0 SystemUi分析,来分析一下drawerlayout
DrawerLayout要想到达侧滑菜单沉浸式,就需要在DrawerLayout布局中加入:
android:fitsSystemWindows="true"
这样系统在向下传递insets时就会传递给DrawerLayout。
DrawerLayout在构造函数中做了一些特殊特处理:
    public DrawerLayout(Context context, AttributeSet attrs, int defStyle) {
        ...
        if (ViewCompat.getFitsSystemWindows(this)) {
            IMPL.configureApplyInsets(this);
            mStatusBarBackground = IMPL.getDefaultStatusBarBackground(context);
        }
        ...
    }
IMPL.configureApplyInsets(this);
对api21以下的不做任何处理(即空方法),
对api21及以上的:
DrawerLayoutCompatApi21:
    public static void configureApplyInsets(View drawerLayout) {
        if (drawerLayout instanceof DrawerLayoutImpl) {
            drawerLayout.setOnApplyWindowInsetsListener(new InsetsListener());
            drawerLayout.setSystemUiVisibility(View.SYSTEM_UI_FLAG_LAYOUT_STABLE
                    | View.SYSTEM_UI_FLAG_LAYOUT_FULLSCREEN);
        }
}
可见DrawerLayout会自动加入View.SYSTEM_UI_FLAG_LAYOUT_STABLE | View.SYSTEM_UI_FLAG_LAYOUT_FULLSCREEN。那么mContentRoot就不会消费。
View.setOnApplyWindowInsetsListener会使在根view向下传递insets时不调用view的onApplyWindowInsets,而调用监听的onApplyWindowInsets。
   static class InsetsListener implements View.OnApplyWindowInsetsListener {
        @Override
        public WindowInsets onApplyWindowInsets(View v, WindowInsets insets) {
            final DrawerLayoutImpl drawerLayout = (DrawerLayoutImpl) v;
            drawerLayout.setChildInsets(insets, insets.getSystemWindowInsetTop() > 0);

            // 直接consume掉
            return insets.consumeSystemWindowInsets();
        }
}
DrawerLayout:
   @Override
    public void setChildInsets(Object insets, boolean draw) {
        mLastInsets = insets;
        mDrawStatusBarBackground = draw;
        setWillNotDraw(!draw && getBackground() == null);
        requestLayout();
}
在setChildInsets中会把insets保存下来,
用在DrawerLayout.onMeasure时使用:
    protected void onMeasure(int widthMeasureSpec, int heightMeasureSpec) {
        ...

        // 判断是否要处理insets
        final boolean applyInsets = mLastInsets != null && ViewCompat.getFitsSystemWindows(this);
        ...

        // 会对drawerlayout的content和drawer都应用insets
        for (int i = 0; i < childCount; i++) {
            final View child = getChildAt(i);

            if (child.getVisibility() == GONE) {
                continue;
            }

            final LayoutParams lp = (LayoutParams) child.getLayoutParams();

            if (applyInsets) {
                final int cgrav = GravityCompat.getAbsoluteGravity(lp.gravity, layoutDirection);

                // 如果子view设置FitsSystemWindows为true则会传递给子view让其消费,
                // 如果是false,则会对子view设置margin值来适配systemui(statusbar等)
                if (ViewCompat.getFitsSystemWindows(child)) {
                    IMPL.dispatchChildInsets(child, mLastInsets, cgrav);
                } else {
                    IMPL.applyMarginInsets(lp, mLastInsets, cgrav);
                }
            }
            ...
        }
    }
下边的两个方法也是只对api21以上的有处理逻辑
IMPL.dispatchChildInsets
  public static void dispatchChildInsets(View child, Object insets, int gravity) {
        WindowInsets wi = (WindowInsets) insets;
        if (gravity == Gravity.LEFT) {
            wi = wi.replaceSystemWindowInsets(wi.getSystemWindowInsetLeft(),
                    wi.getSystemWindowInsetTop(), 0, wi.getSystemWindowInsetBottom());
        } else if (gravity == Gravity.RIGHT) {
            wi = wi.replaceSystemWindowInsets(0, wi.getSystemWindowInsetTop(),
                    wi.getSystemWindowInsetRight(), wi.getSystemWindowInsetBottom());
        }
        child.dispatchApplyWindowInsets(wi);
}
IMPL.applyMarginInsets
    public static void applyMarginInsets(ViewGroup.MarginLayoutParams lp, Object insets, int gravity) {
        WindowInsets wi = (WindowInsets) insets;
        if (gravity == Gravity.LEFT) {
            wi = wi.replaceSystemWindowInsets(wi.getSystemWindowInsetLeft(),
                    wi.getSystemWindowInsetTop(), 0, wi.getSystemWindowInsetBottom());
        } else if (gravity == Gravity.RIGHT) {
            wi = wi.replaceSystemWindowInsets(0, wi.getSystemWindowInsetTop(),
                    wi.getSystemWindowInsetRight(), wi.getSystemWindowInsetBottom());
        }
        lp.leftMargin = wi.getSystemWindowInsetLeft();
        lp.topMargin = wi.getSystemWindowInsetTop();
        lp.rightMargin = wi.getSystemWindowInsetRight();
        lp.bottomMargin = wi.getSystemWindowInsetBottom();
    }
由上可知如果Drawerlayout的drawer是一个ListView/RecyclerView的话,设置如下属性:
android:clipToPadding="false"
android:fitsSystemWindows="true"
就可以是抽屉view在滑出的时候达到沉浸式的效果。
NavigationView沉浸式分析
<android.support.design.widget.NavigationView
        android:id="@+id/navigation"
        android:layout_width="wrap_content"
        android:layout_height="match_parent"
        android:layout_gravity="start"
        android:background="@color/white"
        app:headerLayout="@layout/nav_header"
        app:menu="@menu/activity_main_drawer" />
如果在DrawerLayout中使用NavigationView的话不用加入
android:clipToPadding="false"
android:fitsSystemWindows="true"
也可以直接使用,原因肯定是内部进行了设置。
NavigationView extends ScrimInsetsFrameLayout
ScrimInsetsFrameLayout extends FrameLayout
在NavigationView 构造函数中:
ViewCompat.setFitsSystemWindows(this,
                a.getBoolean(R.styleable.NavigationView_android_fitsSystemWindows, false));
系统默认会设置fitsSystemWindows为true。
在ScrimInsetsFrameLayout 构造函数中:
ViewCompat.setOnApplyWindowInsetsListener(this,
                new android.support.v4.view.OnApplyWindowInsetsListener() {
                    @Override
                    public WindowInsetsCompat onApplyWindowInsets(View v, WindowInsetsCompat insets) {
                        if (null == mInsets) {
                            mInsets = new Rect();
                        }
                        mInsets.set(insets.getSystemWindowInsetLeft(),
                                insets.getSystemWindowInsetTop(),
                                insets.getSystemWindowInsetRight(),
                                insets.getSystemWindowInsetBottom());
                        onInsetsChanged(insets);
                        setWillNotDraw(mInsets.isEmpty() || mInsetForeground == null);
                        ViewCompat.postInvalidateOnAnimation(ScrimInsetsFrameLayout.this);

                        return insets.consumeSystemWindowInsets();
                    }
                });
对insets的dispatch做了监听,那么接着上边的dispatchChildInsets,
会调用ScrimInsetsFrameLayout 监听的onApplyWindowInsets方法。
在NavigationView .onInsetsChanged中
    @Override
    protected void onInsetsChanged(WindowInsetsCompat insets) {
        mPresenter.dispatchApplyWindowInsets(insets);
    }
NavigationMenuPresenter会对侧滑菜单中的header和menu进行初始化和创建添加view。
包含两个view:
LinearLayout mHeaderLayout;
NavigationMenuView mMenuView;
mMenuView实际上是RecyclerView,他的布局是:
    <android.support.design.internal.NavigationMenuView
        xmlns:android="http://schemas.android.com/apk/res/android"
        android:id="@+id/design_navigation_view"
        android:layout_width="match_parent"
        android:layout_height="match_parent"
        android:paddingBottom="@dimen/design_navigation_padding_bottom"
        android:clipToPadding="false"
        android:scrollbars="vertical"/>
mHeaderLayout就是mMenuView中viewType为VIEW_TYPE_HEADER的itemview。
<LinearLayout xmlns:android="http://schemas.android.com/apk/res/android"
      android:id="@+id/navigation_header_container"
      android:layout_width="match_parent"
      android:layout_height="wrap_content"
      android:orientation="vertical"
      android:paddingBottom="@dimen/design_navigation_separator_vertical_padding" />
NavigationMenuPresenter:
    public void dispatchApplyWindowInsets(WindowInsetsCompat insets) {
        int top = insets.getSystemWindowInsetTop();
        if (mPaddingTopDefault != top) {
            mPaddingTopDefault = top;
            if (mHeaderLayout.getChildCount() == 0) {
                mMenuView.setPadding(0, mPaddingTopDefault, 0, mMenuView.getPaddingBottom());
            }
        }
        ViewCompat.dispatchApplyWindowInsets(mHeaderLayout, insets);
}
可以看到mHeaderLayout.getChildCount() == 0的判断肯定为false,所以就直接把insets传递给headerview,
而headerview也是没有设置fitsSystemWindows,所以也不会处理,
也就是说没有view消费insets,所以其实上边clipToPadding可以不设置为false也行。
看起来好像并没有对insets进行消费,那为什么还能达到沉浸效果,主要是因为DrawerLayout在初始化时就设置了可以扩展到状态栏,但如果drawer不设置fitsystemwindow=true,就会交给DrawerLayout用margin进行处理了,所以用fitsystemwindow=true拿来让NavigationView进行处理,NavigationView不处理就可以。

