LInux学习笔记 --NFS
#NFS#
1.服务安装及启用
[root@server29 ~]# yum install nfs-utils -y
[root@server29 ~]# systemctl start nfs-server
[root@server29 ~]# systemctl enable nfs-server
2.火墙配置
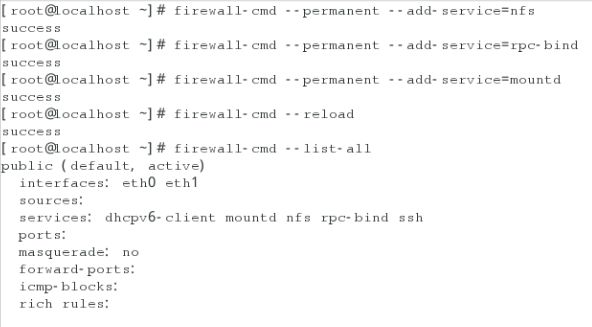
[root@ ~]# firewall-cmd --permanent --add-service=nfs##允许nfs服务
[root@ ~]# firewall-cmd --permanent --add-service=rpc-bind##支持端口分配
[root@ ~]# firewall-cmd --permanent --add-service=mountd##允许挂载服务
[root@ ~]# firewall-cmd --reload
3.共享目录
[root@server29 ~]# mkdir /public
[root@server29 ~]# chmod 777 /public
[root@server29 ~]# touch /public/hahaha{1..6}
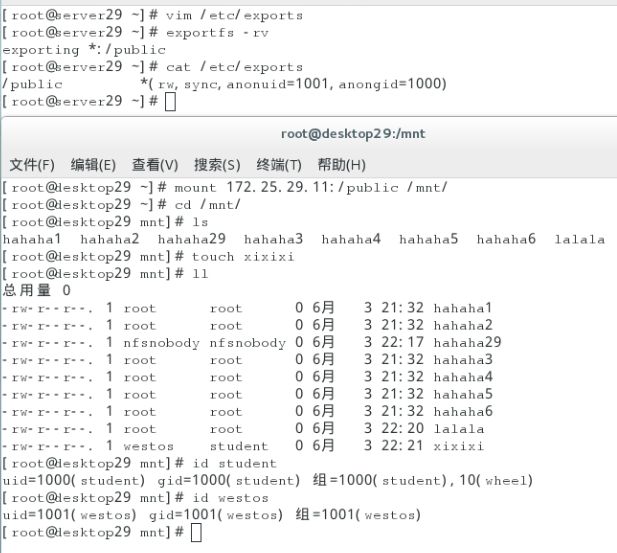
[root@server29 ~]# vim /etc/exports ##man 5 exports
要共享的目录 共享方式
/public *(sync)##public共享给所有人并且数据同步 sync-数据实时同步
/public 172.25.29.0/24(sync)##public共享给172.25.29.0/24网段且数据同步
/public *.example.com(sync) ##public共享给example.com域的所有主机
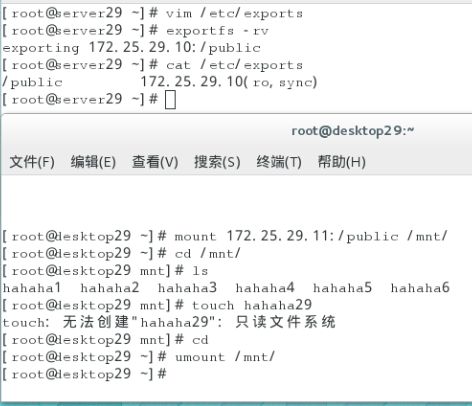
/public 172.25.29.10(ro,sync) ##public共享给172.25.29.10是只读
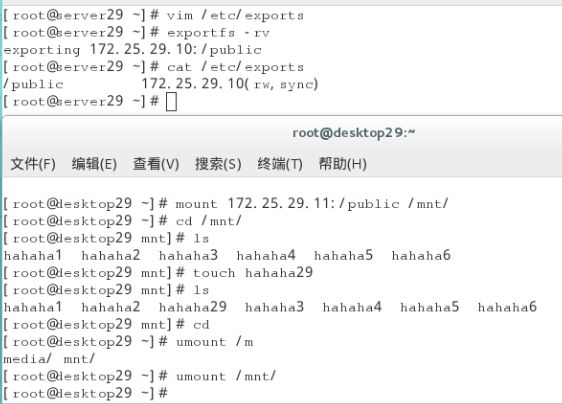
/public 172.25.29.10(rw,sync) ##public共享给172.25.29.10是读写
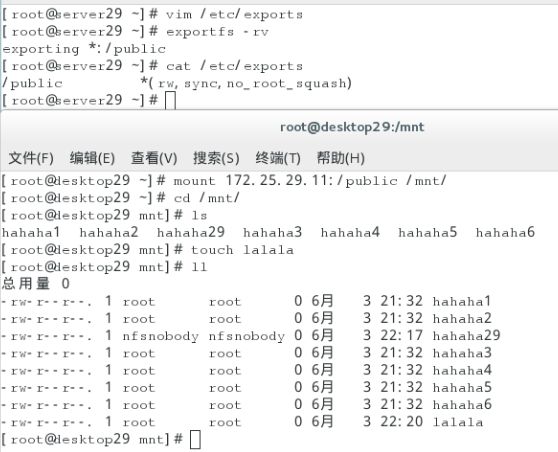
/public *(rw,sync,no_root_squash) ##public共享给所有人,当客户端用超级用户挂载时不转换用户身份
/public *(rw,sync,anonuid=1001,anongid=1000) ##public共享给所有人以1001为uid,1000为gid
[root@server29 ~]# exportfs -rv ##刷新
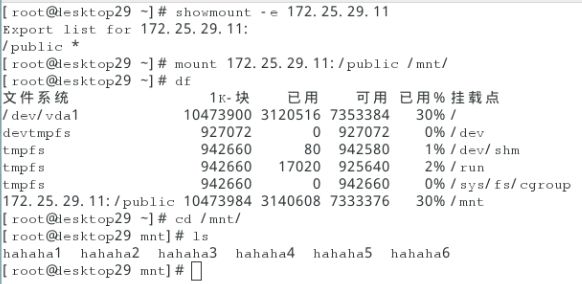
[root@desktop29 ~]# mount 172.25.29.11:/public /mnt/##挂载
4.利用kerberos保护nfs输出
[root@ ~]# yum install sssd krb5-workstation authconfig-gtk -y
[在server上]
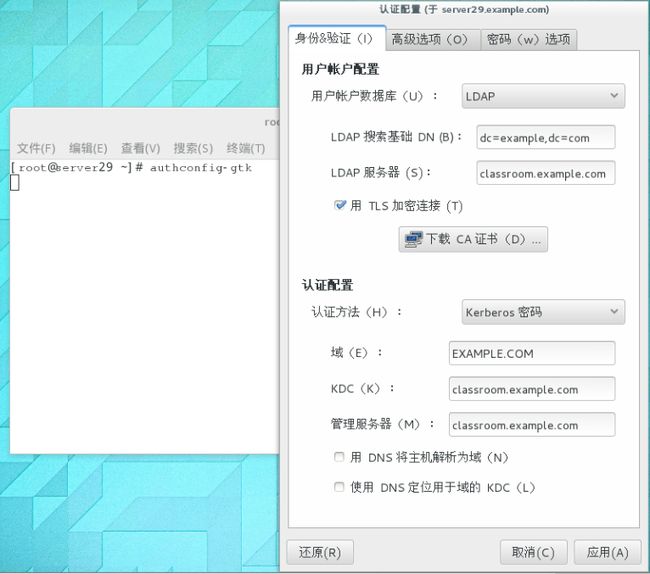
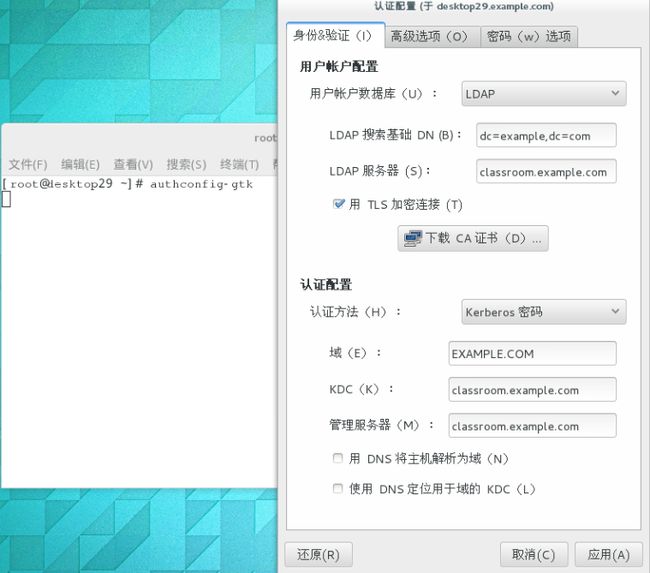
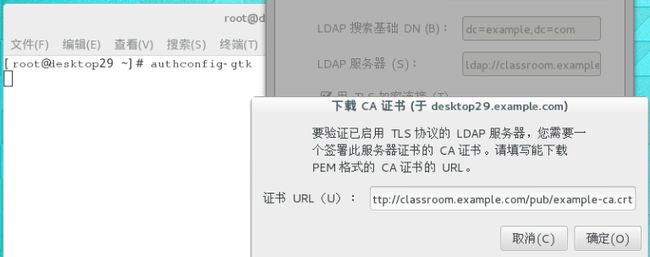
#开启kerberos认证,得到ldap用户
[root@server29 ~]# authconfig-gtk
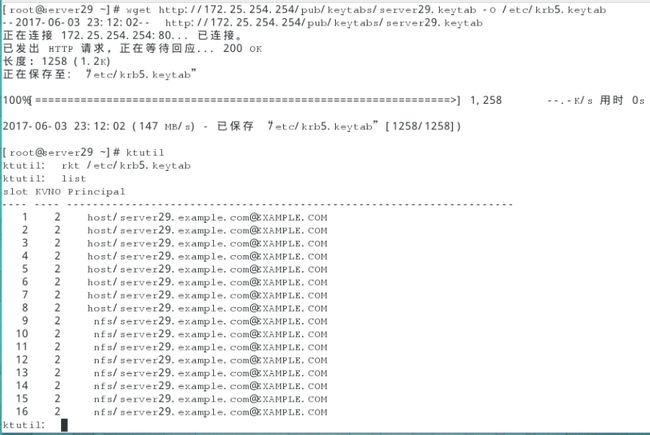
[root@server29 ~]# wget http://172.25.254.254/pub/keytabs/server29.keytab -O /etc/krb5.keytab ##下载server29.keytab
[root@server29 ~]# ktutil ##查看server29.keytab
ktutil: rkt /etc/krb5.keytab
ktutil: list
[root@server29 ~]# systemctl start nfs-secure-server
[root@server29 ~]# systemctl enable nfs-secure-server
[root@server29 ~]# vim /etc/exports
/public *(rw,sec=krb5p)
[root@server29 ~]# exportfs -rv
[在desktop上]
#开启kerberos认证,得到ldap用户
[root@desktop29 ~]# authconfig-gtk
[root@desktop29 ~]# wget http://172.25.254.254/pub/keytabs/desktop29.keytab -O /etc/krb5.keytab ##下载desktop29.keytab
[root@desktop29 ~]# ktutil ##查看desktop29.keytab
ktutil: rkt /etc/krb5.keytab
ktutil: list
[root@desktop29 ~]# systemctl start nfs-secure
[root@desktop29 ~]# systemctl enable nfs-secure
[root@desktop29 ~]# vim /etc/hosts
172.25.29.11 server29.example.com ##解析
[root@desktop29 ~]# mount 172.25.29.11:/public /mnt/ -o sec=krb5p##用krb5p方式挂载
[root@desktop29 ~]# su - student
[student@desktop29 ~]$ ls /mnt/
[student@desktop29 ~]$ su - ldapuser1 ##若从超级用户切入ldap用户不需输入密码,则缺少票据
Password: ##密码为kerberos
-bash-4.2$ ls /mnt/
