VSCode 如何运行调试全局安装的 Electron
背景
- 已安装 nodejs, npm, 以及 vscode
- npm 全局安装位置已变更为 “D:/programs/nodejs/npm_node_modules/”
- 已在 全局 安装 electron, 并未在项目下安装 electron
- 测试项目为 “Electron 初体验”, 路径位置: “D:/workspace/test_room/electron_foretaste”
需求与预期
实现
启动 vscode, 打开项目文件夹 “D:/workspace/test_room/electron_foretaste”. 此时的项目目录结构为:
./electron_foretaste/
	index.html
	package.json
	main.js
为了方便理解, 我把以上三个文件的源码贴在 附录 里, 可供大家参考.
切换到 vscode 的调试窗格, 添加配置文件, 选择 “Node.js”, 此时会在项目目录下生成一个 “.vscode” 文件夹和一个 “launch.json” 文件:

接下来是重点, 一般把 electron 安装在项目下的人, 其 launch.json 如下所示:
{
    "version": "0.2.0",
    "configurations": [
        {
            "type": "node",
            "request": "launch",
            "name": "Electron Main",
            "runtimeExecutable": "${workspaceFolder}/node_modules/.bin/electron",  // 默认启动的是项目下的 electron 模块
            "program": "${workspaceFolder}/main.js"
        }
    ]
}
由于我们是把 electron 安装在全局, 所以需要修改 runtimeExecutable 指向全局模块路径下的 electron.
{
    "version": "0.2.0",
    "configurations": [
        {
            "type": "node",
            "request": "launch",
            "name": "Electron Main",
            // "runtimeExecutable": "${workspaceFolder}/node_modules/.bin/electron",
            "runtimeExecutable": "D:/programs/nodejs/npm_node_modules/electron", // 注: 我的 npm 全局路径在 "D:/programs/nodejs/npm_node_modules/"
            "program": "${workspaceFolder}/main.js"
        }
    ]
}
尝试一下启动调试, 可以看到启动成功了, 但是出现的界面和预想的不一样:

原因在于 main.js 中的 win.loadFile('index.html') 这一行代码没有被正确执行.
解决方法很简单, 在 launch.json 中增加一个 “runtimeArgs” 键值对:
{
    "version": "0.2.0",
    "configurations": [
        {
            "type": "node",
            "request": "launch",
            "name": "Electron Main",
            // "runtimeExecutable": "${workspaceFolder}/node_modules/.bin/electron",
            "runtimeExecutable": "D:/programs/nodejs/npm_node_modules/electron", // 注: 我的 npm 全局路径在 "D:/programs/nodejs/npm_node_modules/"
            "runtimeArgs": ["."]
            "program": "${workspaceFolder}/main.js"
        }
    ]
}
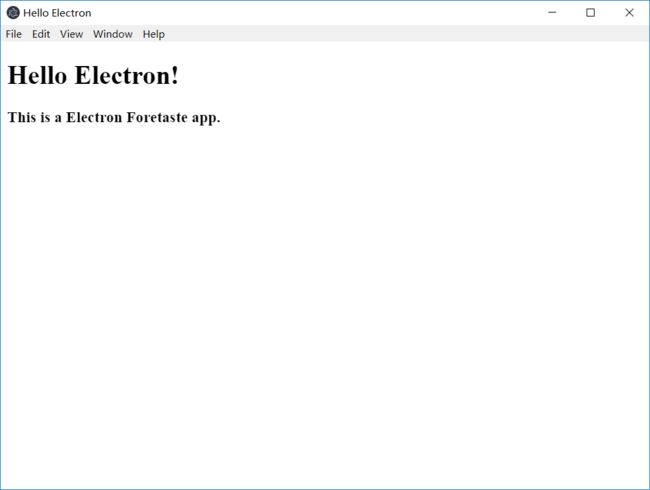
即可成功运行:

以上就是 vscode 运行调试全局安装的 electron 的讲解.
扩展阅读
多机同步项目的问题
问题描述: 我在两台电脑上同步了此项目, 但是这两台电脑上配置的 npm 全局路径不同. 这会导致上面的 launch.json 配置会在其中一台电脑上无法启动, 该如何解决?
对于这种情况, 就不适合使用绝对路径了.
我们可以利用 Windows 环境变量的特性, 通过一个 cmd 文件来引导启动. 在项目下新建一个 “run.cmd”, 内容如下:
electron .
然后更改 launch.json 配置文件, 内容如下:
{
    "version": "0.2.0",
    "configurations": [
        {
            "type": "node",
            "request": "launch",
            "name": "Electron Main",
            // "runtimeExecutable": "${workspaceFolder}/node_modules/.bin/electron",
            "runtimeExecutable": "${workspaceFolder}/run.cmd",  // 通过调用 run.cmd 启动
            "program": "${workspaceFolder}/main.js"
        }
    ]
}
现在运行一下, 我们可以看到成功启动了. 不过不幸的是, 过了 10s 就会报错 (这里我剪掉了等待过程):

报错内容: “Cannot connect to runtime process, timeout after 10000 ms…”, 意思是找不到目标端口 (连接超时).

我尝试了 思否上的这篇文章, 但很可惜不管用, 后来从 官网上的 electron 主进程调试 了解到可能是参数设置有误. 将 run.cmd 改为以下配置后成功:
electron . --inspect=5858
(注: 5858 是 v8 调试器协议中的默认端口号)
然后在 launch.json 中也指定为 5858 端口:
{
    "version": "0.2.0",
    "configurations": [
        {
            "type": "node",
            "request": "launch",
            "name": "Electron Main",
            // "runtimeExecutable": "${workspaceFolder}/node_modules/.bin/electron",
            "runtimeExecutable": "${workspaceFolder}/run.cmd",
            "program": "${workspaceFolder}/main.js",
            "port": 5858
        }
    ]
}
vscode 调试的局限性, 以及使用更好的调试方案
虽然上面讲了 vscode 调试启动 electron 的方法, 但并不推荐使用. 其局限性在于:
官方建议使用 chrome 来替代 vscode.
这些内容已经不在本文详细探讨范围内, 请移步 https://github.com/Microsoft/vscode-recipes/tree/master/Electron 来了解更多.
附录
演示项目源码
main.js
// import { app, BrowserWindow } from "electron"
// 注: 不知道为什么上面这种方式引用 electron 方式会报错 (可能与 electron 安装在全局目录有关?)
// 所以改用下面的导入方式
const { app, BrowserWindow } = require("electron")

function createWindow() {
    let win = new BrowserWindow({
        // 设置一个宽为800, 高为600的窗口
        width: 800,
        height: 600
    })
    // 加载本地的 index.html
    win.loadFile("index.html")
}

// 启动
app.on("ready", createWindow)
index.html
<head>
    <title>Hello Electrontitle>
head>
<body>
    <h1>Hello Electron!h1>
    <h3>This is a Electron Foretaste app.h3>
body>
package.json
{
  "name": "electron_foretaste",
  "version": "1.0.0",
  "description": "Electron 初体验.",
  "main": "main.js",
  "scripts": {
    "test": "echo \"Error: no test specified\" && exit 1",
    "start": "electron ."
  },
  "author": "Likianta",
  "license": "ISC",
  "dependencies": {
    "electron": "^4.1.3"
  }
}
参考
- segmentfault 上关于 vscode 运行全局安装的 electron 的回答 (文中 rum.cmd 的参数可能有误): https://segmentfault.com/a/1190000008349657
- vscode 调试 electron 主进程: https://blog.csdn.net/lady__killer/article/details/78490382
- vscode 调试 electron 主进程: https://electronjs.org/docs/tutorial/debugging-main-process
- stack overflow 上关于 “vscode cannot connect to runtime process” 的回答: https://stackoverflow.com/questions/50083113/visual-studio-code-cannot-connect-to-runtime-process-timeout-after-10000-ms
- vscode 调试 electron 的局限性: https://segmentfault.com/a/1190000012036997
- 官方建议: 使用 chrome 替代 vscode 来调试 electron: https://github.com/Microsoft/vscode-recipes/tree/master/Electron

