Http加密与多虚拟主机配置
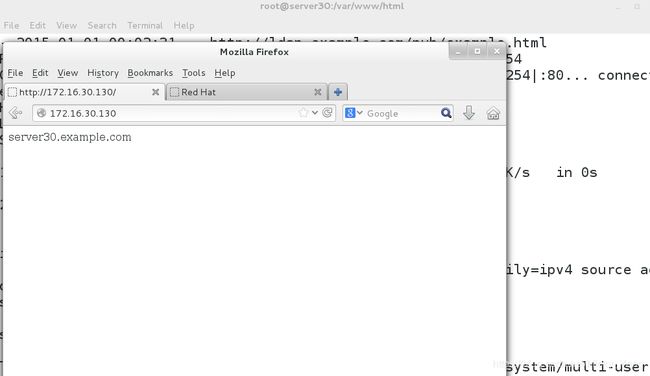
1)在server上配置一个web站点http://server.example.com;
要求:从http://ldap.example.com/pub/example.html下载文件,并重新命名为index.html,不要修改文件内容。将文件index.html拷贝到您的DocumentRoot目录下;将来自于example.com的客户端可以访问web服务器;来自my133t的客户端的访问会被拒绝
[root@server30 ~]#
[root@server30 ~]#
[root@server30 ~]# ntpdate ldap.example.com
 1 Jan 00:00:25 ntpdate[17386]: step time server 172.16.30.254 offset -127583043.347079 sec
[root@server30 ~]# yum install httpd -y          //安装httpd软件包
Loaded plugins: langpacks, product-id, subscription-manager
This system is not registered to Red Hat Subscription Management. You can use subscription-manager to register.
Resolving Dependencies
--> Running transaction check
---> Package httpd.x86_64 0:2.4.6-17.el7 will be installed
--> Processing Dependency: httpd-tools = 2.4.6-17.el7 for package: httpd-2.4.6-17.el7.x86_64
--> Processing Dependency: /etc/mime.types for package: httpd-2.4.6-17.el7.x86_64
--> Processing Dependency: libapr-1.so.0()(64bit) for package: httpd-2.4.6-17.el7.x86_64
--> Processing Dependency: libaprutil-1.so.0()(64bit) for package: httpd-2.4.6-17.el7.x86_64
--> Running transaction check

[root@server30 ~]# cd /var/www/html/
[root@server30 html]# wget -O index.html http://ldap.example.com/pub/example.html     //下载网站主页文件
--2015-01-01 00:02:31--  http://ldap.example.com/pub/example.html
Resolving ldap.example.com (ldap.example.com)... 172.16.30.254
Connecting to ldap.example.com (ldap.example.com)|172.16.30.254|:80... connected.
HTTP request sent, awaiting response... 200 OK
Length: 21 [text/html]
Saving to: ‘index.html’

100%[====================================>] 21          --.-K/s   in 0s

2015-01-01 00:02:31 (1.43 MB/s) - ‘index.html’ saved [21/21]

[root@server30 html]# ls
index.html
[root@server30 html]# firewall-cmd --add-rich-rule 'rule family=ipv4 source address=172.16.30.0/24 service name=http accept' --permanent      //防火墙上开放http服务
success
[root@server30 html]# firewall-cmd --reload
success
[root@server30 html]#
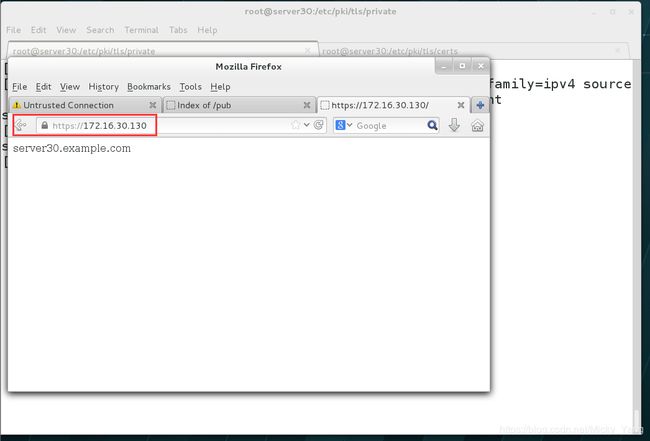
2)为站点http://server.example.com配置TLS加密;
已签名证书从http://ldap.example.com/pub/server30.crt获取
证书的秘钥从http://ldap.example.com/pub/server30.key获取
证书的签名授权信息从http://ldap.example.com/pub/group30.crt获取
[root@server30 html]# yum list all | grep mod_ssl
mod_ssl.x86_64                         1:2.4.6-17.el7              base
[root@server30 html]# yum install mod_ssl*  -y           //安装ssl的软件包
Loaded plugins: langpacks, product-id, subscription-manager
This system is not registered to Red Hat Subscription Management. You can use subscription-manager to register.
Resolving Dependencies
--> Running transaction check
---> Package mod_ssl.x86_64 1:2.4.6-17.el7 will be installed
--> Finished Dependency Resolution

Dependencies Resolved

==============================================================================
 Package          Arch            Version                 Repository     Size
==============================================================================

[root@server30 html]# cd /etc/httpd/
[root@server30 httpd]# ls
conf  conf.d  conf.modules.d  logs  modules  run
[root@server30 httpd]# cd conf.d/
[root@server30 conf.d]# ll
total 28
-rw-r--r--. 1 root root 2893 Mar 20  2014 autoindex.conf
-rw-r--r--. 1 root root  366 Mar 20  2014 README
-rw-r--r--. 1 root root 9426 Mar 20  2014 ssl.conf
-rw-r--r--. 1 root root 1252 Mar 20  2014 userdir.conf
-rw-r--r--. 1 root root  516 Mar 20  2014 welcome.conf
[root@server30 conf.d]# vim ssl.conf


# General setup for the virtual host, inherited from global configuration
#DocumentRoot "/var/www/html"
ServerName server30.example.com:443   //去掉注释行,域名换成自己的主机名

# Use separate log files for the SSL virtual host; note that LogLevel
# is not inherited from httpd.conf.
ErrorLog logs/ssl_error_log
TransferLog logs/ssl_access_log
LogLevel warn

SSLCertificateFile /etc/pki/tls/certs/localhost.crt      //证书文件1

#   Server Private Key:
#   If the key is not combined with the certificate, use this
#   directive to point at the key file.  Keep in mind that if
#   you've both a RSA and a DSA private key you can configure
#   both in parallel (to also allow the use of DSA ciphers, etc.)
SSLCertificateKeyFile /etc/pki/tls/private/localhost.key     //证书文件2

#   Server Certificate Chain:
#   Point SSLCertificateChainFile at a file containing the
#   concatenation of PEM encoded CA certificates which form the
#   certificate chain for the server certificate. Alternatively
#   the referenced file can be the same as SSLCertificateFile
#   when the CA certificates are directly appended to the server
#   certificate for convinience.
#SSLCertificateChainFile /etc/pki/tls/certs/server-chain.crt

#   Certificate Authority (CA):
#   Set the CA certificate verification path where to find CA
#   certificates for client authentication or alternatively one
#   huge file containing all of them (file must be PEM encoded)
#SSLCACertificateFile /etc/pki/tls/certs/ca-bundle.crt      //证书文件3

[root@server30 tls]# cd /etc/pki/tls/certs/
[root@server30 certs]# ls
ca-bundle.crt        localhost.crt    Makefile
ca-bundle.trust.crt  make-dummy-cert  renew-dummy-cert
[root@server30 certs]#
[root@server30 certs]# wget http://ldap.example.com/pub/group30.crt
--2015-01-01 00:29:18--  http://ldap.example.com/pub/group30.crt
Resolving ldap.example.com (ldap.example.com)... 172.16.30.254
Connecting to ldap.example.com (ldap.example.com)|172.16.30.254|:80... connected.
HTTP request sent, awaiting response... 200 OK
Length: 3256 (3.2K)
Saving to: ‘group30.crt’

100%[====================================>] 3,256       --.-K/s   in 0s

2015-01-01 00:29:18 (128 MB/s) - ‘group30.crt’ saved [3256/3256]

[root@server30 certs]# ls
ca-bundle.crt        group30.crt   //文件2   make-dummy-cert  renew-dummy-cert
ca-bundle.trust.crt  localhost.crt  Makefile         server30.crt    //文件1
[root@server30 certs]# vim  ssl.conf
SSLCertificateFile /etc/pki/tls/certs/server30.crt    //修改为下载的server的crt文件名

#   Server Private Key:
#   If the key is not combined with the certificate, use this
#   directive to point at the key file.  Keep in mind that if
#   you've both a RSA and a DSA private key you can configure
#   both in parallel (to also allow the use of DSA ciphers, etc.)
SSLCertificateKeyFile /etc/pki/tls/private/localhost.key

#   Server Certificate Chain:
#   Point SSLCertificateChainFile at a file containing the
#   concatenation of PEM encoded CA certificates which form the
#   certificate chain for the server certificate. Alternatively
#   the referenced file can be the same as SSLCertificateFile
#   when the CA certificates are directly appended to the server
#   certificate for convinience.
#SSLCertificateChainFile /etc/pki/tls/certs/server-chain.crt

#   Certificate Authority (CA):
#   Set the CA certificate verification path where to find CA
#   certificates for client authentication or alternatively one
#   huge file containing all of them (file must be PEM encoded)
SSLCACertificateFile /etc/pki/tls/certs/group30.crt     //修改为下载的crt文件名


[root@server30 tls]# cd private/
[root@server30 private]#
[root@server30 private]#
[root@server30 private]# pwd
/etc/pki/tls/private
[root@server30 private]# wget http://ldap.example.com/pub/server30.key    //证书key文件
--2015-01-01 00:35:41--  http://ldap.example.com/pub/server30.key
Resolving ldap.example.com (ldap.example.com)... 172.16.30.254
Connecting to ldap.example.com (ldap.example.com)|172.16.30.254|:80... connected.
HTTP request sent, awaiting response... 200 OK
Length: 887
Saving to: ‘server30.key’

100%[====================================>] 887         --.-K/s   in 0s

2015-01-01 00:35:41 (55.5 MB/s) - ‘server30.key’ saved [887/887]

[root@server30 private]# ls
localhost.key  server30.key


#   Server Certificate:
# Point SSLCertificateFile at a PEM encoded certificate.  If
# the certificate is encrypted, then you will be prompted for a
# pass phrase.  Note that a kill -HUP will prompt again.  A new
# certificate can be generated using the genkey(1) command.
SSLCertificateFile /etc/pki/tls/certs/server30.crt

#   Server Private Key:
#   If the key is not combined with the certificate, use this
#   directive to point at the key file.  Keep in mind that if
#   you've both a RSA and a DSA private key you can configure
#   both in parallel (to also allow the use of DSA ciphers, etc.)
SSLCertificateKeyFile /etc/pki/tls/private/server30.key    //key证书的名字进行修改

#   Server Certificate Chain:
#   Point SSLCertificateChainFile at a file containing the
#   concatenation of PEM encoded CA certificates which form the
:wq

[root@server30 private]# systemctl restart httpd
[root@server30 private]# firewall-cmd --add-rich-rule 'rule family=ipv4 source address=172.16.30.0/24 service name=https accept' --permanent      	//添加https防火墙规则
success
[root@server30 private]# firewall-cmd --reload
success
[root@server30 private]#
3)在server上扩展您的WEB服务器;
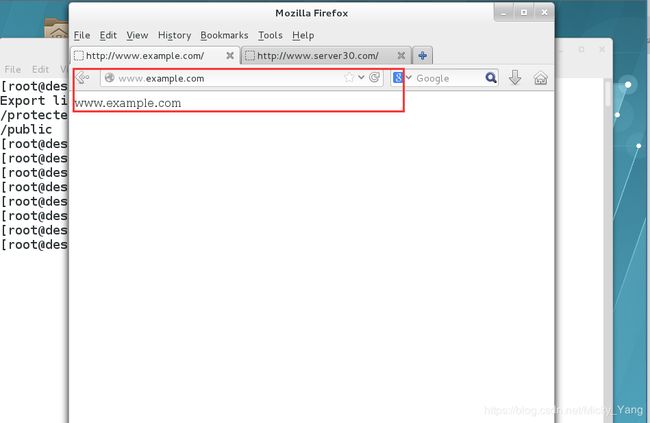
1.为站点http://www.example.com创建一个虚拟主机
2.设置DocumentRoot为/var/www/virtual
3.从http://ldap.example.com/pub/www.html下载文件,并重命名为index.html,不要修改文件内容。
4.将文件内容index.html拷贝到DocumentRoot目录下
5.确保floyd用户能够在/var/www/virtual下创建文件
[root@server30 ~]# cd /var/www/
[root@server30 www]# ls
cgi-bin  html
[root@server30 www]# mkdir virtual      //先创建该目录
[root@server30 www]# ll
total 0
drwxr-xr-x. 2 root root  6 Mar 20  2014 cgi-bin
drwxr-xr-x. 2 root root 23 Jan  1 00:02 html
drwxr-xr-x. 2 root root  6 Jan  1 00:53 virtual
[root@server30 www]# wget -O virtual/index.html http://ldap.example.com/pub/www.html     //下载网站文件并改名称
--2015-01-01 00:54:19--  http://ldap.example.com/pub/www.html
Resolving ldap.example.com (ldap.example.com)... 172.16.30.254
Connecting to ldap.example.com (ldap.example.com)|172.16.30.254|:80... connected.
HTTP request sent, awaiting response... 200 OK
Length: 16 [text/html]
Saving to: ‘virtual/index.html’

100%[====================================>] 16          --.-K/s   in 0s

2015-01-01 00:54:20 (1.29 MB/s) - ‘virtual/index.html’ saved [16/16]

[root@server30 www]#
[root@server30 www]# ls virtual/
index.html         //此时已有文件
[root@server30 www]# cat virtual/index.html
www.example.com     //网站内容
[root@server30 www]# chown -R apache.apache /var/www/
[root@server30 www]# ll
total 0
drwxr-xr-x. 2 apache apache  6 Mar 20  2014 cgi-bin
drwxr-xr-x. 2 apache apache 23 Jan  1 00:02 html
drwxr-xr-x. 2 apache apache 23 Jan  1 00:54 virtual
[root@server30 www]#
[root@server30 www]# useradd floyd       //创建此用户
[root@server30 www]# setfacl -m u:floyd:rwx virtual/		//对floyd用户授权
[root@server30 www]# getfacl virtual/
# file: virtual/
# owner: apache
# group: apache
user::rwx
user:floyd:rwx      //可读写
group::r-x
mask::rwx
other::r-x


[root@server30 conf.d]# ls
autoindex.conf  README  ssl.conf  userdir.conf  welcome.conf
[root@server30 conf.d]# find / -name *vhost*        //查找虚拟主机的模板配置文件
/dev/vhost-net
/etc/selinux/targeted/modules/active/modules/vhostmd.pp
/usr/lib/modules/3.10.0-123.el7.x86_64/kernel/drivers/vhost
/usr/lib/modules/3.10.0-123.el7.x86_64/kernel/drivers/vhost/vhost_net.ko
/usr/lib64/httpd/modules/mod_vhost_alias.so
/usr/share/doc/httpd-2.4.6/httpd-vhosts.conf			//此文件为模板文件
[root@server30 conf.d]# cp /usr/share/doc/httpd-2.4.6/httpd-vhosts.conf .   //拷贝到主配置文件里面来
[root@server30 conf.d]# ll
total 32
-rw-r--r--. 1 root root 2893 Mar 20  2014 autoindex.conf
-rw-r--r--. 1 root root 1511 Jan  1 01:08 httpd-vhosts.conf
-rw-r--r--. 1 root root  366 Mar 20  2014 README
-rw-r--r--. 1 root root 9425 Jan  1 00:37 ssl.conf
-rw-r--r--. 1 root root 1252 Mar 20  2014 userdir.conf
-rw-r--r--. 1 root root  516 Mar 20  2014 welcome.conf

[root@server30 conf.d]# vim httpd-vhosts.conf
# Almost any Apache directive may go into a VirtualHost container.
# The first VirtualHost section is used for all requests that do not
# match a ServerName or ServerAlias in any  block.
#
               //这是虚拟主机1的配置
    DocumentRoot "/var/www/html"
    ServerName server30.example.com


			//这是虚拟主机2的配置
    DocumentRoot "/var/www/virtual"
    ServerName www.example.com


//修改客户端的hosts文件,添加example.com的A记录
127.0.0.1   localhost localhost.localdomain localhost4 localhost4.localdomain4
::1         localhost localhost.localdomain localhost6 localhost6.localdomain6
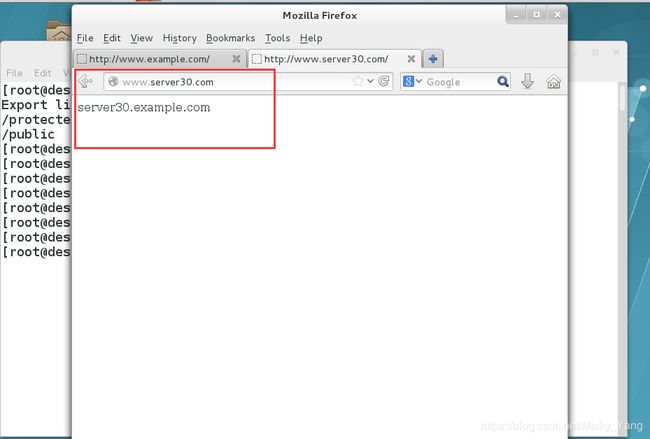
172.16.30.130  www.server30.com
172.16.30.130  www.example.com
[root@server30 conf.d]# systemctl restart httpd
[root@server30 conf.d]# su - floyd		//切换到该普通用户
[floyd@server30 ~]$ cd /var/www/virtual/
[floyd@server30 virtual]$ ll
total 4
-rw-r--r--. 1 apache apache 16 Nov 28 13:11 index.html
[floyd@server30 virtual]$ touch aaa.txt
[floyd@server30 virtual]$ ll
total 4
-rw-rw-r--. 1 floyd  floyd   0 Jan  1 01:18 aaa.txt
-rw-r--r--. 1 apache apache 16 Nov 28 13:11 index.html    //可创建文件
[floyd@server30 virtual]$
4)Web访问控制;
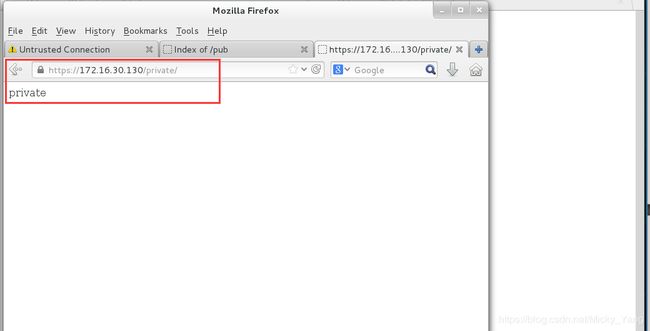
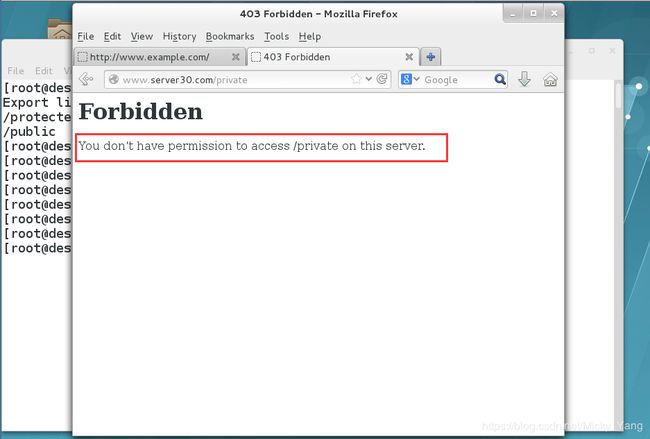
在您server上的web服务器的DocumentRoot目录下创建一个名为private的目录从http://ldap.example.com/pub/private.html下载文件到这个目录,并重命名为index.html,不要修改文件内容;在server上,任何人都可以浏览private的内容,但其他从系统不能访问目录的内容
[root@server30 conf.d]# cd /var/www/html/
[root@server30 html]# mkdir private 		//先创建该目录
[root@server30 html]# wget -O private/index.html http://ldap.example.com/pub/private.html    //下载网站主页文件
--2015-01-01 01:21:08--  http://ldap.example.com/pub/private.html
Resolving ldap.example.com (ldap.example.com)... 172.16.30.254
Connecting to ldap.example.com (ldap.example.com)|172.16.30.254|:80... connected.
HTTP request sent, awaiting response... 200 OK
Length: 8 [text/html]
Saving to: ‘private/index.html’

100%[====================================>] 8           --.-K/s   in 0s

2015-01-01 01:21:09 (578 KB/s) - ‘private/index.html’ saved [8/8]

[root@server30 html]# ll private/
total 4
-rw-r--r--. 1 root root 8 Nov 28 13:11 index.html
[root@server30 html]#
[root@server30 html]# cat private/index.html
private													//这是主页内容
[root@server30 html]# vim /etc/httpd/conf.d/httpd-vhosts.conf
#
# VirtualHost example:
# Almost any Apache directive may go into a VirtualHost container.
# The first VirtualHost section is used for all requests that do not
# match a ServerName or ServerAlias in any  block.
#

    DocumentRoot "/var/www/html"
    ServerName server30.example.com
         //对网站的访问做限制,只有本机ip系统才可以访问该网站内容
        Require ip 172.16.30.130


    DocumentRoot "/var/www/virtual"
    ServerName www.example.com

[root@server30 html]# systemctl restart httpd
5)动态内容由名为alt.example.com的虚拟主机提供
虚拟主机监听的端口为8909
从http://ldap.example.com/pub/webapp.wsgi下载一个脚本后,然后放在适当的位置,不要修改文件内容
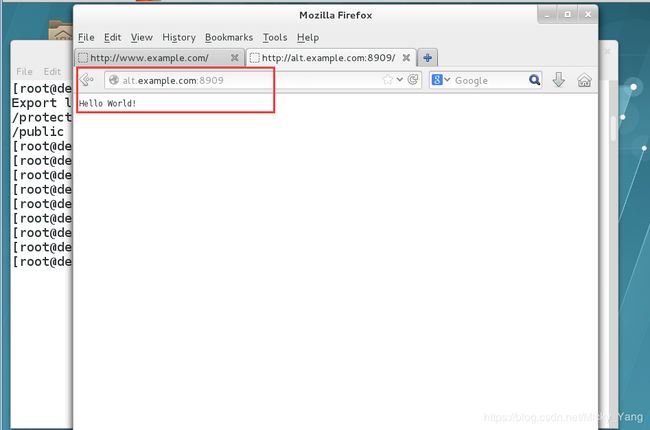
客户端访问http://alt.example.com:8909时,应该接收到动态生成的web页面
此http://alt.example.com:8909必须能够被example.com内所有的系统访问
[root@server30 www]# ls
cgi-bin  html  virtual
[root@server30 www]# mkdir wsgi		//先创建该目录
[root@server30 www]# ls
cgi-bin  html  virtual  wsgi
[root@server30 www]# cd wsgi/
[root@server30 wsgi]# wget http://ldap.example.com/pub/webapp.wsgi    //下载此站点主页文件
--2015-01-01 01:38:22--  http://ldap.example.com/pub/webapp.wsgi
Resolving ldap.example.com (ldap.example.com)... 172.16.30.254
Connecting to ldap.example.com (ldap.example.com)|172.16.30.254|:80... connected.
HTTP request sent, awaiting response... 200 OK
Length: 277
Saving to: ‘webapp.wsgi’

100%[====================================>] 277         --.-K/s   in 0s

2015-01-01 01:38:22 (15.9 MB/s) - ‘webapp.wsgi’ saved [277/277]

[root@server30 wsgi]# ls
webapp.wsgi
[root@server30 wsgi]#
[root@server30 wsgi]# chown -R apache:apache /var/www/     //修改文件的属主为apache
[root@server30 wsgi]#
[root@server30 wsgi]#
[root@server30 wsgi]# ll /var/www/
total 4
drwxr-xr-x. 2 apache apache  6 Mar 20  2014 cgi-bin
drwxr-xr-x. 3 apache apache 37 Jan  1 01:20 html
drwxrwxr-x+ 2 apache apache 37 Jan  1 01:18 virtual
drwxr-xr-x. 2 apache apache 24 Jan  1 01:38 wsgi

[root@server30 wsgi]# vim /etc/httpd/conf.d/httpd-vhosts.conf
# Almost any Apache directive may go into a VirtualHost container.
# The first VirtualHost section is used for all requests that do not
# match a ServerName or ServerAlias in any  block.
#

    DocumentRoot "/var/www/html"
    ServerName server30.example.com

        Require ip 172.16.30.130


    DocumentRoot "/var/www/virtual"
    ServerName www.example.com


Listen 8909							//增加监听的端口
				//增加的虚拟主机的配置
    WSGIScriptAlias  / "/var/www/wsgi/webapp.wsgi"
    ServerName alt.example.com


[root@server30 wsgi]# rpm -qa | grep wsgi
[root@server30 wsgi]# yum install all | grep wsgi
Error: Nothing to do
[root@server30 wsgi]# yum install mod_wsgi*  -y          //安装wsgi的软件包
Loaded plugins: langpacks, product-id, subscription-manager
This system is not registered to Red Hat Subscription Management. You can use subscription-manager to register.
Resolving Dependencies
--> Running transaction check
---> Package mod_wsgi.x86_64 0:3.4-11.el7 will be installed
--> Finished Dependency Resolution

Dependencies Resolved

==============================================================================
 Package           Arch            Version                Repository     Size
==============================================================================
Installing:
 mod_wsgi          x86_64          3.4-11.el7             base           76 k

Transaction Summary
==============================================================================

[root@server30 wsgi]# semanage port -l | grep http       //查看http在seliux上的端口
http_cache_port_t              tcp      8080, 8118, 8123, 10001-10010
http_cache_port_t              udp      3130
http_port_t                    tcp      80, 81, 443, 488, 8008, 8009, 8443, 9000
pegasus_http_port_t            tcp      5988
pegasus_https_port_t           tcp      5989
[root@server30 wsgi]# semanage port -a -t http_port_t -p tcp 8909    //添加8909端口为开放状态
[root@server30 wsgi]# semanage port -l | grep http
http_cache_port_t              tcp      8080, 8118, 8123, 10001-10010
http_cache_port_t              udp      3130
http_port_t                    tcp      8909, 80, 81, 443, 488, 8008, 8009, 8443, 9000
pegasus_http_port_t            tcp      5988
pegasus_https_port_t           tcp      5989
[root@server30 wsgi]#
[root@server30 wsgi]# systemctl restart httpd
[root@server30 wsgi]# ss -tunl | grep 8909
tcp    LISTEN     0      128                   :::8909                 :::*          //8909端口已然处于监听状态
[root@server30 wsgi]#
[root@server30 wsgi]# firewall-cmd --add-rich-rule 'rule family=ipv4 source address=172.16.30.0/24 port protocol=tcp port=8909 accept' --permanent              //添加防火墙,开放8909端口
success
[root@server30 wsgi]# firewall-cmd --reload
success
[root@server30 wsgi]#


127.0.0.1   localhost localhost.localdomain localhost4 localhost4.localdomain4
::1         localhost localhost.localdomain localhost6 localhost6.localdomain6
172.16.30.130  www.server30.com
172.16.30.130  www.example.com
172.16.30.130  alt.example.com				//增加该域名的A记录
