(Tensorflow之十六)采用Opencv对图像批量处理——灰度化+裁剪(python)
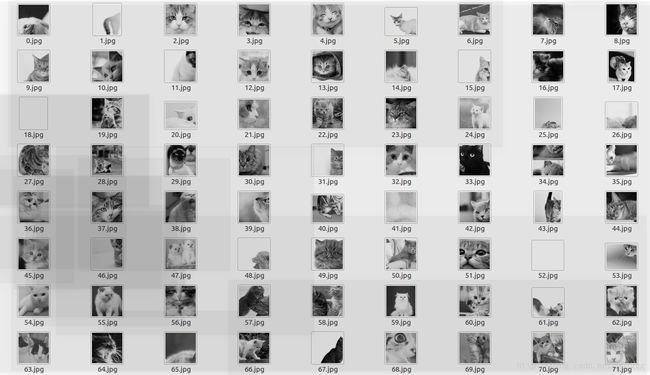
在Tensorflow之十五讲到采用python网络爬虫批量抓取图像,然而,由于抓取的图像尺寸不一,同时大多为RGB三通道的图像,因此需对图像进行处理。本文采用Opencv对的图像进行处理。首先将图像转为灰度图,采用物体检测的方法,抓取图像中的物体,裁剪成250x250尺寸的图像。
一、Opencv图像处理过程
1.1 读取原图
import cv2
import numpy as np
input_img = cv2.imread('1.jpg')
cv2.namedWindow("img", 0)
cv2.imshow('img',input_img)
cv2.waitKey(0)
cv2.destroyAllWindows()
1.2 转化成灰度图
img_gray = cv2.imread('mm/2.jpg',cv2.IMREAD_GRAYSCALE)1.3 获得高水平梯度和低垂直梯度的图像区域
gradX = cv2.Sobel(img_gray, ddepth=cv2.cv.CV_32F, dx=1, dy=0, ksize=-1)
gradY = cv2.Sobel(img_gray, ddepth=cv2.cv.CV_32F, dx=0, dy=1, ksize=-1)
img_gradient = cv2.subtract(gradX, gradY)
img_gradient = cv2.convertScaleAbs(img_gradient)
1.4 去除噪声
blurred = cv2.blur(img_gradient, (9, 9))
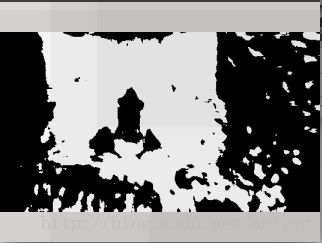
(_, thresh) = cv2.threshold(blurred, 90, 255, cv2.THRESH_BINARY)
1.5 填充空白区域
kernel = cv2.getStructuringElement(cv2.MORPH_RECT, (25, 25))
closed = cv2.morphologyEx(thresh, cv2.MORPH_CLOSE, kernel)
1.6 腐蚀与膨胀
closed = cv2.erode(closed, None, iterations=4)
closed = cv2.dilate(closed, None, iterations=4)
1.7 绘制物体边框
(cnts, _) = cv2.findContours(closed.copy(), cv2.RETR_EXTERNAL, cv2.CHAIN_APPROX_SIMPLE)
c = sorted(cnts, key=cv2.contourArea, reverse=True)[0]
rect = cv2.minAreaRect(c)
box = np.int0(cv2.cv.BoxPoints(rect))
cv2.drawContours(img_gray, [box], -1, (0, 255, 0), 3)
1.8 绘制边框中心的250x250区域
Xs = [i[0] for i in box]
Ys = [i[1] for i in box]
x1 = min(Xs)
x2 = max(Xs)
x1_ = (x2-x1)/2-125
x2_ = (x2-x1)/2+125

y1 = min(Ys)
y2 = max(Ys)
y1_ = (y2 - y1)/2-125
y2_ = (y2 - y1)/2+125
cv2.rectangle(img_gray,(x1_,y1_),(x2_,y2_),(0,255,0),2)
1.9 裁剪边框中心的250x250区域
cropImg = img_gray[y1_:y2_, x1_:x2_]二、批量处理多张图片
完整代码
import cv2
import numpy as np


def crop_image(input_image):
    #高水平梯度和低垂直梯度的图像区域
    gradX = cv2.Sobel(input_image, ddepth=cv2.cv.CV_32F, dx=1, dy=0, ksize=-1)
    gradY = cv2.Sobel(input_image, ddepth=cv2.cv.CV_32F, dx=0, dy=1, ksize=-1)

    # subtract the y-gradient from the x-gradient
    img_gradient = cv2.subtract(gradX, gradY)
    img_gradient = cv2.convertScaleAbs(img_gradient)

    # blur and threshold the image
    blurred = cv2.blur(img_gradient, (9, 9))
    (_, thresh) = cv2.threshold(blurred, 90, 255, cv2.THRESH_BINARY)

    #
    kernel = cv2.getStructuringElement(cv2.MORPH_RECT, (25, 25))
    closed = cv2.morphologyEx(thresh, cv2.MORPH_CLOSE, kernel)

    # perform a series of erosions and dilations
    closed = cv2.erode(closed, None, iterations=4)
    closed = cv2.dilate(closed, None, iterations=4)

    (cnts, _) = cv2.findContours(closed.copy(), cv2.RETR_EXTERNAL, cv2.CHAIN_APPROX_SIMPLE)
    c = sorted(cnts, key=cv2.contourArea, reverse=True)[0]

    # compute the rotated bounding box of the largest contour
    rect = cv2.minAreaRect(c)
    box = np.int0(cv2.cv.BoxPoints(rect))

    # draw a bounding box arounded the detected barcode and display the image
    #cv2.drawContours(input_image, [box], -1, (0, 255, 0), 3)

    height,width = input_image.shape

    Xs = [i[0] for i in box]
    Ys = [i[1] for i in box]
    x1 = min(Xs)
    x2 = max(Xs)
    x1_ = (x2-x1)/2-125
    x2_ = (x2-x1)/2+125
    if x1_< 0:
        x1_ = 0
    if x2_ > width:
        x2_ = width
    y1 = min(Ys)
    y2 = max(Ys)
    y1_ = (y2 - y1)/2-125
    y2_ = (y2 - y1)/2+125
    if y1_ < 0:
        y1_ = 0
    if y2_ > height:
        y2_ = height
    #cv2.rectangle(input_image,(x1_,y1_),(x2_,y2_),(0,255,0),2)
    output_image = input_image[y1_:y2_, x1_:x2_]
    return output_image

j = 0
while j < 200:
    input_img = cv2.imread('Img/%d.jpg'%j,cv2.IMREAD_GRAYSCALE)
    output_img = crop_image(input_img)
    cv2.imwrite('cropImg/%d.jpg'%j,output_img)
    j += 1


