NPR——卡通渲染(一)
-
-
- NPR——卡通渲染
- 1.1 轮廓线
- 1.1.1 基于 2D 图像的边缘检测算法
- Sobel 算子 [3]
- Canny 算子 [4]
- 1.1.2 几何描边法
- 1.1.3 基于视角的描边法
- 1.1.1 基于 2D 图像的边缘检测算法
- 1.2 卡通着色
- 1.2.1 Cel-Shading [5]
- 1.2.2 Tone Based Shading
- 1.2.3 基于 Tone Based Shading 的日式卡通
- 1.2.4 基于 Tone Based Shading 的美式卡通
- 1.3 风格化
- Reference
-
NPR——卡通渲染
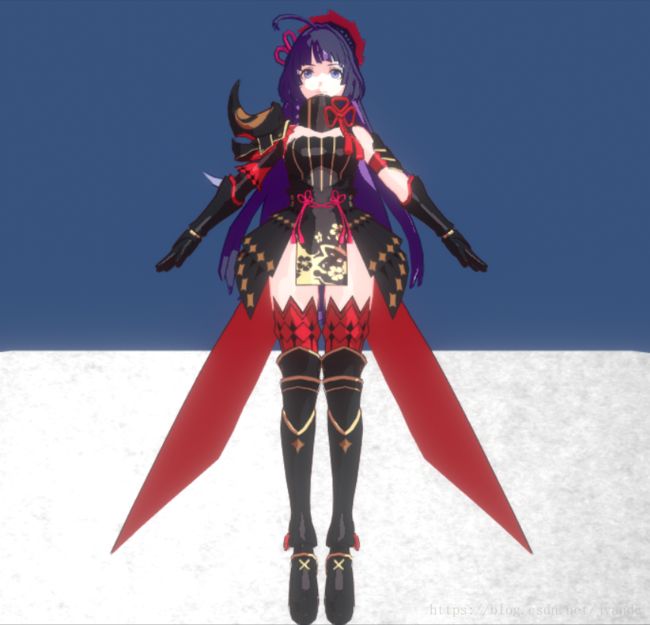
本文的目的是系统的探讨游戏中的卡通渲染技术,以期深刻掌握卡通渲染中所用技术原理。卡通渲染是一种非真实感的图形渲染(NPR)技术(所谓真实感图形渲染是指计算机模拟真实自然的图形技术,最重要的是 Light & Shadow Rendering,达到真实的光影表现)。[侑虎科技——卡通渲染技术总结] 我们常见的卡通风格可大体分为美式和日式的,美式风格整体光照、阴影着色更贴近真实效果,而日式卡通往往与真实自然效果差别巨大。从早期的 Cel-Shading [Wiki] 到 ToneBasedShading,技术在不断的深入,并且实际应用越来越多,如今的二次元游戏画面很多以卡通渲染技术为基础。
1.1 轮廓线
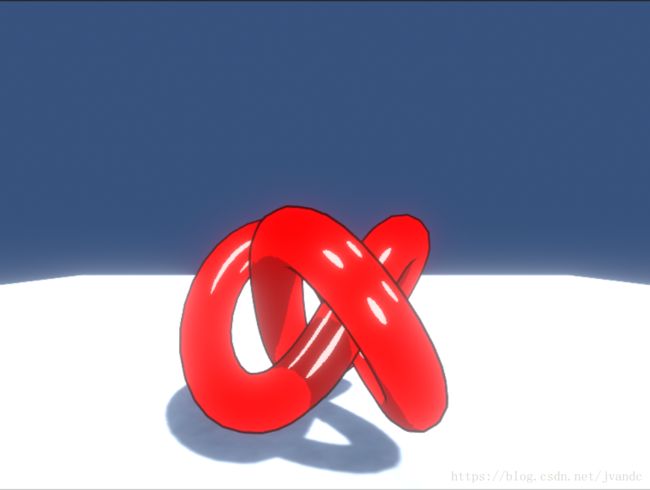
漫画风格的卡通形象一般都会有明确的轮廓线,美式卡通如迪士尼的许多电影动画则不然。本文主要讨论漫画风格的卡通渲染所采用的技术。
1.1.1 基于 2D 图像的边缘检测算法
图像的边缘可以指灰度不连续,或者亮度、深度、表面法线、表面反射系数等图像像素“值”不连续的地方。具体使用图像灰度或是图像亮度检测图像边缘可根据需要选择。
Sobel 算子 [3]
Sobel 边缘检测算法的基本原理是利用两组 3 X 3 的横向和纵向卷积模板,求取图像 X X 、 Y Y 的方向的亮度差分近似值。可以通过设定阈值 Thresold T h r e s o l d 来判定图像边缘,公式:
但是问了节省计算消耗,通常我们使用近视表达式:
当 G G 大于某个阈值 Thresold T h r e s o l d 时,我们便认为点 P(x,y) P ( x , y ) 已经到达了图像边缘,且我们使用以下公式表示图像边缘的方向:
Canny 算子 [4]
1.1.2 几何描边法
几何描边法的基本原理是渲染两次物体,第一次渲染剔除物体的正面,在模型坐标系下,根据顶点位置向量和法向量的内积(正\负)计算顶点位置伸缩方向,这种方法是网文介绍崩坏3渲染时所使用的,(最简便的方法是直接使用法向量 N N 乘以描边大小 OutlineSize O u t l i n e S i z e ,加上顶点位置,得到膨胀后的顶点位置,此类方法都称为 Shell-Method,另一类方法不改变顶点位置,而是通过改变 Z 值,将背面整体前移,该方法称为 Z-Bias Method)。这是比较传统的几何描边法。
Geometry Outline 是使用比较多的描边法,实现简单,描边宽度具备较好的可控性,有的描边实现,可能会基于几何描边法做一些扩展,比如控制描边颜色,模糊描边等等。
1.1.3 基于视角的描边法
基于视角的描边法基本原理是根据表面法线与视线的点积判断“边缘程度”,我们知道点积的几何意义在于判定两个向量的相似程度,也就是说当点积值越趋近于 -1 时,它们的相似度越低,因此,在 Shader 实现中,我们可以设置一个阈值 (Thresold),当 Dot(Normal,ViewDir)<Thresold D o t ( N o r m a l , V i e w D i r ) < T h r e s o l d ,我们判定该顶点或者像素(可以选择 Vertex Shader 或者 Pixel Shader)是图形或者图像边缘。
该方法对于描边的宽度可控性不强,但往往可以获得更好的卡通表现效果。
1.2 卡通着色
卡通风格一般可以大致分为日式和美式的 [2], 日式卡通风格凸出大范围的纯色色块,光影边界明显,“非真实感”明显;而美式卡通色彩比较丰富,光影表现更真实自然。下文将探讨实现这两种风格的着色技术。
1.2.1 Cel-Shading [5]
引文 [5] 中 Cel-Shading 的前两个实现步骤(Outline、Basic Texture)不再详述,我们着重关注其第三步——Shading,也就是着色。Cel-Shading 的基本原理是降低色阶 [2],计算方法如下:
Lambert=dot(normals,lightDir). L a m b e r t = d o t ( n o r m a l s , l i g h t D i r ) .
Lambert=(Lambert+1.0)∗0.5. L a m b e r t = ( L a m b e r t + 1.0 ) ∗ 0.5.
OutColor=tex2D(RampMap,fixed2(Lambert,Lambert)).rgb∗lightColor.rgb∗mainTex.rgb. O u t C o l o r = t e x 2 D ( R a m p M a p , f i x e d 2 ( L a m b e r t , L a m b e r t ) ) . r g b ∗ l i g h t C o l o r . r g b ∗ m a i n T e x . r g b .
上文公式表示计算 Lambert 光照模型,将其点积值 [−1,1] [ − 1 , 1 ] 映射至 [0,1] [ 0 , 1 ] ,以此作为 UV 坐标采样梯度贴图,将得到的颜色与光照颜色以及模型主纹理颜色相乘,得到最后的 Fragment 输出颜色。Unity ShaderLab 相关代码如下:
        Pass
        {
            NAME "CELSHADING"

            CGPROGRAM
            #pragma vertex vert
            #pragma fragment frag

            #include "UnityCG.cginc"

            uniform sampler2D _MainTex;
            uniform float4 _MainTex_ST;

            uniform sampler2D _RampMap;
            uniform float3 _DiffuseColor;
            uniform float _DiffuseScale;
            uniform float _NormalOffset;

            uniform float3 _SpecularColor;
            uniform float _Shininess;
            uniform float _SpecularMult;
            uniform float _SpecThresold;

            struct v2f
            {
                float4 Position : POSITION0;
                float2 UV : TEXCOORD0;
                float3 WorldPos : TEXCOORD1;
                float3 WorldNormal : TEXCOORD2;
            };

            fixed4 celShading(v2f i);

            v2f vert(appdata_base i)
            {
                v2f o;
                o.Position = UnityObjectToClipPos(i.vertex);
                o.WorldPos = mul(unity_ObjectToWorld, i.vertex);
                o.WorldNormal = UnityObjectToWorldNormal(i.normal);

                o.UV = TRANSFORM_TEX(i.texcoord, _MainTex);
                return o;
            }

            fixed4 frag(v2f i) : COLOR
            {
                fixed4 outColor;
                outColor = celShading(i);
                return outColor;
            }

            fixed4 celShading(v2f i)
            {
                fixed4 mainColor = tex2D(_MainTex, i.UV);
                if (mainColor.a <= 0.01f)
                {
                    discard;
                }

                fixed3 worldViewDir = UnityWorldSpaceViewDir(i.WorldPos);
                fixed3 worldLightDir = /*UnityWorldSpaceLightDir(i.WorldPos);*/normalize(_WorldSpaceLightPos0.xyz);
                fixed3 halfDir = normalize(worldViewDir + worldLightDir);

                fixed3 normal = i.WorldNormal;
                normal.xy *= _NormalOffset;
                normal = normalize(normal);
                fixed nlDot = dot(normal, worldLightDir);
                nlDot = nlDot * 0.5f + 0.5f;

                fixed ramp = tex2D(_RampMap, fixed2(nlDot * 0.95f, nlDot * 0.95f)).r;
                fixed3 diffuse = mainColor.rgb * _DiffuseColor * ramp * _DiffuseScale;

                fixed nhDot = dot(normal, halfDir);
                nhDot = saturate(nhDot);
                fixed spec = pow(nhDot, _Shininess);
                spec = step(_SpecThresold, spec);
                fixed3 specular = spec * _SpecularMult * _SpecularColor;

                fixed4 outColor;
                outColor.a = mainColor.a;
                outColor.rgb = diffuse + specular;

                return outColor;
            }

            ENDCG
        }
高光部分实现的是 Bling-Phong 光照模型,加入了几个高光可调参数。
1.2.2 Tone Based Shading
Tone Based Shading 的基本原理是根据“明暗程度”选择冷或暖色调进行着色,具体算法如下:
OutColor=1+dot(normal,lightDir)2kcool+(1−1+dot(normal,lightDir)2)kwarm. O u t C o l o r = 1 + d o t ( n o r m a l , l i g h t D i r ) 2 k c o o l + ( 1 − 1 + d o t ( n o r m a l , l i g h t D i r ) 2 ) k w a r m .
kcool=kblue+αkd. kwarm=kyellow+βkd. k c o o l = k b l u e + α k d . k w a r m = k y e l l o w + β k d .
其中 kd k d 表示贴图自身颜色, kblue k b l u e 和 kyellow k y e l l o w 分别表示“冷”和“暖”基准色调,其他是一些可调参数,(注:该算法表达和引文 [NPR渲染] 的实现有所区别。)基本 Tone Based Shading 基于 Unity ShaderLab 实现如下:
        Pass
        {
            NAME "TONEBASEDSHADING_FORWARDBASE"

            Tags{ "LightMode"="ForwardBase" }

            CGPROGRAM
            #pragma vertex vert
            #pragma fragment frag
            #pragma multi_compile_fwdbase

            #include "UnityCG.cginc"
            #include "Lighting.cginc"
            #include "AutoLight.cginc"

            uniform sampler2D _MainTex;
            uniform float4 _MainTex_ST;
            uniform float4 _TintColor;

            uniform float3 _SpecularColor;
            uniform float _Shininess;
            uniform float _SpecularMult;
            uniform float _SpecThresold;


            uniform float3 _KBlue;
            uniform float _Alpha;
            uniform float3 _KYellow;
            uniform float _Beta;

            struct v2f
            {
                float4 pos : POSITION0;
                float2 uv : TEXCOORD0;
                float3 worldPos : TEXCOORD1;
                float3 worldNormal : TEXCOORD2;
                SHADOW_COORDS(3)
            };

            fixed4 toneBasedShading(v2f i);

            v2f vert(appdata_full i)
            {
                v2f o;
                o.pos = UnityObjectToClipPos(i.vertex);
                o.worldPos = mul(unity_ObjectToWorld, i.vertex);
                o.worldNormal = UnityObjectToWorldNormal(i.normal);
                o.uv = TRANSFORM_TEX(i.texcoord, _MainTex);

                TRANSFER_SHADOW(o);

                return o;
            }

            fixed4 frag(v2f i) : COLOR
            {
                fixed4 outColor;
                outColor = toneBasedShading(i);
                return outColor;
            }

            fixed4 toneBasedShading(v2f i)
            {
                fixed4 mainColor = tex2D(_MainTex, i.uv);
                if(mainColor.a < 0.01f)
                {
                    discard;
                }
                mainColor *= _TintColor;

                fixed3 worldNormal = normalize(i.worldNormal);
                fixed3 worldLightDir = UnityWorldSpaceLightDir(i.worldPos); //normalize(_WorldSpaceLightPos0.xyz);
                fixed3 worldViewDir = UnityWorldSpaceViewDir(i.worldPos);
                fixed3 halfDir = normalize(worldLightDir + worldViewDir);

                //fixed3 ambient = UNITY_LIGHTMODEL_AMBIENT.xyz;

                UNITY_LIGHT_ATTENUATION(atten, i, i.worldPos);
                fixed  nlDot = dot(worldNormal, worldLightDir);
                nlDot = (nlDot + 1.0f) * 0.5f * atten;
                fixed3 kCool = _KBlue + _Alpha * mainColor.rgb;
                fixed3 kWarm = _KYellow + _Beta * mainColor.rgb;

                fixed spec = pow(saturate(dot(worldNormal, halfDir)), _Shininess);
                spec = step(_SpecThresold, spec);
                fixed3 specular = spec * _SpecularMult * _SpecularColor;

                fixed4 outColor;
                outColor.a = mainColor.a;
                //outColor.rgb = ambient;
                outColor.rgb = nlDot * kCool + (1.0f - nlDot) * kWarm;
                outColor.rgb += specular;

                return outColor;
            }

            ENDCG
        }
1.2.3 基于 Tone Based Shading 的日式卡通
引文 [1] 中介绍了游戏《罪恶装备》使用的卡通着色算法(西川善司的两篇文章详述了《罪恶装备》制作流程),表示如下:
OutColor=((darkness<thresold)?kcool∗ksss:kwarm)∗lightColor.rgb∗kd. O u t C o l o r = ( ( d a r k n e s s < t h r e s o l d ) ? k c o o l ∗ k s s s : k w a r m ) ∗ l i g h t C o l o r . r g b ∗ k d .
darkness=dot(normal,lightDir)∗AO. d a r k n e s s = d o t ( n o r m a l , l i g h t D i r ) ∗ A O .
它的基本原理是根据明暗度选择“冷”或者“暖”色调着色,不像基础 Tone Based Shading “冷”和“暖”色调之间会有插值,区别在于前者“冷”和“暖”色调界限区分明显,后者“冷”和“暖”色调过度平滑。 [1] 中作者在计算 darkness d a r k n e s s 时考虑了阴影 Shadow S h a d o w ,本文的实现中则没有考虑这些,Unity ShaderLab 代码如下:
Shader "NPR/NPR_JapanStyleShading"
{
    Properties
    {
        [Header(Main Texture Setting)]
        [Space(5)]
        _MainTex("Texture", 2D) = "white" {}
        _TintColor("Tint Color", color) = (0.5, 0.5, 0.5, 1.0)
        [Space(30)]

        [Header(Outline Setting)]
        [Space(5)]
        _OutlineColor("Outline Color", color) = (0.0, 0.0, 0.0, 1.0)
        _OutlineSize("Outline Size", range(0.0, 1.0)) = 0.1
        _ZBias("Z Bias", range(-1.0, 1.0)) = 0.0
        [Space(30)]

        [Header(Specular Setting)]
        [Space(5)]
        _SpecularColor("Specular Color", color) = (1.0, 1.0, 1.0, 1.0)
        _Shininess("Shininess", range(0.0, 20.0)) = 0.1
        _SpecularMult("Multiple Factor", range(0.1, 1.0)) = 1
        _SpecThresold("Thresold", range(0.1, 1.0)) = 0.5
        [Space(30)]


        [Header(Tone Shading Setting)]
        [Space(5)]
        _KCool("Cool", color) = (0.0, 0.0, 1.0, 1.0)
        _KWarm("Warm", color) = (1.0, 1.0, 0.0, 1.0)
        _Darkness("Darkness", range(0.0, 1.0)) = 0.5
        _KSSS("SSS Color", color) = (1.0, 1.0, 1.0, 1.0)
        //[Space(20)]

        //[Header(StylizedHighLight Setting)]

    }
    SubShader
    {
        Tags{
            "RenderType" = "Opaque"
            "Queue" = "Geometry"
        }

        UsePass "NPR/NPR_CelShading/OUTLINE"

        Pass
        {
            NAME "JAPANSTYLESHADING_FORWARDBASE"

            Tags{ "LightMode"="ForwardBase" }

            CGPROGRAM
            #pragma vertex vert
            #pragma fragment frag
            #pragma multi_compile_fwdbase

            #include "UnityCG.cginc"
            #include "Lighting.cginc"
            #include "AutoLight.cginc"
            #include "NPR_StylizedHighLight.cginc"

            uniform sampler2D _MainTex;
            uniform float4 _MainTex_ST;
            uniform float4 _TintColor;

            uniform float3 _SpecularColor;
            uniform float _Shininess;
            uniform float _SpecularMult;
            uniform float _SpecThresold;

            uniform float3 _KCool;
            uniform float3 _KWarm;
            uniform fixed _Darkness;
            uniform float3 _KSSS;

            struct v2f
            {
                float4 pos : POSITION0;
                float2 uv : TEXCOORD0;
                float3 worldPos : TEXCOORD1;
                float3 worldNormal : TEXCOORD2;
                // float3 tanToWorld_1 : TEXCOORD3;
                // float3 tanToWorld_2 : TEXCOORD4;
                // float3 tanToWorld_3 : TEXCOORD5;
                SHADOW_COORDS(6)
            };

            fixed4 japanStyleShading(v2f i);

            v2f vert(appdata_full i)
            {
                v2f o;
                o.pos = UnityObjectToClipPos(i.vertex);
                o.worldPos = mul(unity_ObjectToWorld, i.vertex);
                o.worldNormal = UnityObjectToWorldNormal(i.normal);
                o.uv = TRANSFORM_TEX(i.texcoord, _MainTex);

                TRANSFER_SHADOW(o);

                return o;
            }

            fixed4 frag(v2f i) : COLOR
            {
                fixed4 outColor;
                outColor = japanStyleShading(i);
                return outColor;
            }

            fixed4 japanStyleShading(v2f i)
            {
                fixed4 mainColor = tex2D(_MainTex, i.uv);
                if(mainColor.a < 0.01f)
                {
                    discard;
                }
                mainColor *= _TintColor;

                fixed3 worldNormal = normalize(i.worldNormal);
                fixed3 worldLightDir = UnityWorldSpaceLightDir(i.worldPos); //normalize(_WorldSpaceLightPos0.xyz);

                //fixed3 ambient = UNITY_LIGHTMODEL_AMBIENT.xyz;

                UNITY_LIGHT_ATTENUATION(atten, i, i.worldPos);

                fixed nlDot = dot(worldNormal, worldLightDir);
                nlDot = (nlDot * 0.5f + 0.5f) * atten;
                fixed darkness = step(_Darkness, nlDot);
                fixed3 cool = (_KCool * _KSSS) * (1.0f - darkness);
                fixed3 warm = _KWarm * darkness;
                fixed3 diffuse = (cool + warm) * _LightColor0.rgb * mainColor.rgb;

                fixed3 worldViewDir = UnityWorldSpaceViewDir(i.worldPos);
                fixed3 halfDir = normalize(worldLightDir + worldViewDir);
                fixed spec = pow(saturate(dot(worldNormal, halfDir)), _Shininess);
                spec = step(_SpecThresold, spec);
                fixed3 specular = spec * _SpecularMult * _SpecularColor;

                fixed4 outColor;
                outColor.a = mainColor.a;
                //outColor.rgb = ambient;
                outColor.rgb = diffuse;
                outColor.rgb += specular;

                return outColor;
            }
            ENDCG
        }
    }
    FallBack "Diffuse"
}这是基本的实现效果,与《崩坏3》游戏效果差距很大,后期有关《NPR——卡通渲染》系列文章会在此基础上进一步延展。
1.2.4 基于 Tone Based Shading 的美式卡通
关于美式卡通的着色风格,许多文章都提到了 Valve 的《军团要塞2》以及引文 [7],知乎上有”拳四郎” [8] 的具体实现描述。
1.3 风格化
论文 [9] 风格化的高光方法我在试验中一直没有调出来,不论是标准的方块化方法还是引文 [6] 的方法变种。本文实现代码如下:
fixed3 halfVecScale(fixed3 halfVec)
{
    halfVec -= fixed3(_ScaleX * halfVec.x, 0.0f, 0.0f);
    halfVec = normalize(halfVec);
    halfVec -= fixed3(0.0f, _ScaleY * halfVec.y, 0.0f);
    halfVec = normalize(halfVec);
    return halfVec;
}

fixed3 halfVecRotate(fixed3 halfVec)
{
    return halfVec;
}

fixed3 halfVecTranslation(fixed3 halfVec)
{
    halfVec += fixed3(_Tx, _Ty, 0.0f);
    halfVec = normalize(halfVec);
    return halfVec;
}

fixed3 halfVecSplit(fixed3 halfVec)
{
    halfVec = halfVec - fixed3(_SplitX * sign(halfVec.x), 0.0f, 0.0f) - fixed3(0.0f, _SplitY * sign(halfVec.y), 0.0);
    halfVec = normalize(halfVec);
    return halfVec;
}

fixed3 halfVecSquaring(fixed3 halfVec)
{
    float theta = min(acos(halfVec.x), acos(halfVec.y));
    float sqrnorm = pow(sin(2.0f * theta), _Squaring);
    halfVec = halfVec - _SquaringArea * sqrnorm * (fixed3(halfVec.x, 0.0f, 0.0f) + fixed3(0.0f, halfVec.y, 0.0f));
    halfVec = normalize(halfVec);

    return halfVec;
}

fixed3 stylizedHighLight(fixed3 halfVec)
{
    fixed3 stylizedHalfVec;

    stylizedHalfVec = halfVecScale(halfVec);
    stylizedHalfVec = halfVecRotate(stylizedHalfVec);
    stylizedHalfVec = halfVecTranslation(stylizedHalfVec);
    stylizedHalfVec = halfVecSplit(stylizedHalfVec);
    stylizedHalfVec = halfVecSquaring(stylizedHalfVec);

    return stylizedHalfVec;
}
Reference
[1] 侑虎科技——卡通渲染技术总结
[2] Wiki——卡通渲染
[3] Sobel 边缘检测算法
[4] Canny 边缘检测算法
[5] Wiki——Cel-Shading
[6] NPR渲染
[7] Jason Mitchell, Moby Francke, Dhabih Eng. Illustrative Rendering in Team Fortress 2
[8] 拳四郎——风格化角色渲染实践

