Unity Shader PostProcessing - 3 - 深度+法线来边缘检测
Unity Shader PostProcessing - 3 - 深度+法线来边缘检测
最近事情太多,学习时间断断续续,终于挤出时间,将深度+法线边缘检测的基础学习完
前一篇:Unity Shader PostProcessing - 2 - 边缘检测,是基于图像像素来边缘检测的。
在平面像素边缘检测会遇到很多像素颜色问题导致检测不精准
那么在有几何体的情况下,后处理能否精准边缘检测呢?
肯定是可以的:后处理的深度、法线纹理图像缓存数据来边缘检测
提取深度、法线
首先,准备好脚本:
shader
- DepthNormalCOM.cginc
- RetrieveDepthNormal.shader
- RetrieveDepth.shader
- RetrieveDepth1.shader
- RetrieveNormal.shader
scripts
- TestRetrieveDepthNormalsTexture.cs
具体脚本如下:
Shader
- DepthNormalCOM.cginc
// DepthNormalCOM.cginc
// jave.lin 2019.08.29
// 获取Depth与Normal纹理
// Depth获取有两种方式
#include "UnityCG.cginc"
struct appdata {
    float4 vertex : POSITION;
    float2 uv : TEXCOORD0;
};
struct v2f {
    float4 vertex : SV_POSITION;
    float2 uv : TEXCOORD0;
};
// 下面vert_DN, frag_DN, frag_D, frag_D1, frag_N 是后处理测试内容中使用
// 对主相机的Depth与Normal的纹理的内容采样输出到屏幕中查看结果
sampler2D _CameraDepthNormalsTexture;
sampler2D _CameraDepthTexture;
v2f vert_DN (appdata v) {
    v2f o;
    o.vertex = UnityObjectToClipPos(v.vertex);
    o.uv = v.uv;
    return o;
}
fixed4 frag_DN (v2f i) : SV_Target { // main camera, depthMode = DepthNormals都可以
    return tex2D(_CameraDepthNormalsTexture, i.uv); // 获取未解码的深度、法线纹理信息
}
fixed4 frag_D (v2f i) : SV_Target { // main camera, depthMode = DepthNormals都可以
    return DecodeFloatRG ((tex2D(_CameraDepthNormalsTexture, i.uv)).zw); // 获取解码后的[0~1]的线性深度信息
}
fixed4 frag_D1 (v2f i) : SV_Target { // main camera, depthMode = Depth或DepthNormals都可以
    return Linear01Depth (SAMPLE_DEPTH_TEXTURE(_CameraDepthTexture, i.uv)); // 另一种方式来获取[0~1]的线性深度信息
}
fixed4 frag_N (v2f i) : SV_Target { // main camera, depthMode = DepthNormals都可以
    fixed4 dn = tex2D(_CameraDepthNormalsTexture, i.uv);
    return fixed4(DecodeViewNormalStereo(dn),1) * 0.5 + 0.5; // 获取解码后的[0~1]的法线信息,没有n*0.5+0.5就是:[-1~1]的法线信息
}
- RetrieveDepthNormal.shader
// RetrieveDepthNormal.shader
// jave.lin 2019.08.31
Shader "Test/RetrieveNormal" {
    CGINCLUDE
    #include "DepthNormalCOM.cginc"
    ENDCG
    SubShader {
        Pass {
        	ZTest Always ZWrite Off Cull Off
            CGPROGRAM
            #pragma vertex vert_DN
            #pragma fragment frag_N
            ENDCG
        }
    }
    Fallback "Diffuse"
}
- RetrieveDepth.shader
// RetrieveDepth.shader
// jave.lin 2019.08.31
Shader "Test/RetrieveDepth" {
    CGINCLUDE
    #include "DepthNormalCOM.cginc"
    ENDCG
    SubShader {
        Pass {
        	ZTest Always ZWrite Off Cull Off
            CGPROGRAM
            #pragma vertex vert_DN
            #pragma fragment frag_D
            ENDCG
        }
    }
    Fallback "Diffuse"
}
- RetrieveDepth1.shader
// RetrieveDepth1.shader
// jave.lin 2019.08.31
Shader "Test/RetrieveDepth1" {
    CGINCLUDE
    #include "DepthNormalCOM.cginc"
    ENDCG
    SubShader {
        Pass {
        	ZTest Always ZWrite Off Cull Off
            CGPROGRAM
            #pragma vertex vert_DN
            #pragma fragment frag_D1
            ENDCG
        }
    }
    Fallback "Diffuse"
}
- RetrieveNormal.shader
// RetrieveNormal.shader
// jave.lin 2019.08.31
Shader "Test/RetrieveNormal" {
    CGINCLUDE
    #include "DepthNormalCOM.cginc"
    ENDCG
    SubShader {
        Pass {
        	ZTest Always ZWrite Off Cull Off
            CGPROGRAM
            #pragma vertex vert_DN
            #pragma fragment frag_N
            ENDCG
        }
    }
    Fallback "Diffuse"
}
Scripts
// jave.lin 2019.08.31
// 测试后处理中提取深度、法线
using UnityEngine;

public class TestRetrieveDepthNormalsTexture : MonoBehaviour
{
    public Shader retrieveDepthNormalShader;
    public Shader retrieveDepthShader;
    public Shader retrieveDepth1Shader;
    public Shader retrieveNormalShader;

    // 公开给外部Inspector中双击RT可查看内容
    public RenderTexture depthAndNormalRT;
    public RenderTexture depthRT;
    public RenderTexture depth1RT;
    public RenderTexture normalRT;

    private Material DN_Mat;
    private Material D_Mat;
    private Material D1_Mat;
    private Material N_Mat;

    void Start()
    {
        DN_Mat = new Material(retrieveDepthNormalShader);
        D_Mat = new Material(retrieveDepthShader);
        D1_Mat = new Material(retrieveDepth1Shader);
        N_Mat = new Material(retrieveNormalShader);

        depthAndNormalRT = RenderTexture.GetTemporary(Screen.width, Screen.height);
        depthRT = RenderTexture.GetTemporary(Screen.width, Screen.height);
        depth1RT = RenderTexture.GetTemporary(Screen.width, Screen.height);
        normalRT = RenderTexture.GetTemporary(Screen.width, Screen.height);
        // Depth==>_CameraDepthTexture
        // DepthNormals ==>_CameraDepthNormalsTexture
        GetComponent<Camera>().depthTextureMode |= DepthTextureMode.DepthNormals;
    }

    private void OnRenderImage(RenderTexture source, RenderTexture destination)
    {
        Graphics.Blit(source, depthAndNormalRT, DN_Mat);        // 使用_CameraDepthNormalsTexture来提取深度、法线数据
        Graphics.Blit(source, depthRT, D_Mat);                  // 使用_CameraDepthNormalsTexture来提取深度数据
        Graphics.Blit(source, depth1RT, D_Mat);                 // 使用_CameraDepthTexture来提取深度数据
        Graphics.Blit(source, normalRT, N_Mat);                 // 使用_CameraDepthNormalsTexture来提取法线数据
        Graphics.Blit(source, destination, DN_Mat);             // 将_CameraDepthNormalsTexture纹理数据直接输出到屏幕查看结果
    }
}
Scene
场景简单放置一些几何网格渲染对象
然后将cs脚本挂载在主相机(Main Camera)中,在给cs脚本对应的脚本中的shader变量设置好后
运行结果如下:
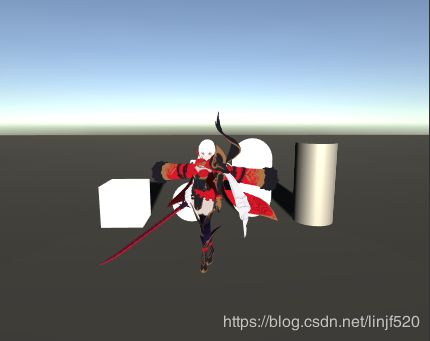
后处理前
后处理
_CameraDepthNormalsTexture中的深度+法线信息

_CameraDepthTexture或_CameraDepthNormalsTexture中的深度信息

_CameraDepthNormalsTexture中的法线*0.5+0.5信息

注意:需要在Shader在使用_CameraDepthTexture或是_CameraDepthNormalsTexture纹理的内容。
需要对主相机(Main Camera)的depthModde设置为:Depth或是DepthNormals。
然后Unity会在所有用户自定义的shader的渲染对象渲染前,先提取所有"RenderType"="Opaque"对象渲染到_CameraDepthTexture或是_CameraDepthNormalsTexture纹理缓存中。
再传入到后面用户自定义的shader中,以供使用。
有了屏幕的深度和法线信息,那么我就在后处理使用它们来描边了
描边
部分代码参考了《Unity Shader入门精要》
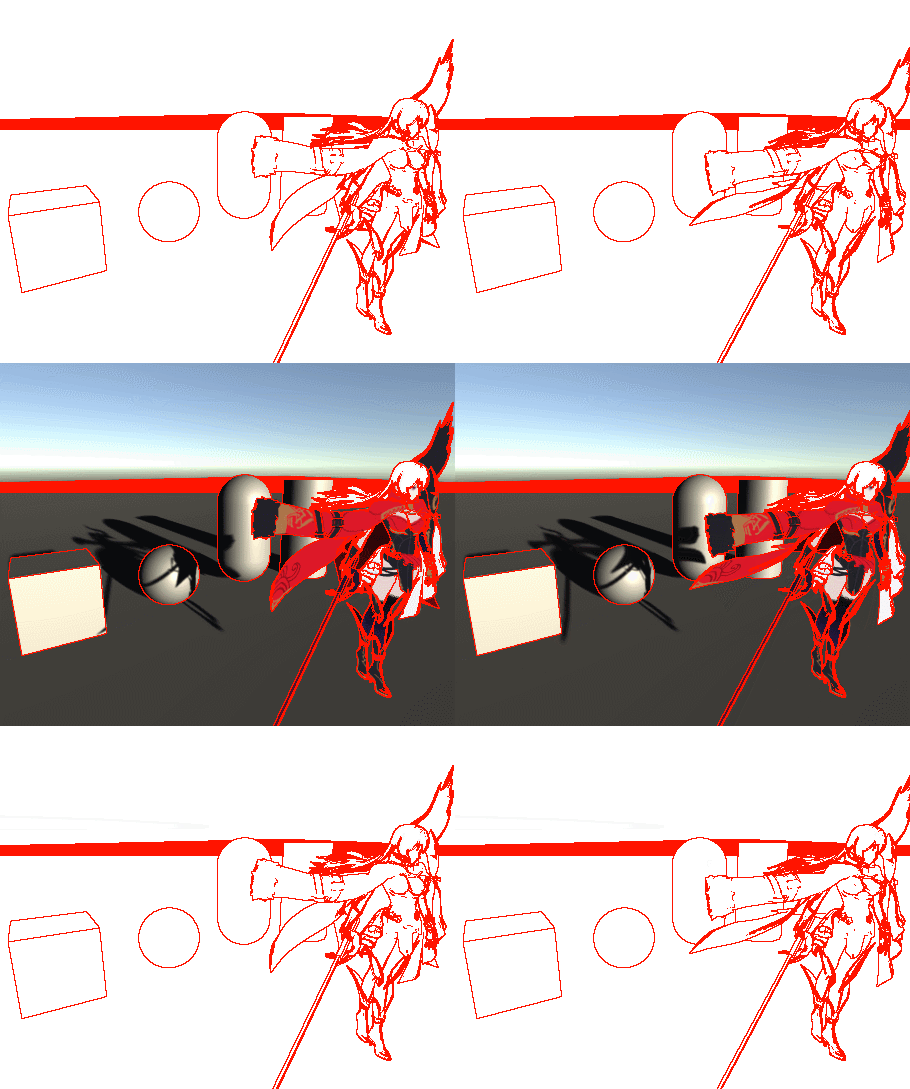
如下这我修改后的效果
仅距离的边缘还不错
Shader1
// jave.lin 2019.9.1
// 使用深度+法线的边缘检测后处理使用
Shader "Test/DepthNormalEdgeDetect" {
    Properties {
        _MainTex ("Texture", 2D) = "white" {}
        _DepthEdgeThreshold ("DepthEdgeThredshold", Range(0,0.001)) = 0.0001            // 大于该阈值算是深度边缘
        _NormalEdgeThreshold ("NormalEdgeThredshold", Range(0,1)) = 0.95                // 小于该阈值算是法线边缘
        _EdgeIntensity ("EdgeIntensity", Range(0,1)) = 1                                // 边缘颜色强度
        _EdgeOnlyIntensity ("EdgeOnlyIntensity", Range(0,1)) = 0                        // 显示_EdgeBgColor,仅突出边缘的强度
        _EdgeColor ("EdgeColor", Color) = (0,0,0,1)                                     // 边缘的颜色
        _EdgeBgColor ("EdgeBgColor", Color) = (1,1,1,1)                                 // 边缘颜以外的颜色,使用_EdgeOnlyIntensity来控制强弱
    }
    SubShader {
        ZTest Always ZWrite Off Cull Off
        Pass {
            CGPROGRAM
            #pragma vertex vert
            #pragma fragment frag
            #include "UnityCG.cginc"
            struct appdata {
                float4 vertex : POSITION;
                float2 uv : TEXCOORD0;
            };
            struct v2f {
                float4 vertex : SV_POSITION;
                float2 uv : TEXCOORD0;
            };
            sampler2D _MainTex;
            float4 _MainTex_TexelSize;
            sampler2D _CameraDepthNormalsTexture;
            float _DepthEdgeThreshold;
            float _NormalEdgeThreshold;
            fixed _EdgeIntensity;
            fixed _EdgeOnlyIntensity;
            fixed4 _EdgeColor;
            fixed4 _EdgeBgColor;
            v2f vert (appdata v) {
                v2f o;
                o.vertex = UnityObjectToClipPos(v.vertex);
                o.uv = v.uv;
                return o;
            }
            inline float Get_G(half4 data1, half4 data2) {
                float d1 = DecodeFloatRG (data1.zw);            // 解码深度
                float3 n1 = DecodeViewNormalStereo(data1);      // 解码法线
                float d2 = DecodeFloatRG (data2.zw);
                float3 n2 = DecodeViewNormalStereo(data2);
                return step(_DepthEdgeThreshold, abs(d1 - d2) * 0.01) + step(dot(n1, n2), _NormalEdgeThreshold);
            }
            fixed IsEdge(float2 uv) {
                // 借用Roberts边缘算法思想(大多资料喜欢叫:算子,之前跑去图书馆看了OpenCV也叫:算子)
                // Gx = |-1| 0|
                //      | 0| 1|
                //
                // Gy = | 0|-1|
                //      | 1| 0|
                // final g = |Gx| + |Gy| // 下面就没必要abs运算了,因为step return 0、1
                // 这里的uv运算量没必要写在vs,因为值有一个‘+’操作
                // 如果写在vs,除了占用vs寄存器
                // 计算量也不少,反而会增加运算量,因为每个片段透视插值需要:
                // 具体可了解我之前写的:C# 实现精简版的栅格化渲染器:https://blog.csdn.net/linjf520/article/details/99129344
                // - 运算 invCamZ = 1 / cameraZ // 这个可以不算,因为其他顶点数据透视插值也是需要的,那么以下三项都算
                // - 乘以 invCamZ
                // - lerp(srcFrag, toFrag, t) // 两个乘以,一个加
                // - 乘以 CamZ
                half4 gx_top_left       = tex2D(_CameraDepthNormalsTexture, uv + fixed2(0,                    _MainTex_TexelSize.y));
                half4 gx_bottom_right   = tex2D(_CameraDepthNormalsTexture, uv + fixed2(_MainTex_TexelSize.x, 0                   ));
                half4 gy_top_right      = tex2D(_CameraDepthNormalsTexture, uv + fixed2(_MainTex_TexelSize.x, _MainTex_TexelSize.y));
                half4 gy_bottom_left    = tex2D(_CameraDepthNormalsTexture, uv);
                fixed gx = Get_G(gx_bottom_right, gx_top_left);
                fixed gy = Get_G(gy_bottom_left, gy_top_right);
                return saturate(gx + gy);
            }
            fixed4 frag (v2f i) : SV_Target {
                fixed4 srcCol = tex2D(_MainTex, i.uv);
                srcCol = lerp(srcCol, _EdgeBgColor, _EdgeOnlyIntensity);
                fixed4 edgeCol = lerp(srcCol, _EdgeColor, _EdgeIntensity);
                return lerp(srcCol, edgeCol, IsEdge(i.uv));
            }
            ENDCG
        }
    }
}
Script1 后处理脚本
// jave.lin 2019.08.29
// 使用深度、法线来边缘检测的后处理

using UnityEngine;

public class EdgeDetectByDepthNormal : PostEffectBasic
{
    private static int DepthEdgeThredshold_hash = Shader.PropertyToID("_DepthEdgeThreshold");
    private static int NormalEdgeThredshold_hash = Shader.PropertyToID("_NormalEdgeThreshold");
    private static int EdgeIntensity_hash = Shader.PropertyToID("_EdgeIntensity");
    private static int EdgeOnlyIntensity_hash = Shader.PropertyToID("_EdgeOnlyIntensity");
    private static int EdgeColor_hash = Shader.PropertyToID("_EdgeColor");
    private static int EdgeBgColor_hash = Shader.PropertyToID("_EdgeBgColor");

    [Range(0, 0.001f)] public float DepthEdgeThredshold = 0.0001f;
    [Range(0, 1)] public float NormalEdgeThredshold = 0.95f;
    [Range(0, 1)] public float EdgeIntensity = 1;
    [Range(0, 1)] public float EdgeOnlyIntensity = 0;
    [ColorUsage(false)] public Color EdgeColor = Color.red;
    [ColorUsage(false)] public Color EdgeBgColor = Color.white;

    protected override void Start()
    {
        base.Start();

        Camera.main.depthTextureMode |= DepthTextureMode.DepthNormals;
    }

    protected override void OnRenderImage(RenderTexture source, RenderTexture destination)
    {
        if (!IsSupported) { Graphics.Blit(source, destination); return; } // 不支持
        mat.SetFloat(DepthEdgeThredshold_hash, DepthEdgeThredshold);
        mat.SetFloat(NormalEdgeThredshold_hash, NormalEdgeThredshold);
        mat.SetFloat(EdgeIntensity_hash, EdgeIntensity);
        mat.SetFloat(EdgeOnlyIntensity_hash, EdgeOnlyIntensity);
        mat.SetColor(EdgeColor_hash, EdgeColor);
        mat.SetColor(EdgeBgColor_hash, EdgeBgColor);
        Graphics.Blit(source, destination, mat);
    }
}
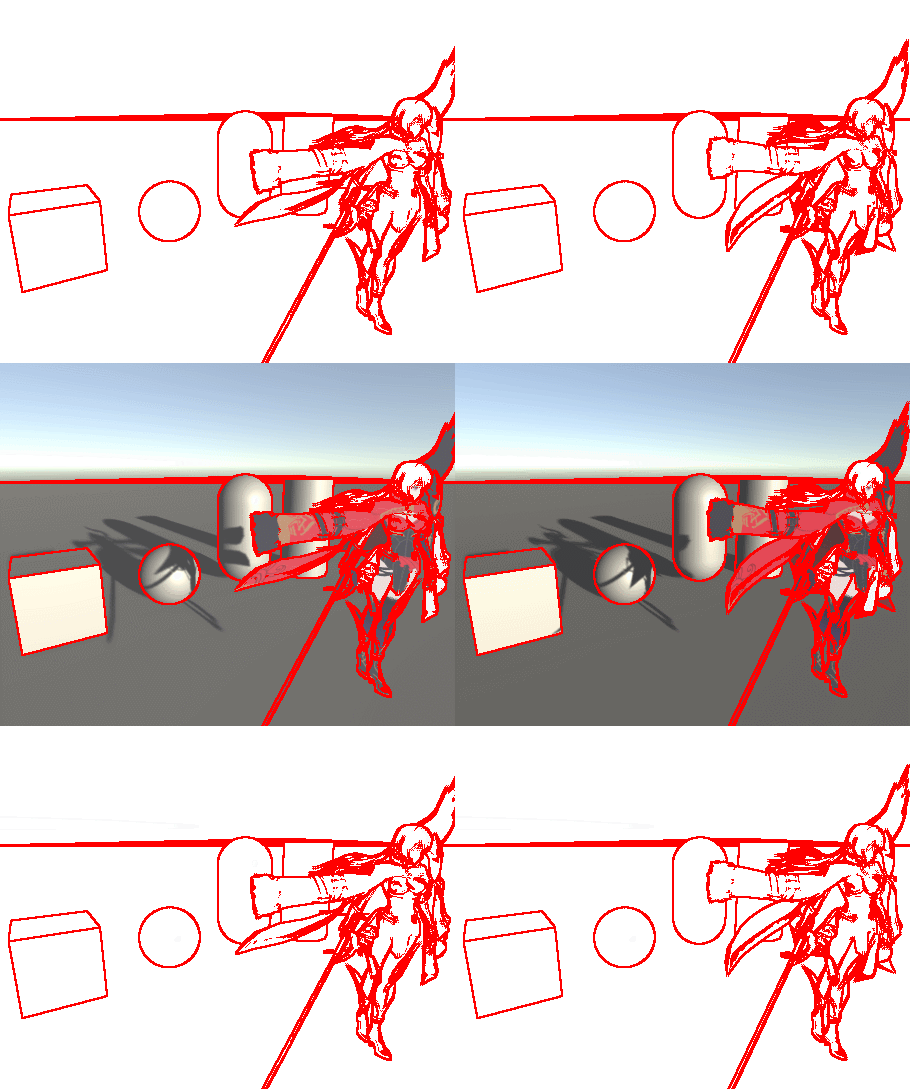
相比上面我修改后的效果来说,边缘更粗了
Shader2
// jave.lin 2019.09.02
// 参考:《Unity Shader入门精要》 - 13.4
Shader "Test/EdgeDetectNormalsAndDepth" {
    Properties {
        _MainTex ("Texture", 2D) = "white" {}
        _EdgeOnly ("Edge Only", Float) = 1.0
        _EdgeColor ("Edge Color", Color) = (0, 0, 0, 1)
        _BackgroundColor ("Background Color", Color) = (1, 1, 1, 1)
        _SampleDistance ("Sample Distnce", Float) = 1.0
        _Sensitivity ("Sensitivity", Vector) = (1, 1, 1, 1)
    }
    CGINCLUDE
    #include "UnityCG.cginc"
    sampler2D _MainTex;
    half4 _MainTex_TexelSize;
    fixed _EdgeOnly;
    fixed4 _EdgeColor;
    fixed4 _BackgroundColor;
    float _SampleDistance;
    half4 _Sensitivity;
    sampler2D _CameraDepthNormalsTexture;
    struct v2f {
        float4 pos : SV_POSITION;
        half2 uv[5] : TEXCOORD0;
    };
    half CheckSame(half4 center, half4 sample) {
        half2 centerNormal = center.xy;
        float centerDepth = DecodeFloatRG(center.zw);
        half2 sampleNormal = sample.xy;
        float sampleDepth = DecodeFloatRG(sample.zw);

        // difference in normals
        // do not bother decoding normals - there's no need here
        half2 diffNormal = abs(centerNormal - sampleNormal) * _Sensitivity.x;
        int isSameNormal = (diffNormal.x + diffNormal.y) < 0.1;
        // difference in depth
        float diffDepth = abs(centerDepth - sampleDepth) * _Sensitivity.y;
        // scale the required thredshold by the distance
        int isSameDepth = diffDepth < 0.1 * centerDepth;

        // return :
        // 1 - if normals and depth are similar enough
        // 0 - otherwise
        return isSameNormal * isSameDepth ? 1.0 : 0.0;
    }
    v2f vert(appdata_img v) {
        v2f o;
        o.pos = UnityObjectToClipPos(v.vertex);

        half2 uv = v.texcoord;
        o.uv[0] = uv;

        #if UNITY_UV_STARTS_AT_TOP
        if (_MainTex_TexelSize.y < 0)
            uv.y = 1 - uv.y;
        #endif

        o.uv[1] = uv + _MainTex_TexelSize.xy * half2(1,1) * _SampleDistance;
        o.uv[2] = uv + _MainTex_TexelSize.xy * half2(-1,-1) * _SampleDistance;
        o.uv[3] = uv + _MainTex_TexelSize.xy * half2(-1,1) * _SampleDistance;
        o.uv[4] = uv + _MainTex_TexelSize.xy * half2(1,-1) * _SampleDistance;

        return o;
    }
    fixed4 fragRobertsCrossDepthAndNormal(v2f i) : SV_Target {
        half4 sample1 = tex2D(_CameraDepthNormalsTexture, i.uv[1]);
        half4 sample2 = tex2D(_CameraDepthNormalsTexture, i.uv[2]);
        half4 sample3 = tex2D(_CameraDepthNormalsTexture, i.uv[3]);
        half4 sample4 = tex2D(_CameraDepthNormalsTexture, i.uv[4]);

        half edge = 1.0;

        edge *= CheckSame(sample1, sample2);
        edge *= CheckSame(sample3, sample4);

        fixed4 withEdgeColor = lerp(_EdgeColor, tex2D(_MainTex, i.uv[0]), edge);
        fixed4 onlyEdgeColor = lerp(_EdgeColor, _BackgroundColor, edge);

        return lerp(withEdgeColor, onlyEdgeColor, _EdgeOnly);
    }
    ENDCG
    SubShader {
        Tags { "RenderType"="Opaque" }
        Pass {
            ZTest Always Cull Off ZWrite Off
            CGPROGRAM
            #pragma vertex vert
            #pragma fragment fragRobertsCrossDepthAndNormal
            ENDCG
        }
    }
}
Script2 后处理脚本
using UnityEngine;

public class EdgeDetectNormalsAndDepth : PostEffectBasic
{
    [Range(0.0f, 1.0f)]
    public float edgesOnly = 0.0f;

    public Color edgeColor = Color.black;

    public Color backgroundColor = Color.white;

    public float sampleDistance = 1.0f;

    public float sensitivityDepth = 1.0f;

    public float sensitivityNormals = 1.0f;

    private void OnEnable()
    {
        GetComponent<Camera>().depthTextureMode |= DepthTextureMode.DepthNormals;
    }

    protected override void OnRenderImage(RenderTexture source, RenderTexture destination)
    {
        if (!IsSupported) { Graphics.Blit(source, destination); return; }

        mat.SetFloat("_EdgeOnly", edgesOnly);
        mat.SetColor("_EdgeColor", edgeColor);
        mat.SetColor("_BackgroundColor", backgroundColor);
        mat.SetFloat("_SampleDistance", sampleDistance);
        mat.SetVector("_Sensitivity", new Vector4(sensitivityNormals, sensitivityDepth, 0.0f, 0.0f));
        Graphics.Blit(source, destination, mat);
    }
}
Project
TestEdgeByDepthAndNormal_边缘检测基于深度+法线.zip
总结
目前没有发现比较好的边缘效果,各有优缺点
- 基于颜色图像的亮度,会有受颜色影响边缘精度,粗细度也不好控制;
- 基于几何体的深度、法线缓存纹理的差异,边缘粗细度不好控制,特别是远距离边缘太粗;
- 基于几何体背面挤出绘制,边缘效果最好,还可以控制粗细,但几何体法线相对相机角度的梯度太大,会导致描边效果不理想,如:正方体:Cube,在角的部分的描边不理想。
希望能有人分享边缘其他的检测方式,可以完美处理上述为题的方案,目前我还没找到。
References
- 《Unity Shader入门精要》 - 13.4


