Springboot项目搭建
根据 sunnyzyq 教程 搭建springboot 整合Mybatis
原链接:https://blog.csdn.net/sunnyzyq/article/details/86711708 springboot 整合Hibernate
项目说明:
开发环境:Eclipse 4.7.3
框架:Springboot(2.0.1)
工具:Maven 3.6.0
前端:html
后台:Mybatis
数据库:Mysql 5.5
为什么要搭建Springboot项目?
springboot是一个轻量级框架,不用我们自己手动的去写一堆xml配置然后进行配置,是非常适合微服务的
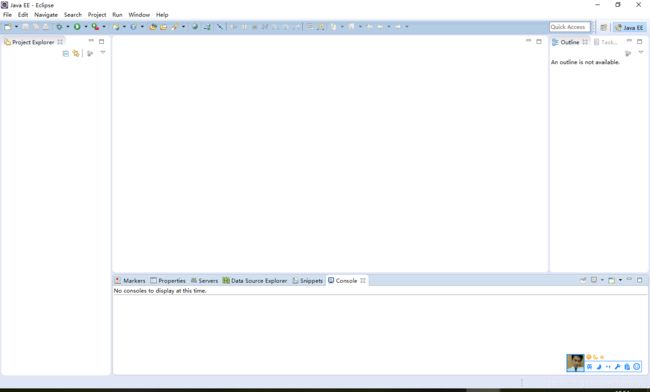
为了更加清晰的展示,sunnyzyq用一个全新的工作空间来演示springboot项目的搭建过程。
【01】创建一个简单的maven项目(如果Eclipse不支持Maven项目创建,请先自行安装Maven,不会问度娘):
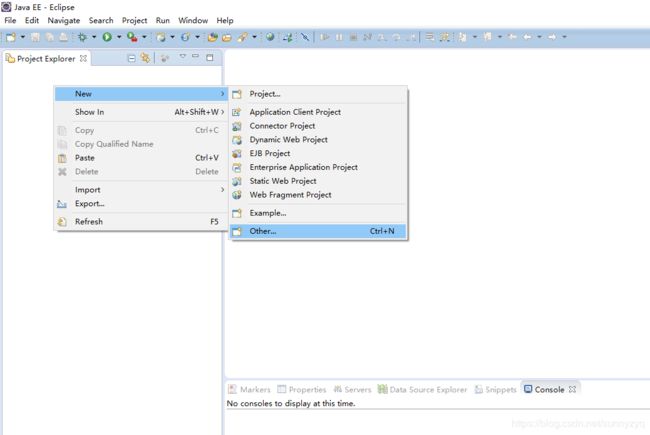
(1.1)右键单击 --> New --> Other
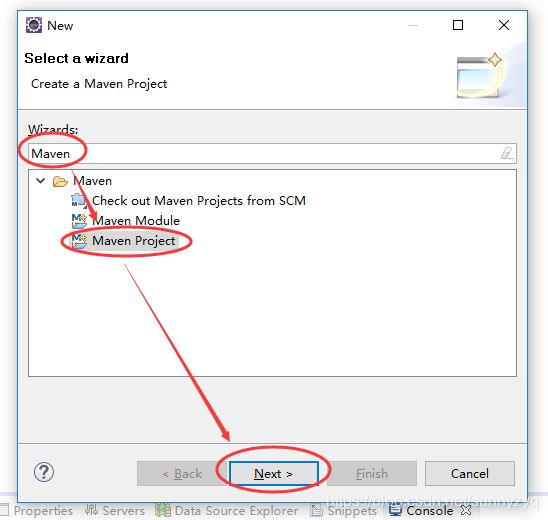
(1.2)输入Maven,选中Maven Project,点击Next。
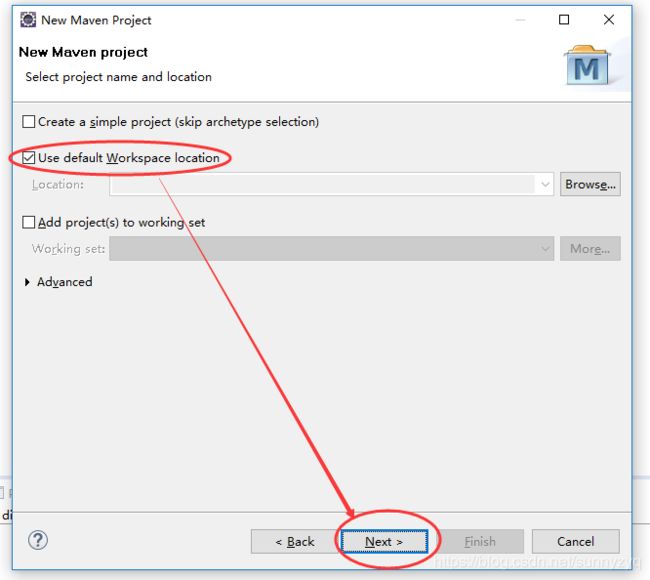
(1.3)勾选 Use default Workspace location,点击Next。
(1.4) 选择 maven-archetype-quickstart,点击Next。
(1.5)填写GroupId、ArtifactId、为了统一,你们也照着这个来写吧 ,真实就是填公司性质(.com)和域名(springboot)。填写好后,Package一栏会自动生成,这也就是项目中的包名,点击Finish。
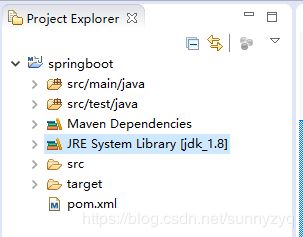
(1.6)可以看到,我们的工程已经创建成功了。但貌似现在有一些不完美的地方需要解决。
(1.7)工程创建成功后,可以看到又一个小红叉,虽然不影响程序运行,但面对有强迫的我们,看着很少难受。选中工程:右键单击--> Maven --> Update Project
(1.8)什么都不管,直接点击OK
(1.9)奈斯!小红叉已经被我们消灭了!
【02】加入Springboot框架
(2.1)我们先双击打开pom.xml文件,把不要的东西先干掉,最后保留如下所示即可:
	4.0.0
	com
	springboot
	0.0.1-SNAPSHOT
	jar
(2.2)定义父类:springboot 所有jar包版本,sunnyzyq 采用 2.0.5.RELEASE 版本后来估计我maven版本太低,采用2.0.1.RELEASE
采用2.0.5.RELEASE出现SpringApplication报红
        org.springframework.boot
        spring-boot-starter-parent
        2.0.1.RELEASE
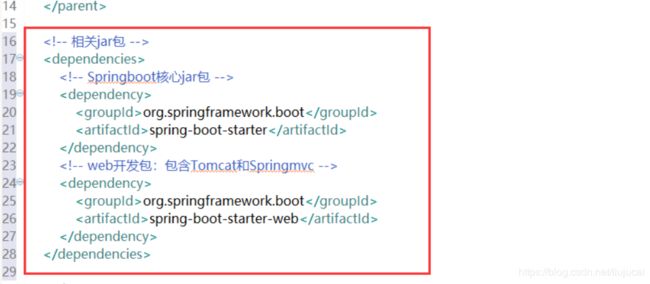
(2.3)加入springboot核心包、和web开发必须的包
            org.springframework.boot
            spring-boot-starter


            org.springframework.boot
            spring-boot-starter-web
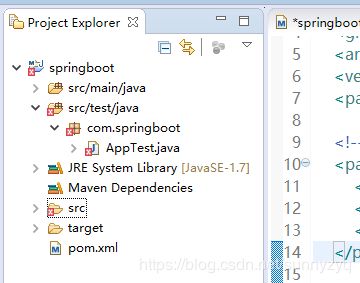
(2.4)可以看到,我们项目测试类现在还有一个大红叉,是因为我们刚刚吧把初始的Junit包干掉了,现在,我们重新加入Junit包。
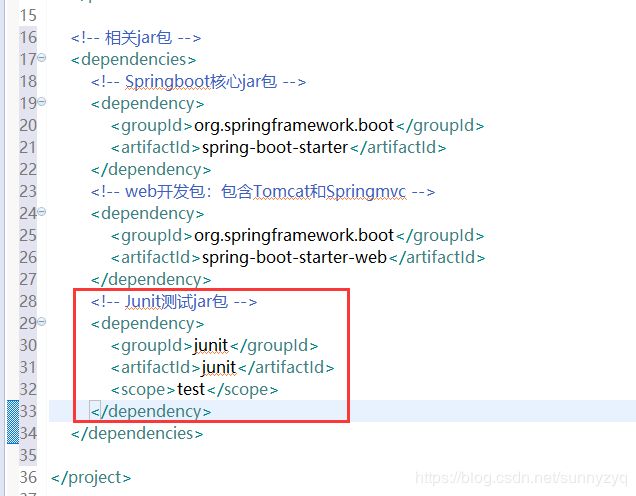
(2.5)加入Junit测试包,保存。
            junit
            junit
            test
(2.6)重新maven update一下,小红叉就没有了(这里JRE我手动换成了自己常用的jdk1.8)。
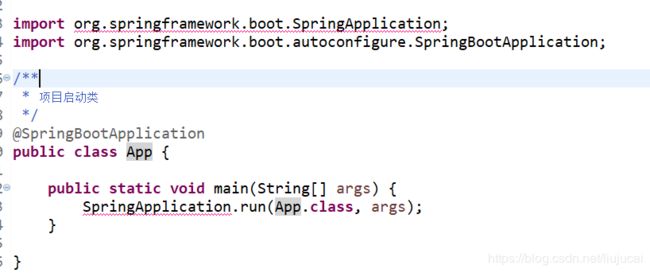
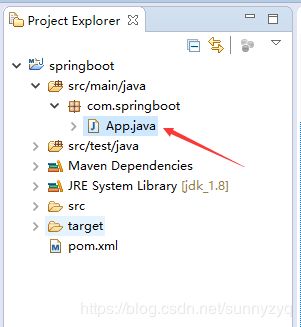
(2.7)我们创建一个App类,用来启动项目用(创建项目的时候已经有这个类了,现在只需要修改代码为如下)。
package com.springboot;

import org.springframework.boot.SpringApplication;
import org.springframework.boot.autoconfigure.SpringBootApplication;

/**
 * 项目启动类
 */
@SpringBootApplication
public class App {

    public static void main(String[] args) {
        SpringApplication.run(App.class, args);
    }

}
里面就一个注解,和一个启动程序的方法。
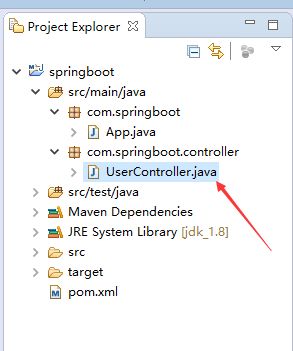
(2.8)创建Controller:我们同样举例以万年不变的User为例,取名UserController。
package com.springboot.controller;

import org.springframework.stereotype.Controller;
import org.springframework.web.bind.annotation.RequestMapping;
import org.springframework.web.bind.annotation.ResponseBody;

@Controller
public class UserController {

	@RequestMapping("/hello")
	@ResponseBody
	public String hello() {
		return "Hello World !!!";
	}

}
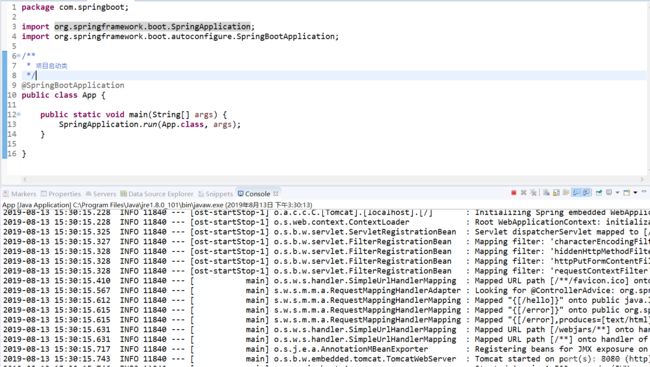
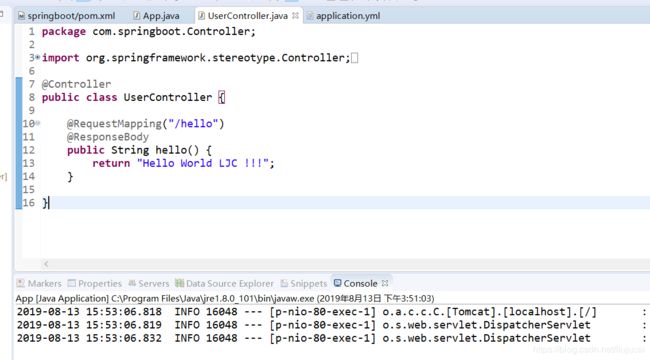
(2.9)启动项目,执行app类中的main函数,如果正常,控制台出现下面输出,则项目已经启动成功了。
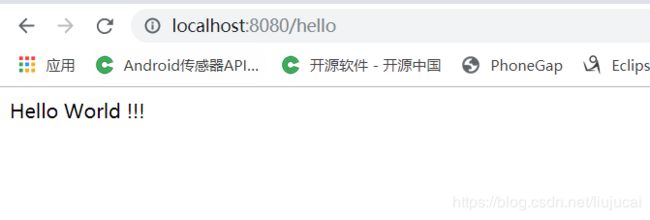
(2.10)我们在地址栏目输入 localhost:8080/hello 进行访问,如果能看到Hello world字样,则说明项目springboot已经搭建成功了。
【03】常用配置设置
springboot项目默认配置文件是resources文件夹下的application.yml文件,现在项目没有这些东西,需要手动进行创建。
(3.1)创建resources文件夹(该文件夹主要存放各种配置资源),如果项目已经有 src/main/resources文件夹,则该步骤略过。如果没有,请按照以下步骤
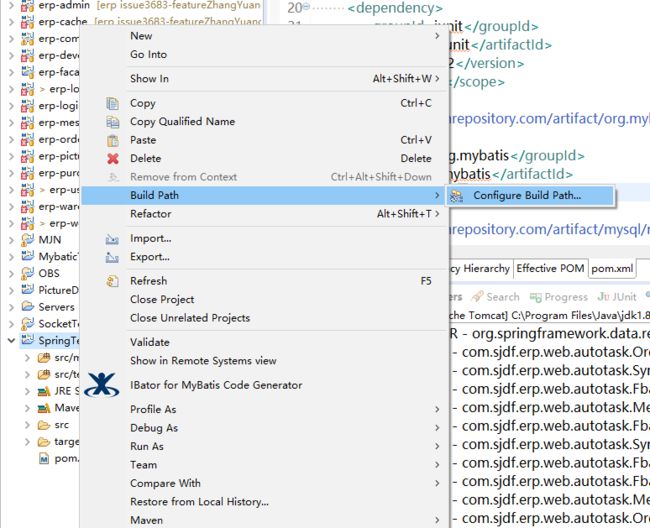
(1)选中项目,右键单击,如图所示选择:Build Path --> Configure Build Path
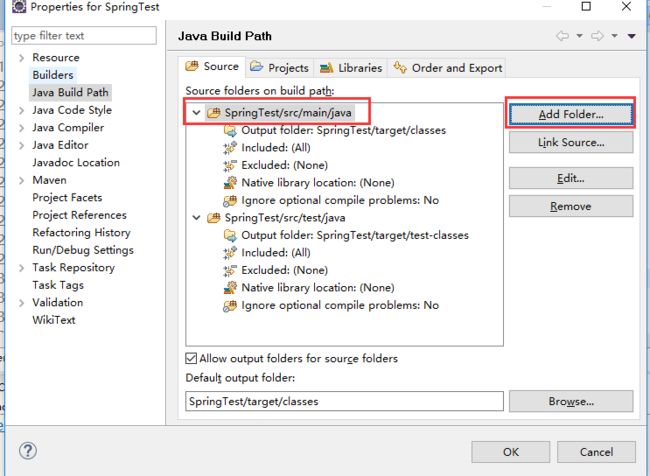
选中src/main/java目录,然后点击Add Floder
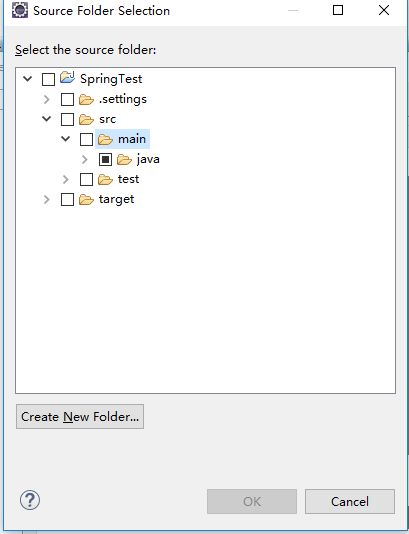
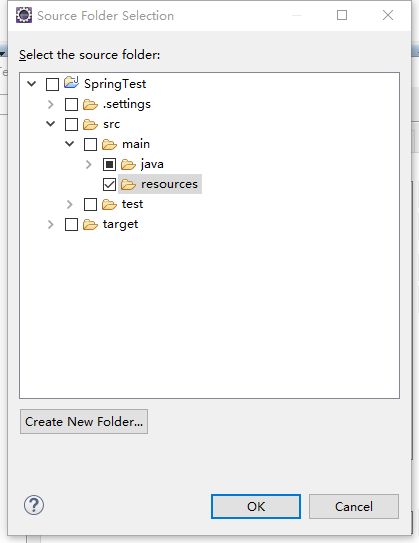
选中main,然后点击下方的Create new Floder
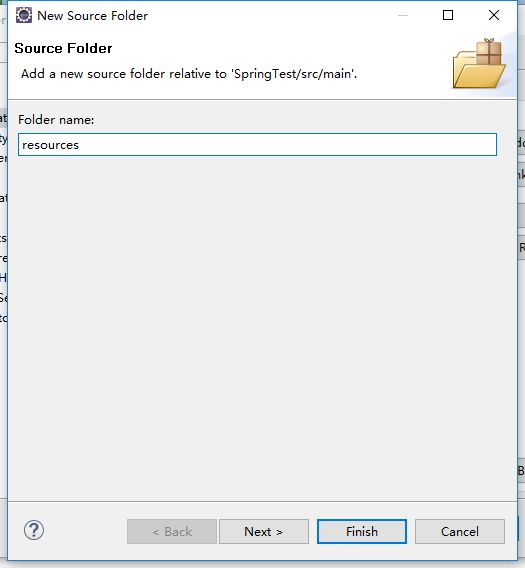
然后输入resources,点击Finish
这时候,上一个界面就有一个该resources文件夹了,然后点击OK。
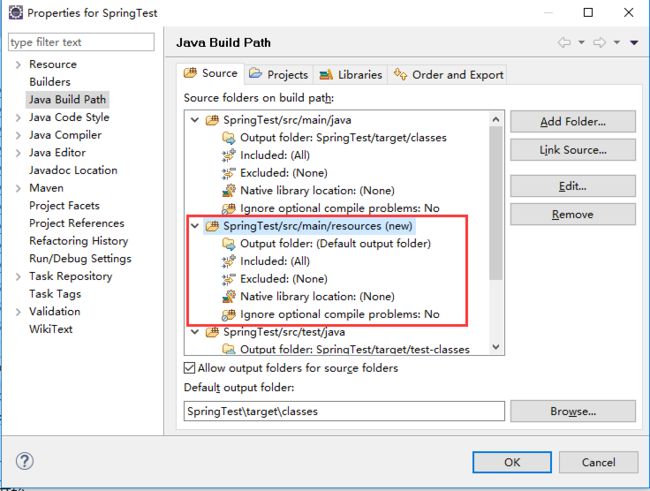
这时返回到更上一级界面,这个时候可以看到.../src/main/resoures已经生成了,继续点击OK,该界面会自动关闭。
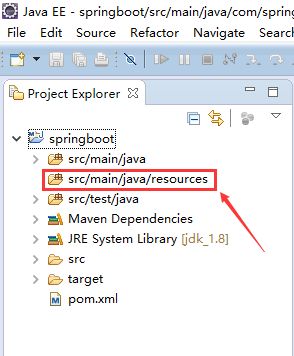
回到项目上,这个文件夹已经被创建好了!于是,问题已被解决!
接着继续配置设置,在resources文件夹下创建application.yml
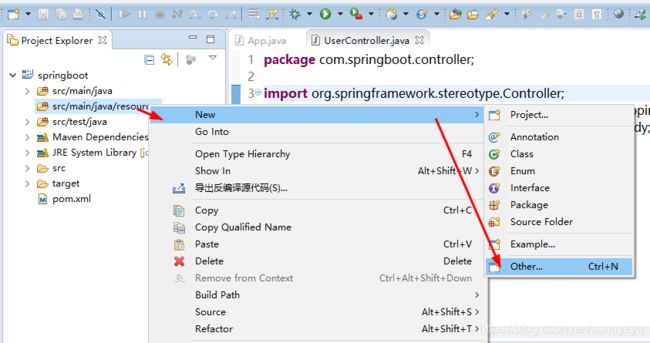
(3.2)创建 application.yml 文件,选中src/main/java/resources/文件夹-->New-->Other
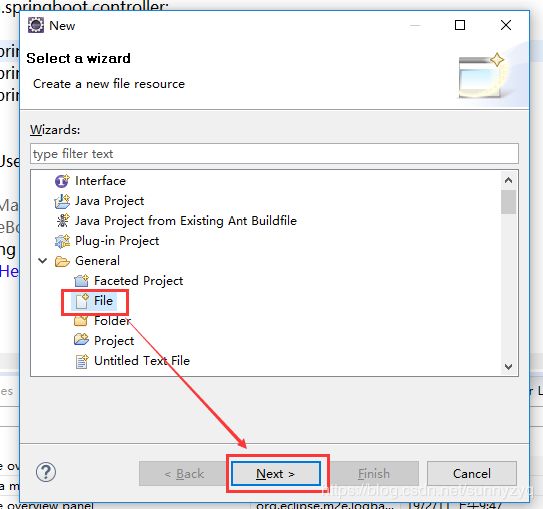
(3.3)选择General文件夹下的File,点击Next
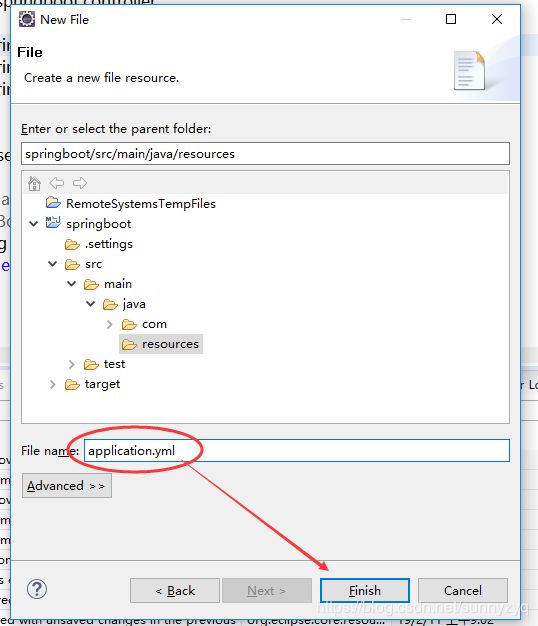
(3.4)输入application.yml,点击Finish。
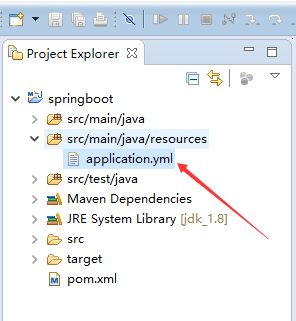
(3.5) 完成创建如图所示
(3.6)打开application.yml文件进行服务器配置(注意排版保持一致,也注意键值对的冒号后有一个空格)
server:
  port: 80
  session-timeout: 30
  tomcat.max-threads: 0
  tomcat.uri-encoding: UTF-8
(3.7)这样配置后,重启项目,我们就可以不用输入端口号了。
【04】修改项目为热部署(凡有文件修改保存后,自动重启)
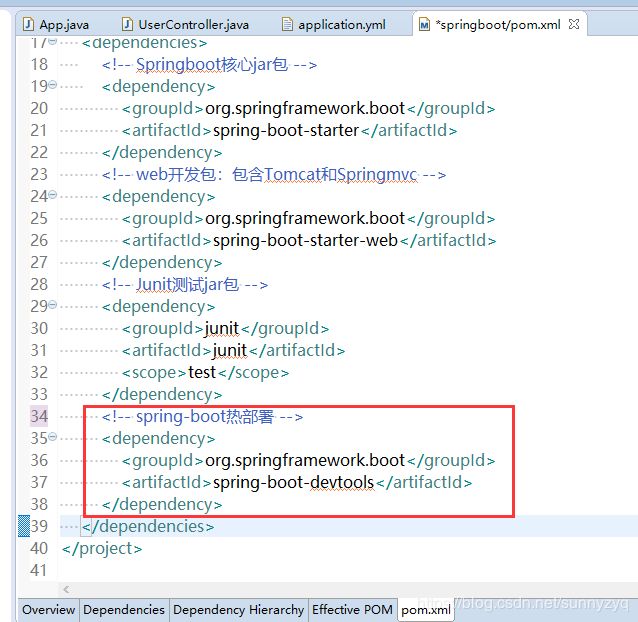
(4.1)打开pom.xml,加入下面依赖,最后重启一次项目。
    org.springframework.boot
    spring-boot-devtools
(4.2)然后修改返回页面的语句,保存,你会发现项目可以自动重启了。
(4.3)并且也能访问成功,说明我们的热部署也已经配置成功了。
【05】配置 Thymeleaf
现在后台已经OK,后台的数据需要显示到前端,我们这里前端显示,用springboot常配套的 thymeleaf(相当于c标签),
这个使用起来很简单,基本一用就会,会c标签的更是一点即通。
下面是我对thymeleaf常用使用方式总结,不懂的可以看看https://blog.csdn.net/sunnyzyq/article/details/86685697
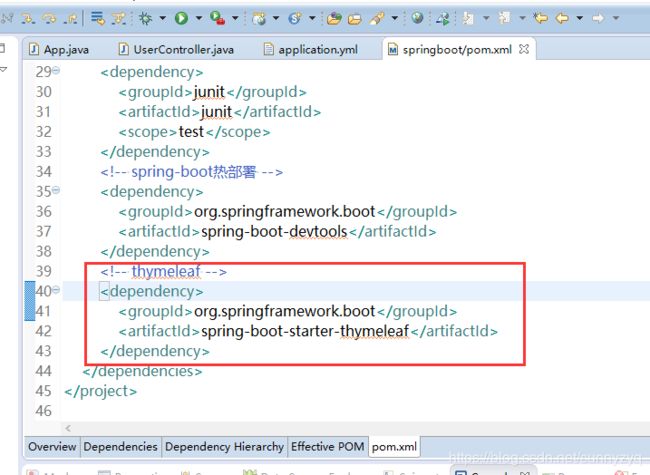
(5.1)在pom.xml中加入thymeleaf
    org.springframework.boot
    spring-boot-starter-thymeleaf
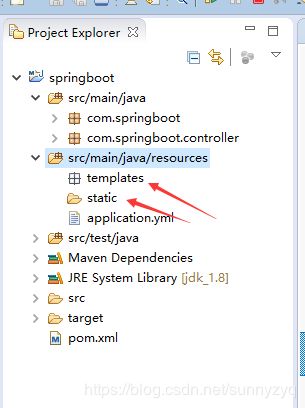
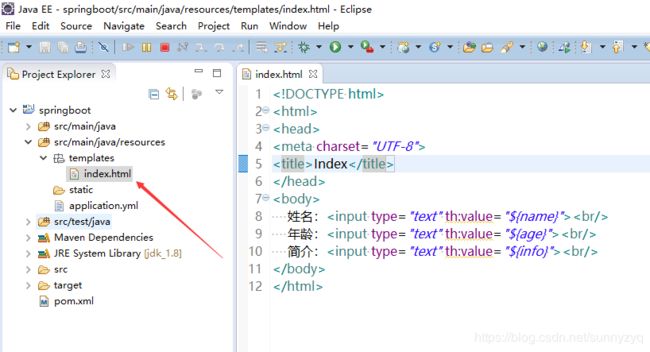
(5.2)在resoures文件夹下分别创建templates(主要放html文件)和static(主要放css、js文件)文件夹
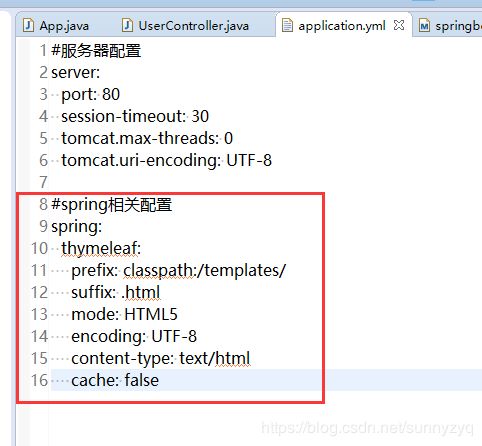
(5.3)配置thymeleaf(这样配置后,再代码中返回到那个页面就不用写过多的前缀和后缀了,达到简化效果)
spring:
  thymeleaf:
    prefix: classpath:/templates/
    suffix: .html
    mode: HTML5
    encoding: UTF-8
    content-type: text/html
    cache: false
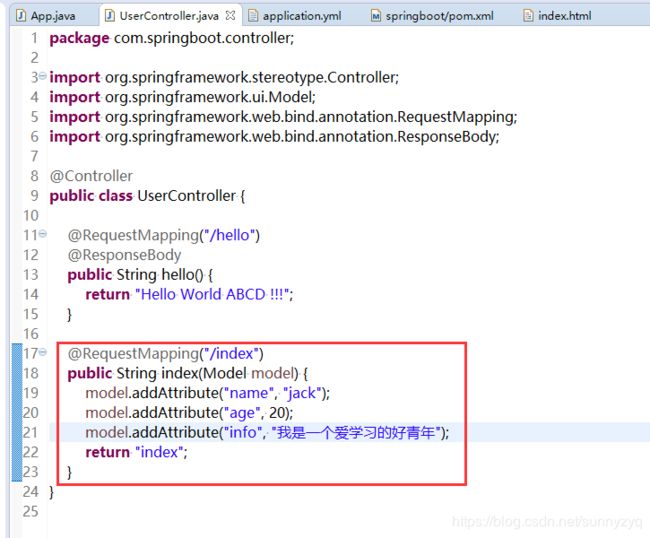
(5.4)再UserController.java文件中加入如下代码,保存。
	@RequestMapping("/index")
	public String index(Model model) {
		model.addAttribute("name", "jack");
		model.addAttribute("age", 20);
		model.addAttribute("info", "我是一个爱学习的好青年");
		return "index";
	}
(5.5)在 templates 文件夹下加入页面 index.html
Index


    姓名:

    年龄:

    简介:
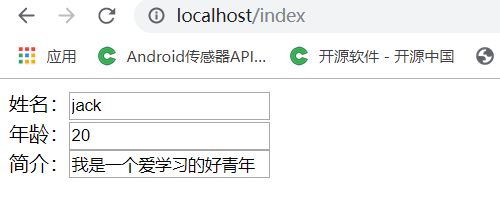
(5.5)由于配置文件进行了修改,这一次我们需要手动重启项目,启动后,输入 localhost/index 访问,可以看到数据已经成功显示到页面上了。
到此为止,我们前台、后台已经打通了,接下来就差最后一步了,把数据存入数据库。
接下来,我们就采用 mybatis 将数据写入到数据库中。
首先到数据库肯定需要jdbc连接容器和mybatis的相关jar包。
【06】配置数据库链接
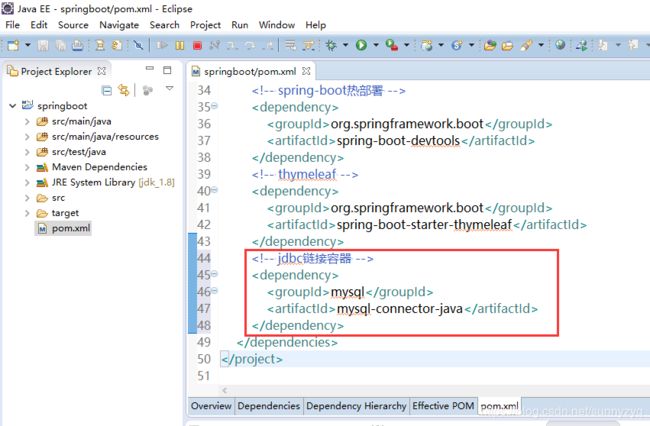
(6.1)在pom.xml中加入jdbc链接容器相关jar包。
    mysql
    mysql-connector-java
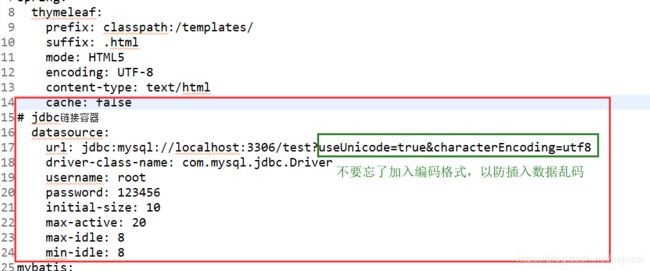
(6.2)配置数据库相关信息(注意datasource的层级是在spring下):
有数据库名称(我这里取名为boot)、数据库用户名、数据库密码等配置信息(这里你需要填你的数据库帐号和密码),我第一次配置的时候忘了加编码格式,导致添加到数据库的数据乱码,所以一定不要忘记加useUnicode=true&characterEncoding=utf8
  datasource:
    url: jdbc:mysql://localhost:3306/test?useUnicode=true&characterEncoding=utf8
    driver-class-name: com.mysql.jdbc.Driver
    username: root
    password: 123456
    initial-size: 10
    max-active: 20
    max-idle: 8
    min-idle: 8
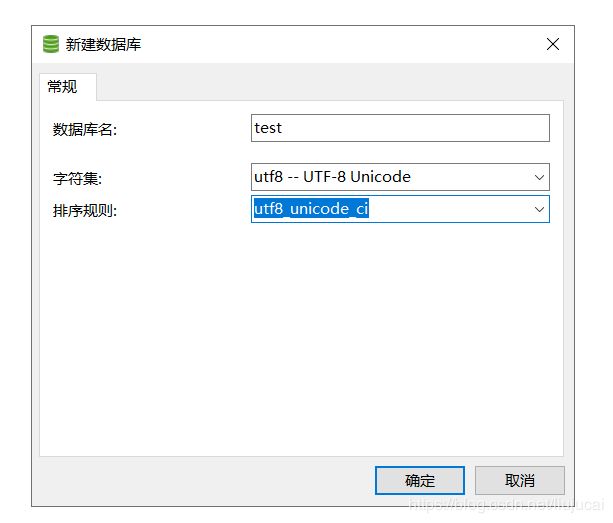
(6.3)在你的mysql中创建对应的数据库,名称和你的配置保持一致。
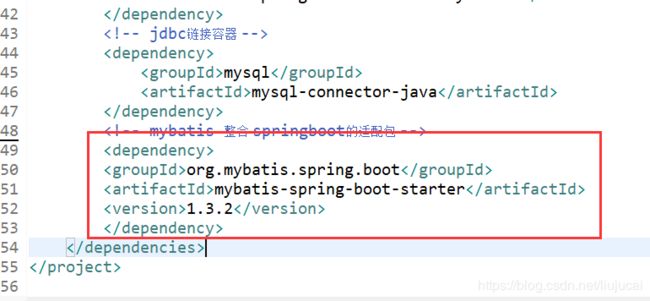
(6.4)加入pom.xml 加入mybatis相关jar包
	    org.mybatis.spring.boot
	    mybatis-spring-boot-starter
	    1.3.2
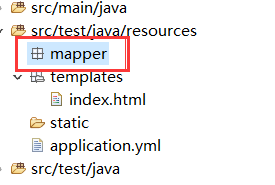
(6.5)我们在resources文件夹下新建mapper文件夹,用于存放MyBatis映射文件
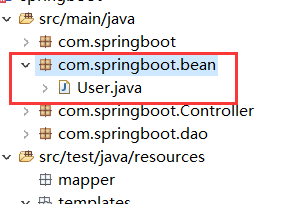
(6.6)创建user实体类
package com.springboot.bean;

public class User {
  private int id;
  private String name;
public int getId() {
	return id;
}
public void setId(int id) {
	this.id = id;
}
public String getName() {
	return name;
}
public void setName(String name) {
	this.name = name;
}
@Override
public String toString() {
	return "User [id=" + id + ", name=" + name + "]";
}

}
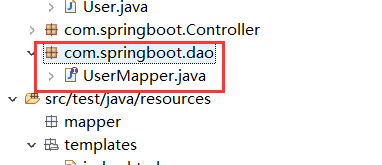
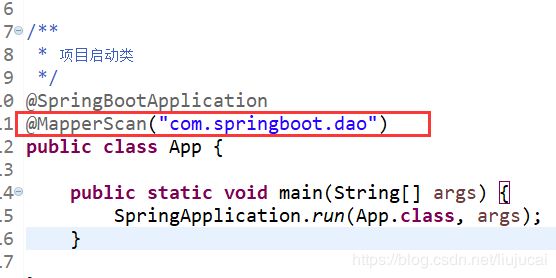
(6.7)创建dao层并在App.java(即项目启动类)增加@MapperScan(“com.springboot.dao”),对应DAO层的包名
package com.springboot.dao;

import org.mybatis.spring.annotation.MapperScan;

import com.springboot.bean.User;

import org.apache.ibatis.annotations.Insert;
import org.apache.ibatis.annotations.Param;
import org.apache.ibatis.annotations.Select;
import java.util.List;
@MapperScan
public interface UserMapper {
	@Select("select id,name from test")
    List select();

    @Insert("insert into test(name) values(#{name})")
    int insert(@Param("name") String name);

}
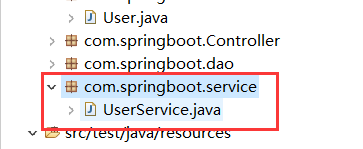
(6.8) 创建Service层
package com.springboot.service;

import org.springframework.beans.factory.annotation.Autowired;
import org.springframework.stereotype.Service;

import com.springboot.bean.User;
import com.springboot.dao.UserMapper;
import java.util.List;

@Service
public class UserService {

    @Autowired
    private UserMapper userMapper;

    public List select() {
        return userMapper.select();
    }

    public int insert(String name) {
        return userMapper.insert(name);
    }
}
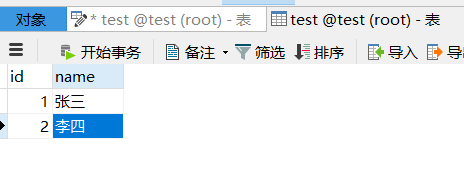
(6.9) 创建数据库表
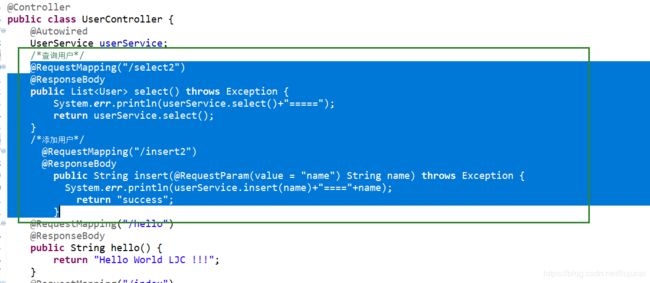
(7.1)在UserController类中增加 查询,添加用户的方法:
@Autowired
	UserService userService;

	/*查询用户*/
	@RequestMapping("/select2")
	@ResponseBody
    public List select() throws Exception {
		System.err.println(userService.select()+"=====");
        return userService.select();
    }
	/*添加用户*/
	  @RequestMapping("/insert2")
	  @ResponseBody
	    public String insert(@RequestParam(value = "name") String name) throws Exception {
		  System.err.println(userService.insert(name)+"===="+name);
	        return "success";
	    }
(7.2)重启项目,访问 localhost/select2
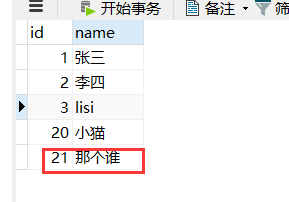
(7.3)访问 localhost/insert2?name=那个谁
然后到数据库查看,数据插入成功
截至这里,Spring Boot已成功整合MyBatis并连接上了数据库,且测试正常。
附加配置可有可无: 配置本地日志文件
(8.1)首先添加日志依赖
	org.springframework.boot
	spring-boot-starter-logging


	commons-logging
	commons-logging
	1.1.1
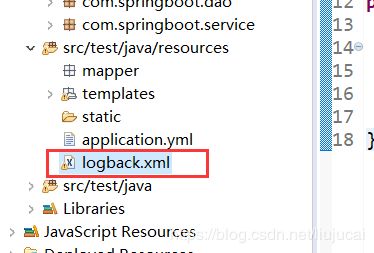
(8.2)在resources下新建logback.xml(默认文件名),配置如下
            ${CONSOLE_LOG_PATTERN}
            utf8


            ${LOG_HOME}/myInfoLog%d{yyyy-MM-dd}.log

            30


            info
            ACCEPT
            DENY


            %d{yyyy-MM-dd HH:mm:ss.SSS} [%thread] %-5level %logger{50} - %msg%n


            10MB


            ${LOG_HOME}/myErrorLog%d{yyyy-MM-dd}.log

            30


            error
            ACCEPT
            DENY


            %d{yyyy-MM-dd HH:mm:ss.SSS} [%thread] %-5level %logger{50} - %msg%n


            10MB
运行项目,输出结果如下:
