windows10 安装MongoDB4.0.9
1、进入MongoDB官网下载
在MongoDB官网的导航栏选择Products-->SOFTWARE-->MongoDBServer
2、安装
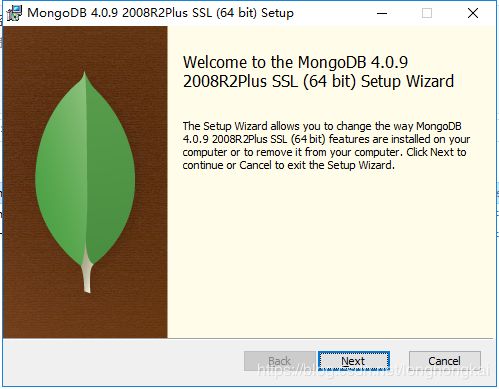
双击安装文件mongodb-win32-x86_64-2008plus-ssl-4.0.9-signed.msi
点击next
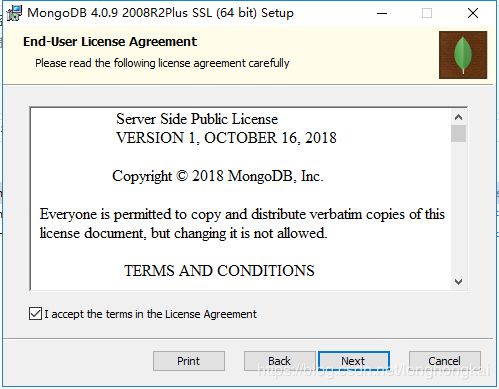
选择i accept点击next
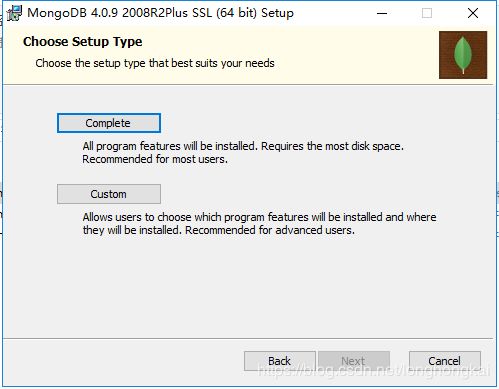
选择Custom(也可以选择第一个默认安装)
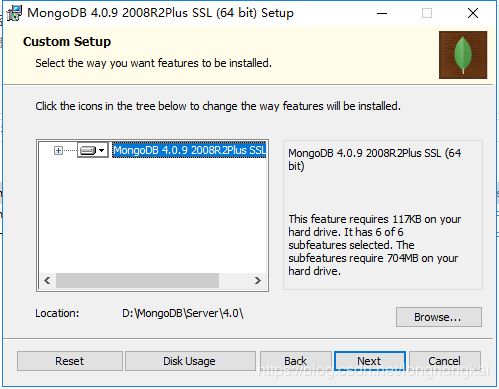
点击Browse选择安装路径,然后ok,next
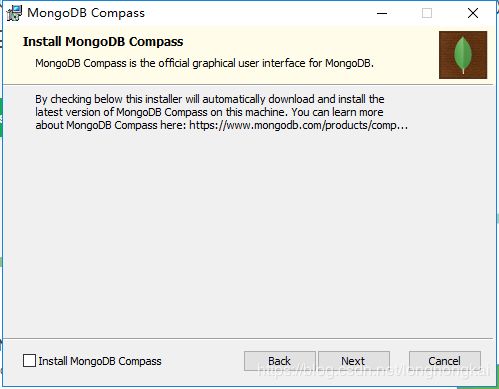
把左下角的√去掉,否则安装会等很久...很久...很久.....(当然你不急就可以直接next),next
install
安装中会出项问题,直接点击Ignore,然后finish
3、配置
这是安装好后的文件
创建一个mongodb.txt文件,输入以下信息(按自己的安装路径进行修改)
#数据库路径
dbpath=D:\MongoDB\Server\4.0\data
#日志输出文件路径
logpath=D:\MongoDB\Server\4.0\log\mongo.log
#错误日志采用追加模式
logappend=true
#启用日志文件,默认启用
journal=true
#这个选项可以过滤掉一些无用的日志信息,若需要调试使用请设置为false
quiet=true
#端口号 默认为27017
port=27017
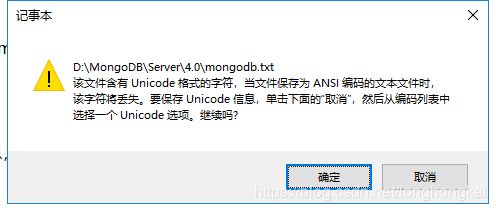
保存时出现这个警告,点击取消
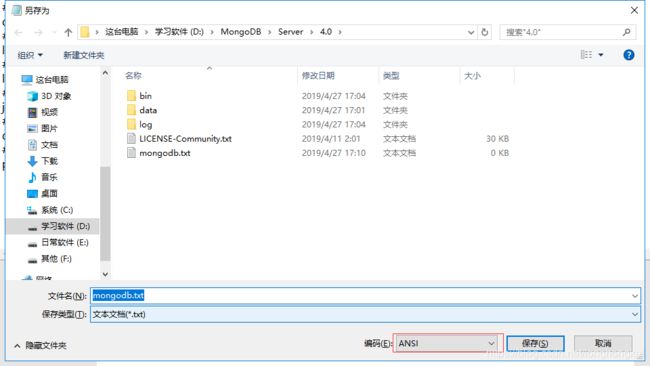
在编码的位置选择Unicode,并选择保存,替换-->是
然后给mongodb.txt重命名为mongodb.conf
然后打开Windows PowerShell(管理员),输入进入mongodb的bin文件夹
cd D:\MongoDB\Server\4.0\bin输入,路径就是刚才配置的数据库路径
./mongod --dbpath D:\MongoDB\Server\4.0\data此时腾讯管家会拦截,点击允许
执行成功
PS D:\MongoDB\Server\4.0\bin> ./mongod --dbpath D:\MongoDB\Server\4.0\data
2019-04-27T02:23:24.323-0700 I CONTROL  [main] Automatically disabling TLS 1.0, to force-enable TLS 1.0 specify --sslDisabledProtocols 'none'
2019-04-27T02:23:24.325-0700 I CONTROL  [initandlisten] MongoDB starting : pid=5084 port=27017 dbpath=D:\MongoDB\Server\4.0\data 64-bit host=DESKTOP-OI912J3
2019-04-27T02:23:24.325-0700 I CONTROL  [initandlisten] targetMinOS: Windows 7/Windows Server 2008 R2
2019-04-27T02:23:24.325-0700 I CONTROL  [initandlisten] db version v4.0.9
2019-04-27T02:23:24.325-0700 I CONTROL  [initandlisten] git version: fc525e2d9b0e4bceff5c2201457e564362909765
2019-04-27T02:23:24.326-0700 I CONTROL  [initandlisten] allocator: tcmalloc
2019-04-27T02:23:24.326-0700 I CONTROL  [initandlisten] modules: none
2019-04-27T02:23:24.326-0700 I CONTROL  [initandlisten] build environment:
2019-04-27T02:23:24.326-0700 I CONTROL  [initandlisten]     distmod: 2008plus-ssl
2019-04-27T02:23:24.326-0700 I CONTROL  [initandlisten]     distarch: x86_64
2019-04-27T02:23:24.326-0700 I CONTROL  [initandlisten]     target_arch: x86_64
2019-04-27T02:23:24.326-0700 I CONTROL  [initandlisten] options: { storage: { dbPath: "D:\MongoDB\Server\4.0\data" } }
2019-04-27T02:23:24.359-0700 I STORAGE  [initandlisten] wiredtiger_open config: create,cache_size=7638M,session_max=20000,eviction=(threads_min=4,threads_max=4),config_base=false,statistics=(fast),log=(enabled=true,archive=true,path=journal,compressor=snappy),file_manager=(close_idle_time=100000),statistics_log=(wait=0),verbose=(recovery_progress),
2019-04-27T02:23:24.659-0700 I STORAGE  [initandlisten] WiredTiger message [1556357004:658956][5084:140713289665616], txn-recover: Set global recovery timestamp: 0
2019-04-27T02:23:24.961-0700 I RECOVERY [initandlisten] WiredTiger recoveryTimestamp. Ts: Timestamp(0, 0)
2019-04-27T02:23:25.285-0700 I CONTROL  [initandlisten]
2019-04-27T02:23:25.286-0700 I CONTROL  [initandlisten] ** WARNING: Access control is not enabled for the database.
2019-04-27T02:23:25.286-0700 I CONTROL  [initandlisten] **          Read and write access to data and configuration is unrestricted.
2019-04-27T02:23:25.287-0700 I CONTROL  [initandlisten]
2019-04-27T02:23:25.287-0700 I CONTROL  [initandlisten] ** WARNING: This server is bound to localhost.
2019-04-27T02:23:25.287-0700 I CONTROL  [initandlisten] **          Remote systems will be unable to connect to this server.
2019-04-27T02:23:25.287-0700 I CONTROL  [initandlisten] **          Start the server with --bind_ip  to specify which IP
2019-04-27T02:23:25.287-0700 I CONTROL  [initandlisten] **          addresses it should serve responses from, or with --bind_ip_all to
2019-04-27T02:23:25.287-0700 I CONTROL  [initandlisten] **          bind to all interfaces. If this behavior is desired, start the
2019-04-27T02:23:25.288-0700 I CONTROL  [initandlisten] **          server with --bind_ip 127.0.0.1 to disable this warning.
2019-04-27T02:23:25.288-0700 I CONTROL  [initandlisten]
2019-04-27T17:23:25.290+0800 I STORAGE  [initandlisten] createCollection: admin.system.version with provided UUID: 4564c88b-d3a3-4bd0-ab45-c86826931178
2019-04-27T17:23:25.599+0800 I COMMAND  [initandlisten] setting featureCompatibilityVersion to 4.0
2019-04-27T17:23:25.609+0800 I STORAGE  [initandlisten] createCollection: local.startup_log with generated UUID: 13855818-1d1c-48ac-8414-b526e2f5234b
2019-04-27T17:23:26.199+0800 I FTDC     [initandlisten] Initializing full-time diagnostic data capture with directory 'D:/MongoDB/Server/4.0/data/diagnostic.data'
2019-04-27T17:23:26.201+0800 I NETWORK  [initandlisten] waiting for connections on port 27017
2019-04-27T17:23:26.201+0800 I STORAGE  [LogicalSessionCacheRefresh] createCollection: config.system.sessions with generated UUID: ed1945b0-03c0-4a99-905a-6618767f2536
2019-04-27T17:23:26.473+0800 I INDEX    [LogicalSessionCacheRefresh] build index on: config.system.sessions properties: { v: 2, key: { lastUse: 1 }, name: "lsidTTLIndex", ns: "config.system.sessions", expireAfterSeconds: 1800 }
2019-04-27T17:23:26.473+0800 I INDEX    [LogicalSessionCacheRefresh]     building index using bulk method; build may temporarily use up to 500 megabytes of RAM
2019-04-27T17:23:26.500+0800 I INDEX    [LogicalSessionCacheRefresh] build index done.  scanned 0 total records. 0 secs
2019-04-27T17:23:26.500+0800 I COMMAND  [LogicalSessionCacheRefresh] command config.$cmd command: createIndexes { createIndexes: "system.sessions", indexes: [ { key: { lastUse: 1 }, name: "lsidTTLIndex", expireAfterSeconds: 1800 } ], $db: "config" } numYields:0 reslen:114 locks:{ Global: { acquireCount: { r: 2, w: 2 } }, Database: { acquireCount: { w: 2, W: 1 } }, Collection: { acquireCount: { w: 2 } } } storage:{} protocol:op_msg 298ms
再打开一个Windows PowerShell(管理员),进入mongodb的bin文件夹,然后执行
./mongo如果安全软件拦截了就点击允许
发现已进入mongodb的客户端
PS C:\windows\system32> cd D:\MongoDB\Server\4.0\bin
PS D:\MongoDB\Server\4.0\bin> ./mongo
MongoDB shell version v4.0.9
connecting to: mongodb://127.0.0.1:27017/?gssapiServiceName=mongodb
Implicit session: session { "id" : UUID("fe389707-9a92-440f-95a5-996218afb8c9") }
MongoDB server version: 4.0.9
Server has startup warnings:
2019-04-27T02:23:25.285-0700 I CONTROL  [initandlisten]
2019-04-27T02:23:25.286-0700 I CONTROL  [initandlisten] ** WARNING: Access control is not enabled for the database.
2019-04-27T02:23:25.286-0700 I CONTROL  [initandlisten] **          Read and write access to data and configuration is unrestricted.
2019-04-27T02:23:25.287-0700 I CONTROL  [initandlisten]
2019-04-27T02:23:25.287-0700 I CONTROL  [initandlisten] ** WARNING: This server is bound to localhost.
2019-04-27T02:23:25.287-0700 I CONTROL  [initandlisten] **          Remote systems will be unable to connect to this server.
2019-04-27T02:23:25.287-0700 I CONTROL  [initandlisten] **          Start the server with --bind_ip  to specify which IP
2019-04-27T02:23:25.287-0700 I CONTROL  [initandlisten] **          addresses it should serve responses from, or with --bind_ip_all to
2019-04-27T02:23:25.287-0700 I CONTROL  [initandlisten] **          bind to all interfaces. If this behavior is desired, start the
2019-04-27T02:23:25.288-0700 I CONTROL  [initandlisten] **          server with --bind_ip 127.0.0.1 to disable this warning.
2019-04-27T02:23:25.288-0700 I CONTROL  [initandlisten]
---
Enable MongoDB's free cloud-based monitoring service, which will then receive and display
metrics about your deployment (disk utilization, CPU, operation statistics, etc).

The monitoring data will be available on a MongoDB website with a unique URL accessible to you
and anyone you share the URL with. MongoDB may use this information to make product
improvements and to suggest MongoDB products and deployment options to you.

To enable free monitoring, run the following command: db.enableFreeMonitoring()
To permanently disable this reminder, run the following command: db.disableFreeMonitoring()
---

>
4、配置mongodb服务
通过windows中的服务来启动mongodb,如果出现这个错误
首先要删除windows中的服务
sc delete MongoDBMongoDB就是服务名称(注意!!!不是显示名称),在服务上右键属性可以查看,经过测试发现Windows PowerShell运行这个命令没有效果,所有在C:\Windows\System32文件夹中找到cmd.exe(或者在c盘搜索)右键-->以管理员身份运行,然后进入mongodb的bin目录,再执行上面的命令
D:\MongoDB\Server\4.0\bin>sc delete MongoDB
[SC] DeleteService 成功
执行成功
然后执行下面这么命令,serviceName是服务名称,serviceDisplayName是服务显示名称
如果还要设置其他的参数,可以输入mongod --help查看
mongod --logpath D:\MongoDB\Server\4.0\log\mongodb.log --logappend --dbpath D:\MongoDB\Server\4.0\data --serviceName MongoDB --serviceDisplayName "MongoDB Server" --install然后刷新服务就可以看到MongoDB服务,右键启动成功
参考:
https://blog.csdn.net/LiDaShaIYyh/article/details/84872106
https://blog.csdn.net/u013452296/article/details/84778807
https://blog.csdn.net/u011692780/article/details/81223525
