spring-restdocs-mockmvc\asciidoctor 系列文章-restdocs详细教程-入门篇
restdocs详细教程-入门篇
本章内容:
- 一个初始spring boot2 web项目
- controller 测试用例
- spring-restdocs初探,最基本最简单的配置看到一个html文档
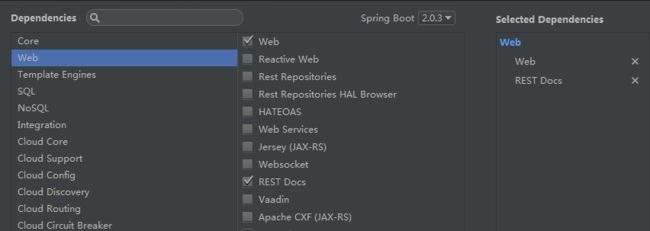
spring boot2 项目搭建
从ui选择创建spring boot 2 项目后,build.gradle 如下所示的初始化配置
buildscript {
    ext {
        springBootVersion = '2.0.3.RELEASE'
    }
    repositories {
        mavenCentral()
    }
    dependencies {
        classpath("org.springframework.boot:spring-boot-gradle-plugin:${springBootVersion}")
    }
}

apply plugin: 'java'
apply plugin: 'eclipse'
apply plugin: 'org.springframework.boot'
apply plugin: 'io.spring.dependency-management'

group = 'cn.mrcode.example.spring.restdocs'
version = '0.0.1-SNAPSHOT'
sourceCompatibility = 1.8

repositories {
    mavenCentral()
}


dependencies {
    compile('org.springframework.boot:spring-boot-starter-web')
    testCompile('org.springframework.boot:spring-boot-starter-test')
    testCompile('org.springframework.restdocs:spring-restdocs-mockmvc')
}
编写HelloWordDocsController
    @GetMapping("/fun1")
    public List fun1() {
        return Arrays.asList(1, 2, 3, 4, 5, 6, 7, 8);
    }
编写HelloWordDocsControllerTest测试类
@RunWith(SpringRunner.class)
@SpringBootTest
public class HelloWordDocsControllerTest {
    @Rule
    public final JUnitRestDocumentation restDocumentation = new JUnitRestDocumentation();
    @Autowired
    private WebApplicationContext context;

    private MockMvc mockMvc;

    @Before
    public void setUp() {
        this.mockMvc = MockMvcBuilders.webAppContextSetup(this.context)
                // 这一段配置是 https://docs.spring.io/spring-restdocs/docs/current/reference/html5/ 官网中的配置
                // 不需要生成文档的话 不用配置该项
                .apply(documentationConfiguration(this.restDocumentation))
                .build();
    }

    @Test
    public void fun1() throws Exception {
        mockMvc.perform(MockMvcRequestBuilders.get("/fun1")) // 请求
                .andExpect(MockMvcResultMatchers.status().isOk()) // 断言HTTP状态为200,否则异常
                .andDo(MockMvcRestDocumentation  // 增加文档;原理就是收集一些请求响应数据按照asciidoctor语法生成“.adoc”文件;
                               .document("fun1"));   // 这个api就是专为生成asciidoctor的配置api;更详细的配置可以参考他的官网
    }
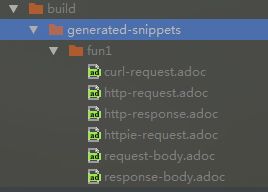
运行 fun1() 测试方法后,会默认在build/generated-snippets中生成fun1文档目录和响应的代码片断,如下图
这里生成的代码片断,也就是fun1目录下的.adoc文件,打开看的话都是很简单的 asciidoctor 语法;可以看到之前说的 spring提供的api就是为了抓取到相应的数据,然后按照 asciidoctor 语法生成文件;
使用插件把这个代码片断转成 html文件
需要在build.gradle中增加配置; 增加的配置项 都在 rest doc 1-4 之间进行了描述和说明
buildscript {
    ext {
        springBootVersion = '2.0.3.RELEASE'
    }
    repositories {
        mavenCentral()
    }
    dependencies {
        classpath("org.springframework.boot:spring-boot-gradle-plugin:${springBootVersion}")
    }
}
plugins {
    // rest doc 2 转换成html的插件
    id "org.asciidoctor.convert" version "1.5.3"
}

apply plugin: 'java'
apply plugin: 'eclipse'
apply plugin: 'org.springframework.boot'
apply plugin: 'io.spring.dependency-management'

group = 'cn.mrcode.example.spring.restdocs'
version = '0.0.1-SNAPSHOT'
sourceCompatibility = 1.8

repositories {
    mavenCentral()
    // rest doc 1  org.asciidoctor.convert 插件不在中央仓库,增加该仓库地址
    maven { url 'https://repo.spring.io/libs-snapshot' }
}

ext {
    // rest doc 3 定义版本号
    springRestdocsVersion = '2.0.2.BUILD-SNAPSHOT'
}

dependencies {
    compile('org.springframework.boot:spring-boot-starter-web')
    testCompile('org.springframework.boot:spring-boot-starter-test')
    testCompile('org.springframework.restdocs:spring-restdocs-mockmvc')

    // rest doc 4 增加依赖;这个依赖很重要,就算其他步骤都配置好了,这里依赖没有增加
    // 将不会看到被转换的代码片断
    asciidoctor "org.springframework.restdocs:spring-restdocs-asciidoctor:${springRestdocsVersion}"
}
配置完成后,我们运行gradle命令
$ gradle asciidoctor

# 运行命令需要注意下:如果你构建gradle的时候不是选择本地的gradle版本
# 而是选择 gradle/wrapper 的形式,那么有可能命令行中的gradle版本和项目版本不一致的情况
# 所以注意版本统一,如果出现什么异常到时候不找到错误
# 最好就是使用idea右侧 gradle面板中的ui去触发,这样就使用的是项目中依赖的gradle了
却发现什么也没有发生,也没有生成什么文件;这是由于少了一个步骤:
为插件编写所需入口文件
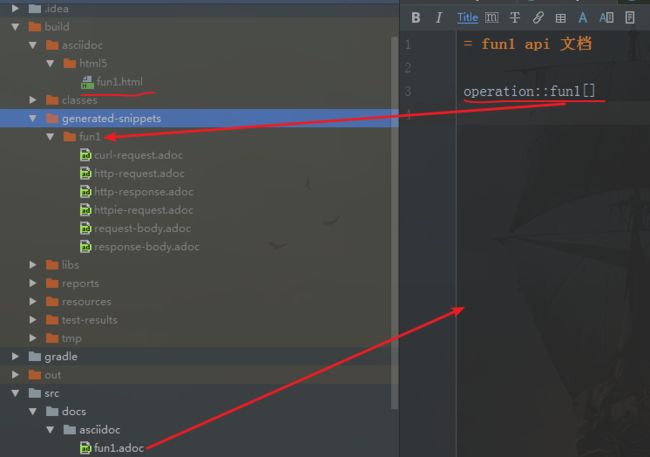
这个转换插件会在 src/docs/asciidoc 目录中寻找入口文件;然后转换此文件(这里一个文件会转换成一个页面);
上图的语法,operation::fun1[] 标识引用之前生成的代码片断目录下的所有文件,按照插件默认格式进行转换
对于这个语法我没有在asciidoctor文档中找到,记不起来在什么地方看到的了,有可能是 这个转换插件的功能
但是无关紧要,后面自定义排版的时候不会用到这个语法
步骤:
- 在
src/docs/assciidoc中新增fun1.adoc文件 - 运行 gradle asciidoctor 命令
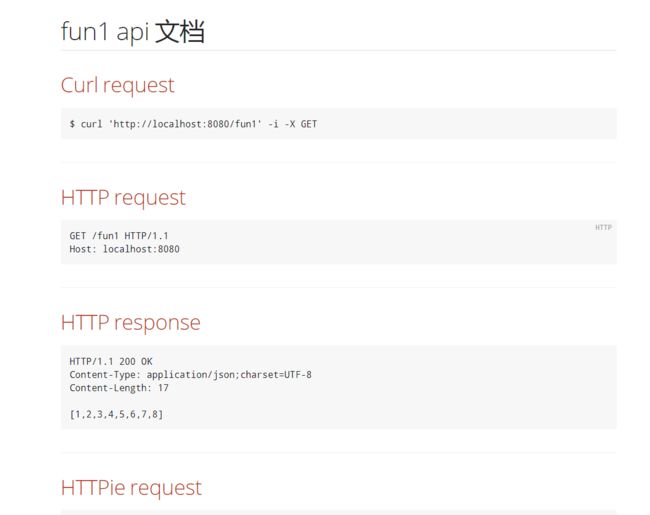
就能看到在 build/asciidoc/html5 中生成了一个同名的html文件;可以直接打开的

如果你仔细观察这个页面的结构,就知道 默认的格式只是把之前运行 test 方法生成的代码片断给拼起来了;
这里也证明了 spring api 提供的功能只是提供程序来控制一些数据的生成符合asciidoctor语法的文件;
如果你懂markdown,或则 gitbook的话,这就不难明白,先文件,然后再编译成html;
restdocs详细教程-入门篇 结束,下一章节实现自定义格式和信息的教程;实现一个 常见的api文档;
spring-restdocs-mockmvc\asciidoctor 系列文章-目录


