使用TensorFlow Lite将ssd_mobilenet移植至安卓客户端
最近开始入门深度学习,想将训练好的手势识别ssd_mobilenet模型移植到安卓上,网上找了一些资料,在不断的尝试中终于成功了,现整理一下实现的步骤,可能出现遗漏错误等情况请大家指点。
(网上看到说有两种移植方法,这里我只讲述自己成功的方法)
系统环境:Ubuntu 16.04.4
python3.6.5
参考官方给出的步骤:
https://github.com/tensorflow/models/blob/master/research/object_detection/g3doc/running_on_mobile_tensorflowlite.md
1、下载TensorFlow源码:
git clone https://github.com/tensorflow/tensorflow.git
使用TensorFlow object_detection API ssd_mobilenet模型训练可参考:https://github.com/tensorflow/models/blob/master/research/object_detection/g3doc/running_pets.md
https://blog.csdn.net/csdn_6105/article/details/82933628
这里不详细写object_detection训练数据生成模型过程,可参考其他资料。
2、通过export_tflite_ssd_graph.py将训练后的模型导出所需要的文件:
TensorFlow lite官网的方法:
export CONFIG_FILE=PATH_TO_BE_CONFIGURED/pipeline.config

export CHECKPOINT_PATH=PATH_TO_BE_CONFIGURED/model.ckpt

export OUTPUT_DIR=/tmp/tflite 注:#(CONFIG_FILE:模型训练完成后的pipeline.config文件位置)
#(CHECKPOINT_PATH:模型训练完成后生成的.ckpt文件位置,以实际名为准)
#(OUTPUT_DTR:根据自己实际目录用于存放导出的文件)
object_detection/export_tflite_ssd_graph.py \

--pipeline_config_path=$CONFIG_FILE \

--trained_checkpoint_prefix=$CHECKPOINT_PATH \

--output_directory=$OUTPUT_DIR \

--add_postprocessing_op=true
本人实际命令:
(1)首先进入TensorFlow工程的research目录下
cd /xxx/tensorflow/models/research/

export PYTHONPATH=$PYTHONPATH:`pwd`:`pwd`/slim
(2)执行object_detection目录下的export_tflite_ssd_graph.py
python object_detection/export_tflite_ssd_graph.py
--pipeline_config_path=/data/hand_data/models/model/train/mobilenet_ssd_025/pipeline.config
--trained_checkpoint_prefix=/data/hand_data/models/model/train/mobilenet_ssd_025/model.ckpt-41306
--output_directory=/data/hand_data/models/model/train/mobilenet_ssd_025
--add_postprocessing_op=true
运行后将在output_directory目录生成tflite_graph.pb 和tflite_graph.pbtxt两个文件。
(3)安装bazel工具,编译转换工具:
下载地址及各系统安装方法https://docs.bazel.build/versions/master/install.html
安装完成后开始编译转换工具:
进入TensorFlow目录,以实际工程目录地址为主
cd tensorflow/

bazel build tensorflow/python/tools:freeze_graph

bazel build tensorflow/contrib/lite/toco:toco
(4)利用bazel生成tflite文件:
官网给出两种命令:
a、
bazel run --config=opt tensorflow/contrib/lite/toco:toco -- \

--input_file=$OUTPUT_DIR/tflite_graph.pb \

--output_file=$OUTPUT_DIR/detect.tflite \

--input_shapes=1,300,300,3 \

--input_arrays=normalized_input_image_tensor \

--output_arrays='TFLite_Detection_PostProcess','TFLite_Detection_PostProcess:1','TFLite_Detection_PostProcess:2','TFLite_Detection_PostProcess:3' \

--inference_type=QUANTIZED_UINT8 \

--mean_values=128 \

--std_values=128 \

--change_concat_input_ranges=false \

--allow_custom_ops
b、(本人采用此方法)
bazel run --config=opt tensorflow/contrib/lite/toco:toco -- \

--input_file=$OUTPUT_DIR/tflite_graph.pb \

--output_file=$OUTPUT_DIR/detect.tflite \

--input_shapes=1,300,300,3 \

--input_arrays=normalized_input_image_tensor \

--output_arrays='TFLite_Detection_PostProcess','TFLite_Detection_PostProcess:1','TFLite_Detection_PostProcess:2','TFLite_Detection_PostProcess:3'  \

--inference_type=FLOAT \

--allow_custom_ops
命令如下:
bazel run tensorflow/contrib/lite/toco:toco -- \
--input_file=/data/hand_data/models/model/train/mobilenet_ssd_025/tflite_graph.pb \
--output_file=/data/hand_data/models/model/train/mobilenet_ssd_025/detect1.tflite \
--input_shapes=1,128,128,3 \
--input_arrays=normalized_input_image_tensor \
--output_arrays='TFLite_Detection_PostProcess','TFLite_Detection_PostProcess:1','TFLite_Detection_PostProcess:2','TFLite_Detection_PostProcess:3' \
--inference_type=FLOAT \
--allow_custom_ops
执行后生成的detect.tflite便可移植至安卓客户端。
5、使用android studio打开TensorFlow源码工程的android目录(可能会出现安卓环境一些问题,本人不会安卓开发没法详细介绍)
我的android目录如下:E:\DataMining\handgesture\tensorflow-master\tensorflow\contrib\lite\examples\android
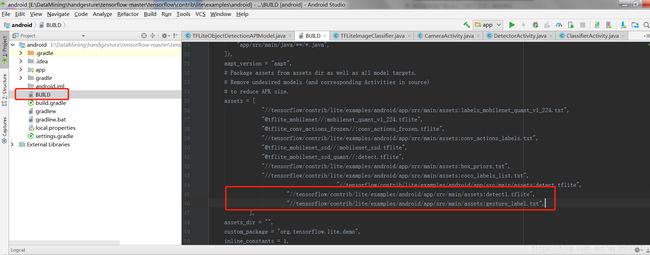
a、修改BUILD文件如下:
b、将转换后的detect1.tflite文件和对应的标签数据拷贝至assets目录下:
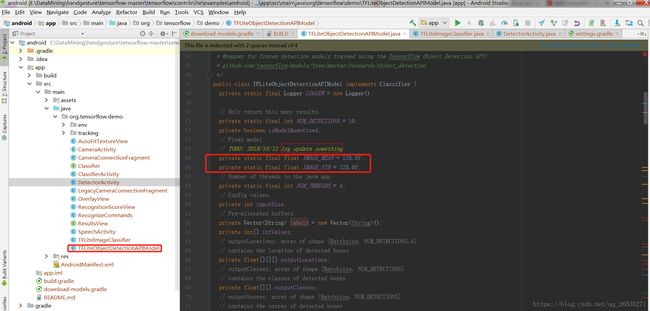
c、修改java目录下DetectorActivity和TFLiteObjectDetectionAPIModel程序:
由于我训练的模型设置图片大小是128*128,TF_OD_API_INPUT_SIZE设置为128;
转换生成detect1.tflite文件采用的是float类型,TF_OD_API_IS_QUANTIZED设置为false
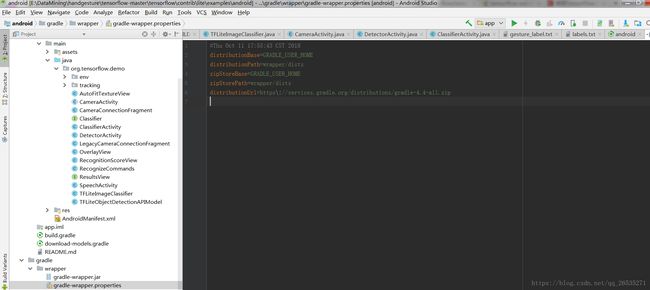
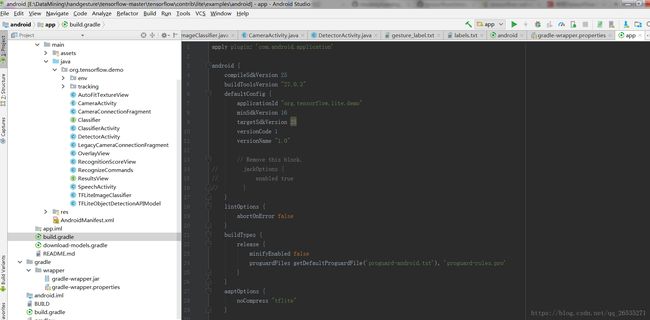
d、该工程安卓环境配置如下(不懂安卓开发,贴上自己的配置文件):
安卓上实际效果:
最后感谢安卓大神同事帮我解决各种移植到安卓时出错的问题
参考资料:
- https://blog.csdn.net/xiji321/article/details/77163550
- https://blog.csdn.net/qq_33200967/article/details/82773677
- https://blog.csdn.net/dongchangzhang/article/details/60886015


