Nginx+Tomcat+Memcached部署
目录
一、安装tomcat
二、创建一个动态web工程,并部署到tomcate上
三、安装Nginx,并配置负载均衡。
四、基于memcached配置tomcate,共享session
环境清单列表:
应用服务器1:192.168.51.10;
应用服务器2:192.168.55.110;
memcached服务器:192.168.51.75;
Nginx地址:192.168.51.75
注:打开linux防火墙端口
iptables 参考:https://blog.csdn.net/qq_27339781/article/details/80113868 二十六章
firewalld 参考:https://blog.csdn.net/qq_27339781/article/details/82153512
参看端口状态 参考:https://blog.csdn.net/qq_27339781/article/details/82193152
一、安装tomcat
参考:
安装jdk:https://www.cnblogs.com/zhjbbt/p/5862800.htm
安装tomcat: https://www.cnblogs.com/hanyinglong/p/5024643.html
注:如多tomcat在一台linux参考https://blog.csdn.net/qq_27339781/article/details/82388875
二、创建一个动态web工程,并部署到tomcate上
(1)测试项目下载地址:下载地址:链接: https://pan.baidu.com/s/1c2Waok4 密码: 2jaf
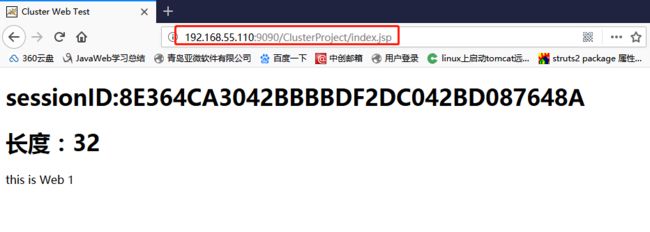
(2)重启Tomcat,并访问:http://192.168.55.110:9090/ClusterProject/index.jsp,如果出现下图,说明应用安装成功。
(3)把ClusterProject.war安装同样的方法,部署到192.168.51.10上。为了与192.168.55.110上的应用区分,修改index.jsp中
this is Web 1
为this is Web 2
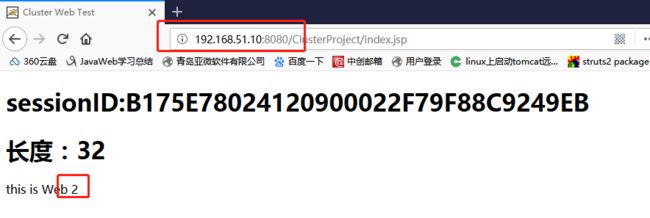
(4)访问:http://192.168.51.10:8080/ClusterProject/index.jsp,如下图所示
三、安装Nginx,并配置负载均衡。
(1)安装:参考:https://blog.csdn.net/qq_27339781/article/details/82156164
(2)修改Nginx的配置文件,/etc/nginx/nginx.conf,修改内容如下:(只需要添加红色字体部分。)
# For more information on configuration, see:
# * Official English Documentation: http://nginx.org/en/docs/
# * Official Russian Documentation: http://nginx.org/ru/docs/user nginx;
worker_processes 1;error_log /var/log/nginx/error.log;
#error_log /var/log/nginx/error.log notice;
#error_log /var/log/nginx/error.log info;pid /run/nginx.pid;
events {
worker_connections 1024;
}
http {
include /etc/nginx/mime.types;
default_type application/octet-stream;log_format main '$remote_addr - $remote_user [$time_local] "$request" '
'$status $body_bytes_sent "$http_referer" '
'"$http_user_agent" "$http_x_forwarded_for"';access_log /var/log/nginx/access.log main;
sendfile on;
#tcp_nopush on;#keepalive_timeout 0;
keepalive_timeout 65;#gzip on;
index index.html index.htm;
# Load modular configuration files from the /etc/nginx/conf.d directory.
# See http://nginx.org/en/docs/ngx_core_module.html#include
# for more information.
include /etc/nginx/conf.d/*.conf;upstream myweb{
server 192.168.51.10:8080;
server 192.168.55.110:9090;
}server {
listen 80 default_server;
server_name localhost;
root /usr/share/nginx/html;#charset koi8-r;
#access_log /var/log/nginx/host.access.log main;
# Load configuration files for the default server block.
include /etc/nginx/default.d/*.conf;location / {
proxy_pass http://myweb;
}# redirect server error pages to the static page /40x.html
#
error_page 404 /404.html;
location = /40x.html {
}# redirect server error pages to the static page /50x.html
#
error_page 500 502 503 504 /50x.html;
location = /50x.html {
}
}
}
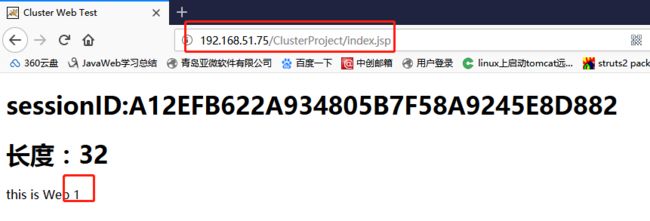
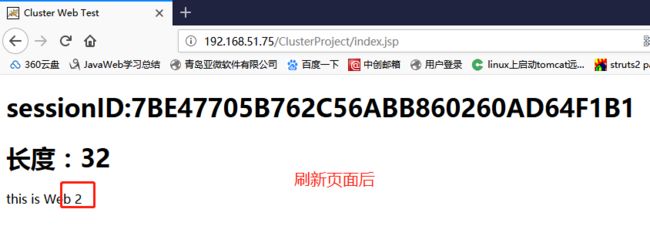
(3)访问Nginx:http://192.168.51.75/ClusterProject/index.jsp,第一次访问显示图一,刷新显示图二,说明第一次访问192.168.51.10,第二次访问192.168.55.110
至此负载均衡搭建完毕。
四、基于memcached配置tomcat,共享session
1、安装memcached,参考:https://blog.csdn.net/qq_27339781/article/details/82389419
2、 配置Tomcat
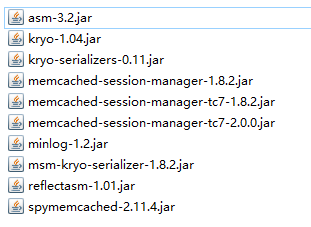
(1) 到tomcat的安装目录lib中,加入:需要的jar包
这里session序列化采用kryo,所有的jar包下载地址:链接: https://pan.baidu.com/s/1htV2vnm 密码: hkiy
maven下依赖如下:
asm
asm
3.2
com.couchbase.client
couchbase-client
1.4.11
com.googlecode
kryo
1.04
de.javakaffee
kryo-serializers
0.11
de.javakaffee.msm
memcached-session-manager
1.8.2
de.javakaffee.msm
memcached-session-manager-tc7
1.8.2
com.googlecode
minlog
1.2
de.javakaffee.msm
msm-kryo-serializer
1.8.2
com.esotericsoftware
reflectasm
1.01
net.spy
spymemcached
2.11.4
(2)在tomcat安装目录下的context.xml文件中加入:
className="de.javakaffee.web.msm.MemcachedBackupSessionManager"
memcachedNodes="n1:127.0.0.1:11211"
sticky="false"
sessionBackupAsync="false"
requestUriIgnorePattern=".*\.(ico|png|gif|jpg|jpeg|bmp|css|js|html|htm)$"
transcoderFactoryClass="de.javakaffee.web.msm.serializer.kryo.KryoTranscoderFactory"
/>
(3)在tomcat安装目录下的server.xml文件中加入:
第二个Tomcat中设置 jvmRoute="tomcat2", 用来区分tomcat
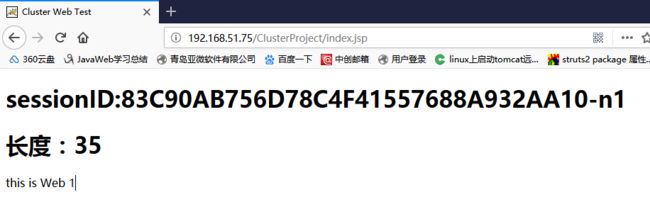
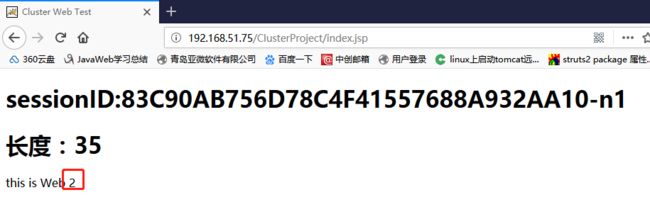
3、访问http://192.168.51.75/ClusterProject/index.jsp,并刷新界面,如下图所示
可以看到this is Web1变成this is web2,说明刷新访问了tomcat1和tomcat2,但是上面的sessionId没有变化,说明,实现了session共享。
至此,tomcat+Nginx+memcached,搭建的session共享集群完毕。
