Ububtu下使用源码安装Tensorflow GPU版本
截至2017年12月只有在安装了CUDA toolkit 8.0和CuDNN v6的64位Ubuntu下可以通过pip安装支持GPU的TensorFlow,对于其他的Linux版本和其他的CUDA/CuDNN版本的用户,需要通过源码进行安装来支持GPU。
选择Tensorflow版本
安装Tensorflow前先确认自己需要的版本,确定使用的版本后再往下进行。
由于需要使用bazel编译Tensorflow源码,需要CUDA和CUDNN实现GPU加速,所以确认Tensorflow版本后,还要确认bazel、CUDA、CUDNN版本。
部分版本配合结果如下
linux:
 比如此时需要在python27下使用bazel安装tensorflow_gpu-1.12.0,相应的我们选择bazel版本为0.15.0,CUDA版本为9.1,CUDNN版本为7.1。
安装bazel 0.15.0
CUDA 和CUDNN安装详见CUDA安装、CUDNN安装
在安装 bazel 时,要先安装 JDK8(按照官方网站安装就没问题:https://docs.bazel.build/versions/master/install.html)
- 安装JDK 8
sudo apt-get install openjdk-8-jdk
- 下载bazel 0.15.0
地址:bazel
将下载好的文件复制到HOME目录下,赋予权限:
chmod +x bazel-0.15.0-installer-linux-x86_64.sh
- 安装
./bazel-0.15.0-installer-linux-x86_64.sh --user
完成后会在HOME目录下生成一个bin文件夹
- 查看bazel 版本
bazel version

从上图可以看到,bazel版本是0.15.0。
编译安装Tensorflow
- 下载Tensorflow
git clone https://github.com/tensorflow/tensorflow
- 进入Tensorflow文件夹
cd tensorflow
- 查看Tensorflow版本
git branch -a
输出的版本信息
master
* origin/r1.12
  remotes/origin/0.6.0
  remotes/origin/ChrisAntaki-patch-1
  remotes/origin/HEAD -> origin/master
  remotes/origin/cherrypick
  remotes/origin/chihuahua-correct-metadata-path
  remotes/origin/master
  remotes/origin/merge_branch
  remotes/origin/meteorcloudy-patch-1
  remotes/origin/r0.10
  remotes/origin/r0.11
  remotes/origin/r0.12
  remotes/origin/r0.7
  remotes/origin/r0.8
  remotes/origin/r0.9
  remotes/origin/r1.0
  remotes/origin/r1.1
  remotes/origin/r1.10
  remotes/origin/r1.11
  remotes/origin/r1.12
  remotes/origin/r1.13
  remotes/origin/r1.2
  remotes/origin/r1.3
  remotes/origin/r1.4
  remotes/origin/r1.5
  remotes/origin/r1.6
  remotes/origin/r1.7
  remotes/origin/r1.8
  remotes/origin/r1.9
  remotes/origin/smit-hinsu-patch-1
  remotes/origin/terrytangyuan-patch-1
  remotes/origin/update-rel-notes
  remotes/origin/update-version
  remotes/origin/yifeif-patch-1
- 切换到1.12版本
git checkout origin/r1.12
- 执行配置信息文件:
./configure
会输出以下信息,需要输入python路径,指定CUDA和CUDNN版本号,其它的根据个人设置,一般选择no。
You have bazel 0.15.0 installed.
Please specify the location of python. [Default is /usr/bin/python]: /usr/bin/python


Found possible Python library paths:
    /opt/ros/indigo/lib/python2.7/dist-packages
    /usr/local/lib/python2.7/dist-packages
   /usr/lib/python2.7/dist-packages
Please input the desired Python library path to use. Default is [/opt/ros/indigo/lib/python2.7/dist-packages]
/usr/local/lib/python2.7/dist-packages

Do you wish to build TensorFlow with jemalloc as malloc support? [Y/n]: n
jemalloc as malloc support will be enabled for TensorFlow.

Do you wish to build TensorFlow with Google Cloud Platform support? [Y/n]: n
No Google Cloud Platform support will be enabled for TensorFlow.

Do you wish to build TensorFlow with Hadoop File System support? [Y/n]: n
No Hadoop File System support will be enabled for TensorFlow.

Do you wish to build TensorFlow with XLA JIT support? [y/N]: N
No XLA JIT support will be enabled for TensorFlow.

Do you wish to build TensorFlow with GDR support? [y/N]: N
No GDR support will be enabled for TensorFlow.

Do you wish to build TensorFlow with VERBS support? [y/N]: N
No VERBS support will be enabled for TensorFlow.

Do you wish to build TensorFlow with OpenCL support? [y/N]: N
No OpenCL support will be enabled for TensorFlow.

Do you wish to build TensorFlow with CUDA support? [y/N]: y
CUDA support will be enabled for TensorFlow.


Please specify the CUDA SDK version you want to use, e.g. 7.0. [Leave empty to default to CUDA 9.0]: 9.1


Please specify the location where CUDA 9.1 toolkit is installed. Refer to README.md for more details. [Default is /usr/local/cuda]: /usr/local/cuda


Please specify the cuDNN version you want to use. [Leave empty to default to cuDNN 7.0]: 7.1
Please specify the location where cuDNN 7.0.0 library is installed. Refer to README.md for more details. [Default is /usr/local/cuda]:/usr/local/cuda


Please specify a list of comma-separated Cuda compute capabilities you want to build with.
You can find the compute capability of your device at: https://developer.nvidia.com/cuda-gpus.
Please note that each additional compute capability significantly increases your build time and binary size. [Default is: 6.1]6.1


Do you want to use clang as CUDA compiler? [y/N]: N
nvcc will be used as CUDA compiler.

Please specify which gcc should be used by nvcc as the host compiler. [Default is /usr/bin/gcc]: /usr/bin/gcc

Do you wish to build TensorFlow with MPI support? [y/N]: N
No MPI support will be enabled for TensorFlow.

Please specify optimization flags to use during compilation when bazel option "--config=opt" is specified [Default is -march=native]: -march=native


Add "--config=mkl" to your bazel command to build with MKL support.
Please note that MKL on MacOS or windows is still not supported.
If you would like to use a local MKL instead of downloading, please set the environment variable "TF_MKL_ROOT" every time before build.
Configuration finished
- 配置完成,编译pip软件安装包
bazel build --config=opt //tensorflow/tools/pip_package:build_pip_package
这一步要等较长时间,大概一个半小时可以完成。
- 生成pip软件安装包
bazel-bin/tensorflow/tools/pip_package/build_pip_package /tmp/tensorflow_pkg
- 查看生成的软件安装包
ls -al /tmp/tensorflow_pkg

会出现类似上面的结果,生成的安装包在/tmp/tensorflow_pkg文件夹下,名称应该是tensorflow-1.12.0-cp27-cp27m-linux_x86_64.whl。
- 安装Tensorflow
sudo pip install /tmp/tensorflow_pkg/tensorflow-1.12.0-cp27-cp27m-linux_x86_64.whl
等待一会,安装就会完成。
- 检验安装是否成功
退出当前目录,然后使用python调用Tensorflow。

如果import tensorflow没有出现问题,说明tensorflow安装成功。
- 通过
pip list查看tensorflow版本
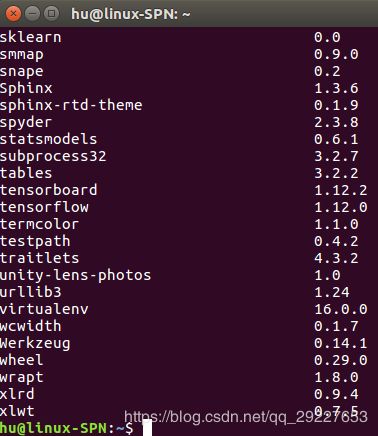
从图中可以看到,tensorflow版本为1.12.0。
安装Tensorflow出错记录
- 安装Tensorflow后,一直可以正常使用的caffe训练时出现
Check failed: error == cudaSuccess (2 vs. 0)  out of memory
*** Check failure stack trace: ***
    @     0x7f685a5fb5cd  google::LogMessage::Fail()
    @     0x7f685a5fd433  google::LogMessage::SendToLog()
    @     0x7f685a5fb15b  google::LogMessage::Flush()
    @     0x7f685a5fde1e  google::LogMessageFatal::~LogMessageFatal()
    @     0x7f685ad112f0  caffe::SyncedMemory::to_gpu()
    @     0x7f685ad102a9  caffe::SyncedMemory::gpu_data()
    @     0x7f685ad04b02  caffe::Blob<>::gpu_data()
    @     0x7f685add4356  caffe::InnerProductLayer<>::Forward_gpu()
    @     0x7f685ad59bc2  caffe::Net<>::ForwardFromTo()
    @     0x7f685ad59ce7  caffe::Net<>::ForwardPrefilled()
    @     0x7f685ad1ea3f  caffe::Solver<>::Test()
    @     0x7f685ad1f47e  caffe::Solver<>::TestAll()
    @     0x7f685ad1f5bd  caffe::Solver<>::Step()
    @     0x7f685ad20139  caffe::Solver<>::Solve()
    @           0x40b1ab  train()
    @           0x407408  main
    @     0x7f6859254a40  __libc_start_main
    @           0x407b79  _start
已放弃 (核心已转储)
这个问题是GPU内存不够。因为一直都可以正常使用,所以和模型的batch size和图片的size关系不大。可能的原因是tensorflow在编译或者测试运行时占用了GPU的内存而没有释放,博主杀死了所有进程后仍没有解决此问题,最后选择使用最暴力的方法:重启电脑。
-
ERROR: Config value cuda is not defined in any .rc file
百度到的解决办法:使用低版本的bazel。
建议参照选择Tensorflow版本安装相应版本的bazel。 -
./tensorflow/core/util/cuda_launch_config.h:127] Check failed: work_element_count > 0 (0 vs. 0)
CUDA版本问题,建议参照选择Tensorflow版本安装相应版本的CUDA。 -
FutureWarning: Conversion of the second argument of issubdtype from
floattonp.floatingis deprecated. In future, it will be treated asnp.float64 == np.dtype(float).type.
解决办法:包内问题,升级h5py包。
sudo pip install h5py==2.8.0