Python学习笔记——pycharm web服务器搭建(4):使用模板与数据展示
1、模板
在项目的templates文件中添加以应用为名称的文件夹,文件夹下添加H5文件,作为模板
在应用的views.py写下如下代码:

def index(request):
    temp = loader.get_template('booktest/index.html')
    return HttpResponse(temp.render())
或者
def index(request):
    return render(request,'booktest/index.html')
这样就可以配合上一节的视图,就可以访问模板了。
2、数据展示
上面我们用的H5文件代码:
<html lang="en">
<head>
    <meta charset="UTF-8">
    <title>Titletitle>
head>
<body>
<h1>hello worldh1>
body>
html>
render有三个参数
第一个是请求,直接写就行
第二个是模板,就是我们在templates/应用名/H5文件
第三个是数据,是以字典形式展示的,将来放在H5文件中进行展示的数据
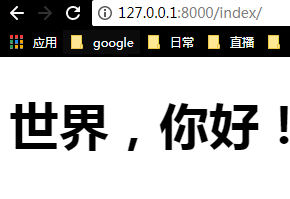
def index(request):
    content = {'title':'世界,你好!'}
    return render(request,'booktest/index.html',content)
我们已经传入titile的键了,下面我们就要想办法把他放在H5文件中去
<html lang="en">
<head>
    <meta charset="UTF-8">
    <title>Titletitle>
head>
<body>
<h1>{{title}}h1>
body>
html>
一个萝卜一个坑,这样就出来对应的数据内容了。
我的数据在数据库,我咋用呢?
views.py
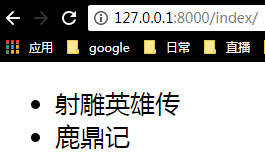
def index(request):
    booklist = BookInfo.objects.all()

    context = {'data': booklist}

    return render(request, 'booktest/index.html', context)


templates/booktest/index.html

<html lang="en">
<head>
    <meta charset="UTF-8">
    <title>Titletitle>
head>
<body>
<ul>
    {% for datum in data %}
        <li>
            {{ datum.btitle }}
        li>
    {% endfor %}
ul>
body>
html>
由上面我们可以看出
{%python代码%}
这样去python代码,具体在pycharm中都会有提示,不用考虑格式问题,写好逻辑与排版就好。
拓展
点击书名,显示书的人物名称,再点击人物名称显示,人物内容:
index.html中添加a标签
    {% for datum in data %}
        <li>
            <a href="{{ datum.id }}">{{ datum.btitle }}a>
        li>
    {% endfor %}
datum代表的是书对象,连接是datum.id就是在本页面网址的基础上添加书本的id
拼接后网址为http://127.0.0.1:8000/index/4
然后子urls.py中去解析
path(r'' , show),去views.py添加show方法
def show(request, id):
    book = BookInfo.objects.get(pk=id)

    herolist = book.heroinfo_set.all()

    context = {'list': herolist, 'bookname': book.btitle, 'bid': id}
    return render(request, 'booktest/show.html', context)
再去项目文件夹下的templates/应用名/ 下新建show.html
<html lang="en">
<head>
    <meta charset="UTF-8">
    <title>{{ bookname }}title>
head>
<body>
<ul>
    {% for hero in list %}
        <li><a href="{{ bid }}/{{ hero.id }}">{{ hero.hname }}a>li>
    {% endfor %}
ul>
body>
html>


注:<a href="{{ bid }}/{{ hero.id }}">{{ hero.hname }}a>
这句是为了点击人物出现人物介绍页面而写的
点击人物后,进入介绍页面,网址格式如下:
http://127.0.0.1:8000/index/4/2
以此类推,
去子urls.py添加
path(r'/' , showcontext)再去新建视图方法,showcontext
def showcontext(request, heroid, bid):
    h = HeroInfo.objects.get(pk=heroid)
    context = {'herodetail': h.hcontent, 'hname': h.hname}
    return render(request, 'booktest/showdetail.html', context)
再去项目文件夹下的templates/应用名/ 下新建showdetail.html 模板文件,进行信息展示
<html lang="en">
<head>
    <meta charset="UTF-8">
    <title>{{ hname }}title>
head>
<body>
{{ herodetail }}
body>
html>
写的比较乱。仅为记录。


