ocr图像预处理-图像分割、文字方向校正
说明:文字方向校正(fft方式和放射变换方式)参考了网上的代码,只做了少量修改
只针对医疗影像图像,自然场景下的另说
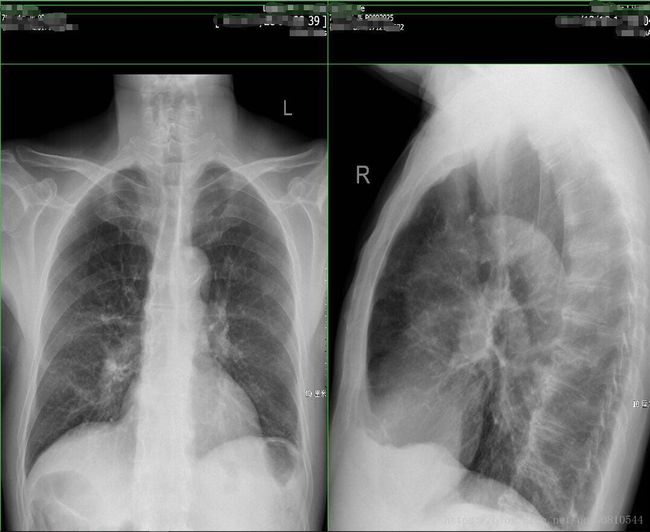
因为处理的图像都很大很大,居然有11000*12000这种分辨率的,有90M大小,我也是醉了,绝大部分都是6000左右分辨率的图像,这种图像直接送到CTPN里的话,效果不是太好,太大了 而且效率感人,所以必须做一下预处理。大部分的X光图像很简单,直接缩放送CTPN即可,而CT和MRI图像虽然一张上有很多小图像,但好在要么有虚线分割要么中间都会留有空白的地方,于是就可以利用直线检测和投影检测来把图片分割成若干小图像了。(吐槽一下之前老外写的代码,不管三七二十一把所有图像都是分成上下两部分,然后上下再各分成上下两部分,四个部分再分别循环他的N个算法,搞的整个系统70%以上的资源都在跑OCR,一张很简单的图片最低也要几分钟才能出结果,复杂一点的都是10几分钟 真想知道这是怎么过验收的!)
- 图像分割,思想很简单 有虚线的直接做直线检测,有空白的做X、Y轴的投影,都没有的就是X光图像了,直接把整张图像当做ROI送CTPN
def _img_split_with_hough(img, min=100, max=220):
    """
    :param img: 读入的二值化图
    :param min: 边缘检测阈值
    :param max: 边缘检测阈值
    :return: 水平和垂直线的坐标集合
    """
    h = img.shape[0]
    w = img.shape[1]
    edges = cv2.Canny(img, min, max)
    lines = cv2.HoughLinesP(edges, 1, np.pi / 180, 30, minLineLength=100, maxLineGap=10)
    lines1 = lines[:, 0, :]
    h_line = []
    v_line = []
    for x1, y1, x2, y2 in lines1[:]:
        if y2 == y1:
            flag = False
            for element in h_line:
                if abs(element[1] - y1) < 10:
                    flag = True
                    break
            if flag == False and abs(x1 - x2) > w * 0.5:
                h_line.append((x1, y1, x2, y2))
        elif x1 == x2:
            flag = False
            for element in v_line:
                if abs(element[0] - x1) < 10:
                    flag = True
                    break
            if flag == False and abs(y1 - y2) > h * 0.5:
                v_line.append((x1, y1, x2, y2))
    return h_line, v_line

def _img_split_with_shadow(gray_img, threshold_value=180):
    """
    :param binary_img: 读入的灰度图
    :param img_show:
    :return: 水平和垂直线的坐标集合
    """
    h = gray_img.shape[0]
    w = gray_img.shape[1]

    # 按行求和
    sum_x = np.sum(gray_img, axis=1)
    # 按列求和
    sum_y = np.sum(gray_img, axis=0)

    h_line_index = np.argwhere(sum_x < 10)
    v_line_index = np.argwhere(sum_y < 10)

    h_line_index = np.reshape(h_line_index, (h_line_index.shape[0],))
    v_line_index = np.reshape(v_line_index, (v_line_index.shape[0],))

    h_line = [(0, h_line_index[0], w - 1, h_line_index[0]), (0, h_line_index[-1], w - 1, h_line_index[-1])] if len(
        h_line_index) > 0 else []
    v_line = [(v_line_index[0], 0, v_line_index[0], h - 1), (v_line_index[-1], 0, v_line_index[-1], h - 1)] if len(
        v_line_index) > 0 else []

    for i in range(len(h_line_index) - 1):
        if h_line_index[i + 1] - h_line_index[i] > 2:
            h_line.append((0, h_line_index[i], w - 1, h_line_index[i]))

    for i in range(len(v_line_index) - 1):
        if v_line_index[i + 1] - v_line_index[i] > 2:
            v_line.append((v_line_index[i], 0, v_line_index[i], h - 1))

    return h_line, v_line


def _combine_rect(h_lines, v_lines, w, h):
    rects = []
    # 添加第一行(列)和最后一行(列)
    x_axis = sorted(set([0, w - 1] + [item[0] for item in v_lines]))
    y_axis = sorted(set([0, h - 1] + [item[1] for item in h_lines]))

    point_list = []
    for y in y_axis:
        point = []
        for x in x_axis:
            point.append((y, x))
        point_list.append(point)

    for y_index in range(len(y_axis) - 1):
        if y_axis[y_index + 1] - y_axis[y_index] <= 10:
            continue
        for x_index in range(len(x_axis) - 1):
            if x_axis[x_index + 1] - x_axis[x_index] <= 10:
                continue
            rects.append((y_axis[y_index], x_axis[x_index],
                          y_axis[y_index + 1], x_axis[x_index + 1]))
    return rects


def img_split(img_file, threshold_value=180, img_show=False):
    """

    :param img_file: 输入图片路径
    :param img_show: 是否显示
    :return: 分割后的子图像rect列表
    """
    img = cv2.imread(img_file, 1)
    gray = cv2.cvtColor(img, cv2.COLOR_BGR2GRAY)
    gray = color_nomal(gray)
    # ret, binary = cv2.threshold(gray, threshold_value, 255, cv2.THRESH_BINARY)
    h = img.shape[0]
    w = img.shape[1]
    rate = h // w if h > w else w // h

    h_line, v_line = _img_split_with_shadow(gray)
    if len(h_line) < 1 and len(v_line) < 1:
        h_line, v_line = _img_split_with_hough(gray)

    rects = _combine_rect(h_line, v_line, w, h)
    split_imgs = []
    for rect in rects:
        split_imgs.append(img[rect[0]:rect[2], rect[1]:rect[3]])

    if img_show:
        for rect in rects:
            cv2.rectangle(img, (rect[1], rect[0]), (rect[3], rect[2]), (0, 255, 0), 2)
        img = cv2.resize(img, (int(h * 0.7), int(h * 0.7 / rate)))
        cv2.imshow('cece', img)
        cv2.waitKey()
    return split_imgs


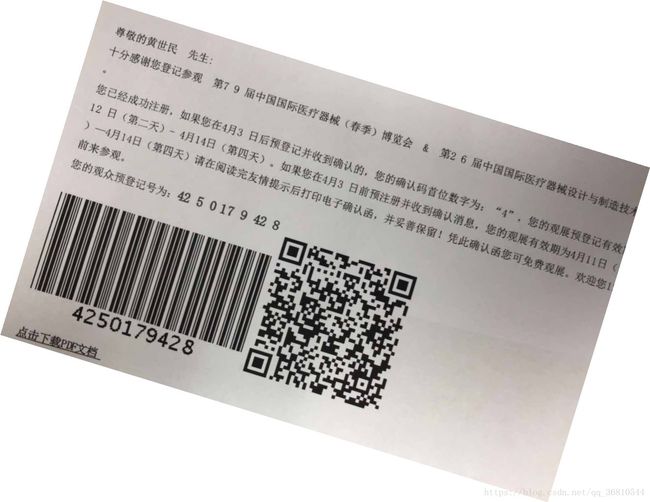
2. 文字方向校正,可以使用FFT变换后校正然后再逆变换回来,也可以直接使用查找包含文字区域的矩形,旋转这个矩形,但是这种方法对于垂直的图像就没效果了,因为会发现包含文字的矩形区域就是方方正正的 不用校正。在二值化的时候采用了自适应二值化,这样做的好处是能更精确的定位文字区域,全局二值化可能会造成有些地方一团黑。
def rotated_img_with_fft(gray):
    # 图像延扩
    h, w = gray.shape[:2]
    new_h = cv2.getOptimalDFTSize(h)
    new_w = cv2.getOptimalDFTSize(w)
    right = new_w - w
    bottom = new_h - h
    nimg = cv2.copyMakeBorder(gray, 0, bottom, 0, right, borderType=cv2.BORDER_CONSTANT, value=0)

    # 执行傅里叶变换,并过得频域图像
    f = np.fft.fft2(nimg)
    fshift = np.fft.fftshift(f)

    fft_img = np.log(np.abs(fshift))
    fft_img = (fft_img - np.amin(fft_img)) / (np.amax(fft_img) - np.amin(fft_img))

    fft_img *= 255
    ret, thresh = cv2.threshold(fft_img, 150, 255, cv2.THRESH_BINARY)

    # 霍夫直线变换
    thresh = thresh.astype(np.uint8)
    lines = cv2.HoughLinesP(thresh, 1, np.pi / 180, 30, minLineLength=40, maxLineGap=100)
    try:
        lines1 = lines[:, 0, :]
    except Exception as e:
        lines1 = []

    # 创建一个新图像,标注直线
    # lineimg = np.ones(nimg.shape,dtype=np.uint8)
    # lineimg = lineimg * 255

    piThresh = np.pi / 180
    pi2 = np.pi / 2
    angle = 0
    for line in lines1:
        # x1, y1, x2, y2 = line[0]
        x1, y1, x2, y2 = line
        # cv2.line(lineimg, (x1, y1), (x2, y2), (0, 255, 0), 2)
        if x2 - x1 == 0:
            continue
        else:
            theta = (y2 - y1) / (x2 - x1)
        if abs(theta) < piThresh or abs(theta - pi2) < piThresh:
            continue
        else:
            angle = abs(theta)
            break

    angle = math.atan(angle)
    angle = angle * (180 / np.pi)
    print(angle)
    # cv2.imshow("line image", lineimg)
    center = (w // 2, h // 2)
    height_1 = int(w * fabs(sin(radians(angle))) + h * fabs(cos(radians(angle))))
    width_1 = int(h * fabs(sin(radians(angle))) + w * fabs(cos(radians(angle))))
    M = cv2.getRotationMatrix2D(center, angle, 1.0)
    M[0, 2] += (width_1 - w) / 2
    M[1, 2] += (height_1 - h) / 2
    rotated = cv2.warpAffine(gray, M, (width_1, height_1), flags=cv2.INTER_CUBIC, borderMode=cv2.BORDER_REPLICATE)
    cv2.imshow('rotated', rotated)
    cv2.waitKey(0)
    return rotated


def rotated_img_with_radiation(gray, is_show=False):
    thresh = cv2.adaptiveThreshold(gray, 255, cv2.ADAPTIVE_THRESH_GAUSSIAN_C, cv2.THRESH_BINARY_INV, 11, 2)
    if is_show:
        cv2.imshow('thresh', thresh)
    # 计算包含了旋转文本的最小边框
    coords = np.column_stack(np.where(thresh > 0))

    # 该函数给出包含着整个文字区域矩形边框,这个边框的旋转角度和图中文本的旋转角度一致
    angle = cv2.minAreaRect(coords)[-1]
    print(angle)
    # 调整角度
    if angle < -45:
        angle = -(90 + angle)
    else:
        angle = -angle
    # 仿射变换
    h, w = gray.shape[:2]
    center = (w // 2, h // 2)
    print(angle)
    M = cv2.getRotationMatrix2D(center, angle, 1.0)
    rotated = cv2.warpAffine(gray, M, (w, h), flags=cv2.INTER_CUBIC, borderMode=cv2.BORDER_REPLICATE)
    if is_show:
        cv2.putText(rotated, 'Angle: {:.2f} degrees'.format(angle), (10, 30), cv2.FONT_HERSHEY_SIMPLEX, 0.7,
                    (0, 0, 255), 2)
        print('[INFO] angel :{:.3f}'.format(angle))
        cv2.imshow('Rotated', rotated)
        cv2.waitKey()
    return rotated


