PyTorch:开始入门的一些小代码下(from 莫烦)
1.CNN
这里一开始的时候import torchvision会报错,我在装pytorch的时候居然没有自动装上torchvision,所以去官网下载了.whl的包。
conda install pippip install torchvision-0.1.9-py2.py3-none-any.whl这样import torchvision的时候就没有问题辣。
import torch
import torch.nn as nn
from torch.autograd import Variable
import torch.utils.data as Data
import torchvision
import matplotlib.pyplot as plt

torch.manual_seed(1)    # reproducible

# Hyper Parameters
EPOCH = 1               # train the training data n times, to save time, we just train 1 epoch
BATCH_SIZE = 50         # batch size
LR = 0.001              # learning rate
DOWNLOAD_MNIST = False  # set to False if you have downloaded True表示需要下载数据


# Mnist digits dataset 在官网下载数据
train_data = torchvision.datasets.MNIST(
    root='./mnist/',
    train=True,                                     # this is training data
    transform=torchvision.transforms.ToTensor(),    # Converts a PIL.Image or numpy.ndarray to
                                                    # torch.FloatTensor of shape (C x H x W) and normalize in the range [0.0, 1.0]
    download=DOWNLOAD_MNIST,                        # download it if you don't have it
)
#download之后大概会有6万的训练集,1万的测试集

'''
# plot one example
print(train_data.train_data.size())                 # (60000, 28, 28)
print(train_data.train_labels.size())               # (60000)
plt.imshow(train_data.train_data[0].numpy(), cmap='gray')
plt.title('%i' % train_data.train_labels[0])
plt.show()

'''

# Data Loader for easy mini-batch return in training, the image batch shape will be (50, 1, 28, 28)
train_loader = Data.DataLoader(dataset=train_data, batch_size=BATCH_SIZE, shuffle=True)


# convert test data into Variable, pick 2000 samples to speed up testing
test_data = torchvision.datasets.MNIST(root='./mnist/', train=False)  #提取的是test data
test_x = Variable(torch.unsqueeze(test_data.test_data, dim=1), volatile=True).type(torch.FloatTensor)[:2000]/255.   # shape from (2000, 28, 28) to (2000, 1, 28, 28), value in range(0,1)
#traindata将原来的[0-255]压缩到了[0.0, 1.0]这个区间,所以test data也要/255做同样处理
test_y = test_data.test_labels[:2000]   #为了节省时间只取了2000个测试 :)


class CNN(nn.Module):

    def __init__(self):
        super(CNN, self).__init__()

        #尺寸:[1*28*28]->[16*28*28]->[16*14*14]
        self.conv1 = nn.Sequential(         # input shape (1, 28, 28)
            nn.Conv2d(
                in_channels=1,              # input height 本例中灰度图只有1层(非RGB)
                out_channels=16,            # n_filters 输出filter的个数
                kernel_size=5,              # filter size
                stride=1,                   # filter movement/step
                padding=2,                  # if want same width and length of this image after con2d, padding=(kernel_size-1)/2 if stride=1
            ),                              # output shape (16, 28, 28)
            nn.ReLU(),                      # activation
            nn.MaxPool2d(kernel_size=2),    # choose max value in 2x2 area, output shape (16, 14, 14)
        )

        #尺寸:[16*14*14]->[32*14*14]->[32*7*7]
        self.conv2 = nn.Sequential(         # input shape (1, 28, 28)
            nn.Conv2d(16, 32, 5, 1, 2),     # output shape (32, 14, 14)
            nn.ReLU(),                      # activation
            nn.MaxPool2d(2),                # output shape (32, 7, 7)
        )

        #因为输入图像维度为[1*28*28],经过2层Conv后尺寸变为[32*7*7]
        #尺寸:[32*7*7]->[1*10]  (数字0-9,10类)
        self.out = nn.Linear(32 * 7 * 7, 10)   # fully connected layer, output 10 classes

    def forward(self, x):
        x = self.conv1(x)
        x = self.conv2(x)

        #将原有的[32*7*7]的数据变成32*7*7的行向量
        x = x.view(x.size(0), -1)           # flatten the output of conv2 to (batch_size, 32 * 7 * 7)

        output = self.out(x)
        return output, x    # return x for visualization


cnn = CNN()
print(cnn)  # net architecture


optimizer = torch.optim.Adam(cnn.parameters(), lr=LR)   # optimize all cnn parameters
loss_func = nn.CrossEntropyLoss()                       # the target label is not one-hotted

# following function (plot_with_labels) is for visualization, can be ignored if not interested
from matplotlib import cm
try: from sklearn.manifold import TSNE; HAS_SK = True
except: HAS_SK = False; print('Please install sklearn for layer visualization')
def plot_with_labels(lowDWeights, labels):
    plt.cla()
    X, Y = lowDWeights[:, 0], lowDWeights[:, 1]
    for x, y, s in zip(X, Y, labels):
        c = cm.rainbow(int(255 * s / 9)); plt.text(x, y, s, backgroundcolor=c, fontsize=9)
    plt.xlim(X.min(), X.max()); plt.ylim(Y.min(), Y.max()); plt.title('Visualize last layer'); plt.show(); plt.pause(0.01)

plt.ion()

# training and testing
for epoch in range(EPOCH):
    for step, (x, y) in enumerate(train_loader):   # gives batch data, normalize x when iterate train_loader
        b_x = Variable(x)   # batch x
        b_y = Variable(y)   # batch y

        output = cnn(b_x)[0]               # cnn output
        loss = loss_func(output, b_y)   # cross entropy loss
        optimizer.zero_grad()           # clear gradients for this training step
        loss.backward()                 # backpropagation, compute gradients
        optimizer.step()                # apply gradients

        if step % 50 == 0:
            test_output, last_layer = cnn(test_x)
            pred_y = torch.max(test_output, 1)[1].data.squeeze()
            accuracy = sum(pred_y == test_y) / float(test_y.size(0))
            print('Epoch: ', epoch, '| train loss: %.4f' % loss.data[0], '| test accuracy: %.2f' % accuracy)
            if HAS_SK:
                # Visualization of trained flatten layer (T-SNE)
                tsne = TSNE(perplexity=30, n_components=2, init='pca', n_iter=5000)
                plot_only = 500
                low_dim_embs = tsne.fit_transform(last_layer.data.numpy()[:plot_only, :])
                labels = test_y.numpy()[:plot_only]
                plot_with_labels(low_dim_embs, labels)

plt.ioff()


# print 10 predictions from test data
test_output, _ = cnn(test_x[:10])
pred_y = torch.max(test_output, 1)[1].data.numpy().squeeze()
print(pred_y, 'prediction number')
print(test_y[:10].numpy(), 'real number')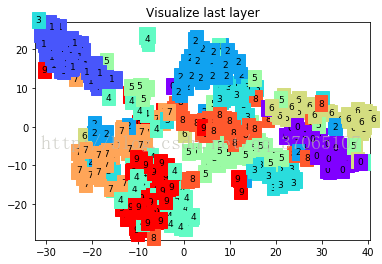

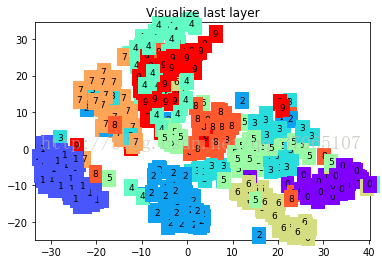
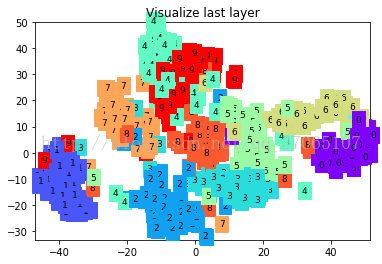
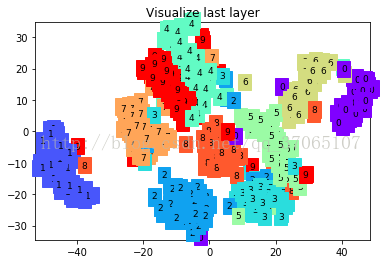
 可以看到分类边界一点点变清晰的过程,最后结果损失在0.0424,准确率达到了0.98。
2.RNN
import torch
from torch import nn
from torch.autograd import Variable
import torchvision.datasets as dsets
import torchvision.transforms as transforms
import matplotlib.pyplot as plt

torch.manual_seed(1)    # reproducible

# Hyper Parameters
EPOCH = 1               # train the training data n times, to save time, we just train 1 epoch
BATCH_SIZE = 64         # batch size
TIME_STEP = 28          # rnn time step / image height
INPUT_SIZE = 28         # rnn input size / image width
LR = 0.01               # learning rate
DOWNLOAD_MNIST = False   # set to True if haven't download the data

# Mnist digital dataset
train_data = dsets.MNIST(
    root='./mnist/',
    train=True,                         # this is training data
    transform=transforms.ToTensor(),    # Converts a PIL.Image or numpy.ndarray to
                                        # torch.FloatTensor of shape (C x H x W) and normalize in the range [0.0, 1.0]
    download=DOWNLOAD_MNIST,            # download it if you don't have it
)

'''
# plot one example
print(train_data.train_data.size())     # (60000, 28, 28)
print(train_data.train_labels.size())   # (60000)
plt.imshow(train_data.train_data[0].numpy(), cmap='gray')
plt.title('%i' % train_data.train_labels[0])
plt.show()
'''

# Data Loader for easy mini-batch return in training
train_loader = torch.utils.data.DataLoader(dataset=train_data, batch_size=BATCH_SIZE, shuffle=True)

# convert test data into Variable, pick 2000 samples to speed up testing
test_data = dsets.MNIST(root='./mnist/', train=False, transform=transforms.ToTensor())
test_x = Variable(test_data.test_data, volatile=True).type(torch.FloatTensor)[:2000]/255.   # shape (2000, 28, 28) value in range(0,1)
test_y = test_data.test_labels.numpy().squeeze()[:2000]    # covert to numpy array

class RNN(nn.Module):

    def __init__(self):
        super(RNN, self).__init__()

        self.rnn = nn.LSTM(         # if use nn.RNN(), it hardly learns
            input_size=INPUT_SIZE,  #LSTM的方法逐行读取图片,所以是28
            hidden_size=64,         # rnn hidden unit
            num_layers=1,           # number of rnn layer
            batch_first=True,       # input & output will has batch size as 1s dimension. e.g. (batch, time_step, input_size)
        )

        self.out = nn.Linear(64, 10)

    def forward(self, x):
        # x shape (batch, time_step, input_size)
        # r_out shape (batch, time_step, output_size)
        # h_n shape (n_layers, batch, hidden_size)
        # h_c shape (n_layers, batch, hidden_size)
        r_out, (h_n, h_c) = self.rnn(x, None)   # None represents zero initial hidden state

        # choose r_out at the last time step 一定要取最后一个
        out = self.out(r_out[:, -1, :])
        return out


rnn = RNN()
print(rnn)

optimizer = torch.optim.Adam(rnn.parameters(), lr=LR)   # optimize all cnn parameters
loss_func = nn.CrossEntropyLoss()                       # the target label is not one-hotted

# training and testing
for epoch in range(EPOCH):
    for step, (x, y) in enumerate(train_loader):        # gives batch data
        b_x = Variable(x.view(-1, 28, 28))              # reshape x to (batch, time_step, input_size)
        b_y = Variable(y)                               # batch y

        output = rnn(b_x)                               # rnn output
        loss = loss_func(output, b_y)                   # cross entropy loss
        optimizer.zero_grad()                           # clear gradients for this training step
        loss.backward()                                 # backpropagation, compute gradients
        optimizer.step()                                # apply gradients

        if step % 100 == 0:
            test_output = rnn(test_x)                   # (samples, time_step, input_size)
            pred_y = torch.max(test_output, 1)[1].data.numpy().squeeze()
            accuracy = sum(pred_y == test_y) / float(test_y.size)
            print('Epoch: ', epoch, '| train loss: %.4f' % loss.data[0], '| test accuracy: %.2f' % accuracy)


# print 10 predictions from test data
test_output = rnn(test_x[:10].view(-1, 28, 28))
pred_y = torch.max(test_output, 1)[1].data.numpy().squeeze()
print(pred_y, 'prediction number')
print(test_y[:10], 'real number')
RNN (
(rnn): LSTM(28, 64, batch_first=True)
(out): Linear (64 -> 10)
)
Epoch: 0 | train loss: 2.3127 | test accuracy: 0.14
Epoch: 0 | train loss: 0.7868 | test accuracy: 0.68
Epoch: 0 | train loss: 0.8782 | test accuracy: 0.81
Epoch: 0 | train loss: 0.3738 | test accuracy: 0.88
Epoch: 0 | train loss: 0.3002 | test accuracy: 0.92
Epoch: 0 | train loss: 0.1786 | test accuracy: 0.94
Epoch: 0 | train loss: 0.1762 | test accuracy: 0.95
Epoch: 0 | train loss: 0.2623 | test accuracy: 0.94
Epoch: 0 | train loss: 0.1319 | test accuracy: 0.96
Epoch: 0 | train loss: 0.1281 | test accuracy: 0.94
[7 2 1 0 4 1 4 9 6 9] prediction number
[7 2 1 0 4 1 4 9 5 9] real number
以上是分类。另一种回归的方法。
import torch
from torch import nn
from torch.autograd import Variable
import numpy as np
import matplotlib.pyplot as plt

torch.manual_seed(1)    # reproducible

# Hyper Parameters
TIME_STEP = 10      # rnn time step
INPUT_SIZE = 1      # rnn input size
LR = 0.02           # learning rate

# show data
steps = np.linspace(0, np.pi*2, 100, dtype=np.float32)
x_np = np.sin(steps)    # float32 for converting torch FloatTensor
y_np = np.cos(steps)
plt.plot(steps, y_np, 'r-', label='target (cos)')
plt.plot(steps, x_np, 'b-', label='input (sin)')
plt.legend(loc='best')
plt.show()


class RNN(nn.Module):

    def __init__(self):
        super(RNN, self).__init__()

        self.rnn = nn.RNN(
            input_size=INPUT_SIZE,
            hidden_size=32,     # rnn hidden unit
            num_layers=1,       # number of rnn layer
            batch_first=True,   # input & output will has batch size as 1s dimension. e.g. (batch, time_step, input_size)
        )

        self.out = nn.Linear(32, 1)

    def forward(self, x, h_state):
        # x (batch, time_step, input_size)
        # h_state (n_layers, batch, hidden_size)
        # r_out (batch, time_step, hidden_size)
        r_out, h_state = self.rnn(x, h_state)
        outs = []    # save all predictions
        for time_step in range(r_out.size(1)):    # calculate output for each time step
            outs.append(self.out(r_out[:, time_step, :]))
        return torch.stack(outs, dim=1), h_state
        # instead, for simplicity, you can replace above codes by follows
        # r_out = r_out.view(-1, 32)
        # outs = self.out(r_out)
        # return outs, h_state


rnn = RNN()
print(rnn)

optimizer = torch.optim.Adam(rnn.parameters(), lr=LR)   # optimize all cnn parameters
loss_func = nn.MSELoss()

h_state = None      # for initial hidden state
plt.figure(1, figsize=(12, 5))
plt.ion()           # continuously plot
for step in range(60):
    start, end = step * np.pi, (step+1)*np.pi   # time range
    # use sin predicts cos
    steps = np.linspace(start, end, TIME_STEP, dtype=np.float32)
    x_np = np.sin(steps)    # float32 for converting torch FloatTensor
    y_np = np.cos(steps)

    x = Variable(torch.from_numpy(x_np[np.newaxis, :, np.newaxis]))    # shape (batch, time_step, input_size)
    y = Variable(torch.from_numpy(y_np[np.newaxis, :, np.newaxis]))

    prediction, h_state = rnn(x, h_state)   # rnn output
    # !! next step is important !!
    h_state = Variable(h_state.data)        # repack the hidden state, break the connection from last iteration

    loss = loss_func(prediction, y)         # cross entropy loss
    optimizer.zero_grad()                   # clear gradients for this training step
    loss.backward()                         # backpropagation, compute gradients
    optimizer.step()                        # apply gradients

    # plotting
    plt.plot(steps, y_np.flatten(), 'r-')
    plt.plot(steps, prediction.data.numpy().flatten(), 'b-')
    plt.draw(); plt.pause(0.05)


plt.ioff()
plt.show()
RNN (
(rnn): RNN(1, 32, batch_first=True)
(out): Linear (32 -> 1)
)
3.AutoEncoder
一种无监督学习的分类过程。无需test data。
import torch
import torch.nn as nn
from torch.autograd import Variable
import torch.utils.data as Data
import torchvision
import matplotlib.pyplot as plt
from mpl_toolkits.mplot3d import Axes3D
from matplotlib import cm
import numpy as np

torch.manual_seed(1)    # reproducible

# Hyper Parameters
EPOCH = 10
BATCH_SIZE = 64
LR = 0.005         # learning rate
DOWNLOAD_MNIST = False
N_TEST_IMG = 5

# Mnist digits dataset

train_data = torchvision.datasets.MNIST(
    root='./mnist/',
    train=True,                                     # this is training data
    transform=torchvision.transforms.ToTensor(),    # Converts a PIL.Image or numpy.ndarray to
                                                    # torch.FloatTensor of shape (C x H x W) and normalize in the range [0.0, 1.0]
    download=DOWNLOAD_MNIST,                        # download it if you don't have it
)

# plot one example
print(train_data.train_data.size())     # (60000, 28, 28)
print(train_data.train_labels.size())   # (60000)
plt.imshow(train_data.train_data[2].numpy(), cmap='gray')
plt.title('%i' % train_data.train_labels[2])
plt.show()

# Data Loader for easy mini-batch return in training, the image batch shape will be (50, 1, 28, 28)
train_loader = Data.DataLoader(dataset=train_data, batch_size=BATCH_SIZE, shuffle=True)


class AutoEncoder(nn.Module):

    def __init__(self):
        super(AutoEncoder, self).__init__()
        self.encoder = nn.Sequential(
            nn.Linear(28*28, 128),
            nn.Tanh(),
            nn.Linear(128, 64),
            nn.Tanh(),
            nn.Linear(64, 12),
            nn.Tanh(),
            nn.Linear(12, 3),   # compress to 3 features which can be visualized in plt
        )

        self.decoder = nn.Sequential(
            nn.Linear(3, 12),
            nn.Tanh(),
            nn.Linear(12, 64),
            nn.Tanh(),
            nn.Linear(64, 128),
            nn.Tanh(),
            nn.Linear(128, 28*28),
            nn.Sigmoid(),       # compress to a range (0, 1) 压缩到0-1的范围
        )

    def forward(self, x):
        encoded = self.encoder(x)
        decoded = self.decoder(encoded)
        return encoded, decoded


autoencoder = AutoEncoder()

optimizer = torch.optim.Adam(autoencoder.parameters(), lr=LR)
loss_func = nn.MSELoss()

# initialize figure
f, a = plt.subplots(2, N_TEST_IMG, figsize=(5, 2))
plt.ion()   # continuously plot

# original data (first row) for viewing
view_data = Variable(train_data.train_data[:N_TEST_IMG].view(-1, 28*28).type(torch.FloatTensor)/255.)
for i in range(N_TEST_IMG):
    a[0][i].imshow(np.reshape(view_data.data.numpy()[i], (28, 28)), cmap='gray'); a[0][i].set_xticks(()); a[0][i].set_yticks(())

for epoch in range(EPOCH):
    for step, (x, y) in enumerate(train_loader):
        b_x = Variable(x.view(-1, 28*28))   # batch x, shape (batch, 28*28)
        b_y = Variable(x.view(-1, 28*28))   # batch y, shape (batch, 28*28) 还是X!!
        b_label = Variable(y)               # batch label

        encoded, decoded = autoencoder(b_x)
        loss = loss_func(decoded, b_y)      # mean square error
        optimizer.zero_grad()               # clear gradients for this training step
        loss.backward()                     # backpropagation, compute gradients
        optimizer.step()                    # apply gradients

        if step % 100 == 0:
            print('Epoch: ', epoch, '| train loss: %.4f' % loss.data[0])
            # plotting decoded image (second row)
            _, decoded_data = autoencoder(view_data)
            for i in range(N_TEST_IMG):
                a[1][i].clear()
                a[1][i].imshow(np.reshape(decoded_data.data.numpy()[i], (28, 28)), cmap='gray')
                a[1][i].set_xticks(()); a[1][i].set_yticks(())
            plt.draw(); plt.pause(0.05)

plt.ioff()
plt.show()

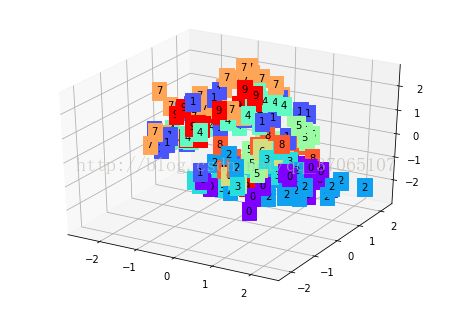
# visualize in 3D plot
view_data = Variable(train_data.train_data[:200].view(-1, 28*28).type(torch.FloatTensor)/255.)
encoded_data, _ = autoencoder(view_data)
fig = plt.figure(2); ax = Axes3D(fig)
X, Y, Z = encoded_data.data[:, 0].numpy(), encoded_data.data[:, 1].numpy(), encoded_data.data[:, 2].numpy()
values = train_data.train_labels[:200].numpy()
for x, y, z, s in zip(X, Y, Z, values):
    c = cm.rainbow(int(255*s/9)); ax.text(x, y, z, s, backgroundcolor=c)
ax.set_xlim(X.min(), X.max()); ax.set_ylim(Y.min(), Y.max()); ax.set_zlim(Z.min(), Z.max())
plt.show()
4.DQN 强化学习
暂时略过去啦。。。。。;)
5.GAN
import torch
import torch.nn as nn
from torch.autograd import Variable
import numpy as np
import matplotlib.pyplot as plt

torch.manual_seed(1)    # reproducible
np.random.seed(1)

# Hyper Parameters
BATCH_SIZE = 64
LR_G = 0.0001           # learning rate for generator
LR_D = 0.0001           # learning rate for discriminator
N_IDEAS = 5             # think of this as number of ideas for generating an art work (Generator)
ART_COMPONENTS = 15     # it could be total point G can draw in the canvas
PAINT_POINTS = np.vstack([np.linspace(-1, 1, ART_COMPONENTS) for _ in range(BATCH_SIZE)])

'''
# show our beautiful painting range
plt.plot(PAINT_POINTS[0], 2 * np.power(PAINT_POINTS[0], 2) + 1, c='#74BCFF', lw=3, label='upper bound')
plt.plot(PAINT_POINTS[0], 1 * np.power(PAINT_POINTS[0], 2) + 0, c='#FF9359', lw=3, label='lower bound')
plt.legend(loc='upper right')
plt.show()
'''

#生成标准“画作”,15个点画出一条线
def artist_works():     # painting from the famous artist (real target)
    a = np.random.uniform(1, 2, size=BATCH_SIZE)[:, np.newaxis]
    paintings = a * np.power(PAINT_POINTS, 2) + (a-1)  #一元二次函数
    paintings = torch.from_numpy(paintings).float()    #转换成torch的形式
    return Variable(paintings)

# Generator
G = nn.Sequential(
    nn.Linear(N_IDEAS, 128),            # random ideas (could from normal distribution)
    nn.ReLU(),
    nn.Linear(128, ART_COMPONENTS),     # making a painting from these random ideas
)

# Discriminator
D = nn.Sequential(
    nn.Linear(ART_COMPONENTS, 128),     # receive art work either from the famous artist or a newbie like G
    nn.ReLU(),
    nn.Linear(128, 1),
    nn.Sigmoid(),                       # tell the probability that the art work is made by artist
)

opt_D = torch.optim.Adam(D.parameters(), lr=LR_D)
opt_G = torch.optim.Adam(G.parameters(), lr=LR_G)

plt.ion()   # something about continuous plotting

for step in range(10000):
    artist_paintings = artist_works()           # real painting from artist
    G_ideas = Variable(torch.randn(BATCH_SIZE, N_IDEAS))    # random ideas
    G_paintings = G(G_ideas)                    # fake painting from G (random ideas)

    prob_artist0 = D(artist_paintings)          # D try to increase this prob
    prob_artist1 = D(G_paintings)               # D try to reduce this prob

    D_loss = - torch.mean(torch.log(prob_artist0) + torch.log(1. - prob_artist1))
    G_loss = torch.mean(torch.log(1. - prob_artist1))
    #取上述两种loss的最小

    opt_D.zero_grad()
    D_loss.backward(retain_variables=True)      # retain_variables for reusing computational graph
    opt_D.step()

    opt_G.zero_grad()
    G_loss.backward()
    opt_G.step()

    if step % 50 == 0:  # plotting
        plt.cla()
        plt.plot(PAINT_POINTS[0], G_paintings.data.numpy()[0], c='#4AD631', lw=3, label='Generated painting',)
        plt.plot(PAINT_POINTS[0], 2 * np.power(PAINT_POINTS[0], 2) + 1, c='#74BCFF', lw=3, label='upper bound')
        plt.plot(PAINT_POINTS[0], 1 * np.power(PAINT_POINTS[0], 2) + 0, c='#FF9359', lw=3, label='lower bound')
        plt.text(-.5, 2.3, 'D accuracy=%.2f (0.5 for D to converge)' % prob_artist0.data.numpy().mean(), fontdict={'size': 15})
        plt.text(-.5, 2, 'D score= %.2f (-1.38 for G to converge)' % -D_loss.data.numpy(), fontdict={'size': 15})
        plt.ylim((0, 3));plt.legend(loc='upper right', fontsize=12);plt.draw();plt.pause(0.01)

plt.ioff()
plt.show()