# 写在前面
完全沉浸:隐藏状态栏、导航栏,在需要时呼出,且会自动再次隐藏。用到的场景很少,例如阅读。
半沉浸:状态栏、导航栏都可以显示且透明,app内容在二者之下。
我实现的是后者。
Api 21中,官方为我们提供了可以直接修改statusbar和navigationbar颜色的方法:
- window.setStatusBarColor(@ColorInt int color);
- window.setNavigationBarColor(@ColorInt int color);
但是在此之前还需要立一些flag (官方注释如此解释道):
    /**
     * Sets the color of the status bar to {@code color}.
     *
     * For this to take effect,
     * the window must be drawing the system bar backgrounds with
     * {@link android.view.WindowManager.LayoutParams#FLAG_DRAWS_SYSTEM_BAR_BACKGROUNDS} and
     * {@link android.view.WindowManager.LayoutParams#FLAG_TRANSLUCENT_STATUS} must not be set.
     *
     * If {@code color} is not opaque, consider setting
     * {@link android.view.View#SYSTEM_UI_FLAG_LAYOUT_STABLE} and
     * {@link android.view.View#SYSTEM_UI_FLAG_LAYOUT_FULLSCREEN}.
     *
     * The transitionName for the view background will be "android:status:background".
     *
     */
需要给window设置flag:
window.addFlags(WindowManager.LayoutParams.FLAG_DRAWS_SYSTEM_BAR_BACKGROUNDS);
以及清除对应的flag:(如果加上这两个Flag,会变成半透明状态,且设置颜色无效果)
window.clearFlags(WindowManager.LayoutParams.FLAG_TRANSLUCENT_STATUS);
window.clearFlags(WindowManager.LayoutParams.FLAG_TRANSLUCENT_NAVIGATION);
那么简单的修改颜色就可以写成:
    public static void setColor(@NonNull Window window, @ColorInt Integer statusbarColor, @ColorInt Integer navigationColor) {
        window.addFlags(WindowManager.LayoutParams.FLAG_DRAWS_SYSTEM_BAR_BACKGROUNDS);
        window.clearFlags(WindowManager.LayoutParams.FLAG_TRANSLUCENT_STATUS);
        window.clearFlags(WindowManager.LayoutParams.FLAG_TRANSLUCENT_NAVIGATION);

        window.setStatusBarColor(statusbarColor);
        window.setNavigationBarColor(navigationColor);
    }
# 沉浸式 状态栏 与 导航栏 的实现

chenjin.png
#思路
与很多方法不同,我通过设置 decorChild0 的padding来控制状态栏、导航栏的沉浸与否。
- 在api 21及以上版本中 :
- 我们的内容包含在 decorView.getChildAt(0) 中,后面简称 decorChild0;
- decorView.getChildAt(1) 是 statusbar;
- decorView.getChildAt(2) 是 navigationbar;
- decorChild0、statusbar、navigationbar同处于decorView这个FramLayout中,之所以我们的内容不被statusbar和navigationbar遮住一部分,是因为window在设置flag后替decorChild0设置了paddingTop和marginBot,并且这不是立即生效的,你会发现设置flag后立即设置decorChild0的padding、margin是没有效果的。而在我延迟了20毫秒后设置是生效的。
- 我的 方法 和 参数 :
public static void setColor(@NonNull Window window, @ColorInt Integer statusbarColor, @ColorInt Integer navigationColor, Boolean belowSta, Boolean belowNav)
- window : 当前的 window
- statusbarColor : 状态栏颜色 ( 为 null 时,不改变当前颜色 )
- navigationColor : 导航栏颜色 ( 为 null 时,不改变当前颜色 )
- belowSta : 状态栏是否沉浸 ( 为 null 时,不改变当前状态 )
- belowNav : 导航栏是否沉浸 ( 为 null 时,不改变当前状态 )
步骤 1. 设置与清除 Flag
        int flags = window.getAttributes().flags;//拿到window的flag值
        if ((flags & WindowManager.LayoutParams.FLAG_DRAWS_SYSTEM_BAR_BACKGROUNDS) !=
                WindowManager.LayoutParams.FLAG_DRAWS_SYSTEM_BAR_BACKGROUNDS) {
//若没有该flag,则添加
            window.addFlags(WindowManager.LayoutParams.FLAG_DRAWS_SYSTEM_BAR_BACKGROUNDS);
        }
        if ((flags & WindowManager.LayoutParams.FLAG_TRANSLUCENT_STATUS) ==
                WindowManager.LayoutParams.FLAG_TRANSLUCENT_STATUS) {
//若有该flag,则清除
            window.clearFlags(WindowManager.LayoutParams.FLAG_TRANSLUCENT_STATUS);
        }

        if ((flags & WindowManager.LayoutParams.FLAG_TRANSLUCENT_NAVIGATION) ==
                WindowManager.LayoutParams.FLAG_TRANSLUCENT_NAVIGATION) {
//若有该flag,则清除
            window.clearFlags(WindowManager.LayoutParams.FLAG_TRANSLUCENT_NAVIGATION);
        }
只会用到这三个Flag.
步骤 2. 设置颜色
//当颜色参数不为 null ,并且与前色值不一样时设置
        if (statusbarColor != null && statusbarColor != window.getStatusBarColor()) {
            window.setStatusBarColor(statusbarColor);
        }
        if (navigationColor != null && navigationColor != window.getNavigationBarColor()) {
            window.setNavigationBarColor(navigationColor);
        }
步骤 3. 将 belowSta 和 belowNav 保存至 decorChild0 中
为什么要保存:将改变 decorChild0 的padding、margin重新提一个静态方法出来,在其他地方设置了window的 flag 后,方便刷新状态。
        ViewGroup decorView = (ViewGroup) window.getDecorView();
        final View decorChild = decorView.getChildAt(0);
        if (belowSta != null) {
            decorChild.setTag(R.id.tag_decor_child_below_statusbar, belowSta);
        }
        if (belowNav != null) {
            decorChild.setTag(R.id.tag_decor_child_below_navigation, belowNav);
        }
- R.id.tag_decor_child_below_statusbar、R.id.tag_decor_child_below_navigation需要在 res / values 下面添加 resource 值:
步骤 4. 获取 decorChild0 的状态
    public static void refreshDecorChildLayout(@NonNull final Window window) {
        ViewGroup decorView = (ViewGroup) window.getDecorView();
        final View decorChild = decorView.getChildAt(0);
//定时器,这里我用的 rxjava 来做延迟和重复操作
        Object checkRetryObj = decorChild.getTag(R.id.tag_decor_child_check_retry);
        Disposable checkRetry;
        if (checkRetryObj != null && checkRetryObj instanceof Disposable) {
            checkRetry = (Disposable) checkRetryObj;
            if (!checkRetry.isDisposed()) {
//若正在做刷新操作则停止
                checkRetry.dispose();
            }
        }
        Object belowStaObj = decorChild.getTag(R.id.tag_decor_child_below_statusbar);
        Object belowNavObj = decorChild.getTag(R.id.tag_decor_child_below_navigation);
        //判断 statusbar、navigationbar 是否可见,若不可见,则必须为沉浸状态,否则会留出空白
        boolean[] systemUiVisible = Statusbar.isSystemUiVisible(window);
//需要的状态
        final Boolean belowSta, belowNav;
        if (belowStaObj != null && belowStaObj instanceof Boolean) {
            belowSta = (Boolean) belowStaObj | !systemUiVisible[0];
        } else {
            belowSta = !systemUiVisible[0] ? true : null;
        }
        if (belowNavObj != null && belowNavObj instanceof Boolean) {
            belowNav = (Boolean) belowNavObj | !systemUiVisible[1];
        } else {
            belowNav = !systemUiVisible[1] ? true : null;
        }
//在此保存状态
        decorChild.setTag(R.id.tag_decor_child_below_statusbar, belowSta);
        decorChild.setTag(R.id.tag_decor_child_below_navigation, belowNav);
步骤 5. 延时设置沉浸效果
需要用到 rxjava :
    implementation "io.reactivex.rxjava2:rxjava:2.1.14"
    implementation 'io.reactivex.rxjava2:rxandroid:2.0.2'
延时设置沉浸效果 :
//这里是每隔50毫秒设置一次,重复3次,防止设置失败
        checkRetry = Observable.interval(50, 50, TimeUnit.MILLISECONDS)//检查间隔
                .subscribeOn(Schedulers.io())
                .observeOn(AndroidSchedulers.mainThread())
                .take(3)//重复检查次数
                .subscribe(new Consumer() {
                    private boolean refreshPadding = false;

                    @Override
                    public void accept(Long aLong) throws Exception {
                        refreshPadding = false;
                        int paddingTop = decorChild.getPaddingTop();
                        int paddingBottom = decorChild.getPaddingBottom();

                        //根据状态判断需要设置的paddingTop的高度.statusbar
                        if (belowSta != null) {
                            if (belowSta && paddingTop != 0) {
                                paddingTop = 0;
                                refreshPadding = true;
                            } else if (!belowSta) {
                                int statusBarHeight = StatusbarTools.getStatusBarHeight(window.getContext());
                                if (paddingTop != statusBarHeight) {
                                    paddingTop = statusBarHeight;
                                    refreshPadding = true;
                                }
                            }
                        }
                        //根据状态判断需要设置的paddingBot的高度.navigation
                        if (belowNav != null) {
                            if (belowNav && paddingBottom != 0) {
                                paddingBottom = 0;
                                refreshPadding = true;
                            } else if (!belowNav) {
                                int navigationHeight = StatusbarTools.getNavigationHeight(window.getContext());
                                if (paddingBottom != navigationHeight) {
                                    paddingBottom = navigationHeight;
                                    refreshPadding = true;
                                }
                            }
                        }
//如非paddingTop或paddingBot值有改变,尽量不调用setPadding方法
                        if (refreshPadding) {
                            decorChild.setPadding(decorChild.getPaddingLeft(), paddingTop, decorChild.getPaddingRight(), paddingBottom);
                        }
                        //设置marginTop与marginBot为 0
                        FrameLayout.LayoutParams layoutParams = (FrameLayout.LayoutParams) decorChild.getLayoutParams();
                        if (layoutParams.topMargin != 0 || layoutParams.bottomMargin != 0) {
                            layoutParams.topMargin = 0;
                            layoutParams.bottomMargin = 0;
                            decorChild.setLayoutParams(layoutParams);
                        }
//不需要设置 FitsSystemWindows
//                        if (!decorChild.getFitsSystemWindows()) {
//                            decorChild.setFitsSystemWindows(false);
//                        }

                    }
                });
//保存延时刷新对象,便于下次刷新时取消前一次刷新
        decorChild.setTag(R.id.tag_decor_child_check_retry, checkRetry);
    }
判断 statusbar、navigationbar 是否可见的方法 :
      /**
     * 在这里不能用内容高度和屏幕真实高度作对比来判断导航栏显示。
     * 这里只适用于21以后的版本,方法是从DecorView源码中来的,
     * 测试了模拟器21版本,和我自己手机Android 8.1.0都是有效的
     * api min is 21 version
     * 0:statusbar is visible
     * 1:navigation is visible
     *
     * @return statusbar, navigation是否可见
     */
    public static boolean[] isSystemUiVisible(Window window) {
        boolean[] result = new boolean[]{false, false};
        if (window == null) {
            return result;
        }
        WindowManager.LayoutParams attributes = window.getAttributes();
        if (attributes != null) {
            result[0] = (attributes.flags & WindowManager.LayoutParams.FLAG_FULLSCREEN) != WindowManager.LayoutParams.FLAG_FULLSCREEN;
            //
            ViewGroup decorView = (ViewGroup) window.getDecorView();
            result[1] = (((attributes.systemUiVisibility | decorView.getWindowSystemUiVisibility()) &
                    View.SYSTEM_UI_FLAG_HIDE_NAVIGATION) == 0) && (attributes.flags & WindowManager.LayoutParams.FLAG_DRAWS_SYSTEM_BAR_BACKGROUNDS) != 0;
        }
        //
        Object decorViewObj = window.getDecorView();
        Class clazz = decorViewObj.getClass();
        int mLastBottomInset = 0, mLastRightInset = 0, mLastLeftInset = 0;
        try {
            Field mLastBottomInsetField = clazz.getDeclaredField("mLastBottomInset");
            mLastBottomInsetField.setAccessible(true);
            mLastBottomInset = mLastBottomInsetField.getInt(decorViewObj);
        } catch (Exception e) {
            e.printStackTrace();
        }
        try {
            Field mLastRightInsetField = clazz.getDeclaredField("mLastRightInset");
            mLastRightInsetField.setAccessible(true);
            mLastRightInset = mLastRightInsetField.getInt(decorViewObj);
        } catch (Exception e) {
            e.printStackTrace();
        }
        try {
            Field mLastLeftInsetField = clazz.getDeclaredField("mLastLeftInset");
            mLastLeftInsetField.setAccessible(true);
            mLastLeftInset = mLastLeftInsetField.getInt(decorViewObj);
        } catch (Exception e) {
            e.printStackTrace();
        }
        boolean isNavBarToRightEdge = mLastBottomInset == 0 && mLastRightInset > 0;
        int size = isNavBarToRightEdge ? mLastRightInset : (mLastBottomInset == 0 && mLastLeftInset > 0 ? mLastLeftInset : mLastBottomInset);
        result[1] = result[1] && size > 0;
        return result;
    }
获取状态栏和导航栏高度:
    /**
     * @return 状态栏高度
     */
    public static int getStatusBarHeight(@Nullable Context context) {
        if (context == null) return 0;
        int result = 0;
        int resId = context.getResources().getIdentifier("status_bar_height", "dimen", "android");
        if (resId != 0) {
            result = context.getResources().getDimensionPixelOffset(resId);
        }
        return result;
    }

    /**
     * @return 导航栏高度
     */
    public static int getNavigationHeight(@Nullable Context context) {
        if (context == null) return 0;
        int result = 0;
        Resources resources = context.getResources();
        int resourceId = resources.getIdentifier("navigation_bar_height", "dimen", "android");
        if (resourceId != 0) {
            result = resources.getDimensionPixelSize(resourceId);
        }
        return result;
    }
# 缺点:
- 在任何调用 window.addFlag() 或 window.setFlag() 后需要调用刷新方法来刷新沉浸状态,否则状态会有改变的可能。
- 由于原生方法和我的方法在反复地拉扯padding、margin值,所以当 '沉浸’ 并且 '连续修改颜色' 时,会出现内容抖动的情况,下面 Gif 中会发现。缓解:
- 可以适当增加刷新延迟的时间,抖动会没有那么频繁;
- 可以在连续修改颜色时,不调用刷新方法,在最后才调用。
- 附上图 和方法:
- 抖动的情况:
@Override
public void onProgressChanged(SeekBar seekBar, int progress, boolean fromUser) {
    int alpha = (int) ((1f * progress / seekBar.getMax()) * 255);
    int statusbar = Color.argb(alpha, 255, 0, 0);
    int navigation = Color.argb(alpha, 0, 255, 0);
    Statusbar.setColor(getWindow(), statusbar, navigation, true, true);
 }
抖动.gif
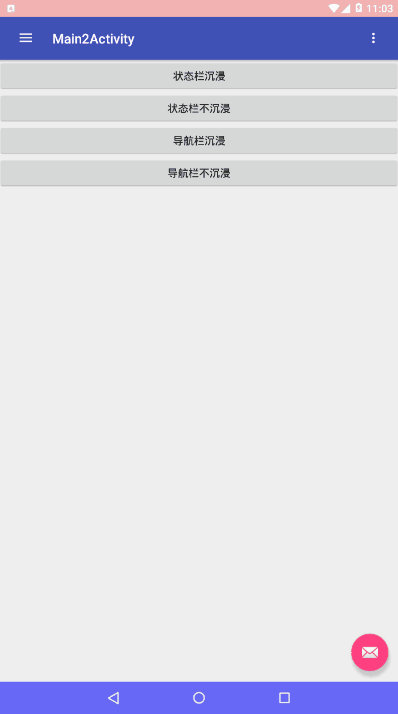
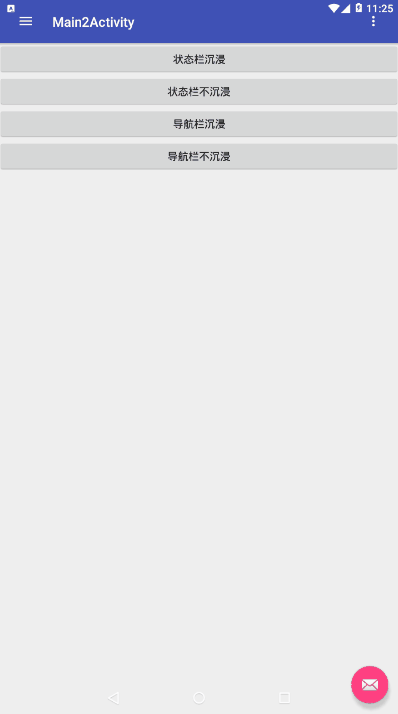
- DrawerLayout + NavigationView :
// 状态栏沉浸
Statusbar.setColor(getWindow(), Color.parseColor("#40ff0000"),Color.parseColor("#900000ff"),true,null);
//状态栏不沉浸
Statusbar.setColor(getWindow(), Color.parseColor("#40ff0000"),Color.parseColor("#900000ff"),false,null);
//导航栏沉浸
Statusbar.setColor(getWindow(), Color.parseColor("#40ff0000"),Color.parseColor("#900000ff"),null,true);
//导航栏不沉浸
Statusbar.setColor(getWindow(), Color.parseColor("#40ff0000"),Color.parseColor("#900000ff"),null,false);
DrawerLayout+NavigationView.gif
为了更清晰,我将状态栏设置为25%透明红色,与Actionbar的蓝色叠加成了紫色,要想完全透明,设置 Transparent就行了。
# Tips:
如果发现顶部多出一个状态栏高度,请检查代码或者 layout.xml 中根布局是否设置了 android:fitsSystemWindows="true" 属性,去掉。
# 最后上图
头尾沉浸.gif