对触摸事件进行一个基本整理吧,最基础的滑动事件
我们一般写demo最简单的方法就是写一个touchBegin方法,将事件写在里面,敲击屏幕做出对应事件就好了,但是具体有些什么东西,我们来探讨一下。
- 基本点击事件,按照iOS的尿性,有点击,肯定有移动,有点击结束等一系列方法
如下:可以多指,但是不建议
// 点击的时候调用
- (void)touchesBegan:(NSSet *)touches withEvent:(nullable UIEvent *)event;
// 点击之后不松手,移动的时候调用
- (void)touchesMoved:(NSSet *)touches withEvent:(nullable UIEvent *)event;
// 点击点离开屏幕的时候点用,点击结束
- (void)touchesEnded:(NSSet *)touches withEvent:(nullable UIEvent *)event;
// 点击取消的时候调用:比如电话打入
- (void)touchesCancelled:(nullable NSSet *)touches withEvent:(nullable UIEvent *)event;
- iOS9以后又新出了一系列的关于3Dtouch的点击事件
- (void)pressesBegan:(NSSet *)presses withEvent:(nullable UIPressesEvent *)event NS_AVAILABLE_IOS(9_0);
- (void)pressesChanged:(NSSet *)presses withEvent:(nullable UIPressesEvent *)event NS_AVAILABLE_IOS(9_0);
- (void)pressesEnded:(NSSet *)presses withEvent:(nullable UIPressesEvent *)event NS_AVAILABLE_IOS(9_0);
- (void)pressesCancelled:(NSSet *)presses withEvent:(nullable UIPressesEvent *)event NS_AVAILABLE_IOS(9_0);
- iOS3增加的摇一摇方法,加速计事件
- (void)motionBegan:(UIEventSubtype)motion withEvent:(nullable UIEvent *)event NS_AVAILABLE_IOS(3_0);
- (void)motionEnded:(UIEventSubtype)motion withEvent:(nullable UIEvent *)event NS_AVAILABLE_IOS(3_0);
- (void)motionCancelled:(UIEventSubtype)motion withEvent:(nullable UIEvent *)event NS_AVAILABLE_IOS(3_0);
- 最后这两个方法是用来接收远程事件的,比如播放器进入后台,点击外部组件,调用APP的事件方法
// 返回是否接收外部远程事件
- (BOOL)canPerformAction:(SEL)action withSender:(nullable id)sender NS_AVAILABLE_IOS(3_0);
// 这个就是接收事件处理方法
- (void)remoteControlReceivedWithEvent:(nullable UIEvent *)event NS_AVAILABLE_IOS(4_0);
简单的点击事件
我们今天仅仅对点击事件来进行个整理
- iOS中不是任何对象都能处理事件,只有继承了UIResponder的对象才能接收并处理事件,我们称之为“响应者对象”
- UIApplication、UIViewController、UIView都继承自UIResponder,因此它们都是响应者对象,都能够接收并处理事件
- 四个触摸事件处理方法中,都有NSSet *touches和UIEvent *event两个参数。
- 如果两根手指同时触摸一个view,那么view只会调用touchesBegan:withEvent:方法一次,touches参数里有两个UITouch对象
- 如果两根手指一前一后分开触摸同一个view,那么view分别调用两次
touchesBegan:withEvent:方法,并且每次调用时的touches参数只包含一个UITouch对象 - 根据touches的UITouch的个数可以判断是单点触摸还是多点触摸
UITouch
- 当用户用一根手指触摸屏幕,会创建一个与手指相关联的UITouch对象
- 一根手指对应一个UITouch对象
& UITouch的作用
- 保存着跟手指相关的信息,比如触摸的对象,时间,阶段
- 当手指移动时,系统会更新同一个UITouch对象,使之能够一直保持该手指在的触摸位置
- 当手指离开屏幕的时候,系统会销毁这个UITouch对象
*** 提示:在iPhone开发中,要避免使用双击时间!***
& UITouch的属性
触摸产生时所处的窗口
@property(nonatomic,readonly,retain) UIWindow *window;
触摸产生时所处的视图
@property(nonatomic,readonly,retain) UIView *view;
短时间内点按屏幕的次数,可以根据tapCount判断单击、双击或更多的点击
@property(nonatomic,readonly) NSUInteger tapCount;```

记录了触摸事件产生或变化时的时间,单位是s
```objc
@property(nonatomic,readonly) NSTimeInterval timestamp;```

当前触摸事件所处的状态
```objc
@property(nonatomic,readonly) UITouchPhase phase;
& UITouch的方法
/**
* 返回值表示触摸在view上的位置
* 这里返回的位置是针对view的坐标系的(以view的左上角为原点(0, 0))
* 调用时传入的view参数为nil的话,返回的是触摸点在UIWindow的位置
*/
- (CGPoint)locationInView:(UIView *)view;

// 该方法记录了前一个触摸点的位置
- (CGPoint)previousLocationInView:(UIView *)view;
UIEvent
- 每产生一个事件,就会产生一个UIEvent对象
- UIEvent:称为事件对象,记录产生的时刻和类型
#######& 常见属性
- 事件类型
@property(nonatomic,readonly) UIEventType type;
@property(nonatomic,readonly) UIEventSubtype  subtype;
- 事件产生的时间
@property (nonatomic, readonly) NSTimeInterval timestamp;
Example:
我们做两个Demo测试一下
第一个Demo
要求:在控制器的View上有一个小的view,这个view随着我们的拖动而移动
// 这个要求实现起来很简单,只需要在touchesMoved:方法里进行操作即可
- (void)touchesMoved:(NSSet *)touches withEvent:(UIEvent *)event
{
    // 因为是NSSet对象,所以我们没办法根据下标取出来内部组件
    // 打印一下看看内部
//    NSLog(@"%zd",touches.count);
    UITouch *touch = [touches anyObject];
    // locationInView:方法取出当前点坐标
    CGPoint curP = [touch locationInView:self];
    // previousLocationInView当前点的前一个点
    CGPoint preP = [touch previousLocationInView:self];
    // precise前缀用于更精确的描点
//    NSLog(@"preciseLocationInView%@",NSStringFromCGPoint([touch preciseLocationInView:self]));

    // 获取x轴偏移量
    CGFloat offsetX = curP.x - preP.x;
    // 获取y轴偏移量
    CGFloat offsetY = curP.y - preP.y;

    // 改变view的位置 (frame,center,transform)
    self.transform = CGAffineTransformTranslate(self.transform, offsetX, offsetY);
    NSLog(@"%s",__func__);
}
上面这段代码只要想说明的就是如何拿到这些点击的点,如果去做一些效果的事件
我们来做一个小玩意儿来玩一下
第二个Demo
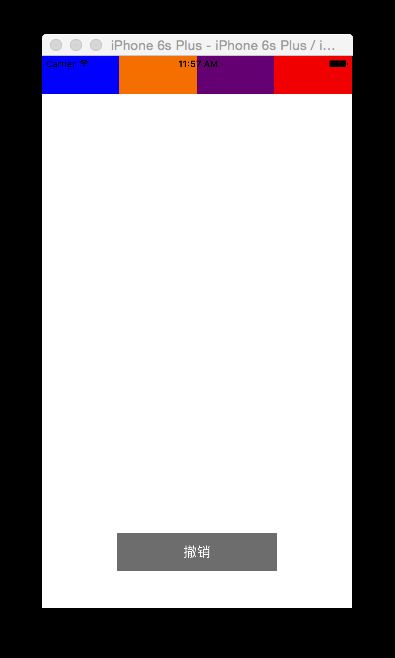
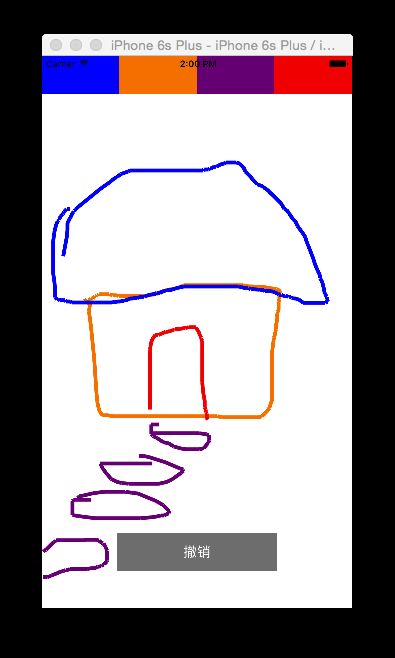
要求:画板,点击顶部颜色,可以在view上画线,点击撤销,取消最近一次画的线,如下图所示:
思路:把所以的触发点放到数组里,然后描绘出来
直接上代码了
.h文件里提供外界方法名
-(id)initWithFrame:(CGRect)frame
      button1Color:(UIColor *)button1Color
      button2Color:(UIColor *)button2Color
      button3Color:(UIColor *)button3Color
      button4Color:(UIColor *)button4Color
    drawPaperColor:(UIColor *)paperColor;
.m文件内部实现
#import "DrawBoard.h"

@interface DrawBoard ()
{
    // 四个颜色按钮
    UIButton *_button1;
    UIButton *_button2;
    UIButton *_button3;
    UIButton *_button4;
    UIButton *_repealButton;
    // 颜色
    UIColor *_color;
    // 存放所有东西的总数组
    NSMutableArray *_ziArray;
}


@end


@implementation DrawBoard

- (id)initWithFrame:(CGRect)frame button1Color:(UIColor *)button1Color button2Color:(UIColor *)button2Color button3Color:(UIColor *)button3Color button4Color:(UIColor *)button4Color drawPaperColor:(UIColor *)paperColor
{
    if ([super initWithFrame:frame]) {
        self.backgroundColor = paperColor;

        float width = [UIScreen mainScreen].bounds.size.width;

        _button1 = [[UIButton alloc]initWithFrame:CGRectMake(0, 0, width*0.25, 50)];
        _button1.backgroundColor=button1Color;
        [self addSubview:_button1];
        //设置点击事件
        [_button1 addTarget:self action:@selector(changeColor:) forControlEvents:UIControlEventTouchDown];


        _button2 = [[UIButton alloc] initWithFrame:CGRectMake(width*0.25, 0, width*0.25, 50)];
        _button2.backgroundColor=button2Color;
        [self addSubview:_button2];
        [_button2 addTarget:self action:@selector(changeColor:) forControlEvents:UIControlEventTouchDown];


        _button3 = [[UIButton alloc]initWithFrame:CGRectMake(width*0.5, 0, width*0.25, 50)];
        _button3.backgroundColor=button3Color;
        [self addSubview:_button3];
        [_button3 addTarget:self action:@selector(changeColor:) forControlEvents:UIControlEventTouchDown];


        _button4 = [[UIButton alloc]initWithFrame:CGRectMake(width*0.75, 0, width*0.25, 50)];
        _button4.backgroundColor=button4Color;
        [self addSubview:_button4];
        [_button4 addTarget:self action:@selector(changeColor:) forControlEvents:UIControlEventTouchDown];

        _repealButton = [[UIButton alloc]initWithFrame:CGRectMake(100, [UIScreen mainScreen].bounds.size.height -100, width-200, 50)];
        _repealButton.backgroundColor=[UIColor grayColor];
        [_repealButton setTitle:@"撤销" forState:UIControlStateNormal];
        [self addSubview:_repealButton];
        [_repealButton addTarget:self action:@selector(repeal:) forControlEvents:UIControlEventTouchDown];


        _ziArray = [[NSMutableArray alloc]init];

        _color = [UIColor blackColor];
    }
    return self;
}

- (void)changeColor:(UIButton *)btn
{
    _color = btn.backgroundColor;
}

- (void)touchesBegan:(NSSet *)touches withEvent:(UIEvent *)event
{
    // 创建数组,每个数组放每一笔的所有点
    NSMutableArray *array = [[NSMutableArray alloc] init];

    UITouch *touch = [touches anyObject];
    CGPoint point = [touch locationInView:self];
    NSValue *pointValue = [NSValue valueWithCGPoint:point];

    [array addObject:pointValue];
    // 这一个数组放一个笔画,然后每个笔画放到一个总数组里
    [_ziArray addObject:array];
}

- (void)touchesMoved:(NSSet *)touches withEvent:(UIEvent *)event
{
    UITouch *touch = [touches anyObject];
    CGPoint point = [touch locationInView:self];
    NSValue *pointValue = [NSValue valueWithCGPoint:point];
    // 取出放点的这个数组
    NSMutableArray *traitArray = [_ziArray lastObject];
    [traitArray addObject:pointValue];
    // 画图
    [self setNeedsDisplay];
}

// 开始画图
- (void)drawRect:(CGRect)rect
{
    for (int i = 0; i < [_ziArray count]; i++) {

        // NSMutableArray *traitArray=[[NSMutableArray alloc] init];错误

        NSMutableArray *traitArray = [_ziArray objectAtIndex:i];
        // 拿起画笔的方法
        // 这个方法只有在drawRect:方法里才能调用
        CGContextRef context = UIGraphicsGetCurrentContext();
        // 设置画笔的粗细。。
        CGContextSetLineWidth(context,5.0f );
        // 设置画笔的颜色
        CGContextSetStrokeColorWithColor(context, [[traitArray objectAtIndex:0] CGColor]);
        for (int j = 1; j < [traitArray count]-1; j++) {
            NSValue *pointValue = [traitArray objectAtIndex:j];

            CGPoint firstPoint = [pointValue CGPointValue ];

            NSValue *secondValue = [traitArray objectAtIndex:j+1];

            CGPoint secondPoint = [secondValue CGPointValue];

            // 设置两点的连线起点,
            CGContextMoveToPoint(context, firstPoint.x, firstPoint.y);
            // 用点连成线,
            CGContextAddLineToPoint(context, secondPoint.x, secondPoint.y);

            // 提交画笔
            CGContextStrokePath(context);
        }
    }
}


- (void)repeal:(UIButton *)btn
{
    // 移除最后面的数组
    [_ziArray removeLastObject];
    // 重画
    [self setNeedsDisplay];
}

@end

