下载一个docker conda , 也可以从ubuntu 进行
进入镜像
docker run -it --name "ubuntu_nong" -v /home/nbt2/docker/docker_dat:/docker_dat --privileged nong/ubuntu_conda_r /bin/bash

conda create -n lncRNA --clone /home/nong/miniconda3/envs/lncRNA/
docker 真的很棒!
之前介绍过用docker安装RNAcocktail了
docker source
参考:http://blog.csdn.net/samxx8/article/details/38946737
docker 是。。。
要安装和配置docker前提你必须有root的权限!
安装
#centos
sudo yum -y install docker
#ubuntu
sudo apt install docker docker.io
#测试
service docker start
docker run hello-world
镜像源
选个国内的镜像提升下载速度
https://www.docker-cn.com/registry-mirror
我使用的是阿里云的加速器,速度超快的!
https://dev.aliyun.com/search.html
将一般用户加入docker
docker 默认只能由root运行。将一般用户加入docker组即可
#创建docker组,一般自己就有
sudo groupadd docker

#将当前用户加入docker组,或者其他用户
sudo gpasswd -a ${USER} docker

#重新启动docker服务(下面是CentOS7的命令)
sudo systemctl restart docker

#当前用户退出系统重新登陆
#运行docker命令
docker ps
docker 使用
安装RNAcocktail 软件集合
docker pull marghoob/rnacocktail
运行方式有多种,这是交互模式
docker run -a stdin -a stdout -a stderr -i -t -v /public1:/public1 5aef8cc6eabd run_rnacocktail.py align -h
docker run -a stdin -a stdout -a stderr -i -t -v /data4:/data4 -v /data5:/data5 5aef8cc6eabd
51a11dbcbbc2 是容器ID
之后是你要运行的命令,如果不带命令,就直接进入交互模式。
要注意的时,运行docker的时候,你是进入了一个容器(container)里面,就是另一个世界,完全一个新的环境, 而且你的当前目录也变了!
这里的-v /public1:/public1是把现实世界的/public1目录映射到容器里面生成/public1。
你运行程序的输入输出都要加绝对路径,或者在cd到你想运行的目录,否者你当程序运行结束,退出容器回到原来世界(环境)的时候,你找不到运行结果!
简化命令
当然是alias
vim /etc/profile
加入下面这行
alias docker_rnacocktail="docker run -a stdin -a stdout -a stderr -i -t "
以后运行命令就是
docker_rnacocktail -v /public1:/public1 51a11dbcbbc2 run_rnacocktail.py align -h
还是有很多命令,docker必须把image ID(51a11dbcbbc2)放在参数后面, 没办法!
安全问题
我下载的这个RNAcockt 镜像运行时的root,即进入这个容器时,你在那个环境里是root,这样很危险!所以我再RNAcocktail的基础上改装成新的镜像,在运行时是非root用户!
Dockerfile 生成新镜像(images)
vim Dockerfile
FROM b29cb6c43221
MAINTAINER      Nong "[email protected]"

RUN     useradd -m -d /home/nong -s /bin/bash -b /home/nong  nong
RUN     /bin/echo 'nong:123456' |chpasswd
RUN     /bin/echo 'root:123456' |chpasswd
USER nong
note:新镜像就是创建了一个普通用户(RUN),并使用普通用户为默认用(USER),
生成镜像
docker build -t docker.io/marghoob/rnacocktail:mytag .
将container 的内容生成镜像
参考这篇文章:http://blog.csdn.net/jiankunking/article/details/62056392
进入一个docker,记住进入后的docker id 961bcbc2bc85,然后修改。
exit, 退出后修改命令
docker commit -m 'fix hisat2_jun2bed.py and unmask' -a 'Docker rnacocktail' 961bcbc2bc85 marghoob/rnacocktail:fixed
其中,-m 来指定提交的说明信息,跟我们使用的版本控制工具一样;-a 可以指定更新的用户信息;之后是用来创建镜像的容器的 ID;最后指定目标镜像的仓库名和 tag 信息。创建成功后会返回这个镜像的 ID 信息。
参考:
http://www.runoob.com/docker/docker-image-usage.html
http://blog.csdn.net/yygydjkthh/article/details/47694929
http://www.simapple.com/374.html
进入docker
 容器(即一个应用环境):
        用镜像建立一个容器,就可以得到一个应用环境工作了。

    创建运行一个容器并进入容器shell:sudo docker run -i -t  /bin/bash
    根据当前目录Dockerfile文件构建容器:docker build -t  .   #Dockerfile 可以理解为一个容器的配置文件。

    查看容器列表及状态:sudo docker ps -a
    查看容器id: docker ps -a -q

    删除所有未运行的容器:docker ps -a -q | xargs docker rm
    删除一个容器:sudo docker rm
    删除所有容器:docker rm $(docker ps -q -a)

    启动一个容器:sudo docker start
    停止一个容器: sudo docker stop
    关联一个容器:sudo docker attach   #其实我的理解就是进入这个容器的shell ,并操作它。

进入 容器还有一个方法 docker exec -ti  /bin/bash
多人进入docker
https://www.cnblogs.com/xhyan/p/6593075.html
更改时区
cp /usr/share/zoneinfo/Asia/Shanghai /etc/localtime
docker 本地导入导出
https://www.cnblogs.com/ksir16/p/6553851.html
用Docker解决坑爹的环境搭建系列——lamp(php5+mysql+apache2)
安装conda
conda install -y python=3
conda update conda
conda clean --all --yes
conda source
conda config --add channels https://mirrors.ustc.edu.cn/anaconda/pkgs/free/
conda config --add channels https://mirrors.ustc.edu.cn/anaconda/pkgs/main/
conda config --set show_channel_urls yes
conda config --add channels https://mirrors.ustc.edu.cn/anaconda/cloud/conda-forge/
conda config --add channels https://mirrors.ustc.edu.cn/anaconda/cloud/bioconda/
配置ubuntu
pip install fire pysam
pip install python-intervals
conda install biopython
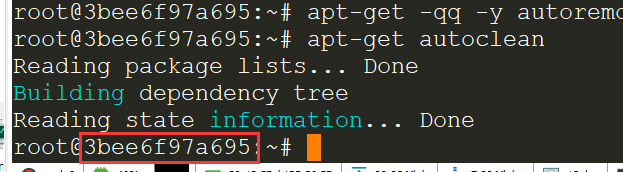
apt-get autoclean
apt-get -qq -y autoremove
vim ~/.Rprofile
options(BioC_mirror="https://mirrors.ustc.edu.cn/bioc/")
安装R
生成镜像
记住 container ID
docker commit -m 'basic R conda' -a 'Docker conda R' 3bee6f97a695 nong/ubuntu_conda_r:20190810
新建一个dockerfile 配置环境
vim Dockerfile
FROM nong/ubuntu_conda_r:20190810
MAINTAINER      Nong "[email protected]"

RUN umask 0000
USER nong
ENV PATH="/home/nong/miniconda3/bin:${PATH}"
USER 说明镜像要用那个用户,
生存docker镜像
docker build -t nong/ubuntu_conda_r:latest .
保存
docker save nong/ubuntu_conda_r:latest > nong.ubuntu_conda_r.latest.docker
## docker export -o .nong.ubuntu_conda_r.latest.docker containerID
转换为singularity
mkdir -p /tmp/test
docker run -v /var/run/docker.sock:/var/run/docker.sock \
-v /tmp/test:/output \
--privileged -t --rm \
singularityware/docker2singularity \
--name nong_ubuntu_conda_r_latest \
nong/ubuntu_conda_r:latest
mv /tmp/test/nong_ubuntu_conda_r_latest.simg .
deb http://mirrors.ustc.edu.cn/debian/ buster main non-free contrib
deb http://mirrors.ustc.edu.cn/debian/ buster-updates main non-free contrib
deb http://mirrors.ustc.edu.cn/debian/ buster-backports main non-free contrib
deb-src http://mirrors.ustc.edu.cn/debian/ buster main non-free contrib
deb-src http://mirrors.ustc.edu.cn/debian/ buster-updates main non-free contrib
deb-src http://mirrors.ustc.edu.cn/debian/ buster-backports main non-free contrib
deb http://mirrors.163.com/debian-security/ buster/updates main non-free contrib
deb-src http://mirrors.163.com/debian-security/ buster/updates main non-free contrib
apt-get clean all
apt-get update