前言
贝塞尔曲线是一种矢量曲线 , 主要应用于平面图形的绘制上 .
UIBezierPath ( 这个类在UIKit中 ) 正是运用了这一数学规则 , 此类是Core Graphics框架关于path的一个封装 , 可以进行曲线 , 直线以及他们组合而成的图形的绘制 .
正文
提示 : 因为UIBezierPath的父类是NSObject而不是UIView , 所以他不是可见的控件 , 为了纯粹的学习UIBezierPath , 避免发生混搅 , 我们的操作都在自己创建的view中的- (void)drawRect:(CGRect)rect {}这个方法中操作完成的.
第一步 : 创建StuBeView
学习之前 , 我们需要创建一个UIView , 取名为StuBeView , 如无说明 , 下面的代码都在这里面 .
然后将StuBeView添加到ViewController里面 .
第二步 : 在StuBeView.m中 , 创建UIBezierPath对象
UIBezierPath顾名思义 , path是根本 .
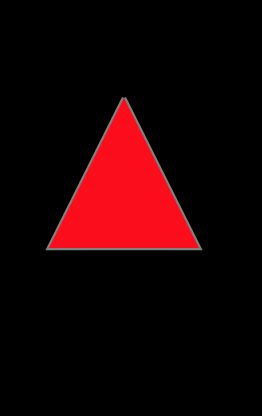
创建和使用一个path对象的过程是分开的 , 包含以下步骤:
- (void)drawRect:(CGRect)rect
{
  //1 ) 创建一个Bezier path对象。
  UIBezierPath *beizer = [UIBezierPath bezierPath];
  //2 ) 使用方法moveToPoint:去设置初始线段的起点。
  [beizer moveToPoint:CGPointMake(100, 100)];
  //3 ) 添加line或者curve去定义一个或者多个subpaths。
  [beizer addLineToPoint:CGPointMake(150, 200)];
  [beizer addLineToPoint:CGPointMake(50, 200)];
  [beizer addLineToPoint:CGPointMake(100, 100)];//回到起始点形成封闭的图形
  //4 ) 改变UIBezierPath对象跟绘图相关的属性。
  beizer.lineWidth = 3;//边线的粗细(command点击lineWidth里面有很多属性,不一一列  举)
  UIColor *color = [UIColor grayColor];
  [color set];  //设置线条颜色
  [beizer stroke]; //连线的颜色
  UIColor *color1 = [UIColor redColor];
  [color1 setFill];
  [beizer fill]; //填充的颜色
}
效果图:
曲线
绘画曲线也是差不多,不过是将line方法变curve方法,直接上代码.
- (void)drawRect:(CGRect)rect
{
  UIBezierPath *beizer = [UIBezierPath bezierPath];
  [beizer moveToPoint:CGPointMake(100, 100)];
  [beizer addQuadCurveToPoint:CGPointMake(200,100)controlPoint:CGPointMake(150, 10)];
  [beizer addQuadCurveToPoint:CGPointMake(300, 100) controlPoint:CGPointMake(250, 190)];
  beizer.lineWidth = 3;
  UIColor *color = [UIColor whiteColor];
  [color set];  //设置线条颜色
  [beizer stroke]; //连线的颜色
  UIColor *color1 = [UIColor redColor];
  [color1 setFill];
  //[beizer fill]; //填充的颜色
}
效果图有两张,第一张是注释掉填充的颜色,第二张是有填充颜色,请观察:

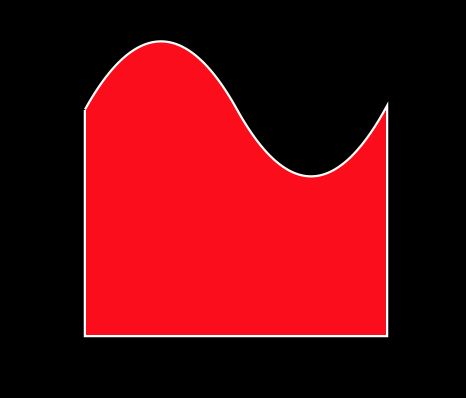
- 发现了吗?(咳咳,图片是截的模拟器的屏,所以第二张图中间看起来像断了,重点不是这个)发现不闭合的曲线填充颜色的时候是以首尾两个端点所连接的直线为闭合线的,所以我们在做需要填充颜色的时候记得绘制完整闭合的图形.
例如:
- (void)drawRect:(CGRect)rect
{
  UIBezierPath *beizer = [UIBezierPath bezierPath];
  [beizer moveToPoint:CGPointMake(100, 100)];
  //endPoint:曲线的终点
  //controlPoint:画曲线的基准点,也是控制点
  [beizer addQuadCurveToPoint:CGPointMake(200,100)controlPoint:CGPointMake(150, 10)];
  [beizer addQuadCurveToPoint:CGPointMake(300, 100) controlPoint:CGPointMake(250, 190)];
  beizer.lineWidth = 3;
  [beizer addLineToPoint:CGPointMake(300, 250)];
  [beizer addLineToPoint:CGPointMake(100, 250)];
  [beizer addLineToPoint:CGPointMake(100, 100)];
  UIColor *color = [UIColor whiteColor];
  [color set];  //设置线条颜色
  [beizer stroke]; //连线的颜色
  UIColor *color1 = [UIColor redColor];
  [color1 setFill];
  //[beizer fill]; //填充的颜色
}
可得到效果图:
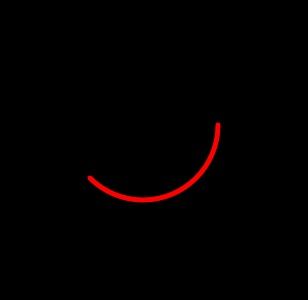
圆曲线
在@implementation StubeView上面定义一个宏
DEGREES_TO_RADIANS(degrees)  ((M_PI * degrees)/ 180)

- (void)drawRect:(CGRect)rect
{
  UIColor *color = [UIColor redColor];
  [color set]; //设置线条颜色
  /*
   * ArcCenter : 中心点
   * radius : 半径
   * startAngle : :弧线开始的角度值
   * endAngle : :弧线结束的角度值
   * clockwise : 是顺时针(YES)或是逆时针(NO)
   * DEGREES_TO_RADIANS()这个是为了将360°的角度值转换成系统的弧角度
  */
  UIBezierPath* aPath = [UIBezierPath bezierPathWithArcCenter:CGPointMake(150, 150)
                                                       radius:75
                                                   startAngle:0
                                                     endAngle:DEGREES_TO_RADIANS(135)
                                                    clockwise:YES];
  aPath.lineWidth = 5.0;
  aPath.lineCapStyle = kCGLineCapRound; //线条拐角
  aPath.lineJoinStyle = kCGLineCapRound; //终点处理
  [aPath stroke];
}
动画连线
- (void)drawRect:(CGRect)rect
{
  UIBezierPath *beizer = [UIBezierPath bezierPath];
  [beizer moveToPoint:CGPointMake(100, 100)];
  [beizer addLineToPoint:CGPointMake(150, 200)];
  [beizer addLineToPoint:CGPointMake(50, 200)];
  [beizer addLineToPoint:CGPointMake(100, 100)];//回到起始点形成封闭的图形

  beizer.lineWidth = 3;//边线的粗细(command点击lineWidth里面有很多属性,不一一列举)
  UIColor *color = [UIColor grayColor];
  [color set];  //设置线条颜色
  [beizer stroke]; //连线的颜色

  //*****************添加动画连线******************//
  CAShapeLayer *shapeLayer = [CAShapeLayer layer];
  shapeLayer.path = beizer.CGPath;
  shapeLayer.fillColor = [UIColor clearColor].CGColor;
  shapeLayer.strokeColor = [UIColor redColor].CGColor;
  shapeLayer.lineWidth = 2;
  [self.layer addSublayer:shapeLayer];

  CABasicAnimation *anmi = [CABasicAnimation animation];
  anmi.keyPath = @"strokeEnd";
  anmi.fromValue = [NSNumber numberWithFloat:0];
  anmi.toValue = [NSNumber numberWithFloat:1.0f];
  anmi.duration =2.0f;
  anmi.timingFunction = [CAMediaTimingFunction functionWithName:kCAMediaTimingFunctionEaseInEaseOut];
  anmi.autoreverses = NO;

  [shapeLayer addAnimation:anmi forKey:@"stroke"];
}
第三步 : 改变view的形状
//左上角和右上角
UIBezierPath *maskPath;
//byRoundingCorners 选项枚举
maskPath = [UIBezierPath bezierPathWithRoundedRect:self.bounds
                                 byRoundingCorners:(UIRectCornerTopLeft | UIRectCornerTopRight)
                                       cornerRadii:CGSizeMake(10.0f, 10.0f)];
CAShapeLayer *maskLayer = [[CAShapeLayer alloc] init];
maskLayer.frame = self.bounds;
maskLayer.path = maskPath.CGPath;
self.layer.mask = maskLayer;
给UIImageView的image添加圆角的方法(如果是加载网络图片必须等图片加载完成后调用):
- (UIImageView *)imageWithRoundedCornersSize:(float)cornerRadius
{
  UIImageView *imageView = self;
  UIImage * original = self.image;
  UIGraphicsBeginImageContextWithOptions(imageView.bounds.size, NO, [UIScreen mainScreen].scale);

  [[UIBezierPath bezierPathWithRoundedRect:imageView.bounds
                            cornerRadius:cornerRadius] addClip];
  [original drawInRect:imageView.bounds];

  imageView.image = UIGraphicsGetImageFromCurrentImageContext();

  UIGraphicsEndImageContext();

  return imageView;
}
如有疑问 , 欢迎交流 !


