3.6 Zookeeper安装及环境配置
3.6.1 Zookeeper安装
安装文件解压到/opt/zookeeper路径下。
[root@master ~]# tar  -xvf   zookeeper-3.4.10.tar.gz
[root@master ~]# mv  zookeeper-3.4.10  /opt/zookeeper
[root@master ~]# mv  zookeeper-3.4.10  zookeeper3.4
在zookeeper路径下创建数据文件和日志文件。
[root@master ~]# mkdir   /opt/zookeeper/data
[root@master ~]# mkdir   /opt/zookeeper/log
# 在/opt/zookeeper/data目录下创建myid文件
[root@master ~]# touch myid
[root@master ~]# vi myid
# 设定值为1
1
修改zoo.cfg文件。
[root@master ~]# cd /opt/zookeeper/zookeeper3.4/conf
# 创建zoo.cfg文件
[root@master conf]# cp zoo_sample.cfg zoo.cfg
[root@master conf]# vi zoo.cfg
具体修改如下所示:
# The number of milliseconds of each tick
tickTime=2000
# The number of ticks that the initial
# synchronization phase can take
initLimit=10
# The number of ticks that can pass between
# sending a request and getting an acknowledgement
syncLimit=5
# the directory where the snapshot is stored.
# do not use /tmp for storage, /tmp here is just
# example sakes.
#dataDir=/tmp/zookeeper
# the port at which the clients will connect
# 默认端口是2181,但本机端口被占用,遂变更为2381
clientPort=2381
# the maximum number of client connections.
# increase this if you need to handle more clients
#maxClientCnxns=60
#
# Be sure to read the maintenance section of the
# administrator guide before turning on autopurge.
#
# http://zookeeper.apache.org/doc/current/zookeeperAdmin.html#sc_maintenance
#
# The number of snapshots to retain in dataDir
#autopurge.snapRetainCount=3
# Purge task interval in hours
# Set to "0" to disable auto purge feature
#autopurge.purgeInterval=1
quorumListenOnAllIPs=ture
# 新增内容
dataDir=/opt/zookeeper/data
dataLogDir=/opt/zookeeper/log
server.1=master:2888:3888
server.2=slave1:2888:3888
server.3=slave2:2888:3888
将Zookeeper传递给slave1和slave2,/opt/zookeeper/data路径下的myid与zoo.cfg内容须保持一致。
[root@master conf]# scp -r /opt/zookeeper root@slave1:/opt
[root@master conf]# scp -r /opt/zookeeper root@slave2:/opt
3.6.2 Zookeeper环境配置
编辑环境变量。
[root@master ~]# vi /etc/profile
修改内容如下:
export  ZK_HOME=/opt/zookeeper/zookeeper3.4
PATH=$PATH:${JAVA_HOME}/bin:$HADOOP_HOME/sbin:$HADOOP_HOME/bin:${SCALA_HOME}/bin:${SPARK_HOME}/bin:${ZK_HOME}/bin:$PATH
使修改生效。
[root@master ~]# source /etc/profile
3.6.3 Zookeeper启动
完成Zookeeper的安装配置后,在每一台机器上启动。注:Zookeeper遵循选举制
slave1
[root@slave1 ~]# cd /opt/zookeeper/zookeeper3.4/bin
[root@slave1 bin]# ./zkServer.sh start
ZooKeeper JMX enabled by default
Using config: /opt/zookeeper/zookeeper3.4/bin/../conf/zoo.cfg
Starting zookeeper ... STARTED
[root@slave1 bin]# ./zkServer.sh status
ZooKeeper JMX enabled by default
Using config: /opt/zookeeper/zookeeper3.4/bin/../conf/zoo.cfg
Mode: leader
slave2
[root@slave2 ~]#  cd /opt/zookeeper/zookeeper3.4/bin
[root@slave2 bin]# ./zkServer.sh start
ZooKeeper JMX enabled by default
Using config: /opt/zookeeper/zookeeper3.4/bin/../conf/zoo.cfg
Starting zookeeper ... STARTED
[root@slave2 bin]# ./zkServer.sh status
ZooKeeper JMX enabled by default
Using config: /opt/zookeeper/zookeeper3.4/bin/../conf/zoo.cfg
Mode: follower
master
[root@master ~]# cd /opt/zookeeper/zookeeper3.4/bin
[root@master bin]# ./zkServer.sh start
ZooKeeper JMX enabled by default
Using config: /opt/zookeeper/zookeeper3.4/bin/../conf/zoo.cfg
Starting zookeeper ... already running as process 3944.
[root@master bin]# ./zkServer.sh status
ZooKeeper JMX enabled by default
Using config: /opt/zookeeper/zookeeper3.4/bin/../conf/zoo.cfg
Mode: follower
3.7 HBase安装及环境配置
3.7.1 HBase安装
将HBase安装包加载至/opt/HBase路径下,并将其解压到当前路径。
[root@master ~]# mkdir /opt/HBase
[root@master ~]# cd /opt/HBase
[root@master HBase]# rz
rz waiting to receive.
Starting zmodem transfer.  Press Ctrl+C to cancel.
Transferring hbase-2.0.2-bin.tar.gz...
  100%  150220 KB    10730 KB/sec    00:00:14       0 Errors
[root@master ~]# tar  -xvf   hbase-2.0.2-bin.tar.gz
3.7.2 配置文件修改
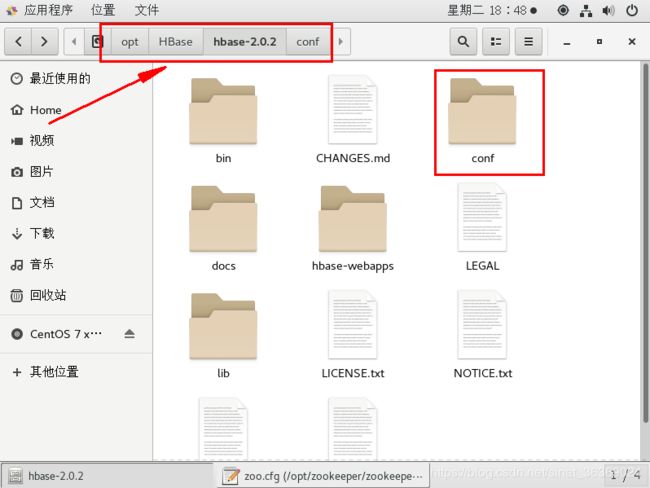
切换到/opt/hbase/hbase-2.0.2/conf路径。
修改hbase-env.sh,在文件中添加以下配置。
export JAVA_HOME=/opt/java/jdk1.8.0_181
export HADOOP_HOME=/opt/hadoop/hadoop-2.7.2
export HBASE_HOME=/opt/HBase/hbase-2.0.2
export HBASE_CLASSPATH=/opt/hadoop/hadoop-2.7.2/etc/hadoop
export HBASE_PID_DIR=/root/hbase/pids
export HBASE_MANAGES_ZK=false
修改hbase-site.xml,在文件中添加以下配置。
 hbase.rootdir
 hdfs://master:9000/hbase
 The directory shared byregion servers.


 hbase.zookeeper.property.clientPort
 2181


 zookeeper.session.timeout
 120000


hbase.master.maxclockskew
150000


 hbase.zookeeper.quorum
 master,slave3,slave4


 hbase.tmp.dir
 /root/hbase/tmp


 hbase.cluster.distributed
 true


    hbase.master
    master:60000
修改regionservers,指定hbase的主从。
master
slave1
slave2
将这些配置传输到其他机器上。
scp -r /opt/HBase root@slave1:/opt
scp -r /opt/HBase root@slave2:/opt
配置环境变量。
[root@master ~]# vi /etc/profile
配置文件内容如下所示:
export HBASE_HOME=/opt/HBase/hbase-2.0.2
export PATH=$PATH:${JAVA_HOME}/bin:$HADOOP_HOME/sbin:$HADOOP_HOME/bin:${SCALA_HOME}/bin:${SPARK_HOME}/bin:${ZK_HOME}/bin:${HBASE_HOME}/bin:$PATH
使配置文件生效。
[root@master ~]# source /etc/profile
查看安装结果。
[root@master ~]# hbase version
SLF4J: Class path contains multiple SLF4J bindings.
SLF4J: Found binding in [jar:file:/opt/HBase/hbase-2.0.2/lib/slf4j-log4j12-1.7.25.jar!/org/slf4j/impl/StaticLoggerBinder.class]
SLF4J: Found binding in [jar:file:/opt/hadoop/hadoop-2.7.2/share/hadoop/common/lib/slf4j-log4j12-1.7.10.jar!/org/slf4j/impl/StaticLoggerBinder.class]
SLF4J: See http://www.slf4j.org/codes.html#multiple_bindings for an explanation.
SLF4J: Actual binding is of type [org.slf4j.impl.Log4jLoggerFactory]
HBase 2.0.2
Source code repository git://ve0524/home/stack/hbase.git revision=1cfab033e779df840d5612a85277f42a6a4e8172
Compiled by stack on Tue Aug 28 20:50:40 PDT 2018
From source with checksum 80b9ac6ea66f2b5cf6bc3ce886f3fc67
3.7.3 启动HBase
Hbase是基于hadoop提供的分布式文件系统的,所以启动Hbase之前,先确保hadoop在正常运行,另外Hbase还依赖于zookkeeper,本来我们可以用hbase自带的zookeeper,但是我们上面的配置启用的是我们自己的zookeeper集群,所以在启动hbase前,还要确保zokeeper已经正常运行。Hbase可以只在hadoop的某个namenode节点上安装,也可以在所有的hadoop节点上安装,但是启动的时候只需要在一个节点上启动就行了,本例中,我在master、slave1、slave2都安装了Hbase,启动的时候只需要在master上启动就OK。
[root@master ~]# cd /opt/HBase/hbase-2.0.2/bin
[root@master bin]# start-hbase.sh
SLF4J: Class path contains multiple SLF4J bindings.
SLF4J: Found binding in [jar:file:/opt/HBase/hbase-2.0.2/lib/slf4j-log4j12-1.7.25.jar!/org/slf4j/impl/StaticLoggerBinder.class]
SLF4J: Found binding in [jar:file:/opt/hadoop/hadoop-2.7.2/share/hadoop/common/lib/slf4j-log4j12-1.7.10.jar!/org/slf4j/impl/StaticLoggerBinder.class]
SLF4J: See http://www.slf4j.org/codes.html#multiple_bindings for an explanation.
SLF4J: Actual binding is of type [org.slf4j.impl.Log4jLoggerFactory]
running master, logging to /opt/HBase/hbase-2.0.2/logs/hbase-root-master-master.out
slave4: running regionserver, logging to /opt/HBase/hbase-2.0.2/logs/hbase-root-regionserver-slave4.out
slave3: running regionserver, logging to /opt/HBase/hbase-2.0.2/logs/hbase-root-regionserver-slave3.out
bug
SLF4J: Class path contains multiple SLF4J bindings.
SLF4J: Found binding in [jar:file:/opt/HBase/hbase-2.0.2/lib/slf4j-log4j12-1.7.25.jar!/org/slf4j/impl/StaticLoggerBinder.class]
SLF4J: Found binding in [jar:file:/opt/hadoop/hadoop-2.7.2/share/hadoop/common/lib/slf4j-log4j12-1.7.10.jar!/org/slf4j/impl/StaticLoggerBinder.class]
SLF4J: See http://www.slf4j.org/codes.html#multiple_bindings for an explanation.
SLF4J: Actual binding is of type [org.slf4j.impl.Log4jLoggerFactory]
solution
发生jar包冲突了,移除其中一个即可。
[root@master bin]#cd /opt/HBase/hbase-2.0.2/lib
[root@master lib]#rm slf4j-log4j12-1.7.25.jar
rm:是否删除普通文件 “slf4j-log4j12-1.7.25.jar”?yes
[root@master lib]#cd /opt/HBase/hbase-2.0.2/bin
[root@master bin]#start-hbase.sh
running master, logging to /opt/HBase/hbase-2.0.2/logs/hbase-root-master-master.out
slave3: running regionserver, logging to /opt/HBase/hbase-2.0.2/logs/hbase-root-regionserver-slave3.out
slave4: running regionserver, logging to /opt/HBase/hbase-2.0.2/logs/hbase-root-regionserver-slave4.out
[root@master bin]#jps
9027 HMaster
9141 Jps
3544 ResourceManager
3944 QuorumPeerMain
3849 Master
3387 SecondaryNameNode
3196 NameNode
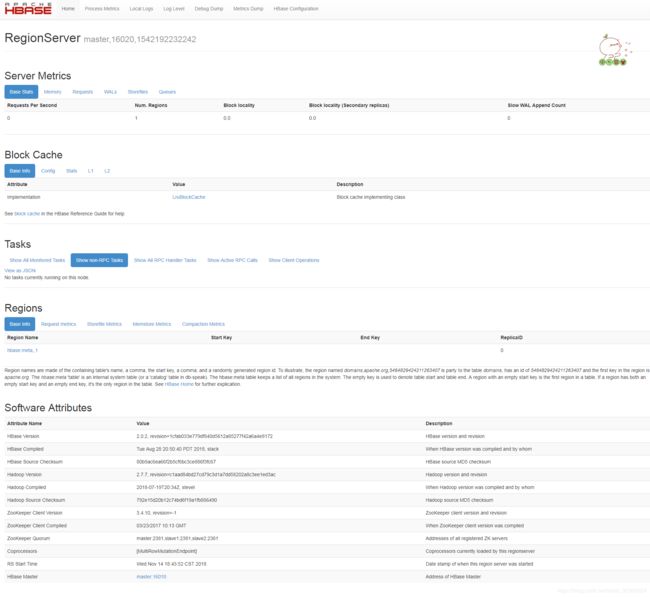
状态信息查看,访问IP:16030或者16010。
此外也可以通过命令行查看状态。
# 切换路径
[root@master bin]# cd /opt/HBase/hbase-2.0.2/bin
# 进入hbase命令窗口
[root@master bin]# ./hbase  shell
HBase Shell
Use "help" to get list of supported commands.
Use "exit" to quit this interactive shell.
Version 2.0.2, r1cfab033e779df840d5612a85277f42a6a4e8172, Tue Aug 28 20:50:40 PDT 2018
Took 0.0268 seconds
# 状态查看
hbase(main):001:0> status
1 active master, 0 backup masters, 3 servers, 0 dead, 0.6667 average load
Took 1.2047 seconds
# 退出
hbase(main):002:0> exit
bug
打开webUI界面后,提示
The RegionServer is initializing!信息。solution
查看hdfs safe mode
[root@master bin]#
hadoop dfsadmin -safemode get退出hdfs safe mode
[root@master bin]#
hadoop dfsadmin -safemode leave
3.8 Hive安装及环境配置
Hive可以选择只安装在master节点上,而不必每一台都部署。
3.8.1 Mysql安装
由于mysql是Hive默认的元数据,所以需先行安装Mysql。
# 检查是否已安装mysql
[root@master ~]# rpm -qa | grep -i mysql
mysql-community-libs-5.6.42-2.el7.x86_64
mysql-community-server-5.6.42-2.el7.x86_64
mysql-community-release-el7-5.noarch
mysql-community-client-5.6.42-2.el7.x86_64
mysql-community-common-5.6.42-2.el7.x86_64
# 如果需要卸载
[root@master ~]# rpm -e --nodeps mysql-community-libs-5.6.42-2.el7.x86_64
[root@master ~]# rpm -e --nodeps mysql-community-server-5.6.42-2.el7.x86_64
[root@master ~]# rpm -e --nodeps mysql-community-release-el7-5.noarch
[root@master ~]# rpm -e --nodeps mysql-community-client-5.6.42-2.el7.x86_64
[root@master ~]# rpm -e --nodeps mysql-community-common-5.6.42-2.el7.x86_64
# 清理文件夹,必须通过该方式才能彻底卸载
[root@master ~]# find / -name mysql
/etc/selinux/targeted/active/modules/100/mysql
/etc/selinux/targeted/tmp/modules/100/mysql
/var/lib/mysql
/var/lib/mysql/mysql
/usr/lib64/mysql
/usr/share/mysql
/opt/hive/apache-hive-2.3.4-bin/scripts/metastore/upgrade/mysql
[root@master ~]# rm -rf /usr/share/mysql
[root@master ~]# rm -rf /var/lib/mysql
[root@master ~]# rm -rf /var/lib/mysql/mysql
# 安装mysql
[root@master ~]# rpm -qa | grep mysql
[root@master ~]# wget http://repo.mysql.com/mysql-community-release-el7-5.noarch.rpm
--2018-12-06 16:46:05-- http://repo.mysql.com/mysql-community-release-el7-5.noarch.rpm
正在解析主机 repo.mysql.com (repo.mysql.com)... 23.220.145.218
正在连接 repo.mysql.com (repo.mysql.com)|23.220.145.218|:80... 已连接。
已发出 HTTP 请求,正在等待回应... 200 OK
长度:6140 (6.0K) [application/x-redhat-package-manager]
正在保存至: “mysql-community-release-el7-5.noarch.rpm”
100%[===============================================================================================================================================================================================>] 6,140 --.-K/s 用时 0.003s
2018-12-06 16:46:06 (1.81 MB/s) - 已保存 “mysql-community-release-el7-5.noarch.rpm” [6140/6140])
[root@master ~]# sudo rpm -ivh mysql-community-release-el7-5.noarch.rpm
准备中... ################################# [100%]
正在升级/安装...
1:mysql-community-release-el7-5 ################################# [100%]
[root@master ~]# sudo yum install mysql-server
已加载插件:fastestmirror, langpacks
Loading mirror speeds from cached hostfile
* base: mirrors.aliyun.com
* extras: mirrors.163.com
* updates: mirrors.aliyun.com
base | 3.6 kB 00:00:00
extras | 3.4 kB 00:00:00
mysql-connectors-community | 2.5 kB 00:00:00
mysql-tools-community | 2.5 kB 00:00:00
mysql56-community | 2.5 kB 00:00:00
updates | 3.4 kB 00:00:00
(1/3): mysql-connectors-community/x86_64/primary_db | 29 kB 00:00:00
(2/3): mysql-tools-community/x86_64/primary_db | 48 kB 00:00:00
(3/3): mysql56-community/x86_64/primary_db | 209 kB 00:00:01
正在解决依赖关系
--> 正在检查事务
---> 软件包 mysql-community-server.x86_64.0.5.6.42-2.el7 将被 安装
--> 正在处理依赖关系 mysql-community-common(x86-64) = 5.6.42-2.el7,它被软件包 mysql-community-server-5.6.42-2.el7.x86_64 需要
--> 正在处理依赖关系 mysql-community-client(x86-64) >= 5.6.10,它被软件包 mysql-community-server-5.6.42-2.el7.x86_64 需要
--> 正在处理依赖关系 perl(DBI),它被软件包 mysql-community-server-5.6.42-2.el7.x86_64 需要
--> 正在检查事务
---> 软件包 mysql-community-client.x86_64.0.5.6.42-2.el7 将被 安装
--> 正在处理依赖关系 mysql-community-libs(x86-64) >= 5.6.10,它被软件包 mysql-community-client-5.6.42-2.el7.x86_64 需要
---> 软件包 mysql-community-common.x86_64.0.5.6.42-2.el7 将被 安装
---> 软件包 perl-DBI.x86_64.0.1.627-4.el7 将被 安装
--> 正在处理依赖关系 perl(RPC::PlServer) >= 0.2001,它被软件包 perl-DBI-1.627-4.el7.x86_64 需要
--> 正在处理依赖关系 perl(RPC::PlClient) >= 0.2000,它被软件包 perl-DBI-1.627-4.el7.x86_64 需要
--> 正在检查事务
---> 软件包 mariadb-libs.x86_64.1.5.5.56-2.el7 将被 取代
---> 软件包 mysql-community-libs.x86_64.0.5.6.42-2.el7 将被 舍弃
---> 软件包 perl-PlRPC.noarch.0.0.2020-14.el7 将被 安装
--> 正在处理依赖关系 perl(Net::Daemon) >= 0.13,它被软件包 perl-PlRPC-0.2020-14.el7.noarch 需要
--> 正在处理依赖关系 perl(Net::Daemon::Test),它被软件包 perl-PlRPC-0.2020-14.el7.noarch 需要
--> 正在处理依赖关系 perl(Net::Daemon::Log),它被软件包 perl-PlRPC-0.2020-14.el7.noarch 需要
--> 正在处理依赖关系 perl(Compress::Zlib),它被软件包 perl-PlRPC-0.2020-14.el7.noarch 需要
--> 正在检查事务
---> 软件包 perl-IO-Compress.noarch.0.2.061-2.el7 将被 安装
--> 正在处理依赖关系 perl(Compress::Raw::Zlib) >= 2.061,它被软件包 perl-IO-Compress-2.061-2.el7.noarch 需要
--> 正在处理依赖关系 perl(Compress::Raw::Bzip2) >= 2.061,它被软件包 perl-IO-Compress-2.061-2.el7.noarch 需要
---> 软件包 perl-Net-Daemon.noarch.0.0.48-5.el7 将被 安装
--> 正在检查事务
---> 软件包 perl-Compress-Raw-Bzip2.x86_64.0.2.061-3.el7 将被 安装
---> 软件包 perl-Compress-Raw-Zlib.x86_64.1.2.061-4.el7 将被 安装
--> 解决依赖关系完成
依赖关系解决
=========================================================================================================================================================================================================================================
Package 架构 版本 源 大小
=========================================================================================================================================================================================================================================
正在安装:
mysql-community-libs x86_64 5.6.42-2.el7 mysql56-community 2.0 M
替换 mariadb-libs.x86_64 1:5.5.56-2.el7
mysql-community-server x86_64 5.6.42-2.el7 mysql56-community 59 M
为依赖而安装:
mysql-community-client x86_64 5.6.42-2.el7 mysql56-community 20 M
mysql-community-common x86_64 5.6.42-2.el7 mysql56-community 257 k
perl-Compress-Raw-Bzip2 x86_64 2.061-3.el7 base 32 k
perl-Compress-Raw-Zlib x86_64 1:2.061-4.el7 base 57 k
perl-DBI x86_64 1.627-4.el7 base 802 k
perl-IO-Compress noarch 2.061-2.el7 base 260 k
perl-Net-Daemon noarch 0.48-5.el7 base 51 k
perl-PlRPC noarch 0.2020-14.el7 base 36 k
事务概要
=========================================================================================================================================================================================================================================
安装 2 软件包 (+8 依赖软件包)
总下载量:82 M
Is this ok [y/d/N]: y
Downloading packages:
警告:/var/cache/yum/x86_64/7/mysql56-community/packages/mysql-community-common-5.6.42-2.el7.x86_64.rpm: 头V3 DSA/SHA1 Signature, 密钥 ID 5072e1f5: NOKEY ] 231 kB/s | 259 kB 00:06:03 ETA
mysql-community-common-5.6.42-2.el7.x86_64.rpm 的公钥尚未安装
(1/10): mysql-community-common-5.6.42-2.el7.x86_64.rpm | 257 kB 00:00:01
(2/10): mysql-community-client-5.6.42-2.el7.x86_64.rpm | 20 MB 00:00:07
警告:/var/cache/yum/x86_64/7/base/packages/perl-Compress-Raw-Bzip2-2.061-3.el7.x86_64.rpm: 头V3 RSA/SHA256 Signature, 密钥 ID f4a80eb5: NOKEY ] 2.6 MB/s | 20 MB 00:00:23 ETA
perl-Compress-Raw-Bzip2-2.061-3.el7.x86_64.rpm 的公钥尚未安装
(3/10): perl-Compress-Raw-Bzip2-2.061-3.el7.x86_64.rpm | 32 kB 00:00:00
(4/10): perl-Compress-Raw-Zlib-2.061-4.el7.x86_64.rpm | 57 kB 00:00:00
(5/10): perl-IO-Compress-2.061-2.el7.noarch.rpm | 260 kB 00:00:00
(6/10): perl-Net-Daemon-0.48-5.el7.noarch.rpm | 51 kB 00:00:00
(7/10): perl-PlRPC-0.2020-14.el7.noarch.rpm | 36 kB 00:00:00
(8/10): perl-DBI-1.627-4.el7.x86_64.rpm | 802 kB 00:00:00
(9/10): mysql-community-libs-5.6.42-2.el7.x86_64.rpm | 2.0 MB 00:00:24
(10/10): mysql-community-server-5.6.42-2.el7.x86_64.rpm | 59 MB 00:02:21
-----------------------------------------------------------------------------------------------------------------------------------------------------------------------------------------------------------------------------------------
总计 567 kB/s | 82 MB 00:02:28
从 file:/etc/pki/rpm-gpg/RPM-GPG-KEY-mysql 检索密钥
导入 GPG key 0x5072E1F5:
用户ID : "MySQL Release Engineering "
指纹 : a4a9 4068 76fc bd3c 4567 70c8 8c71 8d3b 5072 e1f5
软件包 : mysql-community-release-el7-5.noarch (installed)
来自 : file:/etc/pki/rpm-gpg/RPM-GPG-KEY-mysql
是否继续?[y/N]:y
从 file:///etc/pki/rpm-gpg/RPM-GPG-KEY-CentOS-7 检索密钥
导入 GPG key 0xF4A80EB5:
用户ID : "CentOS-7 Key (CentOS 7 Official Signing Key) "
指纹 : 6341 ab27 53d7 8a78 a7c2 7bb1 24c6 a8a7 f4a8 0eb5
软件包 : centos-release-7-5.1804.el7.centos.x86_64 (@anaconda)
来自 : /etc/pki/rpm-gpg/RPM-GPG-KEY-CentOS-7
是否继续?[y/N]:y
Running transaction check
Running transaction test
Transaction test succeeded
Running transaction
警告:RPM 数据库已被非 yum 程序修改。
** 发现 2 个已存在的 RPM 数据库问题, 'yum check' 输出如下:
icedtea-web-1.7.1-1.el7.x86_64 有缺少的需求 java-1.8.0-openjdk
jline-1.0-8.el7.noarch 有缺少的需求 java >= ('0', '1.5', None)
正在安装 : mysql-community-common-5.6.42-2.el7.x86_64 1/11
正在安装 : mysql-community-libs-5.6.42-2.el7.x86_64 2/11
正在安装 : mysql-community-client-5.6.42-2.el7.x86_64 3/11
正在安装 : perl-Compress-Raw-Bzip2-2.061-3.el7.x86_64 4/11
正在安装 : 1:perl-Compress-Raw-Zlib-2.061-4.el7.x86_64 5/11
正在安装 : perl-IO-Compress-2.061-2.el7.noarch 6/11
正在安装 : perl-Net-Daemon-0.48-5.el7.noarch 7/11
正在安装 : perl-PlRPC-0.2020-14.el7.noarch 8/11
正在安装 : perl-DBI-1.627-4.el7.x86_64 9/11
正在安装 : mysql-community-server-5.6.42-2.el7.x86_64 10/11
正在删除 : 1:mariadb-libs-5.5.56-2.el7.x86_64 11/11
warning: file /usr/lib64/mysql/plugin/mysql_clear_password.so: remove failed: No such file or directory
warning: file /usr/lib64/mysql/plugin/dialog.so: remove failed: No such file or directory
warning: file /usr/lib64/mysql/libmysqlclient.so.18.0.0: remove failed: No such file or directory
验证中 : mysql-community-libs-5.6.42-2.el7.x86_64 1/11
验证中 : mysql-community-common-5.6.42-2.el7.x86_64 2/11
验证中 : perl-Net-Daemon-0.48-5.el7.noarch 3/11
验证中 : mysql-community-server-5.6.42-2.el7.x86_64 4/11
验证中 : mysql-community-client-5.6.42-2.el7.x86_64 5/11
验证中 : perl-IO-Compress-2.061-2.el7.noarch 6/11
验证中 : 1:perl-Compress-Raw-Zlib-2.061-4.el7.x86_64 7/11
验证中 : perl-DBI-1.627-4.el7.x86_64 8/11
验证中 : perl-Compress-Raw-Bzip2-2.061-3.el7.x86_64 9/11
验证中 : perl-PlRPC-0.2020-14.el7.noarch 10/11
验证中 : 1:mariadb-libs-5.5.56-2.el7.x86_64 11/11
已安装:
mysql-community-libs.x86_64 0:5.6.42-2.el7 mysql-community-server.x86_64 0:5.6.42-2.el7
作为依赖被安装:
mysql-community-client.x86_64 0:5.6.42-2.el7 mysql-community-common.x86_64 0:5.6.42-2.el7 perl-Compress-Raw-Bzip2.x86_64 0:2.061-3.el7 perl-Compress-Raw-Zlib.x86_64 1:2.061-4.el7 perl-DBI.x86_64 0:1.627-4.el7
perl-IO-Compress.noarch 0:2.061-2.el7 perl-Net-Daemon.noarch 0:0.48-5.el7 perl-PlRPC.noarch 0:0.2020-14.el7
替代:
mariadb-libs.x86_64 1:5.5.56-2.el7
完毕!
启动并查看mysql服务状态。
# 启动服务
[root@master ~]# service mysqld start
Redirecting to /bin/systemctl start mysqld.service
# 查看mysql连接状态
[root@master ~]# service mysqld status
Redirecting to /bin/systemctl status mysqld.service
● mysqld.service - MySQL Server
   Loaded: loaded (/usr/lib/systemd/system/mysqld.service; enabled; vendor preset: disabled)
   Active: active (running) since 五 2018-11-16 20:01:52 CST; 44s ago
     Docs: man:mysqld(8)
           http://dev.mysql.com/doc/refman/en/using-systemd.html
  Process: 20743 ExecStartPre=/usr/bin/mysqld_pre_systemd (code=exited, status=0/SUCCESS)
 Main PID: 20766 (mysqld)
   Status: "SERVER_OPERATING"
    Tasks: 38
   CGroup: /system.slice/mysqld.service
           └─20766 /usr/sbin/mysqld
11月 16 20:01:45 master systemd[1]: Starting MySQL Server...
11月 16 20:01:52 master systemd[1]: Started MySQL Server.
# 设置免密登陆
[root@master ~]# mysqladmin -u root -p password ‘123456’
# 输入密码时候直接选择回车
Enter password:
Warning: Using a password on the command line interface can be insecure.
# 进入mysql
[root@master ~]# mysql -u root -p
Enter password:
Welcome to the MySQL monitor.  Commands end with ; or \g.
Your MySQL connection id is 5
Server version: 5.6.42 MySQL Community Server (GPL)
Copyright (c) 2000, 2018, Oracle and/or its affiliates. All rights reserved.
Oracle is a registered trademark of Oracle Corporation and/or its
affiliates. Other names may be trademarks of their respective
owners.
Type 'help;' or '\h' for help. Type '\c' to clear the current input statement.
mysql> grant all privileges on . to ‘root’@’%’ identified by ‘123456’   # 授权法更改远程连接权限
    -> flush privileges  # 刷新
    -> exit  #退出
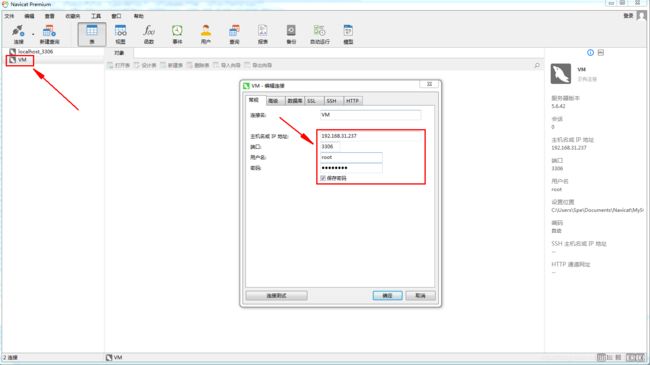
外部验证连接。
当图标变绿时,则表明连接完成。
3.8.2 Hive安装
将HBase安装包加载至/opt/hive路径下,并将其解压到当前路径。
[root@master ~]# mkdir /opt/hive
[root@master ~]# cd /opt/hive
[root@master HBase]# rz
rz waiting to receive.
Starting zmodem transfer.  Press Ctrl+C to cancel.
Transferring apache-hive-2.3.4-bin...
  100%  272180 KB    10820 KB/sec    00:00:25       0 Errors
[root@master ~]# tar  -xvf   apache-hive-2.3.4-bin
3.8.2 Hive环境配置
设置环境变量。
[root@master ~]# vi /etc/profile
export HIVE_HOME=/opt/hive/apache-hive-2.3.4-bin
export HIVE_CONF_DIR=${HIVE_HOME}/conf
export PATH=$PATH:${JAVA_HOME}/bin:$HADOOP_HOME/sbin:$HADOOP_HOME/bin:${SCALA_HOME}/bin:${SPARK_HOME}/bin:${HIVE_HOME}/bin:${ZK_HOME}/bin:${HBASE_HOME}/bin:$PATH
[root@master ~]# source /etc/profile
建立必需的文件夹。
# 建立root目录下需要的文件夹
[root@master ~]# mkdir /root/hive
[root@master ~]# mkdir /root/hive/warehouse
# hadoop下新建文件目录
[root@master ~]# $HADOOP_HOME/bin/hadoop fs -mkdir -p /root/hive/
[root@master ~]# $HADOOP_HOME/bin/hadoop fs -mkdir -p /root/hive/warehouse
# 为新建文件目录授权读写能力
[root@master ~]# $HADOOP_HOME/bin/hadoop fs -chmod 777 /root/hive/
[root@master ~]# $HADOOP_HOME/bin/hadoop fs -chmod 777 /root/hive/warehouse
# 检验创建状态
[root@master ~]# $HADOOP_HOME/bin/hadoop fs -ls /root/
[root@master ~]# $HADOOP_HOME/bin/hadoop fs -ls /root/hive/
修改hive-site.xml。
# 创建hive-site.xml
[root@master ~]# cd /opt/hive/apache-hive-2.3.4-bin/conf
[root@master conf]# cp hive-default.xml.template hive-site.xml
[root@master conf]# vi  hive-site.xml
添加内容如下:
    hive.metastore.warehouse.dir
    /root/hive/warehouse


    hive.exec.scratchdir
    /root/hive


    hive.metastore.uris


        javax.jdo.option.ConnectionURL
        jdbc:mysql://master:3306/hive?createDatabaseIfNotExist=true


        javax.jdo.option.ConnectionDriverName
        com.mysql.jdbc.Driver


        javax.jdo.option.ConnectionUserName
        root


        javax.jdo.option.ConnectionPassword
        123456


   hive.metastore.schema.verification
   false
将配置文件中所有的${system:java.io.tmpdir}更改为 /opt/hive/tmp (如果没有该文件则创建),并将此文件夹赋予读写权限,将${system:user.name}更改为 root。
    hive.exec.local.scratchdir
    /opt/hive/tmp/root
    Local scratch space for Hive jobs


    hive.downloaded.resources.dir
    /opt/hive/tmp/${hive.session.id}_resources
    Temporary local directory for added resources in the remote file system.
修改 hive-env.sh。
[root@master ~]# cd /opt/hive/apache-hive-2.3.4-bin/conf
[root@master conf]# cp hive-env.sh.template hive-env.sh
[root@master conf]# vi hive-env.sh
# 添加以下内容
export  HADOOP_HOME=/opt/hadoop/hadoop-2.7.2
export  HIVE_CONF_DIR=/opt/hive/apache-hive-2.3.4-bin/conf
export  HIVE_AUX_JARS_PATH=/opt/hive/apache-hive-2.3.4-bin/lib
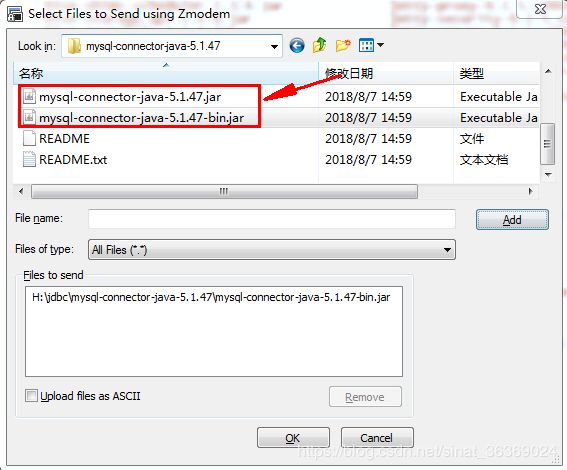
添加数据驱动包
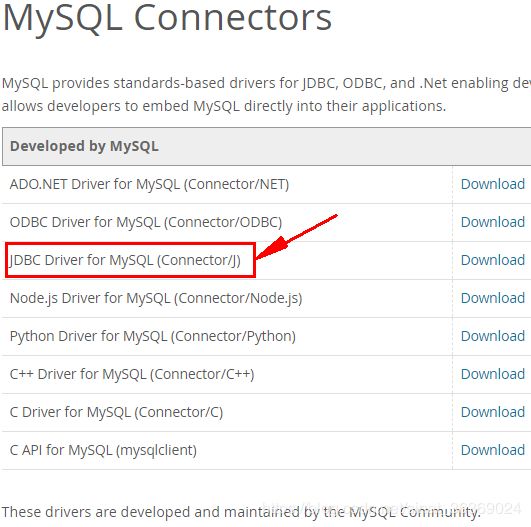
首先从mysql官网下载对应的JDBC安装包。
[root@master ~]# cd /opt/hive/apache-hive-2.3.4-bin/lib
# 下载mysql 的 jdbc连接驱动jar包,放到hive的lib目录下
[root@master lib]# rz
rz waiting to receive.
Starting zmodem transfer.  Press Ctrl+C to cancel.
Transferring mysql-connector-java-5.1.47-bin.jar...
  100%     983 KB     983 KB/sec    00:00:01       0 Errors
3.8.2 Hive启动
# 切换到hive文件目录
[root@master lib]# cd /opt/hive/apache-hive-2.3.4-bin/bin
[root@master bin]# pwd
/opt/hive/apache-hive-2.3.4-bin/bin
# 初始化hive
[root@master bin]# schematool -dbType mysql -initSchema
SLF4J: Class path contains multiple SLF4J bindings.
SLF4J: Found binding in [jar:file:/opt/hive/apache-hive-2.3.4-bin/lib/log4j-slf4j-impl-2.6.2.jar!/org/slf4j/impl/StaticLoggerBinder.class]
SLF4J: Found binding in [jar:file:/opt/hadoop/hadoop-2.7.2/share/hadoop/common/lib/slf4j-log4j12-1.7.10.jar!/org/slf4j/impl/StaticLoggerBinder.class]
SLF4J: See http://www.slf4j.org/codes.html#multiple_bindings for an explanation.
SLF4J: Actual binding is of type [org.apache.logging.slf4j.Log4jLoggerFactory]
Metastore connection URL:        jdbc:mysql://master:3306/hive?createDatabaseIfNotExist=true
Metastore Connection Driver :    com.mysql.jdbc.Driver
Metastore connection User:       root
org.apache.hadoop.hive.metastore.HiveMetaException: Failed to get schema version.
Underlying cause: java.sql.SQLException : Access denied for user 'root'@'master' (using password: YES)
SQL Error code: 1045
Use --verbose for detailed stacktrace.
*** schemaTool failed ***
bug01
发生jar包冲突。
SLF4J: Class path contains multiple SLF4J bindings.
SLF4J: Found binding in [jar:file:/opt/hive/apache-hive-2.3.4-bin/lib/log4j-slf4j-impl-2.6.2.jar!/org/slf4j/impl/StaticLoggerBinder.class]
SLF4J: Found binding in [jar:file:/opt/hadoop/hadoop-2.7.2/share/hadoop/common/lib/slf4j-log4j12-
solution
[root@master bin]# rm /opt/hive/apache-hive-2.3.4-bin/lib/log4j-slf4j-impl-2.6.2.jar
rm:是否删除普通文件 “/opt/hive/apache-hive-2.3.4-bin/lib/log4j-slf4j-impl-2.6.2.jar”?y
bug02
用户权限不足。
org.apache.hadoop.hive.metastore.HiveMetaException: Failed to get schema version.
Underlying cause: java.sql.SQLException : Access denied for user ‘root’@‘master’ (using password: YES)
SQL Error code: 1045
solution
[root@master bin]#mysql -u root -p
Enter password:
Welcome to the MySQL monitor. Commands end with ; or \g.
Your MySQL connection id is 5
Server version: 5.6.42 MySQL Community Server (GPL)
Copyright © 2000, 2018, Oracle and/or its affiliates. All rights reserved.
Oracle is a registered trademark of Oracle Corporation and/or its
affiliates. Other names may be trademarks of their respective
owners.
Type ‘help;’ or ‘\h’ for help. Type ‘\c’ to clear the current input statement.
mysql>use mysql;
Reading table information for completion of table and column names
You can turn off this feature to get a quicker startup with -A
Database changed
mysql>select host,user from user;
±----------±-----+
| host | user |
±----------±-----+
| % | root |
| 127.0.0.1 | root |
| ::1 | root |
| localhost | |
| master | |
| master | root |
±----------±-----+
6 rows in set (0.00 sec)
mysql>show grants for root;
ERROR 1290 (HY000): The MySQL server is running with the --skip-grant-tables option so it cannot execute this statement
mysql> flush privileges;
Query OK, 0 rows affected (0.06 sec)
mysql>show grants for root;
±-------------------------------------------------------------------------------------------------------------------------------+
| Grants for root@% |
±-------------------------------------------------------------------------------------------------------------------------------+
| GRANT ALL PRIVILEGES ON . TO ‘root’@’%’ IDENTIFIED BY PASSWORD ‘*6BB4837EB74329105EE4568DDA7DC67ED2CA2AD9’ WITH GRANT OPTION |
±-------------------------------------------------------------------------------------------------------------------------------+
1 row in set (0.00 sec)
mysql>grant all privileges on *.* to 'root'@'%' identified by '123456' with grant option;
Query OK, 0 rows affected (0.01 sec)
mysql>flush privileges;
Query OK, 0 rows affected (0.01 sec)
