开胃菜:button修改image的大小
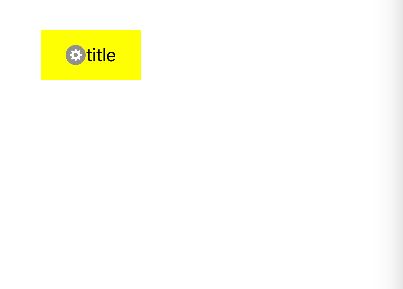
button 可以设置为图片,但是如果图片过小,那么不管 button 设置的 frame 大小是多少,都是显示的图片的大小,这样就需要用代码调整图片的大小。
1、设置图片大小
这个方法我定义到了Image类的扩展里面了
-(UIImage*)scaleToSize:(CGSize)size
{
    // 创建一个bitmap的context
    // 并把它设置成为当前正在使用的context
    UIGraphicsBeginImageContext(size);
    // 绘制改变大小的图片
    [self drawInRect:CGRectMake(0, 0, size.width, size.height)];
    // 从当前context中创建一个改变大小后的图片
    UIImage* scaledImage = UIGraphicsGetImageFromCurrentImageContext();
    // 使当前的context出堆栈
    UIGraphicsEndImageContext();
    // 返回新的改变大小后的图片
    return scaledImage;
}
2、调用方法
需要导入Image类的扩展那个头文件
UIImage *image = [UIImage imageNamed:@"set"];

    UIButton *button = [UIButton buttonWithType:UIButtonTypeCustom];
    button.frame = CGRectMake(50, 50, 100, 50);
    button.backgroundColor = [UIColor yellowColor];
    [button setTitleColor:[UIColor blackColor] forState:UIControlStateNormal];
    [button setTitle:@"title" forState:UIControlStateNormal];
    [button setImage:[image scaleToSize:CGSizeMake(50, 50)] forState:UIControlStateNormal];
    [self.view addSubview:button];
重点来啦
广大的程序员们肯定都遇到过这种布局把,一开始我是重新自定义一个view,然后有两个属性label和imageView,然后设置位置布局,再添加单击手势,这个方法需要写很多的代码。其实button已经给我们提供了这样的布局,有时候我们只是还不了解
在开始正文之前需要先介绍两个概念:
button可以设置 titleEdgeInsets属性和 imageEdgeInsets属性来调整其image和label相对位置
titleEdgeInsets是titleLabel相对于其上下左右的inset,如果只有title,那titleLabel的 上下左右 都是 相对于Button 的;如果只有image,那imageView的 上下左右 都是 相对于Button 的;如果同时有image和label,那这时候image的上左下是相对于button,右边是相对于label的;title的上右下是相对于button,左边是相对于image的。
在我们不做任何处理的时候同时设置image和title可以看出,image是在左边,label是在右边,所以“如果同时有image和label,那这时候image的上左下是相对于button,右边是相对于label的;title的上右下是相对于button,左边是相对于image的”这句话是很好理解的。
CGFloat imageViewWidth = CGRectGetWidth(button.imageView.frame);

CGFloat labelWidth = CGRectGetWidth(button.titleLabel.frame);

CGFloat buttonWidth = CGRectGetWidth(button.frame);

默认状态UIButton 的  imageEdgeInsets = UIEdgeInsetsMake(0,0,0,0);

titleEdgeInsets = UIEdgeInsetsMake(0,0,0,0);
比如按钮的初始位置是这样
效果图:
这时候如果我们想要改变button的样式,就可以通过imageEdgeInsets&titleEdgeInsets来设置啦
譬如设置image在右,label在左边:
效果图:
想要变成上面的形式,需要设置image的偏移量上下不变,向右偏移一个label宽度,button.imageEdgeInsets = UIEdgeInsetsMake(0, labelWidth, 0, -labelWidth);
label的上下偏移量也是不变的,但是需要向左偏移一个image的宽度
button.titleEdgeInsets = UIEdgeInsetsMake(0, -imageViewWidth, 0, imageViewWidth);
代码示例:
UIImage *image = [UIImage imageNamed:@"set"];

    UIButton *button = [UIButton buttonWithType:UIButtonTypeCustom];
    button.frame = CGRectMake(50, 50, 100, 50);
    button.backgroundColor = [UIColor yellowColor];
    [button setTitleColor:[UIColor blackColor] forState:UIControlStateNormal];
    [button setTitle:@"title" forState:UIControlStateNormal];
    [button setImage:image forState:UIControlStateNormal];
    [self.view addSubview:button];

  //获得imageView&label的宽度
    CGFloat imageViewWidth = CGRectGetWidth(button.imageView.frame);
    CGFloat labelWidth = CGRectGetWidth(button.titleLabel.frame);
   //设置偏移,必须上下左右都设置,不然出不来效果,小伙伴们可以尝试一下不设置image的右偏移量和label的左偏移量,看看效果
    button.imageEdgeInsets = UIEdgeInsetsMake(0, labelWidth, 0, -labelWidth);
    button.titleEdgeInsets = UIEdgeInsetsMake(0, -imageViewWidth, 0, imageViewWidth);
为了方便我们能够一直使用修改的button,我们可以写一个button的扩展
1、创建一个Button的Category,.h文件如下,定义一个Enum,用于决定image和label的样式;一个方法用于调用设置。
#import
typedef NS_ENUM(NSUInteger, MKButtonEdgeInsetsStyle) {
    MKButtonEdgeInsetsStyleTop, // image在上,label在下
    MKButtonEdgeInsetsStyleLeft, // image在左,label在右
    MKButtonEdgeInsetsStyleBottom, // image在下,label在上
    MKButtonEdgeInsetsStyleRight // image在右,label在左
};
@interface UIButton (ImageTitleSpacing)
/**
 *  设置button的titleLabel和imageView的布局样式,及间距
 *
 *  @param style titleLabel和imageView的布局样式
 *  @param space titleLabel和imageView的间距
 */
- (void)layoutButtonWithEdgeInsetsStyle:(MKButtonEdgeInsetsStyle)style
                        imageTitleSpace:(CGFloat)space;
2、.m文件如下,实现方法
#import "UIButton+ImageTitleSpacing.h"
@implementation UIButton (ImageTitleSpacing)
- (void)layoutButtonWithEdgeInsetsStyle:(MKButtonEdgeInsetsStyle)style
                        imageTitleSpace:(CGFloat)space
{
    // 1. 得到imageView和titleLabel的宽、高
    CGFloat imageWith = self.imageView.frame.size.width;
    CGFloat imageHeight = self.imageView.frame.size.height;

    CGFloat labelWidth = 0.0;
    CGFloat labelHeight = 0.0;
    if ([UIDevice currentDevice].systemVersion.floatValue >= 8.0) {
        // 由于iOS8中titleLabel的size为0,用下面的这种设置
        labelWidth = self.titleLabel.intrinsicContentSize.width;
        labelHeight = self.titleLabel.intrinsicContentSize.height;
    } else {
        labelWidth = self.titleLabel.frame.size.width;
        labelHeight = self.titleLabel.frame.size.height;
    }

    // 2. 声明全局的imageEdgeInsets和labelEdgeInsets
    UIEdgeInsets imageEdgeInsets = UIEdgeInsetsZero;
    UIEdgeInsets labelEdgeInsets = UIEdgeInsetsZero;

    // 3. 根据style和space得到imageEdgeInsets和labelEdgeInsets的值
    switch (style) {
        case MKButtonEdgeInsetsStyleTop:
        {
            imageEdgeInsets = UIEdgeInsetsMake(-labelHeight-space/2.0, 0, 0, -labelWidth);
            labelEdgeInsets = UIEdgeInsetsMake(0, -imageWith, -imageHeight-space/2.0, 0);
        }
            break;
        case MKButtonEdgeInsetsStyleLeft:
        {
            imageEdgeInsets = UIEdgeInsetsMake(0, -space/2.0, 0, space/2.0);
            labelEdgeInsets = UIEdgeInsetsMake(0, space/2.0, 0, -space/2.0);
        }
            break;
        case MKButtonEdgeInsetsStyleBottom:
        {
            imageEdgeInsets = UIEdgeInsetsMake(0, 0, -labelHeight-space/2.0, -labelWidth);
            labelEdgeInsets = UIEdgeInsetsMake(-imageHeight-space/2.0, -imageWith, 0, 0);
        }
            break;
        case MKButtonEdgeInsetsStyleRight:
        {
            imageEdgeInsets = UIEdgeInsetsMake(0, labelWidth+space/2.0, 0, -labelWidth-space/2.0);
            labelEdgeInsets = UIEdgeInsetsMake(0, -imageWith-space/2.0, 0, imageWith+space/2.0);
        }
            break;
        default:
            break;
    }
    // 4. 赋值
    self.titleEdgeInsets = labelEdgeInsets;
    self.imageEdgeInsets = imageEdgeInsets;
}


