Android NDK 开发入门(CMake)
本文主要记录以及简单介绍Ndk 的入门,以及google目前推荐的开发方式 AndroidStudio + CMake 的使用
1 什么是NDK
NDk(Native Development Kit):原生开发工具包,是一组可让您在 Android 应用中利用 C 和 C++ 代码的工具。 可用以从您自己的源代码构建,或者利用现有的预构建库。
上面是官方对NDK的定义。简单的说就是Android开发人员可以使用C/C++语言来实现部分app功能。
在介绍NDK的时候,对其他一些会用到的名词先做一下解释。
JNI 本意是Java native interface(Java本地接口),是为了方便Java调用c、c++等本地代码所封
装的一层接口。大家都知道,Java的优点是跨平台,但是作为优点的同时,其在本地交互的时候就编程了缺点。
Java的跨平台特性导致其本地交互的能力不够强大,一些和操作系统相关的特性Java无法完成,于是Java提供了
jni专门用于和本地代码交互,这样就增强了Java语言的本地交互能力。
通过Java jni,用户可以调用用c、c++所编写的native code。在html5视频的开发中就采用了jni,
android只用于ui的显示,其业务逻辑都是通过native code所完成的,android代码只是负责通过jni和native进
行交互。任玉刚-Java JNI介绍
CMake 是个开源的跨平台自动化建构系统,它用配置文件控制建构过程(build process)的方式和Unix的Make相似,只是CMake的配置文件取名为CMakeLists.txt。Cmake并不直接建构出最终的软件,而是产生标准的建构档(如Unix的Makefile或Windows Visual C++的projects/workspaces),然后再依一般的建构方式使用。这使得熟悉某个集成开发环境(IDE)的开发者可以用标准的方式建构他的软件,这种可以使用各平台的原生建构系统的能力是CMake和SCons等其他类似系统的区别之处。CMake可以编译源代码、制做程序库、产生适配器(wrapper)、还可以用任意的顺序建构可执行文件。CMake支持in-place建构(二进档和源代码在同一个目录树中)和out-of-place建构(二进档在别的目录里),因此可以很容易从同一个源代码目录树中建构出多个二进档。CMake也支持静态与动态程序库的建构。维基百科
简单的说,CMake是一个跨平台的编译工具,它自己不编译出目标对象,而是根据CMakeLists.txt生成 makefile(Unix) 或 project(Windows)文件,再使用一般的构建方式编译出目标对象。
目前在AndroidStudio中,一共有两种构建方式:
- ndk-build,需要配置文件Application.mk,Android.mk。
- Cmake,需要配置文件CMakeLists.txt。这种方式是AndroidStudio2.2版本新增加的方式,是目前google主推的方式(的确比ndk-build方式简便友好)
2 什么时候需要使用NDK
google 总结了两点需要使用NDK的地方:
- 从设备获取卓越性能以用于计算密集型应用,例如游戏或物理模拟。
- 重复使用您自己或其他开发者的 C 或 C++ 库。
C/C++代码执行效率高于java代码,这也是很多优秀的播放器核心都是使用C/C++来编写的原因之一。
除了上面两种情况外,还有一种经常使用NDK的场景:安全。
对于一些比较敏感的内容,我们需要把它给藏起来。java 的代码很容易被逆向反编译出来,即使进行了混淆,加壳等方式提高安全性。对于定义的一些key常量等,进行简单的逆向工程,就会赤裸裸的暴露在外。这时候,就需要使用C/C++来隐藏我们的敏感数据。
3 配置NDK开发环境
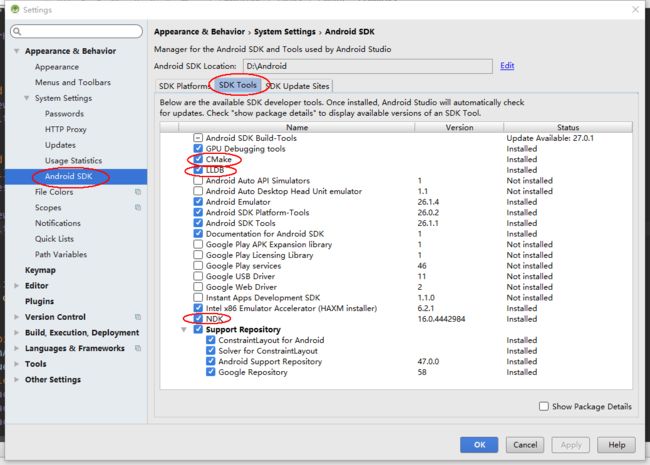
1.安装NDK
1.打开Settings,如下图勾选需要安装的工具
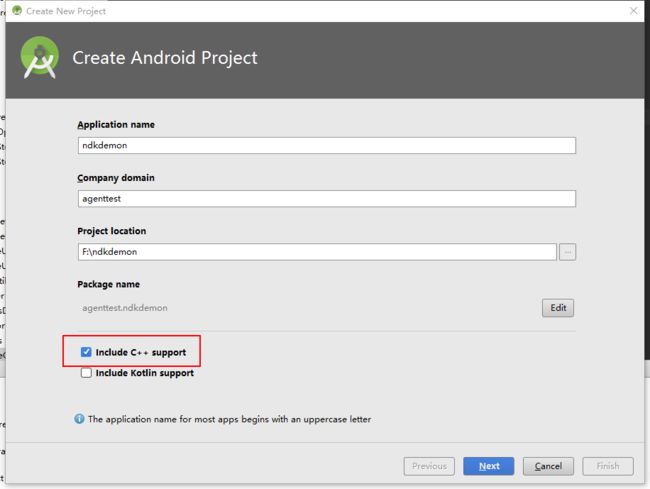
4 Holle World
新建Hello World项目,勾选Include C++ support表示需要Jni开发。
C++配置

- C++ Standard 使用
Toolchain Default默认的C++标准即可, - 勾选Exceptions Support添加C++中对于异常的处理
- 勾选Runtime Type Information Support启用支持RTTI
项目结构:
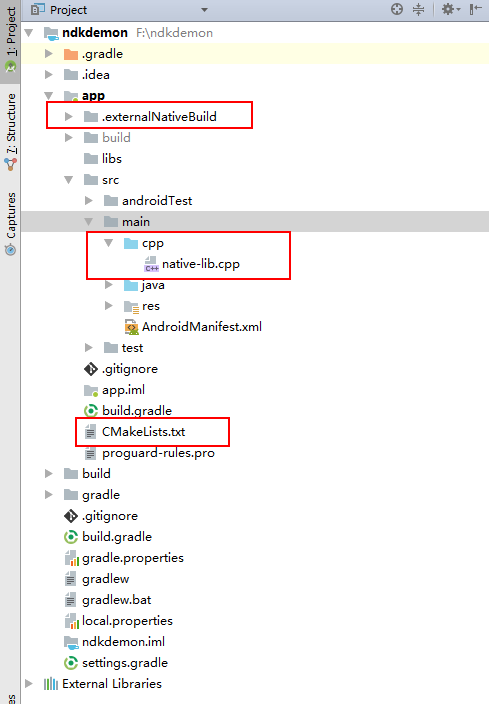
对比下与普通项目的区别:
- 增加了
.externalNativeBuild目录 - app模块中新增了一个cpp文件夹,用来放C/C++文件,
native-lib.cpp文件是默认创建的。 - 增加了
CMakeLists.txt文件 -
app module下的build.gradle文件修改
build.gradle
apply plugin: 'com.android.application'

android {
    compileSdkVersion 26
    defaultConfig {
        applicationId "agenttest.ndkdemon"
        minSdkVersion 14
        targetSdkVersion 26
        versionCode 1
        versionName "1.0"
        testInstrumentationRunner "android.support.test.runner.AndroidJUnitRunner"
        externalNativeBuild {
           cmake {
               cppFlags "-frtti -fexceptions" // CMake 命令参数
           }
       }
    }
    buildTypes {
       release {
           minifyEnabled false
            proguardFiles getDefaultProguardFile('proguard-android.txt'), 'proguard-rules.pro'
       }
    }
    externalNativeBuild {
      cmake {
           path "CMakeLists.txt" //指定CMakeLists.txt l路径
        }
    }
}
CMakeLists.txt
CMakeLists.txt 文件用于定义一些构建行为,主要定义了哪些文件需要编译,库之间的关系。
# For more information about using CMake with Android Studio, read the
# documentation: https://d.android.com/studio/projects/add-native-code.html

# Sets the minimum version of CMake required to build the native library.

cmake_minimum_required(VERSION 3.4.1)

# Creates and names a library, sets it as either STATIC
# or SHARED, and provides the relative paths to its source code.
# You can define multiple libraries, and CMake builds them for you.
# Gradle automatically packages shared libraries with your APK.
# 编译出一个名为native-lib 的动态库,包含的源文件有src/main/cpp/native-lib.cpp
add_library( # Sets the name of the library.
             native-lib

             # Sets the library as a shared library.
             SHARED

             # Provides a relative path to your source file(s).
             src/main/cpp/native-lib.cpp )

# Searches for a specified prebuilt library and stores the path as a
# variable. Because CMake includes system libraries in the search path by
# default, you only need to specify the name of the public NDK library
# you want to add. CMake verifies that the library exists before
# completing its build.
# 找到预编译库log ,命名为log-lib 并连接到我们的native-lib动态库
find_library( # Sets the name of the path variable.
              log-lib

              # Specifies the name of the NDK library that
              # you want CMake to locate.
              log )

# Specifies libraries CMake should link to your target library. You
# can link multiple libraries, such as libraries you define in this
# build script, prebuilt third-party libraries, or system libraries.

target_link_libraries( # Specifies the target library.
                       native-lib

                       # Links the target library to the log library
                       # included in the NDK.
                       ${log-lib} )
更加详细的CMake命令可以去查看CMake的官方文档
项目结构已经介绍完毕,下面介绍具体的编写及调用
MainActivity
从MainActivity 开始看jni的具体使用过程
public class MainActivity extends AppCompatActivity {

    // Used to load the 'native-lib' library on application startup.
    static {
        System.loadLibrary("native-lib");
    }

    @Override
    protected void onCreate(Bundle savedInstanceState) {
        super.onCreate(savedInstanceState);
        setContentView(R.layout.activity_main);

        // Example of a call to a native method
        TextView tv = (TextView) findViewById(R.id.sample_text);
        tv.setText(stringFromJNI());
    }

    /**
     * A native method that is implemented by the 'native-lib' native library,
     * which is packaged with this application.
     */
    public native String stringFromJNI();
}
整个过程分为3步:
- 使用
System.loadLibrary()载入我们生成的动态库native-lib。 - 使用
native修饰一个native方法stringFromJNI() - 像正常使用java方法一样,调用
stringFromJNI():tv.setText(stringFromJNI());
下面找到cpp文件夹下的native-lib.cpp,看它是怎么实现我们的stringFromJNI()方法的。
native-lib
#include
#include

extern "C"
JNIEXPORT jstring

JNICALL
Java_agenttest_ndkdemon_MainActivity_stringFromJNI(
        JNIEnv *env,
        jobject /* this */) {
    std::string hello = "Hello from C++";
    return env->NewStringUTF(hello.c_str());
}
目前这个文件的内容是自动生成的。具体的C/C++语法等就不做解释了。
我们可以看到它的方发的命名方式
Java_agenttest_ndkdemon_MainActivity_stringFromJNI(JNIEnv *env, jobject instance)
Java_包名类名方法名
该方法具体内容不做解释,只是返回了一个 "Hello from C++" 字符串。
那么我们如何添加一个native方法呢?
下面以字符串签名为例
1. 首先 定义一个native方法
`public native String sign(String text);`
这时,这个sign方法是红色的,表示找不到该方法。
2. 把光标放在该方法上,按下Alt+Enter,选择 Create function Java_agenttest_ndkdemon_MainActivity_sign

3. 这时可以看到native-lib.cpp 文件多了一个方法
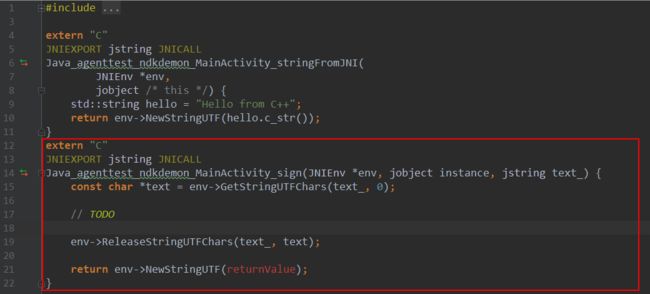
extern "C" 表示 该方法用C的方式编译
JNIEXPORT JNICALL 都是JNI的关键字,表示此函数是要被JNI调用的。
入参 JNIEnv * env 这个env可以看做是Jni接口本身的一个对象,在jni.h头文件中存在着大量被封装好的函数,这些函数也是Jni编程中经常被使用到的,要想调用这些函数就需要使用JNIEnv这个对象。例如:env->GetStringUTFChars(text_, 0);。(详情请查看jni.h)
入参 jobject 分为两种情况:
- 本地方法是一个静态方法时,第二个参数代表本地方法所在的类,是一个
jclass type; - 本地方法时一个实例方法时,第二个参数代表本地方法所在的对象,是一个
jobject instance。
入参 jstring 是JAVA String 在jni中的代理对象。需要使用
const char *text = env->GetStringUTFChars(text_, 0);来转化成C/C++能用的对象。
4. 填充C/C++ 签名代码
extern "C"
JNIEXPORT jstring JNICALL
Java_agenttest_ndkdemon_MainActivity_sign(JNIEnv *env, jobject instance, jstring text_) {
    const char *text = env->GetStringUTFChars(text_, 0);

    string result = string("signed: ")+string(text);

    env->ReleaseStringUTFChars(text_, text);

    return env->NewStringUTF(result.c_str());
}
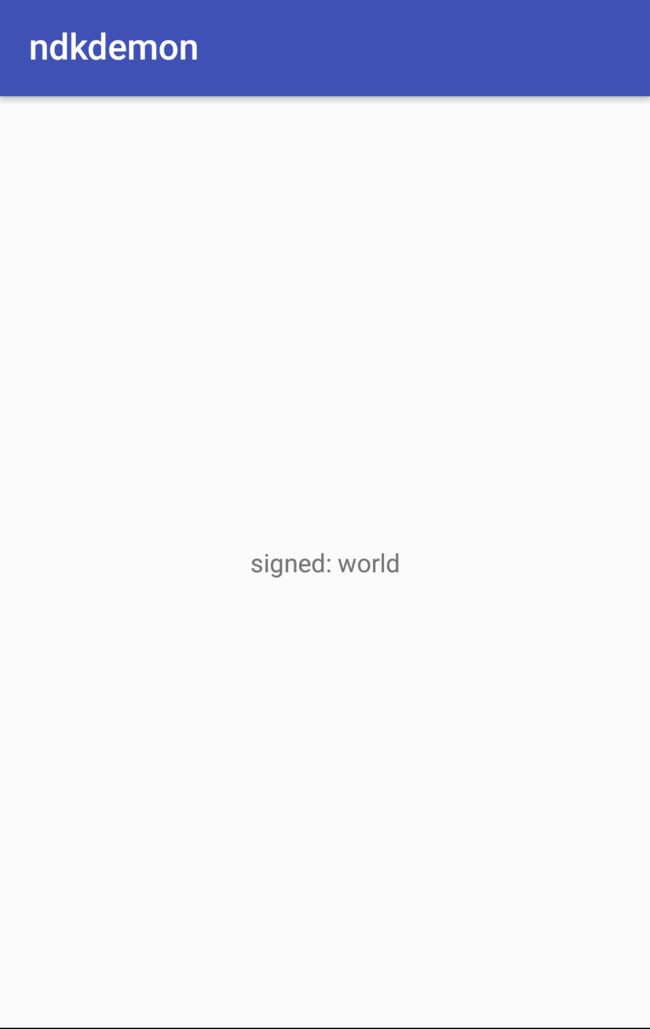
C/C++代码简单实现了 输入 s ,输出 “signed:”+s 的功能。
调用native方法

下面看一下运行结果,点击textview 后 出来签名结果
以上,简单的NDK入门知识介绍的差不多了。本文作为我刚接触NDK的总结,可能有许多错误之处,欢迎大家前来讨论,指点。