SLAM (simultaneous localization and mapping) 其实我们一直在搞得的就是 SLAM。那么什么是 SLAM 呢?百度给出定义是即时定位与地图构建,或并发建图与定位。
问题可以描述为:车辆放入未知路面环境中的未知位置,是否有办法让车辆一边移动一边逐步描绘出此环境完全的地图,这是我们的目的。
首先我们需要找到特征值,然后根据特征值在帧一帧间的位移来获取当前速度。
    def extract(self,img):
        # detection
        feats = cv2.goodFeaturesToTrack(np.mean(img,axis=2).astype(np.uint8),3000,qualityLevel=0.01,minDistance=3)

        # extraction
        kps = [cv2.KeyPoint(x=f[0][0],y=f[0][1],_size=20) for f in feats]
        kps, des = self.orb.compute(img,kps)
        print(des.shape)
        # matches
        matches = None
        if self.last is not None:
            matches = self.bf.match(des,self.last['des'])

        self.last = {'kps':kps,'des':des}
        return kps,des,matches
img = np.mean(img,axis=2).astype(np.uint8)
cv2.imshow('img',img)
cv2.waitKey(0)
cv2.destroyAllWindows()
观察一下 DMatch 类的结构,会发现 DMatch 包换了一个 queryIdx 和 一个 trainIdx,用来指定构成一个匹配的两个特征点。queryIdx对应你问题描述中的 descriptor1,后者对应 descriptor2 。
的确跟着大神思路有有些困难,不少新的知识点需要消化一下。不过希望自己这样一步一步剖析大神代码会对大家有所帮助。
    def extract(self,img):
        # detection
        feats = cv2.goodFeaturesToTrack(np.mean(img,axis=2).astype(np.uint8),3000,qualityLevel=0.01,minDistance=3)

        # extraction
        kps = [cv2.KeyPoint(x=f[0][0],y=f[0][1],_size=20) for f in feats]
        kps, des = self.orb.compute(img,kps)
        # print(des.shape)
        # matches
        matches = None
        if self.last is not None:
            matches = self.bf.match(des,self.last['des'])
            matches = zip([kps[m.queryIdx] for m in matches],[self.last['kps'][m.trainIdx] for m in matches])

        self.last = {'kps':kps,'des':des}
        return matches
kps 是一组 KeyPoint 的集合,包含特征的信息,然后通过 orb 来计算出关键点和描述符
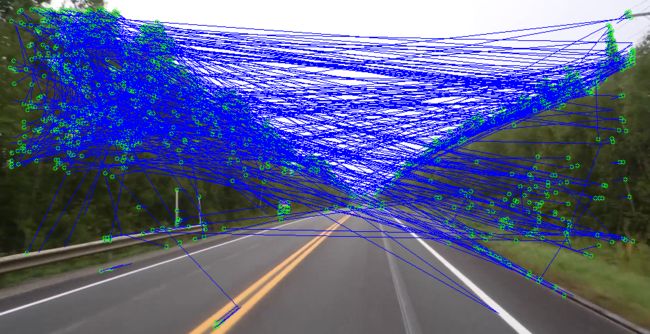
    for m in matches:
        pt1 = m[0]
        pt2 = m[1]
        u1, v1 = map(lambda x: int(round(x)),pt1.pt)
        u2, v2 = map(lambda x: int(round(x)),pt2.pt)
        cv2.circle(img,(u1,v1),color=(0,255,0),radius=3)
        cv2.line(img,(u1,v1),(u2,v2),(255,0,0),1)
self.bf = cv2.BFMatcher(cv2.NORM_HAMMING,crossCheck=True)
self.bf = cv2.BFMatcher(cv2.NORM_HAMMING)
ret = []
        if self.last is not None:
            matches = self.bf.knnMatch(des,self.last['des'],k=2)
            print(matches)
            for m,n in matches:
                if m.distance < 0.75*n.distance:
                    ret.append((kps[m.queryIdx],self.last['kps'][m.trainIdx]))


        self.last = {'kps':kps,'des':des}
        return ret
print("%d matchess" % (len(matches)))
732 matchess
812 matchess
800 matchess
648 matchess
728 matchess
759 matchess
from skimage.measure import ransac
from skimage.transform import FundamentalMatrixTransform
        ret = []
        if self.last is not None:
            matches = self.bf.knnMatch(des,self.last['des'],k=2)
            # print(matches)
            for m,n in matches:
                if m.distance < 0.75*n.distance:
                    kp1 = kps[m.queryIdx].pt
                    kp2 = self.last['kps'][m.trainIdx].pt
                    ret.append((kp1,kp2))
        # filter
        if len(ret) > 0:
            ret = np.array(ret)

            model, inliers = ransac((ret[:,0],ret[:,1]),FundamentalMatrixTransform,min_samples=8,residual_threshold=0.01,max_trials=100)
            print(sum(inliers))
        # return
        self.last = {'kps':kps,'des':des}
        return ret
ransac(Random Sample Consensus)算法经常用于处理计算机视觉,在立体视觉领域中同时解决一对相机的匹配点问题及基本矩阵的计算
ransac 是根据一组包含异常数据的样本数据集,计算出数据的数学模型参数,得到有效样本数据的算法。所以可以通过该方法对我们的特征点进行提纯剔除掉那些异常数据。
if len(ret) > 0:
            ret = np.array(ret)

            model, inliers = ransac((ret[:,0],ret[:,1]),
                                        FundamentalMatrixTransform,
                                        min_samples=8,
                                        residual_threshold=1,
                                        max_trials=100)
            # print(sum(inliers))
            ret = ret[inliers]
if len(ret) > 0:
            ret = np.array(ret)

            ret[:,:,0] -= img.shape[0]//2
            ret[:,:,1] -= img.shape[1]//2

            model, inliers = ransac((ret[:,0],ret[:,1]),
                                        FundamentalMatrixTransform,
                                        min_samples=8,
                                        residual_threshold=1,
                                        max_trials=100)
 def denormalize(pt):
        return int(round(pt[0] + img.shape[0]/2)),int(round(pt[1] + img.shape[1]/2))

    for pt1, pt2 in matches:
        u1, v1 = denormalize(pt1)
        u2, v2 = denormalize(pt2)


        cv2.circle(img,(u1,v1),color=(0,255,0),radius=3)
        cv2.line(img,(u1,v1),(u2,v2),(255,0,0),1)
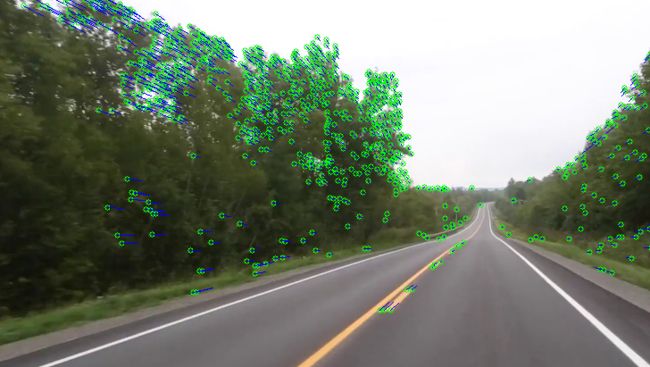
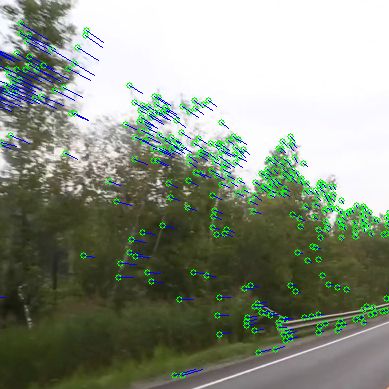
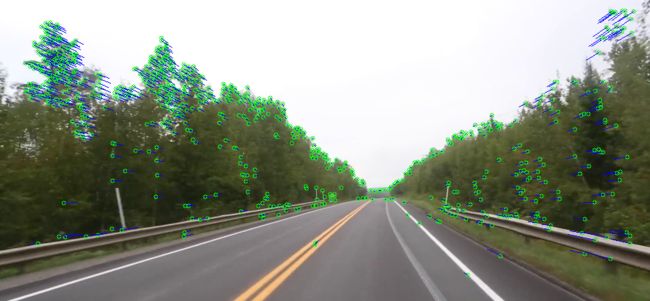
现在效果看起来不错,通过蓝色的短线可以看出这些特征点在两帧之间运动的轨迹。
print(np.linalg.svd(model.params))
s, v, d = np.linalg.svd(model.params)


