参考文档
比较Masonry 和 SDAutoLayout 两个自动布局其实各有优劣,在使用上SDAutoLayout更方便简单,Masonry感觉功能更全面一些,并且SDAutoLayout 和 MyLayout 都是对frame的封装。
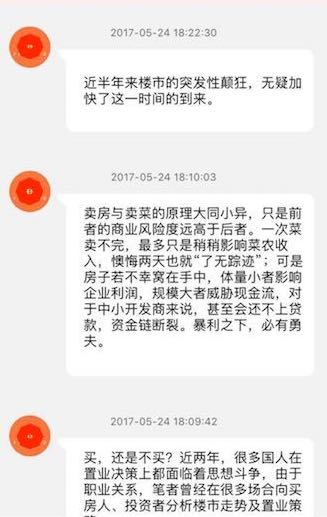
1. Masonry + 估算高度
- (UITableView *)tableView{
    if (!_tableView) {
        _tableView = [[UITableView alloc]initWithFrame:CGRectMake(0, 0, kWidth, kHeight ) style:UITableViewStylePlain];
        _tableView.delegate = self;
        _tableView.dataSource = self;

        //直接用估算高度
        _tableView.rowHeight = UITableViewAutomaticDimension;
        _tableView.estimatedRowHeight = 80;

        _tableView.separatorStyle = UITableViewCellSeparatorStyleNone;
        [_tableView registerClass:[PUshMessageCell class] forCellReuseIdentifier:@"PUshMessageCell"];

    }
    return _tableView;
}

//*****cell 文件中主要方法*****//
- (instancetype)initWithStyle:(UITableViewCellStyle)style reuseIdentifier:(NSString *)reuseIdentifier{
    self = [super initWithStyle:style reuseIdentifier:reuseIdentifier];
    if (self) {
        [self setup];
    }
    return self;
}
- (void)setup{

  //logo图片
    _logoImageView = [[UIImageView alloc]init];
    _logoImageView.image = [UIImage imageNamed:@"faghoo-logo"];
    [self.contentView addSubview:_logoImageView];
    [_logoImageView mas_makeConstraints:^(MASConstraintMaker *make) {
        make.top.equalTo(@28);
        make.left.equalTo(@10);
        make.width.height.equalTo(@40);
    }];

 //时间
    _timeLabel = [[UILabel alloc]init];
    [self.contentView addSubview:_timeLabel];
    [_timeLabel mas_makeConstraints:^(MASConstraintMaker *make) {
        make.top.equalTo(_logoImageView.mas_top);
        make.centerX.equalTo(self.contentView);
    }];

   //文字背景图片
    UIImageView *containView = [[UIImageView alloc]init];
    containView.clipsToBounds = YES;
    UIImage *image = [UIImage imageNamed:@"qipao"];
    containView.image = [image resizableImageWithCapInsets: UIEdgeInsetsMake(50, 50, 50, 50) resizingMode:UIImageResizingModeStretch ];
    [self.contentView addSubview:containView];

    [containView mas_updateConstraints:^(MASConstraintMaker *make) {

        make.top.equalTo(_timeLabel.mas_bottom).offset(10);
        make.left.equalTo(_logoImageView.mas_right).offset(7);
        make.right.lessThanOrEqualTo(self.contentView).offset(-10);
        make.bottom.offset(-10).priorityLow();

    }];

    //文字Label
    _messageLabel = [[MLLinkLabel alloc]init];
    [containView addSubview:_messageLabel];
    _messageLabel.numberOfLines = 0;


   // _messageLabel.preferredMaxLayoutWidth = [UIScreen mainScreen].bounds.size.width - 10-40 -7- 25-20;

    [_messageLabel mas_makeConstraints:^(MASConstraintMaker *make) {

        make.top.equalTo(containView.mas_top).offset(10);
        make.left.equalTo(containView.mas_left).offset(25);
        make.right.equalTo(containView.mas_right).offset(-10);
        make.bottom.equalTo(containView.mas_bottom).offset(-10);

    }];
   [_messageLabel setContentHuggingPriority:1000 forAxis:UILayoutConstraintAxisVertical];

   //设置label中链接方法
    [_messageLabel setDidClickLinkBlock:^(MLLink *link, NSString *linkText, MLLinkLabel *label) {
        if (link.linkType==MLLinkTypeURL) {

            NSString *url = [NSString stringWithFormat:@"%@",link.linkValue];
            [[UIApplication sharedApplication] openURL:[NSURL URLWithString:url]];

        }

    }];
}
2.Masonry/XIB + UITableView+FDTemplateLayoutCell
TableView如果用估算高度的话,可能会出现卡顿,系统性能有损耗较大。所以结合正确约束自动适应高度是比较合适的。
#import
-(CGFloat)tableView:(UITableView *)tableView heightForRowAtIndexPath:(NSIndexPath *)indexPath {
    //有缓存
    return [tableView fd_heightForCellWithIdentifier:@"identifer" cacheByIndexPath:indexPath configuration:^(id cell) {
        // 配置 cell 的数据源,和 "cellForRow" 干的事一致,比如:
        cell.entity = self.feedEntities[indexPath.row];
       }];
    //无缓存
    return [tableView fd_heightForCellWithIdentifier:@"reuse identifer" configuration:^(id cell) {
        // Configure this cell with data,
        //same as what you've done in "-tableView:cellForRowAtIndexPath:"
        // Like:
        cell.entity = self.feedEntities[indexPath.row];
       }];
}


//*****cell 文件中主要方法*****//
- (instancetype)initWithStyle:(UITableViewCellStyle)style reuseIdentifier:(NSString *)reuseIdentifier{
    self = [super initWithStyle:style reuseIdentifier:reuseIdentifier];
    if (self) {
        [self setup];
    }
    return self;
}
- (void)setup{
    _godImageView = [[UIImageView alloc]init];
    [self.contentView addSubview:_godImageView];

   //图片
    [_godImageView mas_makeConstraints:^(MASConstraintMaker *make) {
        make.top.equalTo(@12);
        make.left.equalTo(@12);
        make.width.height.equalTo(@46);
        make.bottom.equalTo(@-10).priorityLow();
    }];

   //标题
    _godTitle = [[UILabel alloc]init];
    [self.contentView addSubview:_godTitle];
    [_godTitle mas_makeConstraints:^(MASConstraintMaker *make){

        make.top.equalTo(@16);
        make.left.equalTo(_godImageView.mas_right).offset(10);
        make.right.lessThanOrEqualTo(self.mas_rightMargin);
    }];

 //内容
    _contentMLabel = [[MLLabel alloc]init];
    _contentMLabel.numberOfLines = 0;
    _contentMLabel.lineSpacing = 5;
    [self.contentView addSubview:_contentMLabel];
    _contentMLabel.preferredMaxLayoutWidth = [UIScreen mainScreen].bounds.size.width - 63;
    [_contentMLabel mas_makeConstraints:^(MASConstraintMaker *make) {

        make.top.equalTo(_godTitle.mas_bottom).offset(7);
        make.left.equalTo(_godTitle);
        make.right.equalTo(self.contentView).offset(-12);
       make.bottom.equalTo(self.contentView).offset(-10);

    }];
Notes:
FDTemplateLayoutCell有两种计算高度的模式
- 是AutoLayout使用的-systemLayoutSizeFittingSize:
- 是Frame使用的-sizeThatFits:
可以通过fd_enforceFrameLayout = YES 开启Frame模式,
注意,开启Frame模式需要重写- (CGSize)sizeThatFits,
如下:
-(CGSize)sizeThatFits:(CGSize)size{
return CGSizeMake(size.width, A+B+C+D+E+....);
}
3. SDAutoLayout相关
比masonry易用性更强,对view,tableView等视图的约束更加便捷,UILabel,UIButton,UIScrollView都有相应的约束方法。
类似的链式编码 很简洁,同时对Cell高度自适应效果也很好,并且有高度缓存。
- 基本使用
    self.view0 = [[UIView alloc]init];
    self.view1 = [[UIView alloc]init];
    self.view2 = [[UIView alloc]init];
    self.view3 = [[UIView alloc]init];
    self.view4 = [[UIView alloc]init];

    self.view1.sd_layout
    .leftSpaceToView(self.view0,10)
    .topEqualToView(self.view0)
    .heightRatioToView(self.view0,0.5)
    .widthIs(60);

    self.view3.sd_layout
    .leftSpaceToView(self.view0,10)
    .topSpaceToView(self.view1,0)
    .widthRatioToView(self.view1,1)
    .heightRatioToView(self.view0,0.5);

    self.view4.sd_layout
    .centerXEqualToView(self.view0)
    .centerYEqualToView(self.view0)
    .widthRatioToView(self.view0,0.5)
    .autoHeightRatio(1);
    //添加多个子视图
    [self.view sd_addSubviews:@[_view0,_view1,_view2,_view3,_view4]];

    //修改约束后要更新父图及子视图的约束
     [UIView animateWithDuration:0.5 animations:^{
        self.view0.sd_layout
        .widthRatioToView(self.view,_widthRatio);

        //一定要更新约束,否则没效果
        [self.view0 updateLayout];
        //如果不更新子视图,则子视图没有动画效果
        [self.view5 updateLayout];
        //也可以写成下面这样生新而局子视图
        //[self.view0 layoutSubviews];
     }];
- 普通View,Label 和 button 的约束
//view0有两个子视图
self.view0.sd_layout
    .topSpaceToView(self.view,10)
    .leftSpaceToView(self.view,10)
    .rightSpaceToView(self.view,10);
    [self.view0 sd_addSubviews:@[self.view1,self.view2]];

    self.view1.sd_layout
    .topSpaceToView(self.view0,10)
    .leftSpaceToView(self.view0,10)
    .rightSpaceToView(self.view0,10)
    .autoHeightRatio(0);       //view1 为UILabel类型,自适应高度

    self.view2.sd_layout
    .rightEqualToView(self.view1)
    .leftEqualToView(self.view1)
    .topSpaceToView(self.view1,10)
    .heightIs(30);
    //设置view或Cell 高度自适应
    [self.view0 setupAutoHeightWithBottomView:self.view2 bottomMargin:10];

    //单行label 自适应宽度
    self.view4.text = @"Label的宽度自适应的测试";
    self.view4.sd_layout
    .leftSpaceToView(self.view,10)
    .topSpaceToView(self.view3,10)
    .heightIs(30);
    //设置单行Label自适应的最大宽度
    [self.view4 setSingleLineAutoResizeWithMaxWidth:300];

    //button的自适应高度
    //A:
   [self.view3 setTitle:@"这是关于button的宽度自适应" forState:UIControlStateNormal];
    self.view3.sd_layout
    .centerXEqualToView(self.view)
    .topSpaceToView(self.view0,10);
    //设置button单行文字自适应padding为左右边距
    [self.view3 setupAutoSizeWithHorizontalPadding:10 buttonHeight:30];
    //B:
    UIButton *button = [[UIButton alloc]init];
    self.button = button ;
    [button setImage:[UIImage imageNamed:@"test0.jpg"] forState:UIControlStateNormal];
    [button setTitle:@"这是一个文字" forState:UIControlStateNormal];
    button.backgroundColor = [UIColor grayColor];
    button.titleLabel.backgroundColor = [UIColor redColor];//文字默认颜色可能为白色
    button.titleLabel.textAlignment = NSTextAlignmentCenter;
    [self.view addSubview:button];

    button.sd_layout
    .topSpaceToView(self.view,10)
    .centerXEqualToView(self.view)
    .widthRatioToView(self.view,0.5)
    .autoHeightRatio(1);
    [self.view addSubview:button];

   //设置样式
    button.imageView.sd_layout
    .topSpaceToView(button,10)
    .centerXEqualToView(button)
    .widthRatioToView(button,0.8)
    .heightRatioToView(button,0.6);

    button.titleLabel.sd_layout
    .topSpaceToView(button.imageView,10)
    .rightSpaceToView(button,10)
    .leftSpaceToView(button,10)
    .bottomSpaceToView(button,10);
- 生成与collectionView类似效果
 UIView *view0 = [[UIView alloc]init];
    [self.view addSubview:view0];
    self.view0 = view0;
    view0.backgroundColor = [UIColor yellowColor];
    view0.sd_layout
    .leftSpaceToView(self.view,10)
    .rightSpaceToView(self.view,10)
    .topSpaceToView(self.button,10);

    NSMutableArray *arr = [NSMutableArray array];
for (int i = 0; i- ScrollView的约束1
 UIScrollView *scrollView = [[UIScrollView alloc]init];
 [self.view addSubview:scrollView];
 scrollView.sd_layout.spaceToSuperView(UIEdgeInsetsZero);
  [scrollView sd_addSubviews:@[_view0,_view1,_view2,_view3]];

    self.view0.sd_layout
    .topSpaceToView(scrollView,50)
    .centerXEqualToView(scrollView)
    .widthIs(200)
    .heightEqualToWidth();

    self.view1.sd_layout
    .topSpaceToView(self.view0,100)
    .leftSpaceToView(scrollView,30)
    .rightSpaceToView(scrollView, 30)
    .heightIs(100);

    self.view2.sd_layout
    .topSpaceToView(self.view1,100)
    .rightSpaceToView(scrollView,60)
    .leftSpaceToView(scrollView,60)
    .autoHeightRatio(0.4);

   self.view3.sd_layout
    .topSpaceToView(self.view2,100)
    .rightSpaceToView(scrollView,100)
    .leftSpaceToView(scrollView,100)
    .heightIs(100);

  [scrollView setupAutoContentSizeWithBottomView:self.view3 bottomMargin:10];
- ScrollView的约束2
 UIView *contentView = [[UIView alloc]init];
 contentView.backgroundColor = [UIColor whiteColor];
[self.scrollView addSubview:contentView];

    contentView.sd_layout
    .topSpaceToView(self.scrollView,0)
    .leftSpaceToView(self.scrollView,0)
    .rightEqualToView(self.scrollView);

    NSMutableArray *arr  = [NSMutableArray array];
    for (int i= 0; i < 100; i++) {
        UIView *view = [[UIView alloc]init];
        view.backgroundColor = [self randomColor];
        [contentView addSubview:view];
        view.sd_layout.autoHeightRatio(1);
        [arr addObject:view];
    }
    [contentView setupAutoWidthFlowItems:arr
                    withPerRowItemsCount:5
                          verticalMargin:10
                        horizontalMargin:10
                       verticalEdgeInset:10
                     horizontalEdgeInset:10 ];
//    [contentView setupAutoMarginFlowItems:arr
//                     withPerRowItemsCount:5
//                                itemWidth:50
//                           verticalMargin:10
//                        verticalEdgeInset:10
//                      horizontalEdgeInset:10 ];

    //如果scrollView 中子视图也要自适应则这样处理合适
    //将所有视图放到contentView中
    [self.scrollView setupAutoContentSizeWithBottomView:contentView bottomMargin:10];
- TableViewCell 的约束
//第一步设置正确的cell 约束
    UIView *view0 = [UIView new];
    view0.backgroundColor = [UIColor redColor];
    UIView *view1 = [UIView new];
    UILabel *lable = [UILabel new];
    UIView *view3 = [UIView new];
    /*******
     一定要先将视图添加到父视图后再添加约束,否则可能无效
     ********/
    [self.contentView sd_addSubviews:@[view0,view1,lable,view3,view4,view5]];

    view0.sd_layout
    .topSpaceToView(self.contentView,10)
    .leftSpaceToView(self.contentView,10)
    .widthIs(50)
    .heightIs(50);

    view1.sd_layout
    .topEqualToView(view0)
    .leftSpaceToView(view0,10)
    .rightSpaceToView(self.contentView,10)
    .heightIs(30);

    lable.sd_layout
    .leftEqualToView(view1)
    .topSpaceToView(view1,10)
    .rightSpaceToView(self.contentView,120)
    .autoHeightRatio(0);

    view3.sd_layout
    .leftSpaceToView(lable,10)
    .topSpaceToView(view1,10)
    .rightSpaceToView(self.contentView,10)
    .heightRatioToView(lable,1);
    //设置cell 高度自适应
    [self setupAutoHeightWithBottomView:view4 bottomMargin:10];

 //第二步代理方法返回Cell高度
-(CGFloat)tableView:(UITableView *)tableView heightForRowAtIndexPath:(NSIndexPath *)indexPath
{
    return     //推荐写法
 [self.tableView cellHeightForIndexPath:indexPath                                        model:self.dataSource[indexPath.row]
                                  keyPath:@"text"
                                cellClass:[DemoVC7Cell class]
                         contentViewWidth:[UIScreen mainScreen].bounds.size.width];
    /*
    //数据量小时可以这样写
    return
 [self.tableView cellHeightForIndexPath:indexPath
                    cellContentViewWidth:[UIScreen mainScreen].bounds.size.width tableView:tableView];
     */
}
高度缓存
-(UITableViewCell *)tableView:(UITableView *)tableView
           cellForRowAtIndexPath:(NSIndexPath *)indexPath {
 //
//
//缓存高度,tableview滑动更加流畅
 [cell useCellFrameCacheWithIndexPath:indexPath tableView:tableView];
//
//
}

