一、注册中心Zookeeper的安装
正如上一章节(微服务学习(2)-微服务框架实现-Dubbo简介)中介绍的服务的消费者和提供者都需要在注册中心注册。所以,本节选择Zookeeper入手介绍注册中心的安装部署。ZooKeeper是一个分布式的,开放源码的分布式应用程序协调服务,是Google的Chubby一个开源的实现,是Hadoop和Hbase的重要组件。它是一个为分布式应用提供一致性服务的软件,提供的功能包括:配置维护、域名服务、分布式同步、组服务等。
1)Zookeeper下载
可以到官网http://zookeeper.apache.org/ 下载。
2)下载
解压到指定目录下D:\soft\zookeeper-3.4.8
修改zoo_sample.cfg 文件名(D:\soft\zookeeper-3.4.8\conf) 为 zoo.cfg
主要修改一下日志位置,具体配置文件如下:
[html]view plaincopy
# The number of milliseconds of each tick
tickTime=2000
# The number of ticks that the initial
# synchronization phase can take
initLimit=10
# The number of ticks that can pass between
# sending a request and getting an acknowledgement
syncLimit=5
# the directory where the snapshot is stored.
# do not use /tmp for storage, /tmp here is just
# example sakes.
dataDir=D:\\zookeeper\\data
dataLogDir=D:\\zookeeper\\log
# the port at which the clients will connect
clientPort=2181
# the maximum number of client connections.
# increase this if you need to handle more clients
#maxClientCnxns=60
#
# Be sure to read the maintenance section of the
# administrator guide before turning on autopurge.
#
# http://zookeeper.apache.org/doc/current/zookeeperAdmin.html#sc_maintenance
#
# The number of snapshots to retain in dataDir
#autopurge.snapRetainCount=3
# Purge task interval in hours
# Set to "0" to disable auto purge feature
#autopurge.purgeInterval=1
配置文件简单解析
1、tickTime:这个时间是作为 Zookeeper 服务器之间或客户端与服务器之间维持心跳的时间间隔,也就是每个 tickTime 时间就会发送一个心跳。
2、dataDir:顾名思义就是 Zookeeper 保存数据的目录,默认情况下,Zookeeper 将写数据的日志文件也保存在这个目录里。
3、dataLogDir:顾名思义就是 Zookeeper 保存日志文件的目录
4、clientPort:这个端口就是客户端连接 Zookeeper 服务器的端口,Zookeeper 会监听这个端口,接受客户端的访问请求。
3)启动
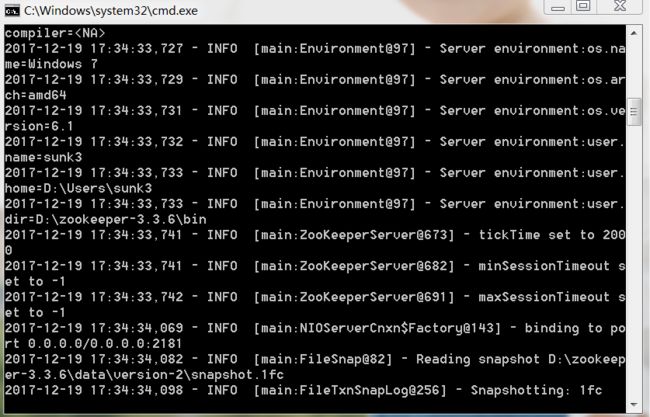
在window下 直接运行D:\zookeeper-3.3.6\bin\zkServer.cmd ,或者命令行zkServer.cmd 即可。如下图:
若是linux系统可以使用
在准备好相应的配置之后,可以直接通过zkServer.sh 这个脚本进行服务的相关操作
1. 启动ZK服务: sh bin/zkServer.sh start
2. 查看ZK服务状态: sh bin/zkServer.sh status
3. 停止ZK服务: sh bin/zkServer.sh stop
4. 重启ZK服务: sh bin/zkServer.sh restart
4)验证是否启动成功
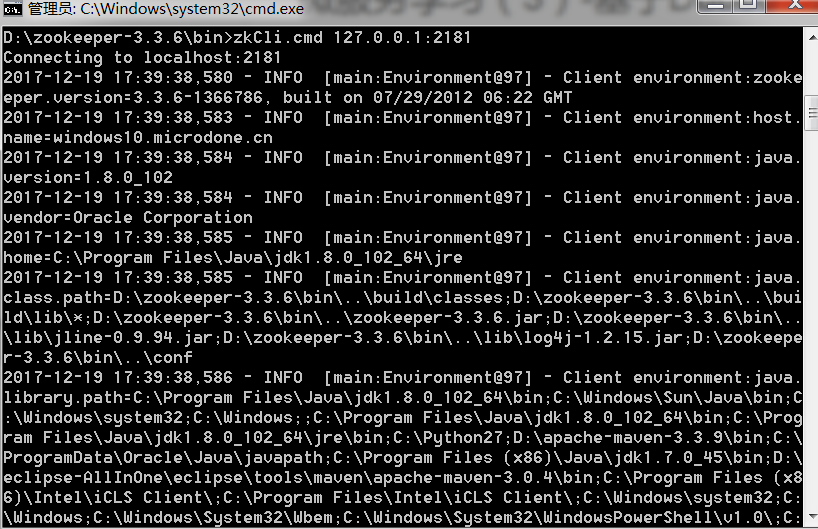
也可以启动客户端连接一下在Cmd 中输入 zkCli.cmd 127.0.0.1:2181 如图所示:
二、安装部署Dubbo的管理控制台
下载dubbo-admin,可自行根据网上介绍安装。一个JDK8可以实现的dubbo-admin版本,下载地址:http://www.itmayun.com/it/files/226631678709806/resource/901920001882583/1.html。
或者通过对Dubbo的源代码工程进行mvn install 打包。
1)将dubbo-admin.war 放到tomcat下后,访问http://localhost:8080/dubbo-admin/ ,用户和密码都输入root
2)在此监控平台里面可以配置路由规则、负载均衡,并监控服务等。
三、搭建Dubbo的Maven工程
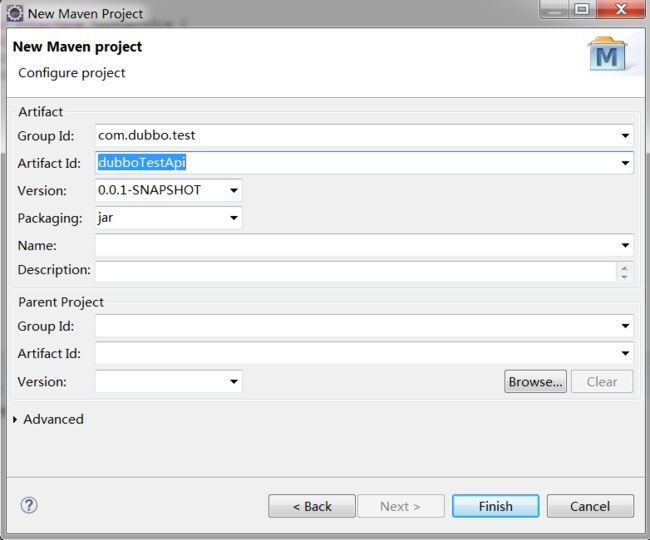
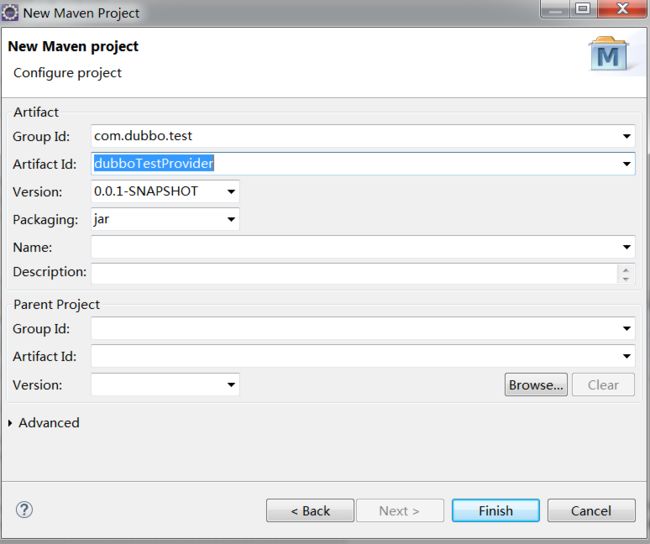
1)创建微服务接口工程DubboTestApi,该项目工服务提供方和消费方共享,打开Eclipse -新建maven工程-填写工程信息
在该工程中创建公共接口:
package com.dubbo.test;
public interface DubboTestApi {
public String hello(String name);
}
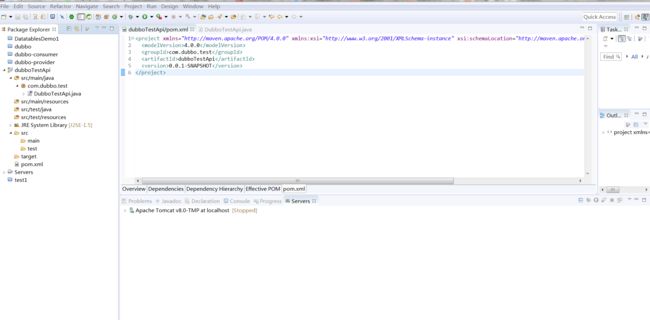
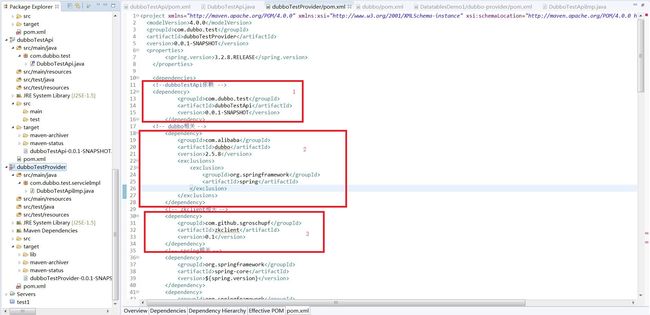
项目工程及POM.xml 配置如下:
运行maven install 打包成dubboTestApi-0.0.1-SNAPSHOT.jar
2)创建服务提供者maven工程dubboTestProvider,该工程需要加入dubbo、zookeeper、spring的相关依赖包。
在改工程中创建服务提供者DubboTestApiImp:
package com.dubbo.test.servcieImpl;
import com.dubbo.test.DubboTestApi;
/**
* 实现服务提供者
* @author 花蝴蝶511
*
*/
public class DubboTestApiImp implements DubboTestApi {
public DubboTestApiImp() {
// TODO Auto-generated constructor stub
}
public String hello(String name) {
// TODO Auto-generated method stub
return "hello "+name;
}
}
配置pom分别依赖dubboTestApi、dubbo、zookeeper、spring,并将相关依赖包打包到lib目录下方便发布。
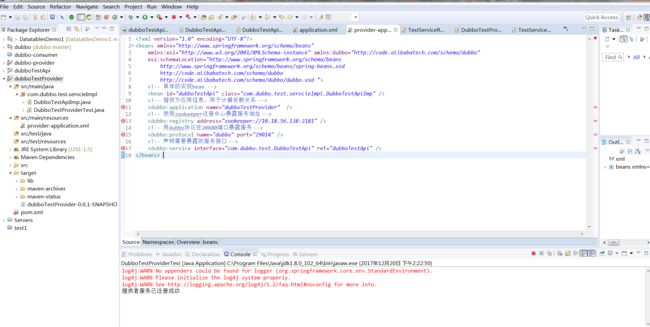
定义服务提供者的spring配置文件provider-application.xml
编写服务启动测试程序
package com.dubbo.test.servcieImpl;
import java.io.IOException;
import org.springframework.context.support.ClassPathXmlApplicationContext;
/**
*
* @author 花蝴蝶511
*
*/
public class DubboTestProviderTest {
public DubboTestProviderTest() {
// TODO Auto-generated constructor stub
}
public static void main(String[] args) {
// TODO Auto-generated method stub
ClassPathXmlApplicationContext context = new ClassPathXmlApplicationContext(new String[]{"provider-application.xml"});
context.start();
System.out.println("提供者服务已注册成功");
try {
System.in.read();//让此程序一直跑,表示一直提供服务
} catch (IOException e) {
e.printStackTrace();
}
}
}
运行启动DubboTestProviderTest 程序,到dubbo-admin 确定提供者已注册到注册中心
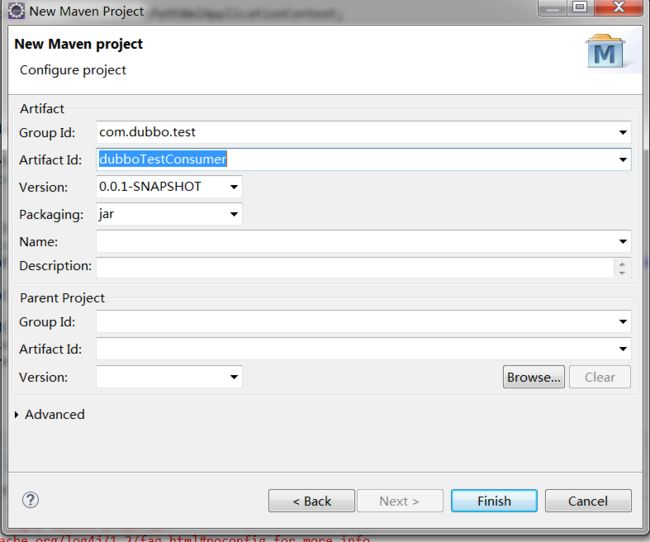
3)创建消费者maven工程-dubboTestConsumer
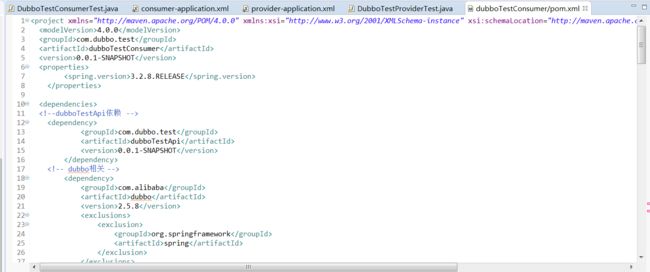
该工程需要加入dubbo、zookeeper、spring的相关依赖包。其pom.xml如服务提供者
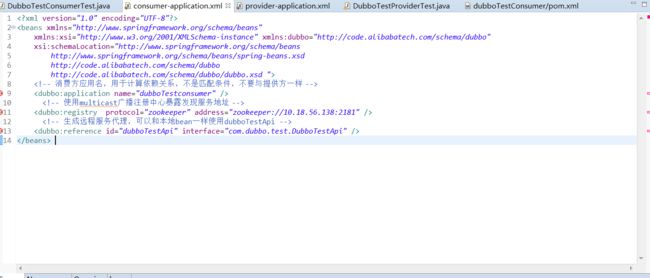
定义服务消费者spring文件
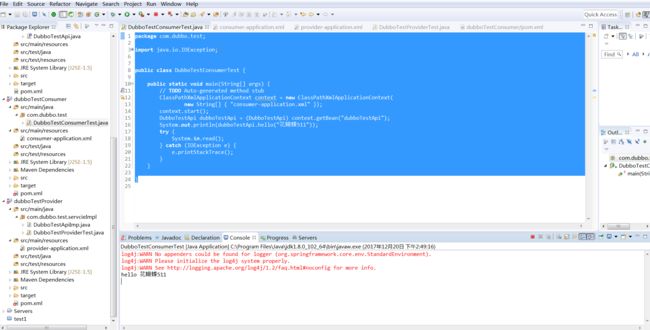
编写消费者测试程序
package com.dubbo.test;
import java.io.IOException;
import org.springframework.context.support.ClassPathXmlApplicationContext;
public class DubboTestConsumerTest {
public static void main(String[] args) {
// TODO Auto-generated method stub
ClassPathXmlApplicationContext context = new ClassPathXmlApplicationContext(
new String[] { "consumer-application.xml" });
context.start();
DubboTestApi dubboTestApi = (DubboTestApi) context.getBean("dubboTestApi");
System.out.println(dubboTestApi.hello("花蝴蝶511"));
try {
System.in.read();
} catch (IOException e) {
e.printStackTrace();
}
}
}
运行后结果,远程方法调用成功:
查看dubbo-admin,发现消费新增一个:
四、集群启动和部署
在第三节里面已经将dubbo成功启动,但是建立集群需要发布到其他PC机器上面,需要在在生产者和消费者打包时候将项目引用的jar类一起打包到固定目录,如lib下,需要在pom.xml中加入build项目信息。具体参考http://blog.csdn.net/itsenlin/article/details/51419639
例如:将服务提供包复制到lib下
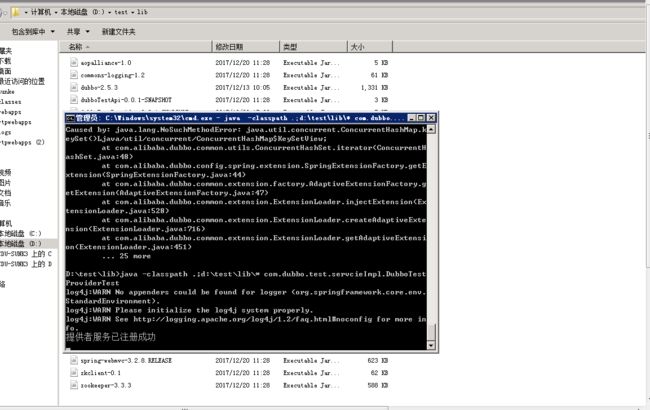
然后将该整个目录包复制到另外一台PC 的D:\test\lib 下,在CMD中启动服务提供者主程序
D:\test\lib>java -classpath .;d:\test\lib\* com.dubbo.test.servcieImpl.DubboTestProviderTest
令人不解是利用dubbo 2.5.3是可以运行成功,但是dubbo2.5.8报上面错误。请有明白的高手帮分析下。查dubbo-admin
发现注册成功。
参考文档:http://blog.csdn.net/noaman_wgs/article/details/70214612
http://blog.csdn.net/itsenlin/article/details/51419639
