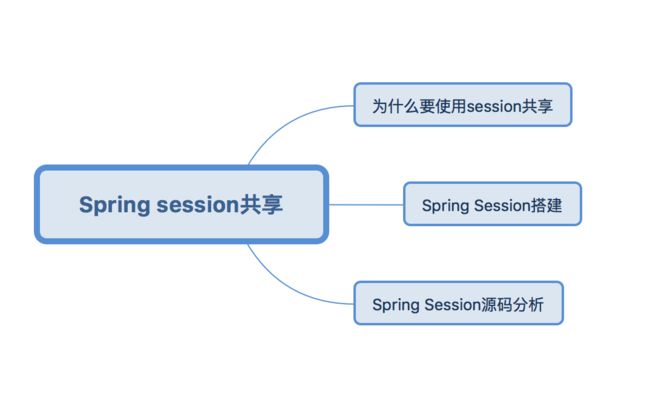
思维导图:
一、为什么需要session共享
HttpSession是由servelet容器进行管理的。而我们常用的应用容器有 Tomcat/Jetty等, 这些容器的HttpSession都是存放在对应的应用容器的内存中,在分布式集群的环境下,通常我们使用Nginx或者LVS、Zuul等进行反向代理和负载均衡,因此用户请求是由一组提供相同服务的应用来进行处理,而用户最终请求到的服务由Nginx和LVS、Zuul进行确定。
例如:我们现在有2相同的服务,服务A和服务B,通过Nginx进行反向代理和负载均衡,用户请求,登录时由服务A进行处理,而修改用户资料有服务B进行处理。当前HttpSession是存放在服务A的内存中,而进行修改资料的时候由服务B进行处理,这时候服务B是不可能获取到服务A的HttpSession。因此请求修改用户资料的请求会失败。
那么问题就来了,我们怎样保证多个相同的应用共享同一份session数据?对于这种问题Spring为我们提供了Spring Session进行管理我们的HttpSession。项目地址:http://projects.spring.io/spring-session/
二、Spring Session搭建
1.添加Spring session的包,而Spring session 是将HttpSession存放在Redis中,因此需要添加Redis的包。我们这里是用了Spring boot进行配置Rdies。
  com.test
  SpringSession
  0.0.1
  jar
  SpringSession
  http://maven.apache.org

        org.springframework.boot
        spring-boot-starter-parent
        1.4.0.RELEASE


    UTF-8
    1.8


            org.springframework.boot
            spring-boot-starter


            org.springframework.boot
            spring-boot-starter-web


            org.springframework.boot
            spring-boot-starter-redis


            org.springframework.session
            spring-session-data-redis
2.使用@EnableRedisHttpSession注解进行配置启用使用Spring session。
@SpringBootApplication
@EnableRedisHttpSession
public class App
{
    public static void main( String[] args )
    {
        SpringApplication.run(App.class, args);
    }
}
扩展知识:Spring Session提供了3种方式存储session的方式。分别对应3各种注
@EnableRedisHttpSession-存放在缓存redis
@EnableMongoHttpSession-存放在Nosql的MongoDB
@EnableJdbcHttpSession-存放数据库
3.配置我们的Redis链接,我们这里使用的是Spring Boot作为基础进行配置,因此我们只需要在YML或者Properties配置文件添加Redis的配置即可。
server:
  port: 8081

spring:
  application:
    name: manager
  profiles:
    active: dev
  redis:
     database: 1
     host: 192.168.1.104
     password:
     port: 6379
4.创建请求的控制器来进行确定我们是否启用Session 共享。
@RestController
public class SessionController {

    @GetMapping("/setUrl")
    public Map setUrl(HttpServletRequest request){
        request.getSession().setAttribute("url", request.getRequestURL());
        Map map = new HashMap<>();
        map.put("url", request.getRequestURL());
        return map;
    }

    @GetMapping("/getSession")
    public Map getSession(HttpServletRequest request){
        Map map = new HashMap<>();
        map.put("sessionId", request.getSession().getId());
        map.put("url", request.getSession().getAttribute("url"));
        return map;
    }
}
5.将当前的工程拷贝一份.
修改YML或者Properties配置文件中的端口。原工程的端口为:8080,我们拷贝的工程修改成为:8081
(1)执行请求:http://localhost:8080/setUrl
     界面显示:{"url":"http://localhost:8080/setUrl"}
(2)执行请求:http://localhost:8081/getSession,查看是否显示之前设置在Session中的属性
     界面显示:{"sessionId":"e8c50c54-9aa7-4c34-bcea-a648242dfd0b","url":"http://localhost:8080/setUrl"}
(3)执行请求:http://localhost:8080/getSession
      界面显示:{"sessionId":"e8c50c54-9aa7-4c34-bcea-a648242dfd0b","url":"http://localhost:8080/setUrl"}
通过上面请求显示的结果我们可以看出使用的是同一个Seesion,我们也可以查看下存在Redis中的Session。我这里使用RDM进行查看,我们还可以查看Session的属性。从图可以看出我们存进入的url属性。
二、Spring Session源码分析
我们从启动Spring Session的配置注解@EnableRedisHttpSession开始。
1.我们可以通过@EnableRedisHttpSession可以知道,Spring Session是通过RedisHttpSessionConfiguration类进行配置的。
@Retention(java.lang.annotation.RetentionPolicy.RUNTIME)
@Target({ java.lang.annotation.ElementType.TYPE })
@Documented
@Import(RedisHttpSessionConfiguration.class)
@Configuration
public @interface EnableRedisHttpSession {
    int maxInactiveIntervalInSeconds() default 1800;
2.我们在RedisHttpSessionConfiguration类种的注释可以知道,该类是用于创建一个过滤SessionRepositoryFilter。
/**
 * Exposes the {@link SessionRepositoryFilter} as a bean named
 * "springSessionRepositoryFilter". In order to use this a single
 * {@link RedisConnectionFactory} must be exposed as a Bean.
 *
 * @author Rob Winch
 * @since 1.0
 *
 * @see EnableRedisHttpSession
 */
@Configuration
@EnableScheduling
public class RedisHttpSessionConfiguration extends SpringHttpSessionConfiguration
        implements ImportAware {
3.探究下SessionRepositoryFilter类是在哪里创建\创建过程\作用。
(1)哪里创建:
通过搜索RedisHttpSessionConfiguration发现SessionRepositoryFilter的创建不是在RedisHttpSessionConfiguration,而是在父类SpringHttpSessionConfiguration中创建。
@Bean
    public  SessionRepositoryFilter springSessionRepositoryFilter(
            SessionRepository sessionRepository) {
        SessionRepositoryFilter sessionRepositoryFilter = new SessionRepositoryFilter(
                sessionRepository);
        sessionRepositoryFilter.setServletContext(this.servletContext);
        if (this.httpSessionStrategy instanceof MultiHttpSessionStrategy) {
            sessionRepositoryFilter.setHttpSessionStrategy(
                    (MultiHttpSessionStrategy) this.httpSessionStrategy);
        }
        else {
            sessionRepositoryFilter.setHttpSessionStrategy(this.httpSessionStrategy);
        }
        return sessionRepositoryFilter;
    }
为什么会在父类种进行创建呢?因为Spring Session 是提供多种存储Session的策略,因此会把创建SessionRepositoryFilter的方法放在SpringHttpSessionConfiguration中,而把每种策略特有的链接和操作放在了子类当中。
(2)SessionRepositoryFilter创建过程:
- SessionRepositoryFilter的创建需要sessionRepository,而sessionRepository是一个接口,我可以通过查看接口发现该接口有一个扩展的子类接口FindByIndexNameSessionRepository,从该接口的实现类种我们可以发现有3个对应实现类分别为:
- RedisOperationsSessionRepository
- MongoOperationsSessionRepository
- JdbcOperationsSessionRepository
- 我们使用的是Redis的Session共享,因此这里使用到的实现类为RedisOperationsSessionRepository,而该类的初始化是在RedisHttpSessionConfiguration中。在初始化的时候需要一个sessionRedisTemplate参数,而该参数也在RedisHttpSessionConfiguration中进行初始化
    @Bean
    public RedisTemplate sessionRedisTemplate(
            RedisConnectionFactory connectionFactory) {
        RedisTemplate template = new RedisTemplate();
        template.setKeySerializer(new StringRedisSerializer());
        template.setHashKeySerializer(new StringRedisSerializer());
        if (this.defaultRedisSerializer != null) {
            template.setDefaultSerializer(this.defaultRedisSerializer);
        }
        template.setConnectionFactory(connectionFactory);
        return template;
    }
@Bean
    public RedisOperationsSessionRepository sessionRepository(
            @Qualifier("sessionRedisTemplate") RedisOperations sessionRedisTemplate,
            ApplicationEventPublisher applicationEventPublisher) {
        RedisOperationsSessionRepository sessionRepository = new RedisOperationsSessionRepository(
                sessionRedisTemplate);
        sessionRepository.setApplicationEventPublisher(applicationEventPublisher);
        sessionRepository
                .setDefaultMaxInactiveInterval(this.maxInactiveIntervalInSeconds);
        if (this.defaultRedisSerializer != null) {
            sessionRepository.setDefaultSerializer(this.defaultRedisSerializer);
        }

        String redisNamespace = getRedisNamespace();
        if (StringUtils.hasText(redisNamespace)) {
            sessionRepository.setRedisKeyNamespace(redisNamespace);
        }

        sessionRepository.setRedisFlushMode(this.redisFlushMode);
        return sessionRepository;
    }
我们在创建RedisOperationsSessionRepository的时候需要一个applicationEventPublisher的参数,而applicationEventPublisher主要用于发布事件。当创建session:handleCreated();删除session:handleDeleted();session过期:handleExpired();时都会发布事件,而事件的处理是由SessionEventHttpSessionListenerAdapter进行接受后分配到HttpSessionMutexListener进行实际处理。对Session增加SESSION_MUTEX_ATTRIBUTE属性,而该属性主要用于保证Session在其生命周期中都是唯一,并且使当前的Session是线程安全的。
这里我们可以总结下:
Redis确保链接的情况下。
1.创建sessionRedisTemplate
2.创建RedisOperationsSessionRepository
3.创建SessionRepositoryFilter
(3)SessionRepositoryFilter的作用:
SessionRepositoryFilter的主要作用接管Seession的管理。我们可以从下面几个点知道为什么?
- 我们从SessionRepositoryFilter注释可以看到,SessionRepositoryFilter放在访问的任何Filter之前。那我们怎么保证我们的SessionRepositoryFilter会在其他Filter之前执行呢?关键在于SessionRepositoryFilter是继承了OncePerRequestFilter,而OncePerRequestFilter是一个抽象的类,我们从注释中可以看到,该类是一个确保每一个请求前进行调用。正因为SessionRepositoryFilter继承了OncePerRequestFilter因此确保了SessionRepositoryFilter的优先级别高与其他Filter。
/**
 * Allows for easily ensuring that a request is only invoked once per request. This is a
 * simplified version of spring-web's OncePerRequestFilter and copied to reduce the foot
 * print required to use the session support.
 *
 * @author Rob Winch
 * @since 1.0
 */
abstract class OncePerRequestFilter implements Filter
- 我们会想那为什么需要将SessionRepositoryFilter放在所有的Filter之前呢?因为SessionRepositoryFilter使用SessionRepositoryRequestWrapper进行处理Session的管理。因此我们需要将SessionRepositoryFilter放在其他Filter之前。
@Override
    protected void doFilterInternal(HttpServletRequest request,
            HttpServletResponse response, FilterChain filterChain)
                    throws ServletException, IOException {
        request.setAttribute(SESSION_REPOSITORY_ATTR, this.sessionRepository);

        SessionRepositoryRequestWrapper wrappedRequest = new SessionRepositoryRequestWrapper(
                request, response, this.servletContext);
        SessionRepositoryResponseWrapper wrappedResponse = new SessionRepositoryResponseWrapper(
                wrappedRequest, response);

        HttpServletRequest strategyRequest = this.httpSessionStrategy
                .wrapRequest(wrappedRequest, wrappedResponse);
        HttpServletResponse strategyResponse = this.httpSessionStrategy
                .wrapResponse(wrappedRequest, wrappedResponse);

        try {
            filterChain.doFilter(strategyRequest, strategyResponse);
        }
        finally {
            wrappedRequest.commitSession();
        }
    }
4.我们研究下SessionRepositoryRequestWrapper是怎样接管Session?
(1)存储Session的过程
- SessionRepositoryRequestWrapper继承了HttpServletRequestWrapper,而我们都知道HttpServletRequest对象的参数是不可改变的,使用HttpServletRequestWrapper尽管你不能改变不变对象本身,但你却可以通过使用装饰模式来改变HttpServletRequest状态。传递下去的HttpServletRequest就包含了我们增加的处理.
- SessionRepositoryFilter每次调用完毕后都会调用commitSession()方法。 当前的Session不为空的情况下,保存当前的Session。
/**
         * Uses the HttpSessionStrategy to write the session id to the response and
         * persist the Session.
         */
        private void commitSession() {
            HttpSessionWrapper wrappedSession = getCurrentSession();
            if (wrappedSession == null) {
                if (isInvalidateClientSession()) {
                    SessionRepositoryFilter.this.httpSessionStrategy
                            .onInvalidateSession(this, this.response);
                }
            }
            else {
                S session = wrappedSession.getSession();
                //将Session存放到Redis中
SessionRepositoryFilter.this.sessionRepository.save(session);
                if (!isRequestedSessionIdValid()
                        || !session.getId().equals(getRequestedSessionId())) {
                    SessionRepositoryFilter.this.httpSessionStrategy.onNewSession(session,
                            this, this.response);
                }
            }
        }
当调用SessionRepositoryFilter.this.sessionRepository.save(session)完毕后,会判断当前的SessionId是否与请求的中的Cookie中SessionId一致,若不一致的情况下会调用onNewSession()方法,我们可以通过SpringHttpSessionConfiguration配置类的可以看到使用的是
CookieHttpSessionStrategy();
从CookieHttpSessionStrategy.onNewSession()方法可以看到是将SessionId写到Cookie中。
private CookieHttpSessionStrategy defaultHttpSessionStrategy = new CookieHttpSessionStrategy();
private HttpSessionStrategy httpSessionStrategy = this.defaultHttpSessionStrategy;

  @Bean
  public  SessionRepositoryFilter springSessionRepositoryFilter(
          SessionRepository sessionRepository) {
      SessionRepositoryFilter sessionRepositoryFilter = new SessionRepositoryFilter(
              sessionRepository);
      sessionRepositoryFilter.setServletContext(this.servletContext);
      if (this.httpSessionStrategy instanceof MultiHttpSessionStrategy) {
          sessionRepositoryFilter.setHttpSessionStrategy(
                  (MultiHttpSessionStrategy) this.httpSessionStrategy);
      }
      else {
          sessionRepositoryFilter.setHttpSessionStrategy(this.httpSessionStrategy);
      }
      return sessionRepositoryFilter;
  }
public void onNewSession(Session session, HttpServletRequest request,
         HttpServletResponse response) {
     Set sessionIdsWritten = getSessionIdsWritten(request);
     if (sessionIdsWritten.contains(session.getId())) {
         return;
     }
     sessionIdsWritten.add(session.getId());

     Map sessionIds = getSessionIds(request);
     String sessionAlias = getCurrentSessionAlias(request);
     sessionIds.put(sessionAlias, session.getId());

     String cookieValue = createSessionCookieValue(sessionIds);
     this.cookieSerializer
             .writeCookieValue(new CookieValue(request, response, cookieValue));
 }
(2)获取Session的过程
-
获取Session的过程,是调用SessionRepositoryRequestWrapper的 getSession(boolean create)方法。通过该方法我们可以分析到:
第一:获取当前的Session,如果获取到直接返回。
第二:如果获取不到当前的标记属性的Session,从Cookie中获取SessionId,在Redis中获取Session,判断是否获取到Session,若获取到Session将Session存放到当前请求中。若获取不到创建新的Session。public HttpSessionWrapper getSession(boolean create) { HttpSessionWrapper currentSession = getCurrentSession(); if (currentSession != null) { return currentSession; } String requestedSessionId = getRequestedSessionId(); if (requestedSessionId != null && getAttribute(INVALID_SESSION_ID_ATTR) == null) { S session = getSession(requestedSessionId); if (session != null) { this.requestedSessionIdValid = true; currentSession = new HttpSessionWrapper(session, getServletContext()); currentSession.setNew(false); setCurrentSession(currentSession); return currentSession; } else { // This is an invalid session id. No need to ask again if // request.getSession is invoked for the duration of this request if (SESSION_LOGGER.isDebugEnabled()) { SESSION_LOGGER.debug( "No session found by id: Caching result for getSession(false) for this HttpServletRequest."); } setAttribute(INVALID_SESSION_ID_ATTR, "true"); } } if (!create) { return null; } if (SESSION_LOGGER.isDebugEnabled()) { SESSION_LOGGER.debug( "A new session was created. To help you troubleshoot where the session was created we provided a StackTrace (this is not an error). You can prevent this from appearing by disabling DEBUG logging for " + SESSION_LOGGER_NAME, new RuntimeException( "For debugging purposes only (not an error)")); } S session = SessionRepositoryFilter.this.sessionRepository.createSession(); session.setLastAccessedTime(System.currentTimeMillis()); currentSession = new HttpSessionWrapper(session, getServletContext()); setCurrentSession(currentSession); return currentSession; }
总结:
我们根据源码的分析可以知道:
1.Spring Session 是通过SessionRepositoryFilter过滤器进行拦截,然后通过SessionRepositoryRequestWrapper继承HttpServletRequestWrapper进行管理Session。
2.Spring Session 为我们提供了3中存放的策略而每种策略提供对应的注解启动。分别为:
(1)NoSql形式的MongoDb:@EnableMongoHttpSession
(2)持久化形式的JDBC:@EnableJdbcHttpSession
(3)缓存形式的Redis:@EnableRedisHttpSession
3.Spring Session 共享Session过程:
(1)先过程过滤器存储将SessionID存放到本地的Cookie 和Redis中。
如果本地没有启用Cookie的情况下,Spring Session也就不能使用。
(2)获取Session的时候,先从请求中获取Session,Session不为空的情况下直接返回Session,若当前的Session为空的情况下,从Cookie中获取SessionId,判断SessionId不为空,再从Redis中获取Session,若从Redis中获取到的Session不为空将Session存放到请求中,再返回Session,如果从Redis中获取的Session为空,再创建新的Session并且添加到请求中,后返回Session。

