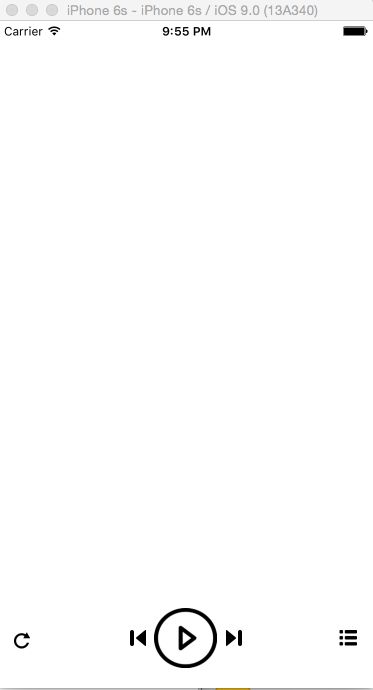
今天试了试Storyboard,感觉还是挺方便的,减少了大量代码量,算作是提高了效率吧。不过本人第一次用还不是很熟悉,对于autolayout也是第一次使用(之前是使用Masonry,还是很方便,详情见里脊串大神的Masonry使用),也是第一次使用xib,想想有点落伍了。不过本人的建议是初学者可以先从代码入手,之后转Storyboard很容易。
初始界面如下所示,为故事板构建,其中按钮使用autolayout,点击故事板文件,选择要适配的控件,然后点击故事板下方wAny hAny那行的右边小按钮(之所以这样描述是因为本渣渣一开始找半天没找到),有系统自动推荐的适配,也可以自己添加约束。在这里我按钮均为系统推荐的约束,然后下方有UINavigationBar,UITableView,UIToolBar。不得不说我一开始也是各种奇怪的控件跑来跑去,后面慢慢摸索出来自己的套路。我最常用的是Add Missing Constraints,用来进行控件与控件间的约束。添加完约束后可以在右边Show the Size inspector里面微调,在这里就不细说(因为本渣不擅长解说,想玩玩的可以去GitHub找源码研究,挺详细的)。
接下来是UITableView界面。点击右下角的按钮就能显示出来。这里是设计为播放列表显示,界面如下。这里我的UITableView放在屏幕下面,没有添加约束,因为一约束然后点击编辑就会缩下去。播放列表跟关闭两个控件都与UITableView添加了约束。UITableView采用了自定义cell,有机会专门写篇介绍自定义cell的代码实现与xib实现,或者大家去网上搜教程,本渣也是从网上学来的。粗略介绍下,首先建立一个空白文件,命名XX.xib,之后与故事板一样也是拖动控件进去,然后自己设计控件样式,然后点击File's Owner设置为要使用的controller,并设置自定义控件的identifier。附上一段使用代码:
- (UITableViewCell *)tableView:(UITableView *)tableView cellForRowAtIndexPath:(NSIndexPath *)indexPath{
//自定义控件的identifier
static NSString *simpleIdentify = @"SimpleIdentify";
UITableViewCell *cell = [tableView dequeueReusableCellWithIdentifier:simpleIdentify];
NSArray *nib = [[NSBundle mainBundle] loadNibNamed:@"MyTable" owner:self options:nil];
if ([nib count] > 0) {
self.customCell = [nib objectAtIndex:0];
cell = self.customCell;
}
//控件的tag值需设定
UILabel *nameLabel = (UILabel *)[cell.contentView viewWithTag:1];
nameLabel.text = _musicList[indexPath.row];
UIButton *clearBtn = (UIButton *)[cell.contentView viewWithTag:2];
clearBtn.tag = indexPath.row;
[clearBtn addTarget:self action:@selector(deleteOneAction:) forControlEvents:UIControlEventTouchUpInside];
return cell;
}
实现UITableView的编辑功能主要是实现几个方法:- (BOOL)tableView:(UITableView *)tableView canEditRowAtIndexPath:(NSIndexPath *)indexPath;设置是否允许编辑,返回YES表示可以编辑
-(UITableViewCellEditingStyle)tableView:(UITableView *)tableView editingStyleForRowAtIndexPath:(NSIndexPath *)indexPath;设置编辑状态UITableViewCellEditingStyleNone,UITableViewCellEditingStyleDelete,UITableViewCellEditingStyleInsert三种状态。
-(void)tableView:(UITableView *)tableView commitEditingStyle:(UITableViewCellEditingStyle)editingStyle forRowAtIndexPath:(NSIndexPath *)indexPath;完成编辑。附上代码:
- (BOOL)tableView:(UITableView *)tableView canEditRowAtIndexPath:(NSIndexPath *)indexPath {
// Return NO if you do not want the specified item to be editable.
return YES;
}
-(UITableViewCellEditingStyle)tableView:(UITableView *)tableView editingStyleForRowAtIndexPath:(NSIndexPath *)indexPath{
if (_myTableView.editing) {
return UITableViewCellEditingStyleInsert|UITableViewCellEditingStyleDelete;
}
else{
return UITableViewCellEditingStyleDelete;
}
}
-(void)tableView:(UITableView *)tableView commitEditingStyle:(UITableViewCellEditingStyle)editingStyle forRowAtIndexPath:(NSIndexPath *)indexPath{
if (editingStyle == UITableViewCellEditingStyleDelete) {
[_musicList removeObjectAtIndex:indexPath.row];
//[_myTableView beginUpdates];
[tableView deleteRowsAtIndexPaths:@[indexPath] withRowAnimation:UITableViewRowAnimationFade];
// [_myTableView endUpdates];
}
}
//确定删除选中的cell
- (IBAction)sureAction:(id)sender {
NSArray *arr = _myTableView.indexPathsForSelectedRows;
NSMutableIndexSet *set = [NSMutableIndexSet indexSet];
for (NSIndexPath *indexP in arr) {
[set addIndex:indexP.row];
}
[_musicList removeObjectsAtIndexes:set];
[_myTableView deleteRowsAtIndexPaths:arr withRowAnimation:UITableViewRowAnimationAutomatic];
}
讲得可能不够详细,最后附上项目文件,后续再进行更新。有什么意见或者心得可以与我分享。新鸟还请大家见谅。项目下载

