本文主要讲解使用uiautomator2+pytest+allure进行Android的UI自动化测试,也可以通过写一些实战的脚本来更深入学习pytest框架。
学习地址:uiautomator2+pytest+allure测试框架介绍
踩坑记录:https://www.jianshu.com/p/e9c542632f2c
基础开发环境:
macOS 10.14
Python 3.7.2
环境搭建
mac电脑自带python2.7, 所以想用python3.X来安装相关库时,建议使用pip3 install ...
pytest
最新版本出到4.0了,但是实际使用4.0和allure有些不兼容.
所以推荐使用3.7版本的pytest
pip3 install pytest==3.7
uiautomator2
uiautomator2也是python的一个类库,用pip安装即可.
pip3 install uiautomator2
allure
brew install allure
pip3 install pytest-allure-adaptor
有了测试框架、自动化框架、测试报告,基本上就能coding了。
pytest插件
pytest插件可以实现失败重试、打印进度、指定顺序
pip install pytest-sugar # 打印进度
pip install pytest-rerunfailures # 失败重试
pip install pytest-ordering # 执行顺序
当然插件还有很多,这里就不一一介绍了。
uiautomator2基本操作
启动服务
执行如下命令:
python3 -m uiautomator2 init
会在手机上安装atx-agent.apk并且会在手机上启动服务:
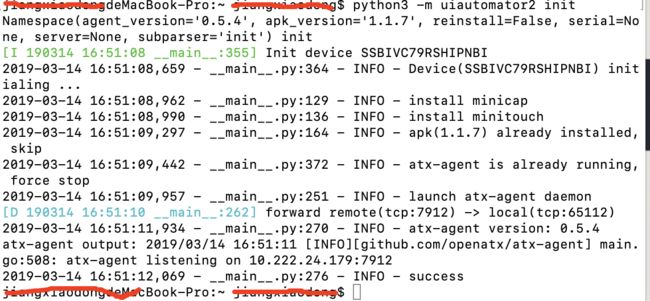
手机上也会自动访问以下地址:

监听的是手机上的ip+默认7921.
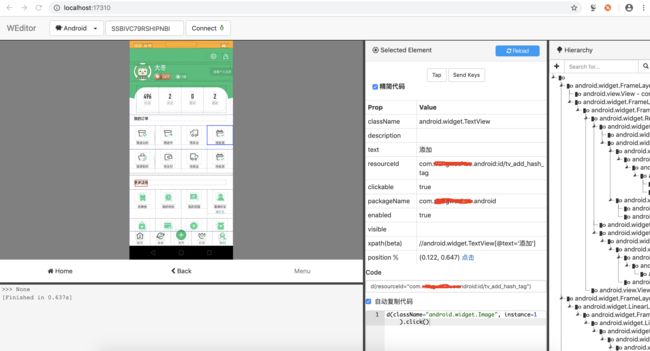
查看元素
安装
需要安装weditor库
pip3 install weditor
启动工具
python3 -m weditor
会在自动打开浏览器并且展示元素,相当于web版本的uiautomatorviewer,使用起来比较方便:
无线运行
上边提到的手机ip,有了这个手机ip就可以进行无线运行脚本
把connect中的方法替换成手机ip就可以了:
# d = ut2.connect(device_name)
d = ut2.connect("192.168.129.93")
demo代码
原作者的demo,需要安装下58同城最新版apk.
代码地址:https://github.com/xinxi1990/atxdemo.git
我的测试代码,本公司测试小伙伴可以去gitlab 获取。
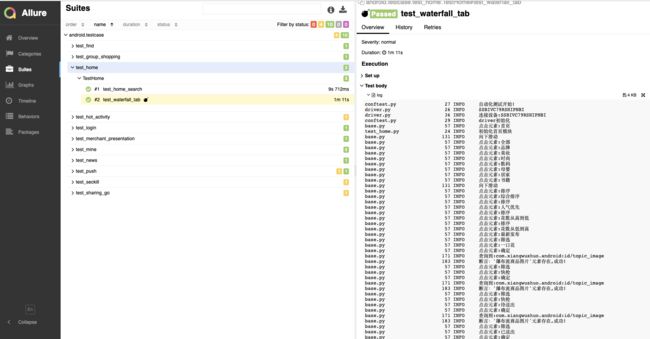
报告
allure报告,附几张跑完用例的截图:
需要说明的是,查看报告时,请使用Firefox浏览器,或在IDE(如PyCharm)用任意浏览器打开,如直接使用Chrome打开,报告内容为空。

PS:详细的uiautomator2使用方法可以移步如下地址:
https://github.com/openatx/uiautomator2