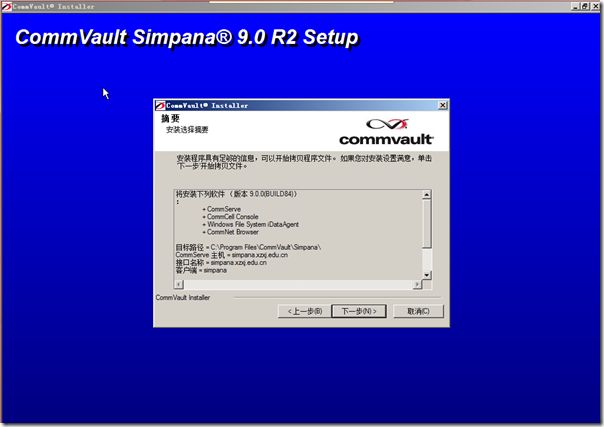
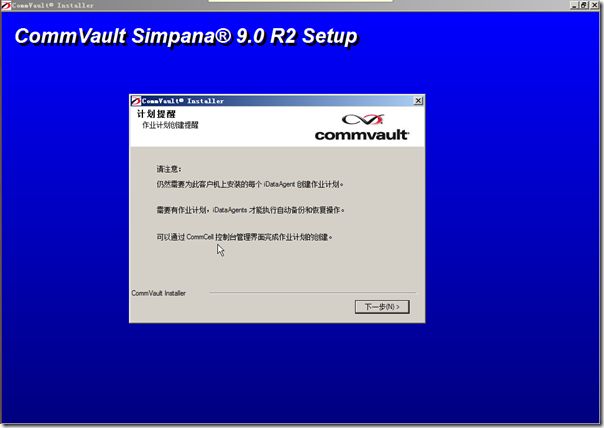
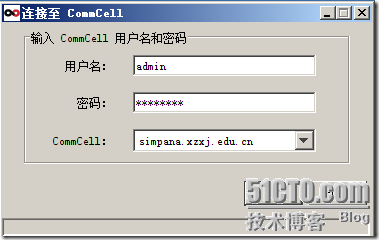
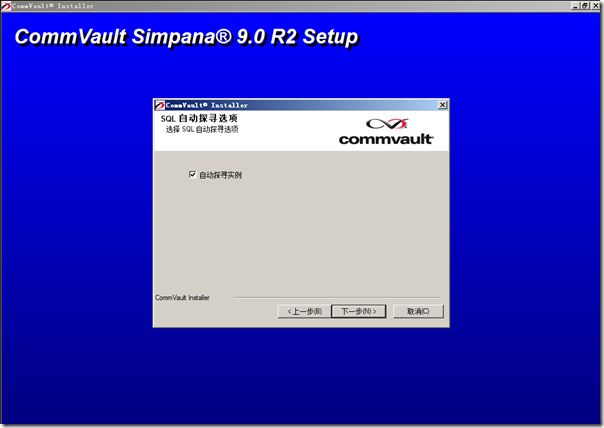
CommVault Simpana includes three parts:CommServe, MediaAgent and File System iDataAgent.

  • CommServe? communicates with all clients and MediaAgents and coordinates all operations such as backups, restores, copies, media management, etc. within a CommCell.
  • MediaAgent manages the transmission of data between clients and backup media.
  • File System iDataAgent performs the backup and restore of the clients data.

This article will show you how to install the CommServe and MediaAgent.The CommServe only support windows server.Here i install it on windows server 2008 R2.For more information about CommServe System Requirements from here.

Installing the CommServe On Windows Server 2008 R2

1.Run Setup.exe from the Software Installation Disc.

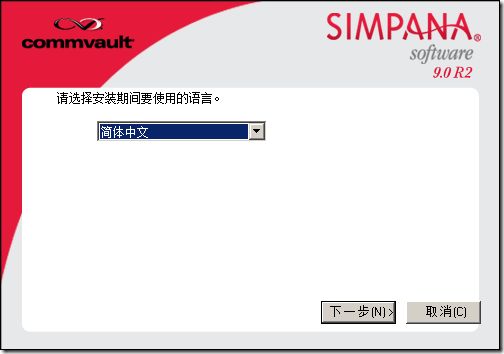
2.Select the required language.

CommVault Simpana 9 Installation Guide_第1张图片

3.Select the option to install software on this computer.

CommVault Simpana 9 Installation Guide_第2张图片

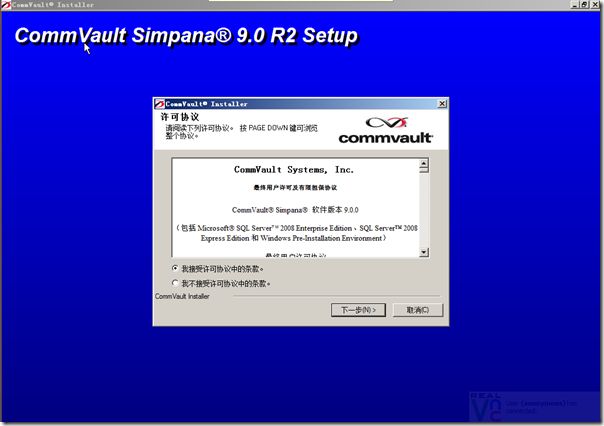
4.Select I accept the terms in the license agreement and click next.

CommVault Simpana 9 Installation Guide_第3张图片

5.Select the following component(s) to install:

  • Expand CommServe Modules and click CommServe.
  • Expand CommNet and clear CommNet Server.
  • Expand CommCell Console and clear CommNet Browser.
  • Expand MediaAgent Modules and click MediaAgent.

CommVault Simpana 9 Installation Guide_第4张图片

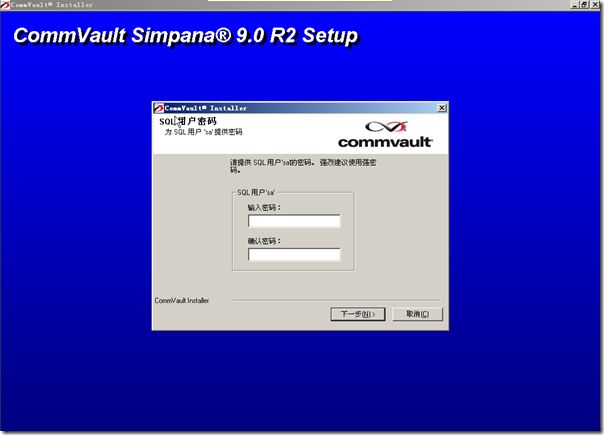
6.Specify the SQL Server System Administrator password.

CommVault Simpana 9 Installation Guide_第5张图片

7.If this message is displayed, click Reboot Now to continue. The install program will automatically resume from the point of failure after the reboot.

CommVault Simpana 9 Installation Guide_第6张图片

8.Click next.

CommVault Simpana 9 Installation Guide_第7张图片

9.Click next.

CommVault Simpana 9 Installation Guide_第8张图片

10.Installing SQL Server 2008.

CommVault Simpana 9 Installation Guide_第9张图片

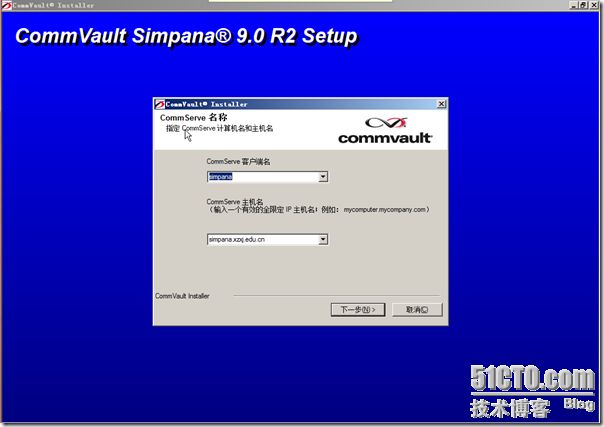
11.The CommServe Client Name and CommServe Host Name are automatically populated.

CommVault Simpana 9 Installation Guide_第10张图片

12.I disabled Windows firewall so click next.

CommVault Simpana 9 Installation Guide_第11张图片

13.Verify the default location for software installation.

CommVault Simpana 9 Installation Guide_第12张图片

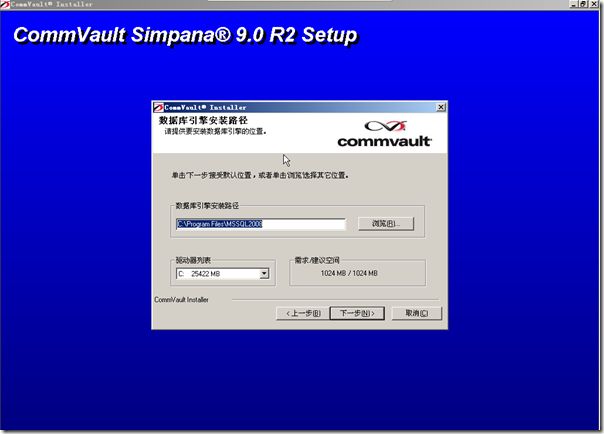
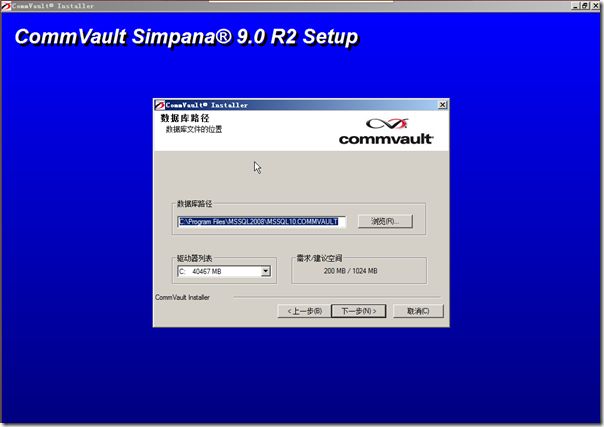
14.Verify the location of the database.

CommVault Simpana 9 Installation Guide_第13张图片

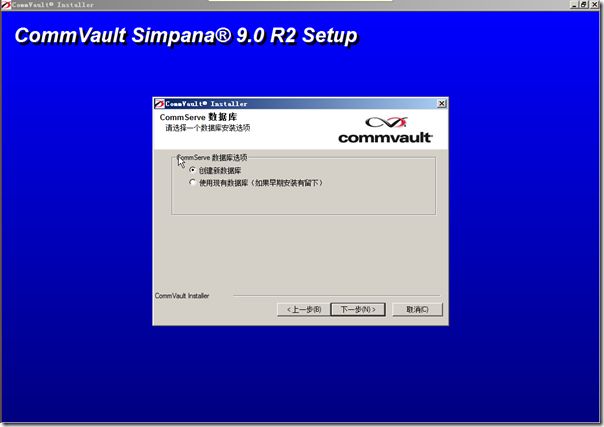
15.Select the Create a New Database option and click Next to continue.

CommVault Simpana 9 Installation Guide_第14张图片

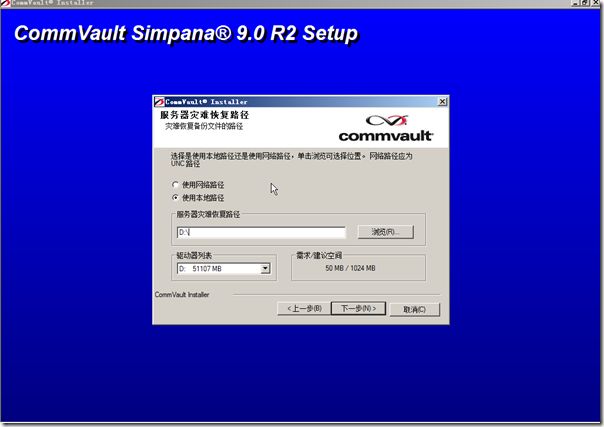
16.I select local path where Disaster Recovery Backup files should be stored.

CommVault Simpana 9 Installation Guide_第15张图片

17.Enter the CommCell Username and CommCell Password.

CommVault Simpana 9 Installation Guide_第16张图片

18.Click next.

CommVault Simpana 9 Installation Guide_第17张图片

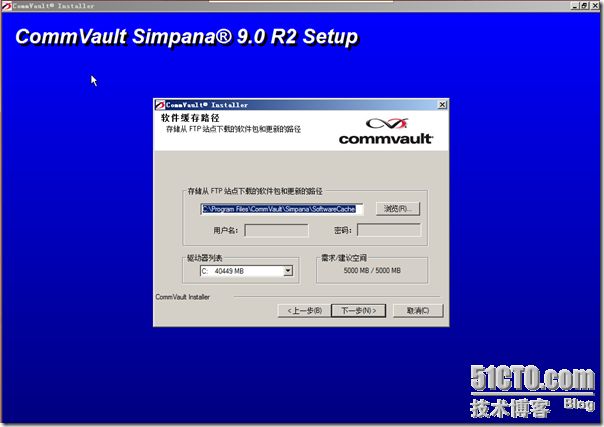
19.Verify the location where the update files from the FTP site should be stored.

CommVault Simpana 9 Installation Guide_第18张图片

20.Click next.

CommVault Simpana 9 Installation Guide_第19张图片

21.Click next.

CommVault Simpana 9 Installation Guide_第20张图片

22.Click next.

CommVault Simpana 9 Installation Guide_第21张图片

23.Click finish.

CommVault Simpana 9 Installation Guide_第22张图片

After installation,open CommCell Console GUI the Programs menu.

CommVault Simpana 9 Installation Guide_第23张图片

Installing The MediaAgent On Windows

1.Run Setup.exe from disc.

2.Select I accept the terms in the license agreement and click next.

CommVault Simpana 9 Installation Guide_第24张图片

3.Select MediaAgent.

CommVault Simpana 9 Installation Guide_第25张图片

4.Setup Windows FireWall

CommVault Simpana 9 Installation Guide_第26张图片

5.Click next.

CommVault Simpana 9 Installation Guide_第27张图片

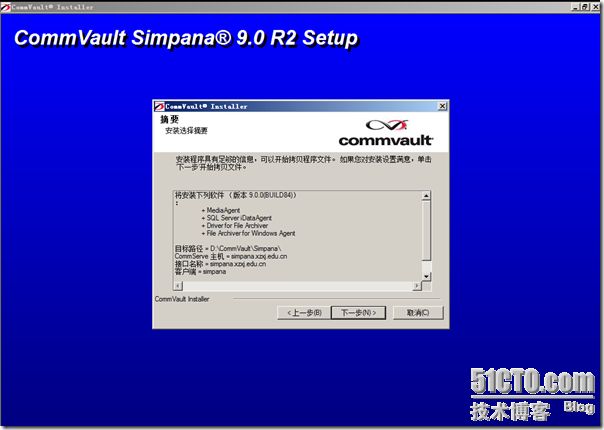
6.Installation Summary.

CommVault Simpana 9 Installation Guide_第28张图片

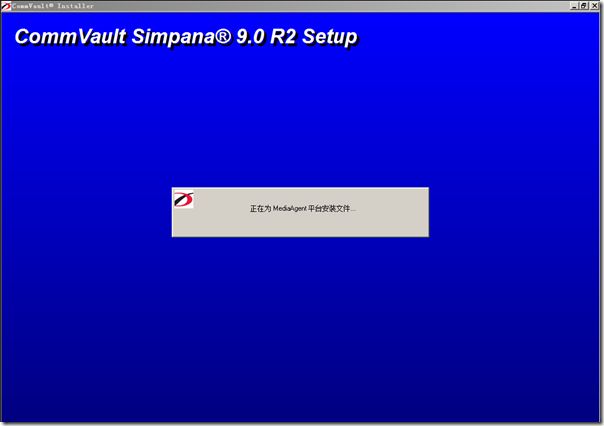
7.Installing.

CommVault Simpana 9 Installation Guide_第29张图片

8.Setup Schedule.

CommVault Simpana 9 Installation Guide_第30张图片

9.After installation,reboot your machine.

CommVault Simpana 9 Installation Guide_第31张图片

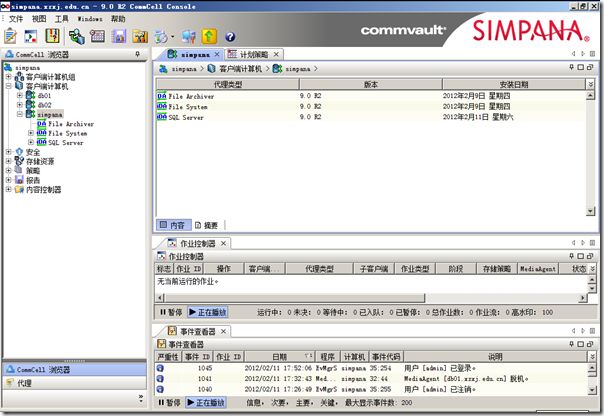
10.Veriry by CommCell Console GUI .

CommVault Simpana 9 Installation Guide_第32张图片

Installing The Agent On Linux

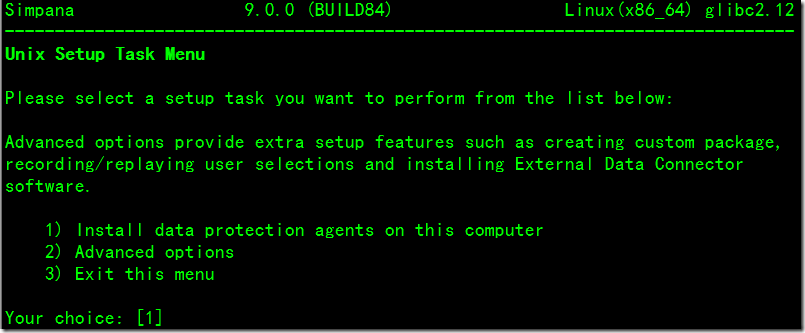
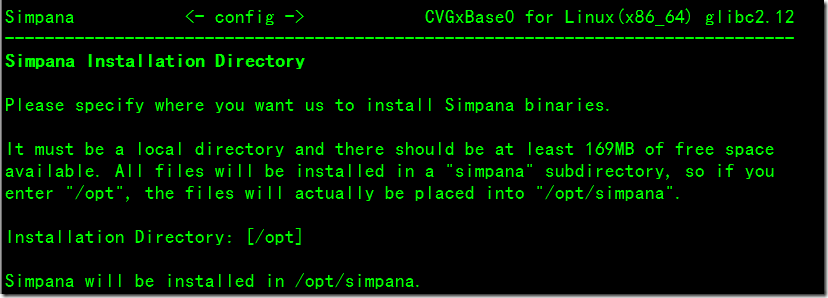
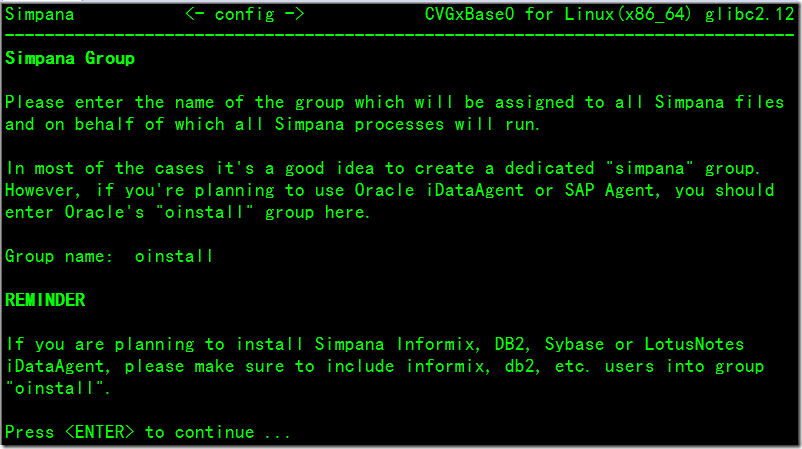
Run cvpkadd command from the simpana DVD3.

CommVault Simpana 9 Installation Guide_第33张图片

CommVault Simpana 9 Installation Guide_第34张图片

CommVault Simpana 9 Installation Guide_第35张图片

CommVault Simpana 9 Installation Guide_第36张图片

CommVault Simpana 9 Installation Guide_第37张图片

CommVault Simpana 9 Installation Guide_第38张图片

Here i select 1,2,5,11 options.

CommVault Simpana 9 Installation Guide_第39张图片

Enter d to exit this menu.

CommVault Simpana 9 Installation Guide_第40张图片

CommVault Simpana 9 Installation Guide_第41张图片

CommVault Simpana 9 Installation Guide_第42张图片

CommVault Simpana 9 Installation Guide_第43张图片

CommVault Simpana 9 Installation Guide_第44张图片

CommVault Simpana 9 Installation Guide_第45张图片

CommVault Simpana 9 Installation Guide_第46张图片

CommVault Simpana 9 Installation Guide_第47张图片

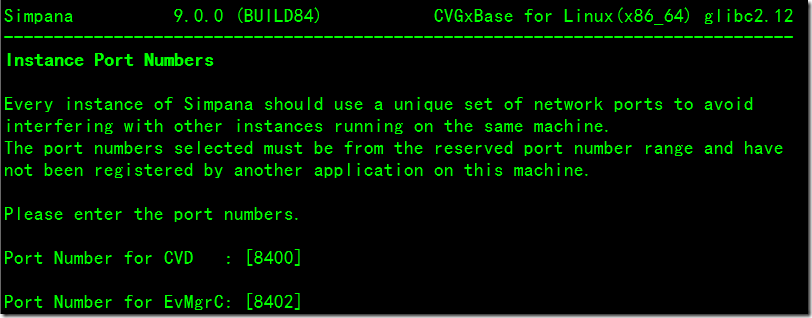
Using default Instance Port Numbers.

CommVault Simpana 9 Installation Guide_第48张图片

I don't use Firewall so i enter ‘no’go to next.

CommVault Simpana 9 Installation Guide_第49张图片

Enter CommServe Host Name.The name must is fully qualified and it must be resolvable by the name service.

CommVault Simpana 9 Installation Guide_第50张图片

CommVault Simpana 9 Installation Guide_第51张图片

CommVault Simpana 9 Installation Guide_第52张图片

p_w_picpath

CommVault Simpana 9 Installation Guide_第53张图片

p_w_picpath

CommVault Simpana 9 Installation Guide_第54张图片

CommVault Simpana 9 Installation Guide_第55张图片

CommVault Simpana 9 Installation Guide_第56张图片

CommVault Simpana 9 Installation Guide_第57张图片

CommVault Simpana 9 Installation Guide_第58张图片

CommVault Simpana 9 Installation Guide_第59张图片

After installation,you can verify it from Commcell Console.
CommVault Simpana 9 Installation Guide_第60张图片