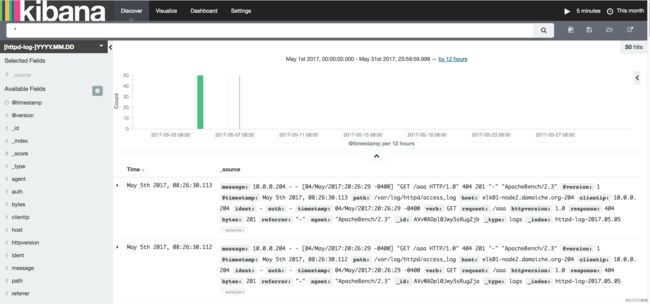
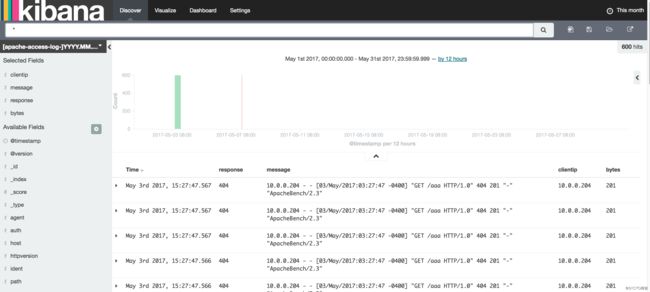
1. kibana图形化
- 1 每个es上都装一个kibana
- 2 kibana连接自己的es
- 3 前端的Nginx做登录验证
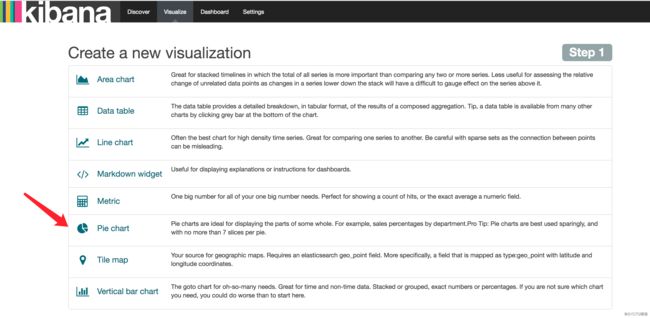
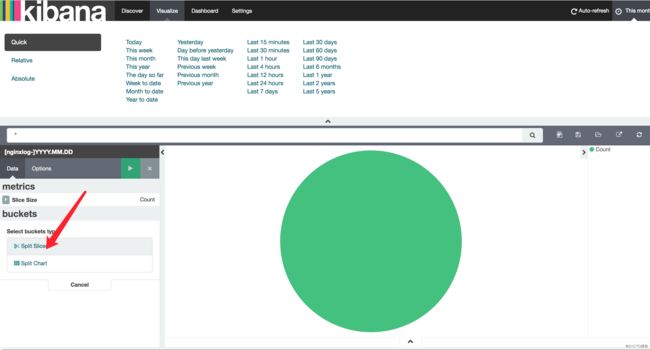
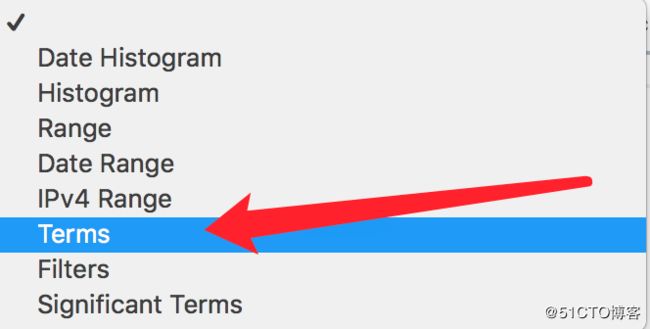
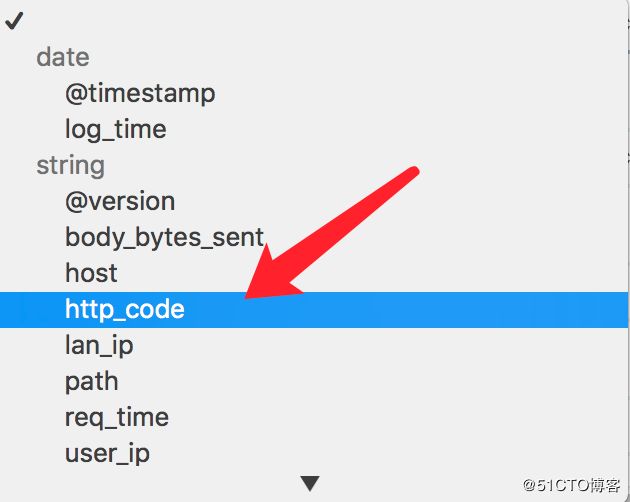
1.1 添加图形
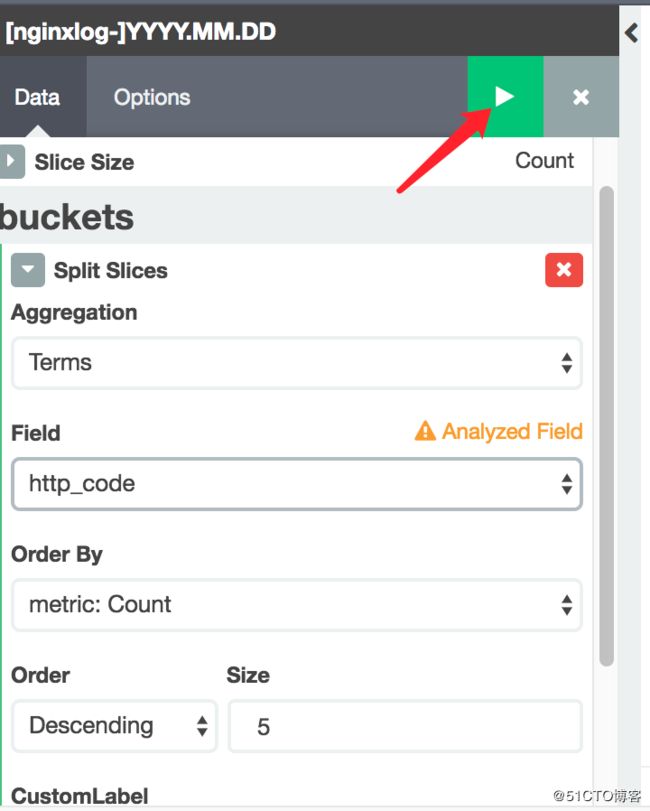
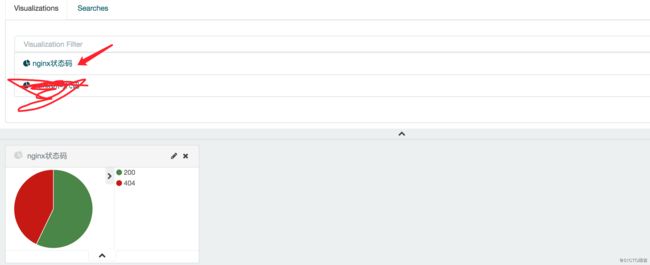
添加一个统计nginx日志状态码的饼图。
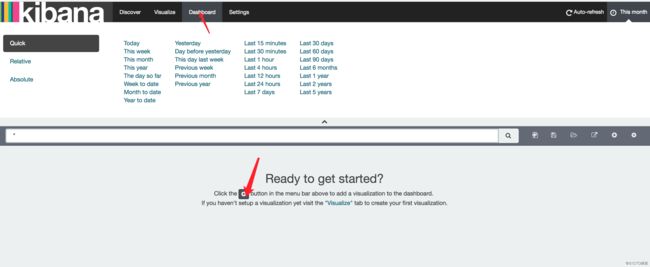
1.2 添加监控大盘
2. logstash实战 input插件syslog
https://www.elastic.co/guide/en/logstash/2.3/plugins-inputs-syslog.html
注意
- 1 syslog的插件性能不好,但是没有个几千台是搞不挂它的。
- 2 syslog默认是监听514端口。用logstash的syslog模块去监听系统的514端口,就可以获得日志了。
- 3 syslog模块还有可以用来采集交换机、路由器等的日志。
2.1 配置系统的rsyslog.conf文件
[root@elk01-node2 ~]# vim /etc/rsyslog.conf
# 修改为如下:
 90 *.* @@10.0.0.204:514

# 第一个* 日志类型
# 第二个* 日志级别

# 修改之后,重启即可。
[root@elk01-node2 ~]# systemctl restart rsyslog
2.2 编写配置文件收集系统日志
2.2.1 先打印到前台
[root@elk01-node2 conf.d]# cat rsyslog.conf
input {
    syslog {
        type => "rsyslog"
        port => 514
    }
}

filter {
}

output {
    stdout {
        codec => "rubydebug"
    }
}
启动到前台,然后进行测试
#
[root@elk01-node2 conf.d]# /opt/logstash/bin/logstash -f ./rsyslog.conf
Settings: Default pipeline workers: 4
Pipeline main started
{
           "message" => "[system] Activating service name='org.freedesktop.problems' (using servicehelper)\n",
          "@version" => "1",
        "@timestamp" => "2017-05-04T19:31:44.000Z",
              "type" => "rsyslog",
              "host" => "10.0.0.204",
          "priority" => 29,
         "timestamp" => "May  4 15:31:44",
         "logsource" => "elk01-node2",
           "program" => "dbus",
               "pid" => "900",
          "severity" => 5,
          "facility" => 3,
    "facility_label" => "system",
    "severity_label" => "Notice"
...........
...........
可以通过logger 命令产生测试日志。
[root@elk01-node2 conf.d]# logger wangfei

.......
}
{
           "message" => "wangfei\n",
          "@version" => "1",
        "@timestamp" => "2017-05-04T19:43:19.000Z",
              "type" => "rsyslog",
              "host" => "10.0.0.204",
          "priority" => 13,
         "timestamp" => "May  4 15:43:19",
         "logsource" => "elk01-node2",
           "program" => "root",
          "severity" => 5,
          "facility" => 1,
    "facility_label" => "user-level",
    "severity_label" => "Notice"
}
2.2.2 收集到es
[root@elk01-node2 conf.d]# cat rsyslog.conf
input {
    syslog {
        type => "rsyslog"
        port => 514
    }
}

filter {

}

output {
    #stdout {
    #    codec => "rubydebug"
    #}

    if [type] == "rsyslog" {
        elasticsearch {
            hosts => ["10.0.0.204:9200"]
            # 这里通过月来建立索引,不能通过日,否则那样会建立太多的索引,况且也不需要对系统日志每天都建立一个索引。
            index => "rsyslog-%{+YYYY.MM}"
        }
    }

}
ps:记得通过logger搞测试日志,然后才能到es里看到新建的索引
2.2.3 kibana添加索引
略
3. logstash实战-input插件tcp
https://www.elastic.co/guide/en/logstash/2.3/plugins-inputs-tcp.html
适用场景
- 1 当es对某个文件日志部分没有正常的收集到。
- 2 客户端没有安装logstash,或者不想安装。
[root@elk01-node2 conf.d]# cat tcp.conf
input {
    tcp {
         port => 6666 # 指定的端口,可以自己定义。
         type => "tcp"
         mode => "server"  # 模式,默认就是server
    }
}

filter {
}

output {
    stdout {
           codec => rubydebug
    }
}
用nc命令来将要发送的日志发给logstash tcp服务端
方法1
[root@web01-node1 ~]# echo wf |nc 10.0.0.204 6666

方法2 通过文件输入重定向
[root@web01-node1 ~]#  nc 10.0.0.204 6666 /dev/tcp/10.0.0.204/6666
4. logstash filter插件-grok
作用:对获取到得日志内容,进行字段拆分。
列如:nginx可以将日志写成json格式,apache的日志就不行,需要使用grok模块来搞。
注意:
- 1 grok是非常的影响性能的。
- 2 不灵活。除非你懂ruby
- 3 grok已经内置了很多的正则表达式,我们直接调用就行。表达式位置:/opt/logstash/vendor/bundle/jruby/1.9/gems/logstash-patterns-core-2.0.5/patterns/grok-patterns
https://www.elastic.co/guide/en/logstash/2.3/plugins-filters-grok.html
4.1 一个使用filter模块的小例子
root@elk01-node2 conf.d]# cat grok.conf
input {
    stdin {}
}

filter {
    grok {
        match => { "message" => "%{IP:client} %{WORD:method} %{URIPATHPARAM:request} %{NUMBER:bytes} %{NUMBER:duration}" }
    }
}

output{
    stdout {
        codec => rubydebug
    }
}
输入如下测试日志:
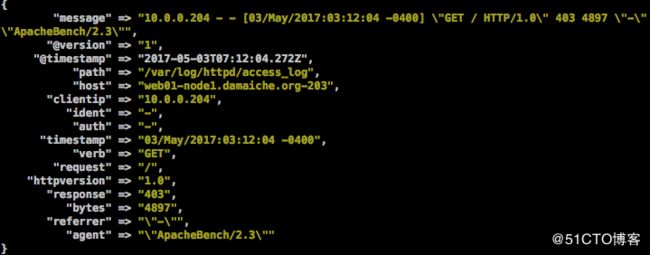
55.3.244.1 GET /index.html 15824 0.043效果
{
       "message" => "55.3.244.1 GET /index.html 15824 0.043",
      "@version" => "1",
    "@timestamp" => "2017-05-04T23:59:15.836Z",
          "host" => "elk01-node2.damaiche.org-204",
        "client" => "55.3.244.1",
        "method" => "GET",
       "request" => "/index.html",
         "bytes" => "15824",
      "duration" => "0.043"
}
{
       "message" => "",
      "@version" => "1",
    "@timestamp" => "2017-05-04T23:59:16.000Z",
          "host" => "elk01-node2.damaiche.org-204",
          "tags" => [
        [0] "_grokparsefailure"
    ]
}
4.2 收集apache日志
打印到前台
[root@elk01-node2 conf.d]# cat grok.conf
input {
    file {
         path => "/var/log/httpd/access_log"
         start_position => "beginning"
    }
}

filter {
    grok {
        match => { "message" => "%{COMBINEDAPACHELOG}"}
    }
}

output{
    stdout {
        codec => rubydebug
    }
}
产生测试日志
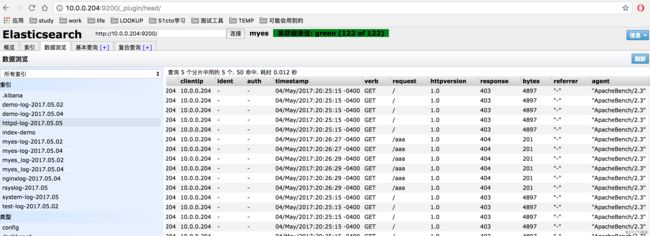
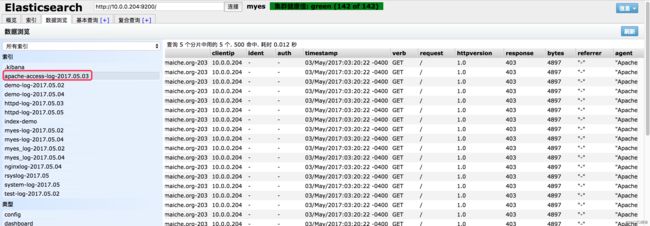
[root@elk01-node2 httpd]# ab -n 10 http://10.0.0.204:8081/存到es里
[root@elk01-node2 conf.d]# cat grok.conf
input {
    file {
         path => "/var/log/httpd/access_log"
         start_position => "beginning"
    }
}

filter {
    grok {
        match => { "message" => "%{COMBINEDAPACHELOG}"}
    }
}

output{
    #stdout {
    #    codec => rubydebug
    #}
    elasticsearch {
        hosts => ["10.0.0.204:9200"]
        index => "httpd-log-%{+YYYY.MM.dd}"
    }
}
启动到前台,然后产生测试日志。
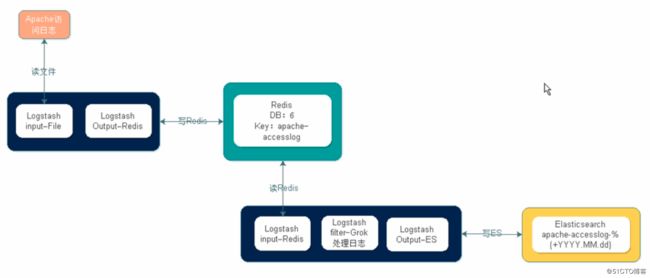
5 . 使用消息队列扩展
https://www.elastic.co/guide/en/logstash/2.3/deploying-and-scaling.html
没有消息队列的架构,ex系统一挂,就玩玩。
数据-logstash-es
解耦后架构。加上mq后的架构,es挂了,还有redis,数据啥的都不会丢失。
data - logstash - mq -logstash -es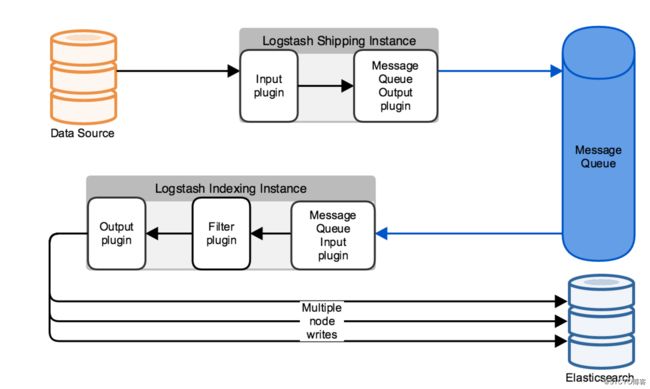
input的redis
https://www.elastic.co/guide/en/logstash/2.3/plugins-inputs-redis.html#plugins-inputs-redis
output的redis
https://www.elastic.co/guide/en/logstash/2.3/plugins-outputs-redis.html
说明
web01-node1.damaiche.org-203 logstash 收集数据
elk01-node2.damaiche.org-204 logstash(indexer) + kibana + es + redis
5.1 部署redis
机器:elk01-node2.damaiche.org-204
yum -y install redis修改配置文件
vim /etc/redis.conf

 61 bind 10.0.0.204 127.0.0.1
128 daemonize yes
启动redis
systemctl restart redis测试redis是否能正常写入
redis-cli -h 10.0.0.204 -p 6379

10.0.0.204:6379> set name hehe
OK
10.0.0.204:6379> get name
"hehe"
5.2 收集apache日志
5.2.1 收集日志到redis
机器:web01-node1.damaiche.org-203
[root@web01-node1 conf.d]#cat redis.conf
input {
stdin{}
    file {
         path => "/var/log/httpd/access_log"
         start_position => "beginning"
    }
}

output {
        redis {
                host => ['10.0.0.204']
                port => '6379'
                db => "6"
                key => "apache_access_log"
                data_type => "list"
        }
}
登录redis查看
10.0.0.204:6379> info   # 查看redis详细的信息
......
# Keyspace
db0:keys=1,expires=0,avg_ttl=0
db6:keys=2,expires=0,avg_ttl=0

10.0.0.204:6379> select 6 # 选择key
OK

10.0.0.204:6379[6]> keys *  # 查看所有的key内容,生产环境禁止操作
1) "apache_access_log"
2) "demo"

10.0.0.204:6379[6]> type apache_access_log # 查看key的类型
list

10.0.0.204:6379[6]> llen apache_access_log # 查看key的长度
(integer) 10

10.0.0.204:6379[6]> lindex apache_access_log -1  # 查看最后一行的内容,有得时候程序有问题,想看最后一行的日志信息,那么就可以这么查看。
"{\"message\":\"10.0.0.204 - - [04/May/2017:21:07:17 -0400] \\\"GET / HTTP/1.0\\\" 403 4897 \\\"-\\\" \\\"ApacheBench/2.3\\\"\",\"@version\":\"1\",\"@timestamp\":\"2017-05-05T01:07:17.422Z\",\"path\":\"/var/log/httpd/access_log\",\"host\":\"elk01-node2.damaiche.org-204\"}"
10.0.0.204:6379[6]>

启动到前台
5.2.2 启动logstash从redis读取数据
机器:elk01-node2.damaiche.org-204
测试能否正常从redis读取数据(先不要写到es)
root@elk01-node2 conf.d]# cat indexer.conf
input {
        redis {
                host => ['10.0.0204']
                port => '6379'
                db => "6"
                key => "apache_access_log"
                data_type => "list"
        }
}

filter {
    grok {
        match => { "message" => "%{COMBINEDAPACHELOG}"}
    }
}

output{
    stdout {
        codec => rubydebug
    }
}
造数据
[root@elk01-node2 conf.d]# ab -n 100 -c 1 http://10.0.0.203:8081/此时到redis查看key access_apache_log的长度
10.0.0.204:6379[6]> llen apache_access_log
(integer) 100
将写好的indexer.conf启动到前台,此时再查看redis apache_access_log的长度
10.0.0.204:6379[6]> llen apache_access_log
(integer) 0

长度为0,说明数据从redis里都取走了
此时将数据写入到es里
[root@elk01-node2 conf.d]# cat indexer.conf
input {
        redis {
                host => ['10.0.0204']
                port => '6379'
                db => "6"
                key => "apache_access_log"
                data_type => "list"
        }
}

filter {
   # 如果收集多个日志文件,那么这里一定要有type来进行判断,否则所有的日志都会来进行匹配。grok本来就性能不好,这么一搞,机器就死掉了。
    grok {
        match => { "message" => "%{COMBINEDAPACHELOG}"}
    }
}

output{
    elasticsearch {
        hosts => ["10.0.0.204:9200"]
        index => "apache-access-log-%{+YYYY.MM.dd}"
    }
}6. 项目实战
6.1 需求分析
访问日志:apache访问日志,nginx访问日志,tomcat (file > filter)
错误日志: java日志。
系统日志:/var/log/* syslog rsyslog
运行日志:程序写的(json格式)
网络日志:防火墙、交换机、路由器。。。
标准化:日志是什么格式的 json ?怎么命名?存放在哪里?/data/logs/? 日志怎么切割?按天?按小时?用什么工具切割?脚本+crontab ?
工具化:如何使用logstash进行收集方案?
6.2 实战
6.2.1 说明
收集日志:nginx访问日志、apache访问日志、es日志、系统message日志
角色说明:
10.0.0.203 web01-node1.damaiche.org-203 logstash 收集数据
10.0.0.204 elk01-node2.damaiche.org-204 logstash(indexer) + kibana + es + redis
6.2.2 客户端收集日志,存放在redis上。
[root@web01-node1 conf.d]# cat shipper.conf
input{
    file {
        path => "/var/log/nginx/access.log"
        start_position => "beginning"
        type => "nginx-access01-log"
    }

    file {
        path => "/var/log/httpd/access_log"
        start_position => "beginning"
        type => "apache-access01-log"
    }

    file {
        path => "/var/log/elasticsearch/myes.log"
        start_position => "beginning"
        type => "myes01-log"
        codec => multiline {
            pattern => "^\["
            negate => "true"
            what => "previous"
       }
    }

    file {
        path => "/var/log/messages"
        start_position => "beginning"
        type => "messages01"
    }

}

output{
    if [type] == "nginx-access01-log" {
            redis {
                host => "10.0.0.204"
                port => "6379"
                db => "3"
                data_type => "list"
                key => "nginx-access01-log"
            }
    }

    if [type] == "apache-access01-log" {
            redis {
                host => "10.0.0.204"
                port => "6379"
                db => "3"
                data_type => "list"
                key => "apache-access01-log"
            }
    }

    if [type] == "myes01-log" {
            redis {
                host => "10.0.0.204"
                port => "6379"
                db => "3"
                data_type => "list"
                key => "myes01-log"
            }
    }

    if [type] == "messages01" {
            redis {
                host => "10.0.0.204"
                port => "6379"
                db => "3"
                data_type => "list"
                key => "messages01"
            }
    }
}

[root@web01-node1 conf.d]# /etc/init.d/logstash start
注:
- 1 启动过后,需关注下logstash是否有异常输出。最好仔细核对下配置文件然后启动,如有报错,结合报错日志进行分析。ps:一般都是配置文件写错了,引起的报错。
- 2 记得造日志啊。
- 3 logstash是用rpm安装的,默认的启动用户是logstash,收集某些日志时,可能权限不够无法正常收集。
有2种解决方法:- 1 将logstash用户加入到root组.
- 2.将logstsh用root用户启动(修改/etc/init.d/logstash 脚本,将LS_USER改成root
登录redis查看各个key是否正常生成,以及key的长度。
info
....
# Keyspace
db0:keys=1,expires=0,avg_ttl=0
db3:keys=4,expires=0,avg_ttl=0
db6:keys=5,expires=0,avg_ttl=0

10.0.0.204:6379> select 3
OK

10.0.0.204:6379[3]> keys *
1) "messages01"
2) "myes01-log"
3) "apache-access01-log"
4) "nginx-access01-log"

10.0.0.204:6379[3]> llen messages01
(integer) 20596

10.0.0.204:6379[3]> llen myes01-log
(integer) 2336

10.0.0.204:6379[3]> llen apache-access01-log
(integer) 92657

10.0.0.204:6379[3]> llen nginx-access01-log
(integer) 100820
6.2.3 es上启动一个logstash从redis里读取数据。
[root@elk01-node2 conf.d]# cat indexer.conf
input {
    redis {
        host => "10.0.0.204"
        port => "6379"
        db => "3"
        data_type => "list"
        key => "nginx-access01-log"
    }

    redis {
        host => "10.0.0.204"
        port => "6379"
        db => "3"
        data_type => "list"
        key => "apache-access01-log"
    }

    redis {
        host => "10.0.0.204"
        port => "6379"
        db => "3"
        data_type => "list"
        key => "myes01-log"
    }

    redis {
        host => "10.0.0.204"
        port => "6379"
        db => "3"
        data_type => "list"
        key => "messages01"
    }
}

filter {
    if [type] == "apache-access01-log" {
        grok {
            match => { "message" => "%{COMBINEDAPACHELOG}"}
        }
    }
}

output {
    if [type] == "nginx-access01-log" {
        elasticsearch {
            hosts => ["10.0.0.204:9200"]
            index => "nginx-access01-log-%{+YYYY.MM.dd}"
        }
    }

    if [type] == "apache-access01-log" {
        elasticsearch {
            hosts => ["10.0.0.204:9200"]
            index => "apache-access01-log-%{+YYYY.MM.dd}"
        }
    }

    if [type] == "myes01-log" {
        elasticsearch {
            hosts => ["10.0.0.204:9200"]
            index => "myes01-log-%{+YYYY.MM.dd}"
        }
    }

    if [type] == "messages01" {
        elasticsearch {
            hosts => ["10.0.0.204:9200"]
            index => "messages01-%{+YYYY.MM}"
        }
    }
}
如果使用redis list作为elkstack的消息队列,需要对所有的list key的长度进行监控。
根据实际情况,例如超过'10w'就报警。
